Spokes adjustments

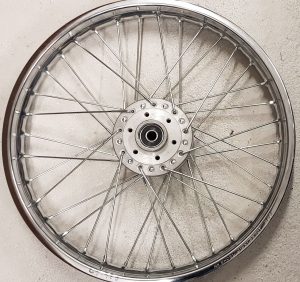
Got some help today showing me how to adjust the spokes. Jan Hansen and Thor Haugland came all the way from Kristiansand help me on this.

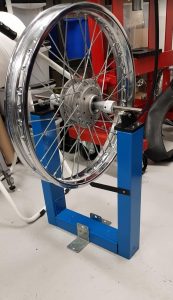
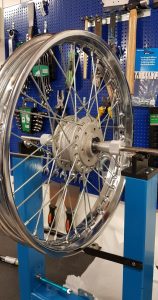
A simple homemade wheel jig

Step 1

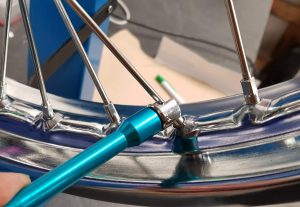
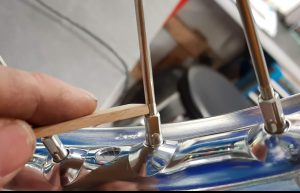
Adjust all the spokes to the same length, see the picture. I used a piece of stick as a template to get the same distance all over. Adjust the nipples by hand at this point. Make sure you have the same number of threads by comparing the thickness of the stick

Spin the wheel and watch the height. There should be not much play in the height of the rim if all the spokes are evenly adjusted.

Step 2

Tighten the spokes:

Turn the nipple 1/4 of a turn on all of the spokes. Continue until you start to feel some resistance. Not much torque should be applied at this point. Remember to spin the wheel and only 1/4 of a turn on each spoke.

Step 3

Time to check the play at the side:

Spin the wheel and use a whiteboard marker to define the area where you see the largest clearance to the reference stick. Make two lines, the start and stop of the area.

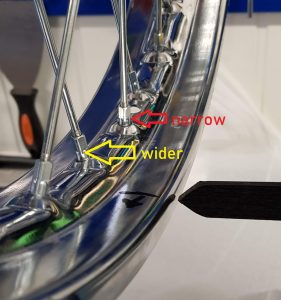
Adjust all spokes in the area to adjust the proper way. As the yellow arrow shows, the outer one to widen the gap and the inner one ( red arrow) to narrow the gap.

Repeat this procedure until you are down to 1-2mm play. Suzuki allows up to 3mm offset.

Step 4

Final adjustments

Continue with step 3 until you have to apply some torque to turn the nipples around.

This is the time when you have to trust your basic instinct. Do not overtighten the nipples !

If the nipple feels tight go further to the next one. Make sure you have about the same tension on all spokes. You can knock on the spokes and if one of them are to loose you will hear a different sound.

This is how I did it with help from Jan giving me advice all the time.
Am I lucky or something ? Looks like the wheel came out pretty well 🙂
GT 750 Front wheel, spokes mounting

For the frist time I’m going to build the front wheel with new spokes. Will be the same for both GT750 and Gt380.

Click on the images for a close up view.

All spokes mounted, but how?  Will try to give a detailed guidance below:

Step 1

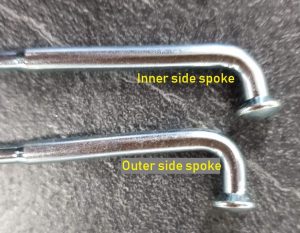
Sort the spokes. There are 18 spokes to be mounted on the inner side of the hub and 18 spokes for the outer side

The spokes for the outer side of the hub has more bending at the end, see the picture above.

Step 2

Study the rim:

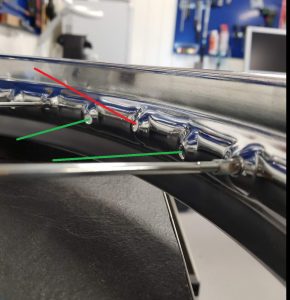
The mounting holes in the rim are aligned to left and right to fit with the corresponding side of the hub. The change in direction is done for every second hole. As the picture shows with red and green lines.

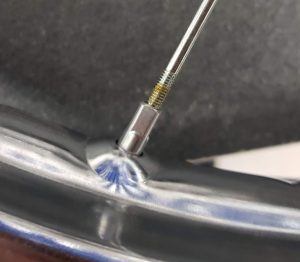
There is also angle pointing from the rim to the center of the hub. Should be easy to spot but if you don’t know this part will go wrong while mounting the spokes.


Step 3

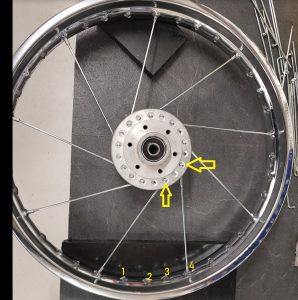
Always start with the inner side of the hub and find a the right corresponding hole in the rim. Correct angle and direction ( left or right ) explained in step 2. Repeat the same for the next spoke counting 4 holes as shown in the picture. Fasten the spoke by mounting the nipple at the end, only some few turns. You can also apply some grease.

Complete the mounting all 9 spokes on this side. Turn the wheel and do the next 9 spokes on the other side of the wheel and still at the inner side of the hub.

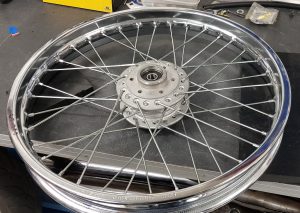
Watch the first picture with all 36 spokes mounted before you start with the 9 inner side spokes at the next side of the wheel. Check the position in the hub carefully against the picture and find the right corresponding hole in the rim.

If you mount all 18 spokes on one side first ( inner and outer) you will not be able to fit the spokes at the other side.


Step 4

Mounting the spokes at the outer side of the hub

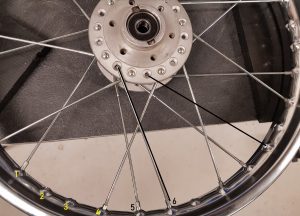
If you count in the same way as in step 3, the no 6 will be the right hole in the rim. See the black line in the picture and continue in the same way for every 4th hole.

If you are in doubt, have a close look at the first picture again.

Do both sides of the wheel and you are done 🙂

The next step, the adjustments will be uploaded in another post.


Part list and Service Manuals

Part list :

GT750: GT750-K-Bm

GT380: 01 – Suzuki GT380 GT 380 Parts List Diagram Manual 1972-77

Service manual: 

GT750 : GT750 Service Manual

GT380: 02 – Suzuki GT380 GT 380 Service Manual

Carburetor :GT carb sevice manual


Specifications:

Spec: 72-77: Suzuki GT Series Specifications 1972-77

Service Bulletins:

GT & T series: 08 – Suzuki GT & T Series Factory Service Bulletins

http://www.ozebook.com/compendium/techbuls/index.htm


Anti surge jet bulletin: GT-36

Butterfly shaft repair

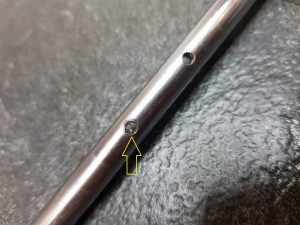
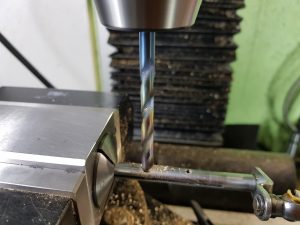
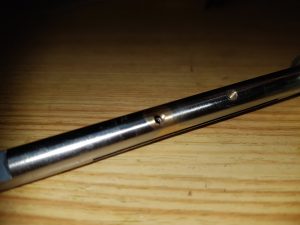
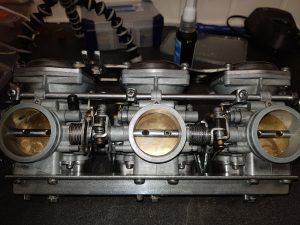
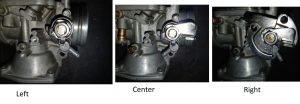
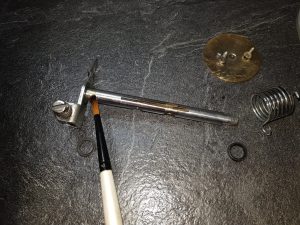
While doing the work on the carburetors I saw two of the butterfly shafts had bad threads for the 3mm screw holding the butterfly valve.

The one on the photo below looks like it has a previous repair using some sort of insert, not sure but it looks bad.

Click on the images for detailed view

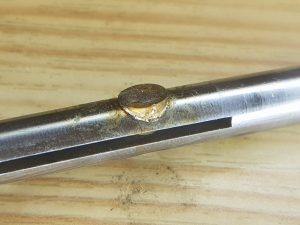
The procedure below is a much better way to do the repair. Since the shaft is made of brass a new piece of brass can easily be soldered into the bad area.


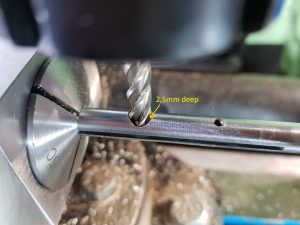
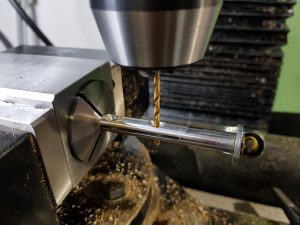
Drill down about 1,5 mm using a 6mm drill bit.


Continue down to 2,5mm using an end mill. ( not all the way through )


The piece of brass has been soldered


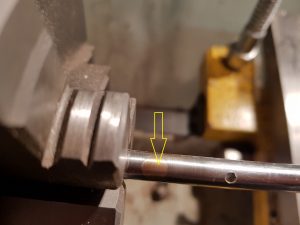
Use a lathe to turn turn off the brass piece until the shaft looks smooth and nice.


Use the second hole as alignment to get the right angle before you drill out the new part using a 2,5mm drill bit.


Make new 3mm threads and you are done. Good luck 🙂


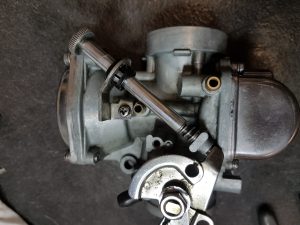
Mounted back into the carburetor

Left butterfly valve assembly

As always, click on the images for detailed view.

Step 1

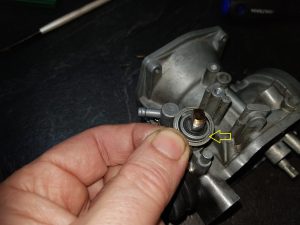
Add some grease on the both ends of the shaft.

Very much the same assembly as on the right carb ( see the post Right butterfly vavle assembly )


Step 2

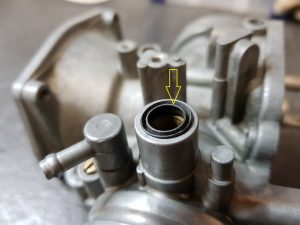
Insert the seal with the lips facing outwards. Two seals, one for each end.


Step 3

Insert the shaft and the butterfly valve. Secure the screws with loctite. Use new screws if they are worn.

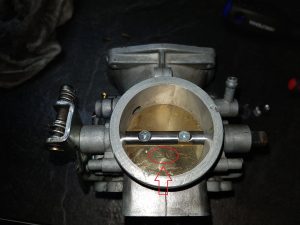
Note, the text on the valve facing upwards (red arrow on the picture )

Make sure the valve sits well and is the correct position. If not you will get trouble later on doing the synchronization ( balancing ) of the carbs.


Step 4


Step 5

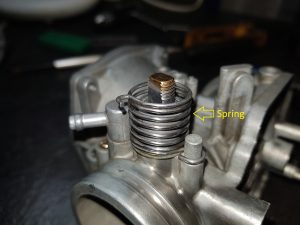
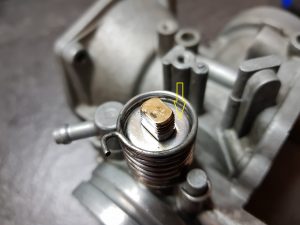
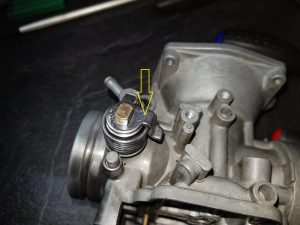
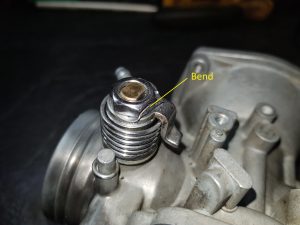
Most of the parts got some seconds or minutes on the polishing machine before mounting, the spring as well. Looks so much better.


Step 6


Step 7


Step 8

DONE !