Browse Category: GT380 Engine assembly

Crankshaft

Before mounting the crankshaft, make sure the C-ring is in place in the groove, see the yellow arrow. There is only one to be fitted.

The grooves shown from the red arrows are meant to grab the oil seals. When I got my crankshaft back from overhaul the seals had no marks to fit into the grooves. The old ones had. Don’t know why but they should be original Suzuki seals according to the workshop. Probably a design change on later models.

Align the studds into the grooves as shown on the pic.

The seals should be moved into the bearings, see the red arrows.

A bit of 2 stroke oil will not harm.

Kickstarter

Hmm, was not able to align the punch marks as described in the workshop manual.

If I follow the procedure, the spring on image 3 is way too loose. If I turn it all the way around it will be too tight. Got advice from guys on FB and will ignore the punch marks. Mounted as on pic 1 and after the case is closed I will rewind the ratchet wheel 3/4 of a turn to give the correct tension. The rachet wheel is outside the crank case and can easely be adjusted. By the way, the punch marks were also wrong on my GT750 engine.

Don’t forget to mount the gears for the oil pump and tachometer:

Gear assembly

After repairing the crankcase :

I mounted all the gears before I spotted the damages caused by the lock pins. See my previous post explaining the issue.

http://mc.grenasberg.no/2019/12/30/lock-pin-repair/

I therefore had to remove it all and assemble the gears once more after repairing the crankcase.

Step 1, see the previous post, GT380 Gear shifting.

http://mc.grenasberg.no/2019/08/05/gt380-gear-shifting/

For a detailed view on how to mount the gear shifting mechanism, see how it’s done for the GT750. It’s very much the same:

http://mc.grenasberg.no/2016/02/21/gear-shifting/

One difference is of course the number of gears. Five on GT750 and six on GT380.  In addition, the CAM stopper is not mounted from the bottom side of the crankcase as it’s done on the GT750.

Step 2:

Mount the pin and spring:

Step 3:

Mounting the forks:

As always on my blog, click on the images for a more detailed view.

Step 4:

Don’t use thread lock on the screws at this point. Wait until you have checked all the functions of the gears.


Step 5, gears.

Front axle 

Running smooth and nice.

Rear axle:


Checking the shifting of all six gears:

Added labels on both axles to easy count the ratio of the gear shifting. It all looks good 🙂

No issues as I can see while shifting the gears up and down. The no 1 gear runs a bit tight compare to the rest. Don’t think i will cause any problems. I will open up the spare engine and check to verify its condition and compare the gear shifting against this one, but not today.

The outer C-ring is missing on the rear gear axle. Will borrow one from the spare engine later on.

Lock pin repair

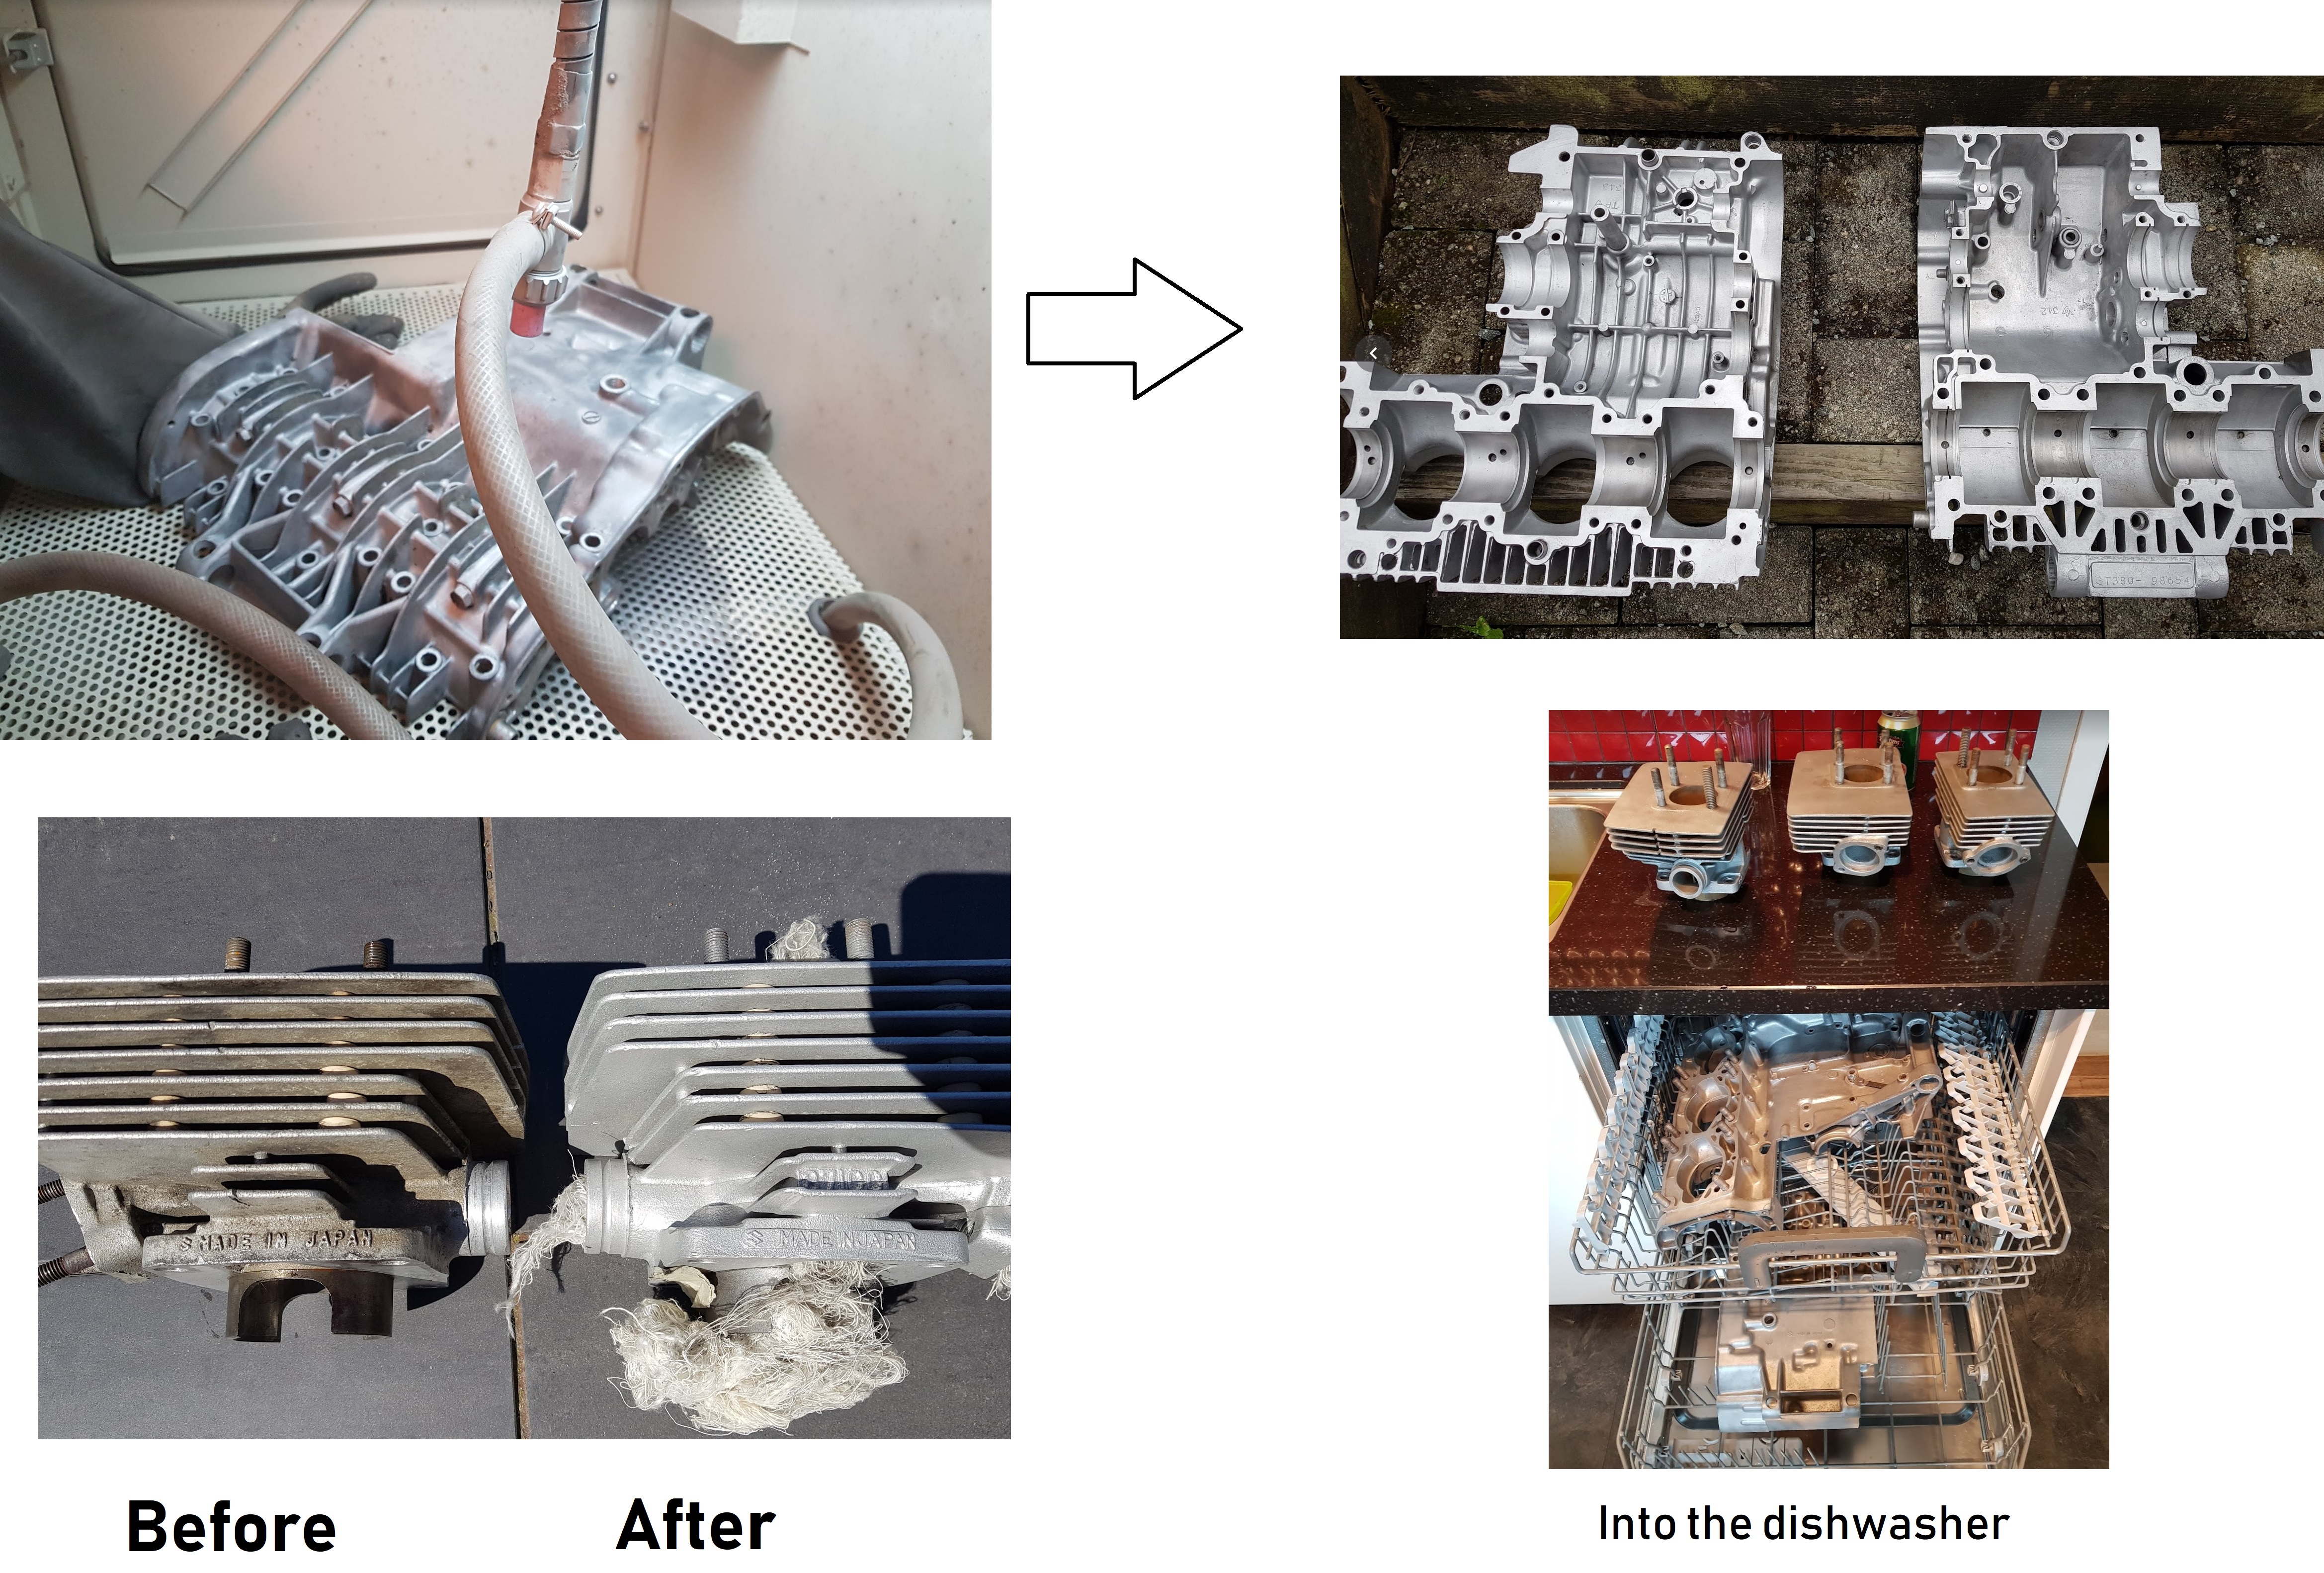
After months of doing nothing on the GT380 I’m now back on track. This fall has been very busy and I had to focus all on work and not much spare time to invest on my GT380. Hopefully it will be better the following winter and spring.

Two weeks of Christmas vacation has been good and I was able to get some steps further on the project, but then…..I spotted a disaster.


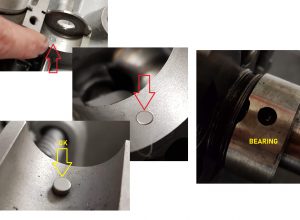
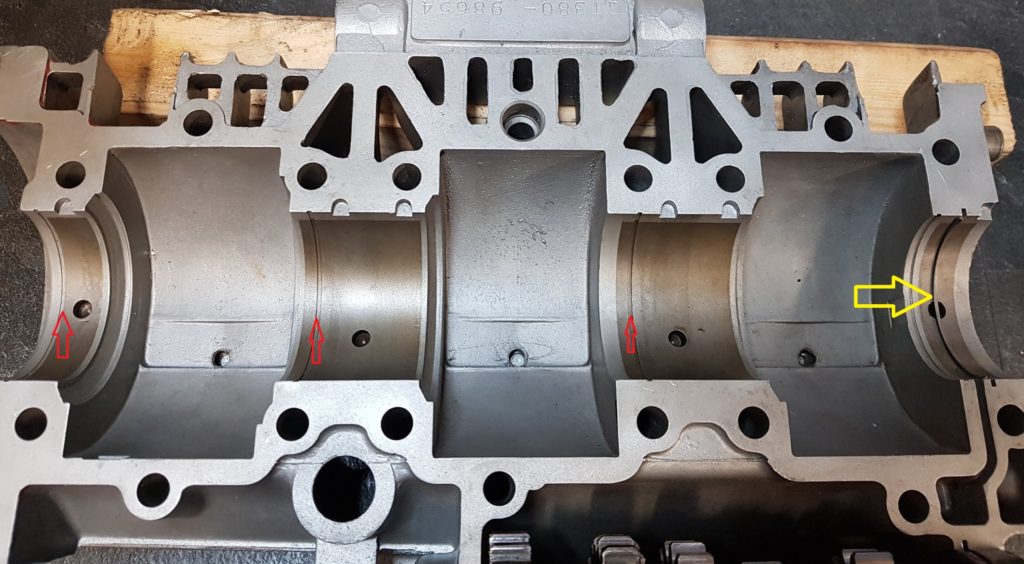
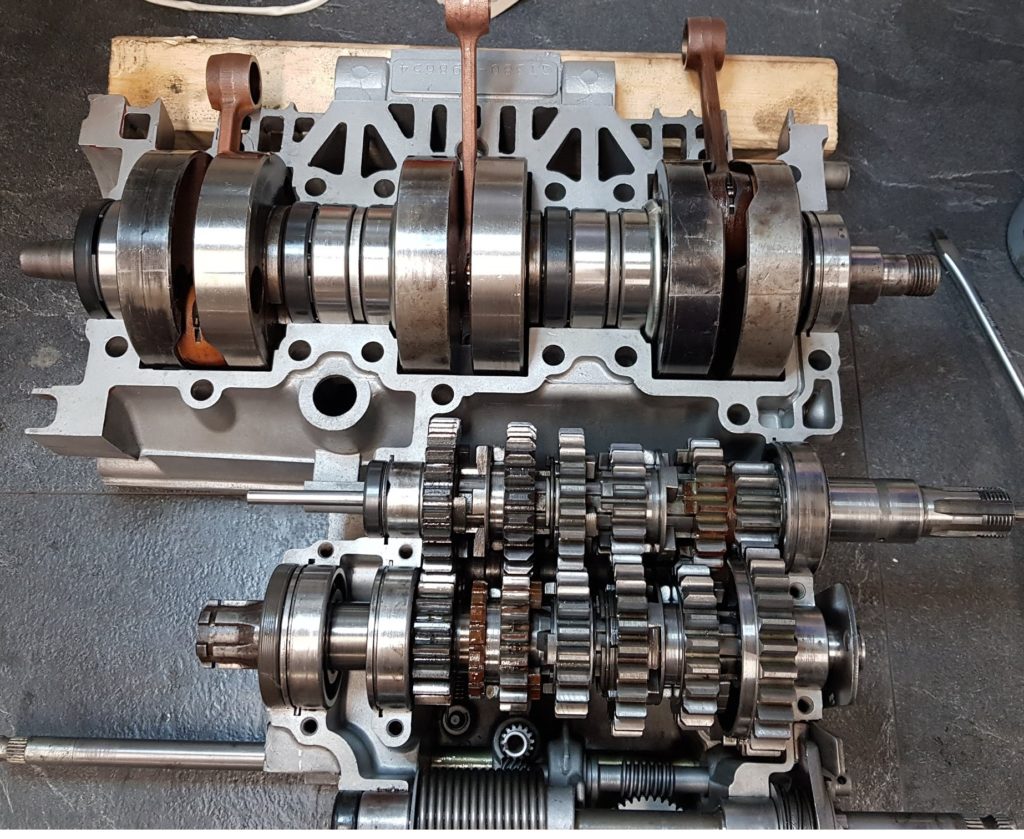
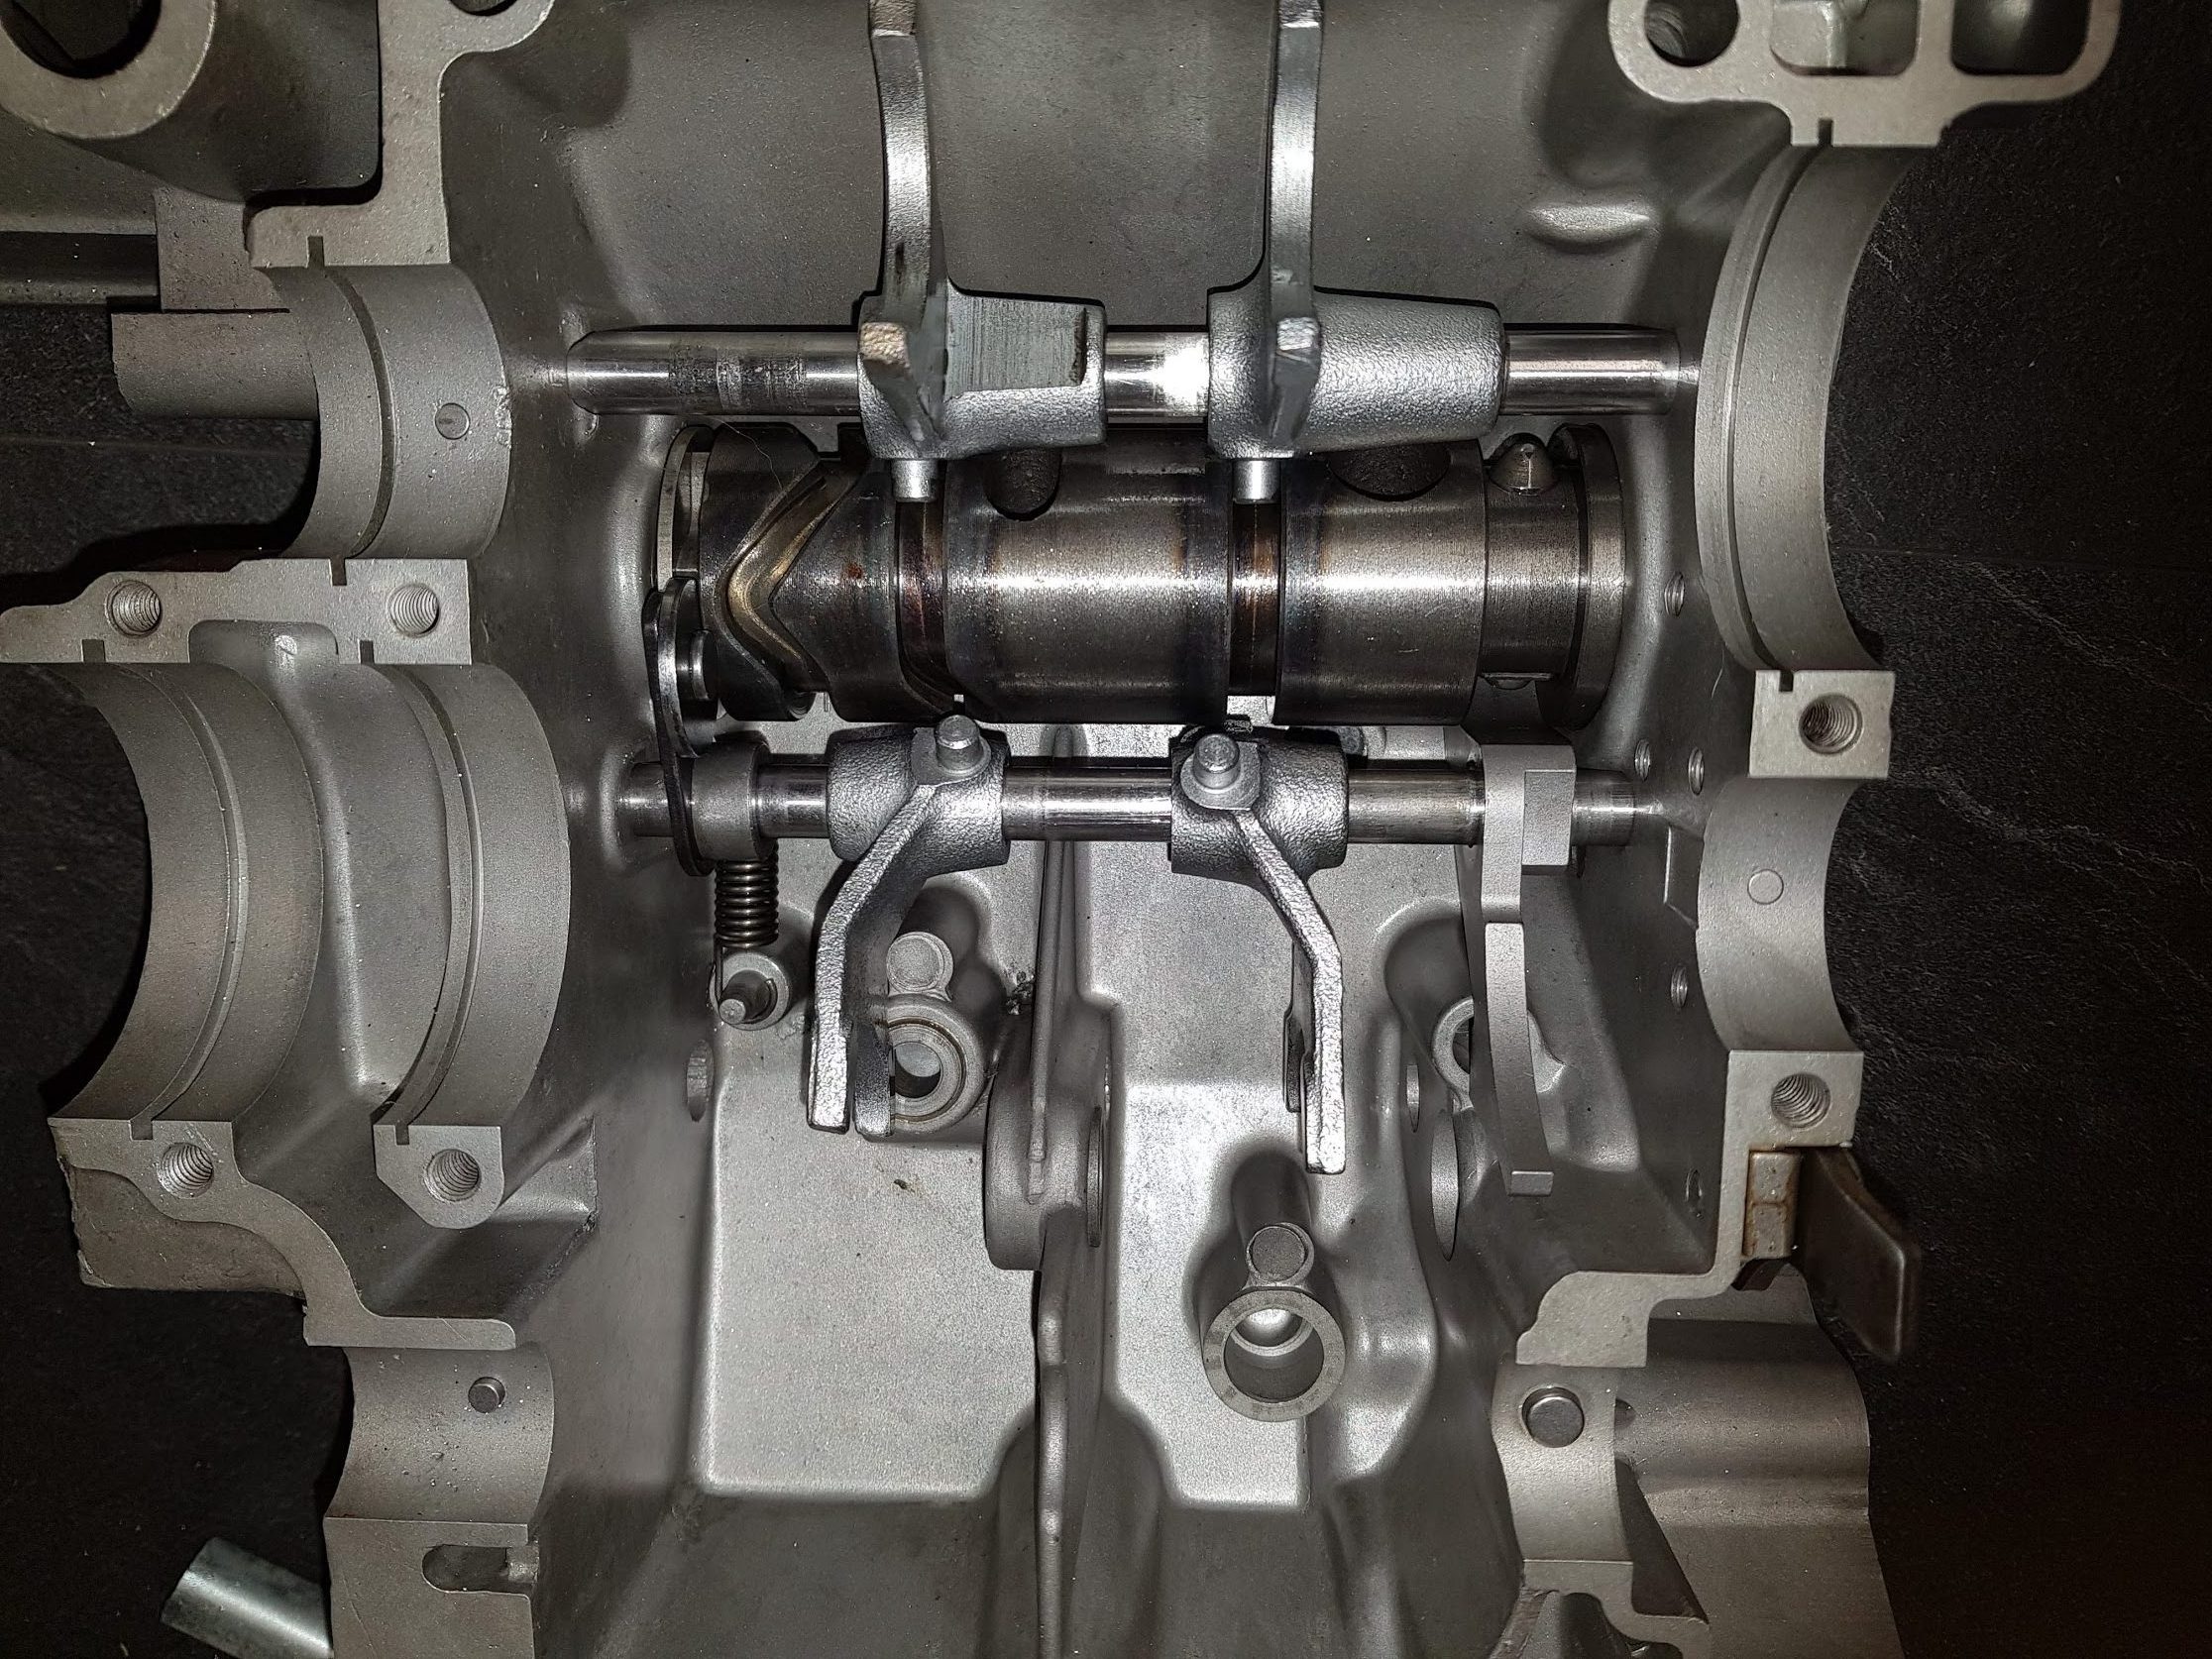
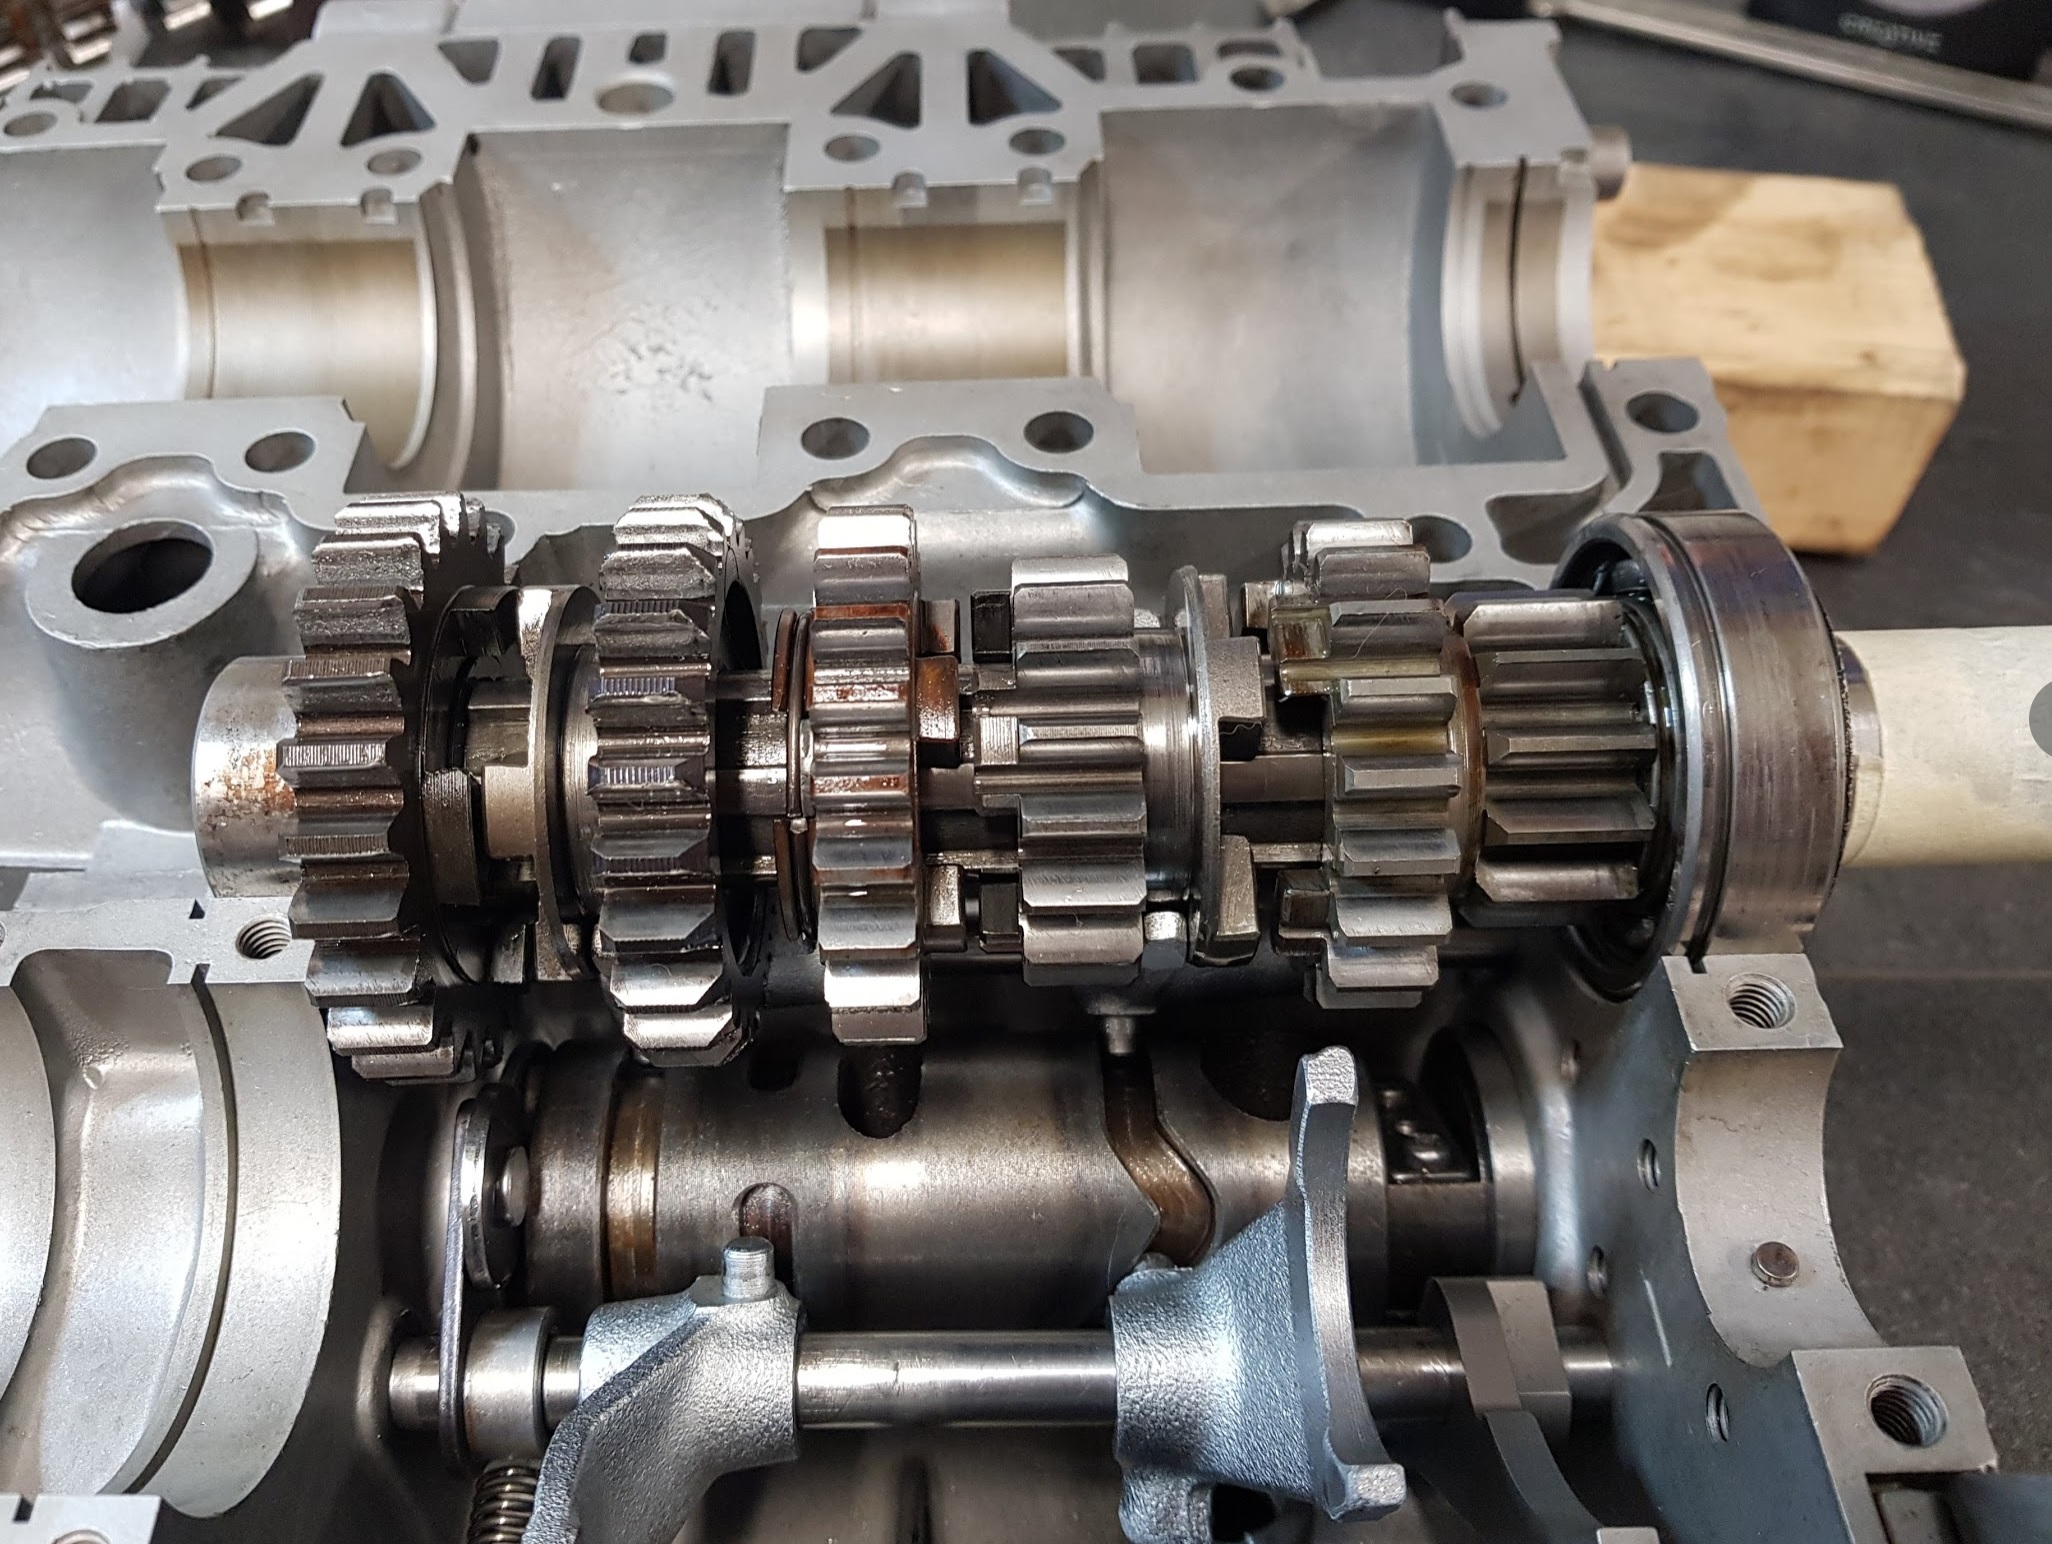
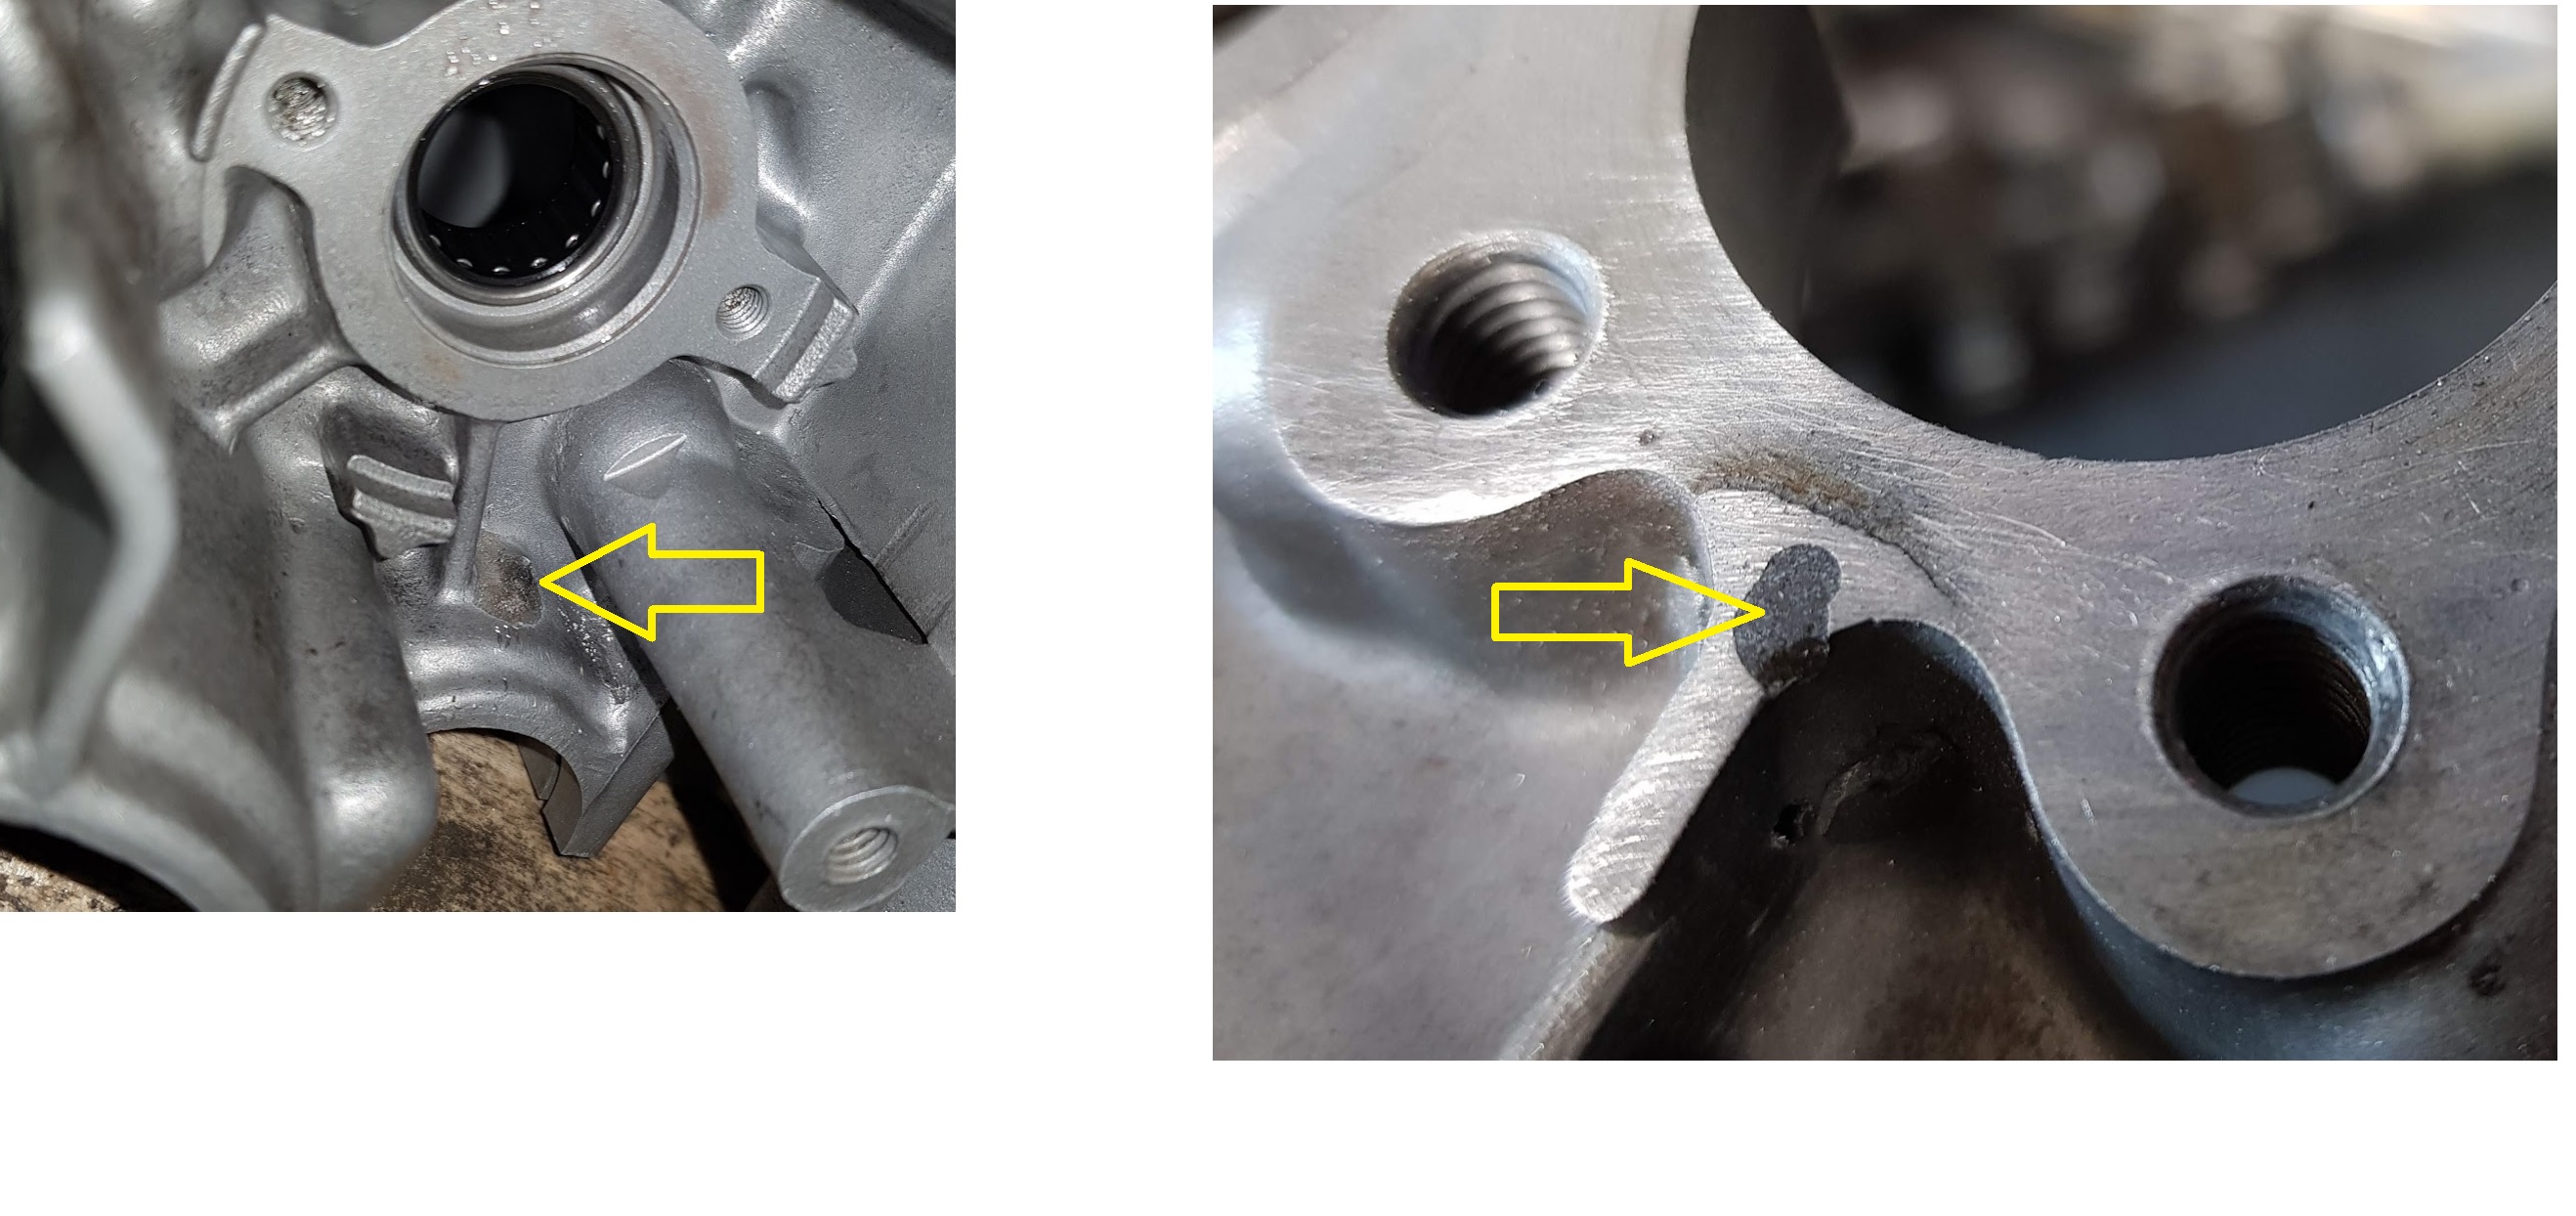
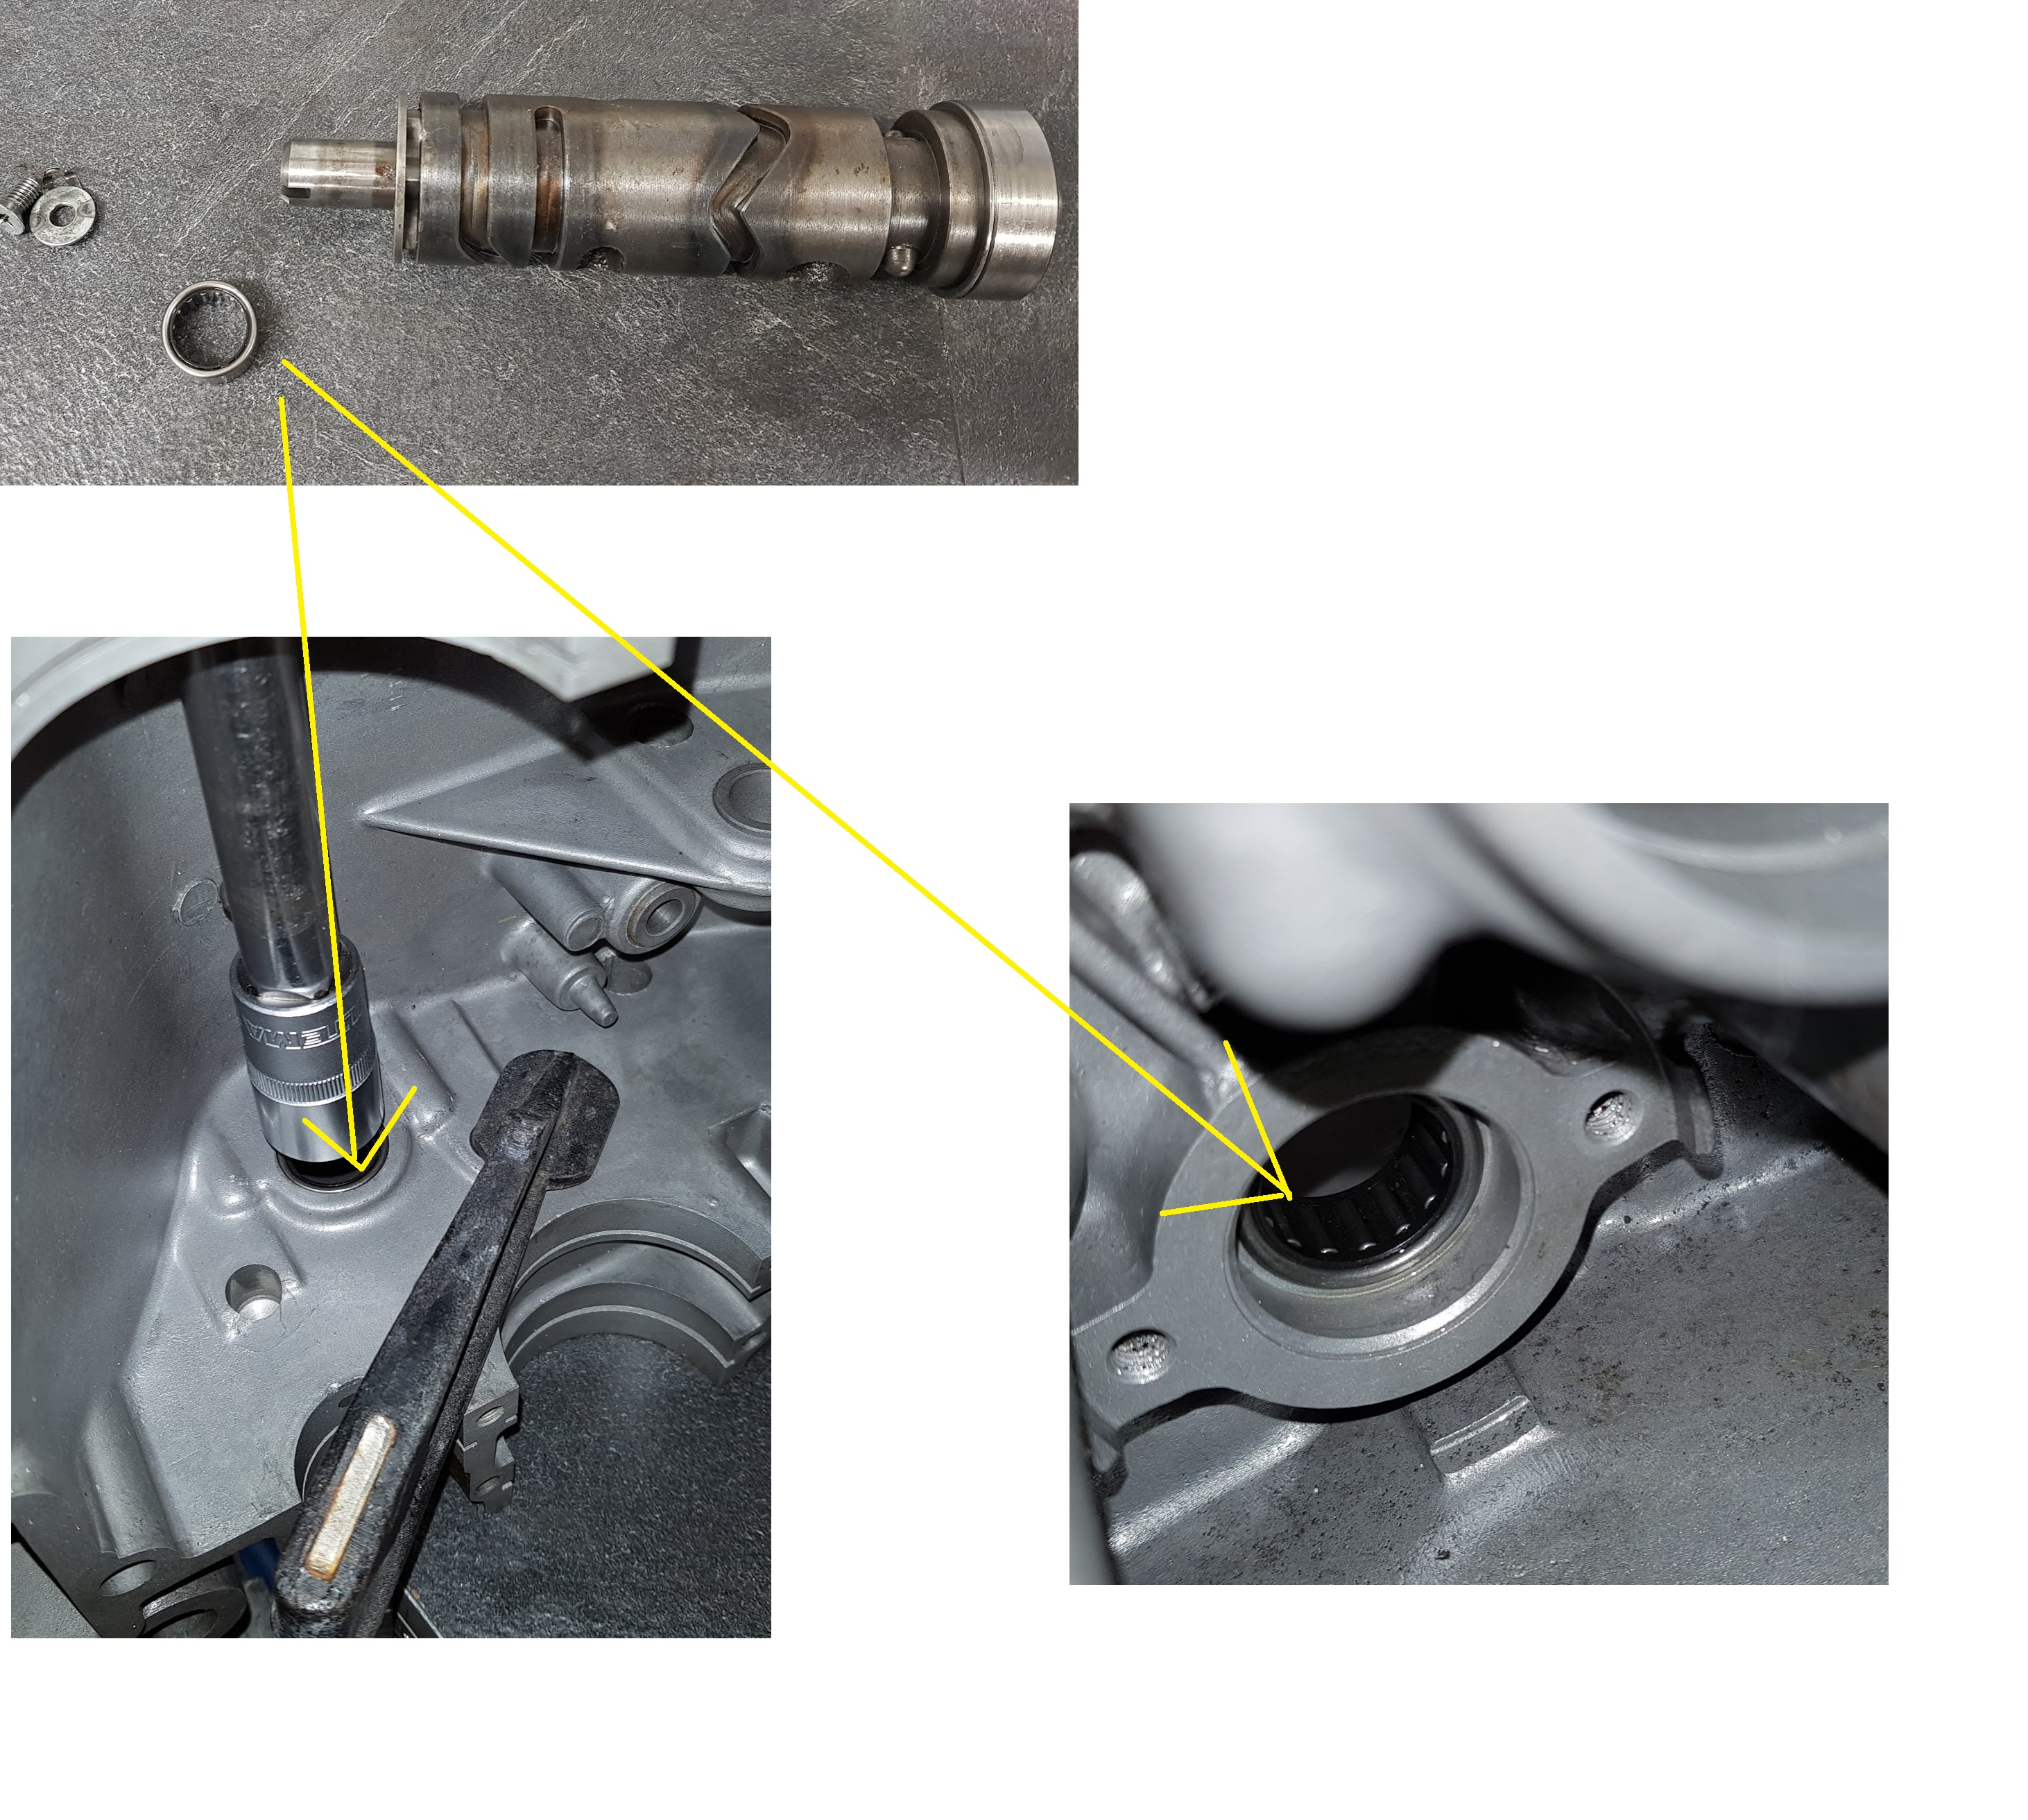
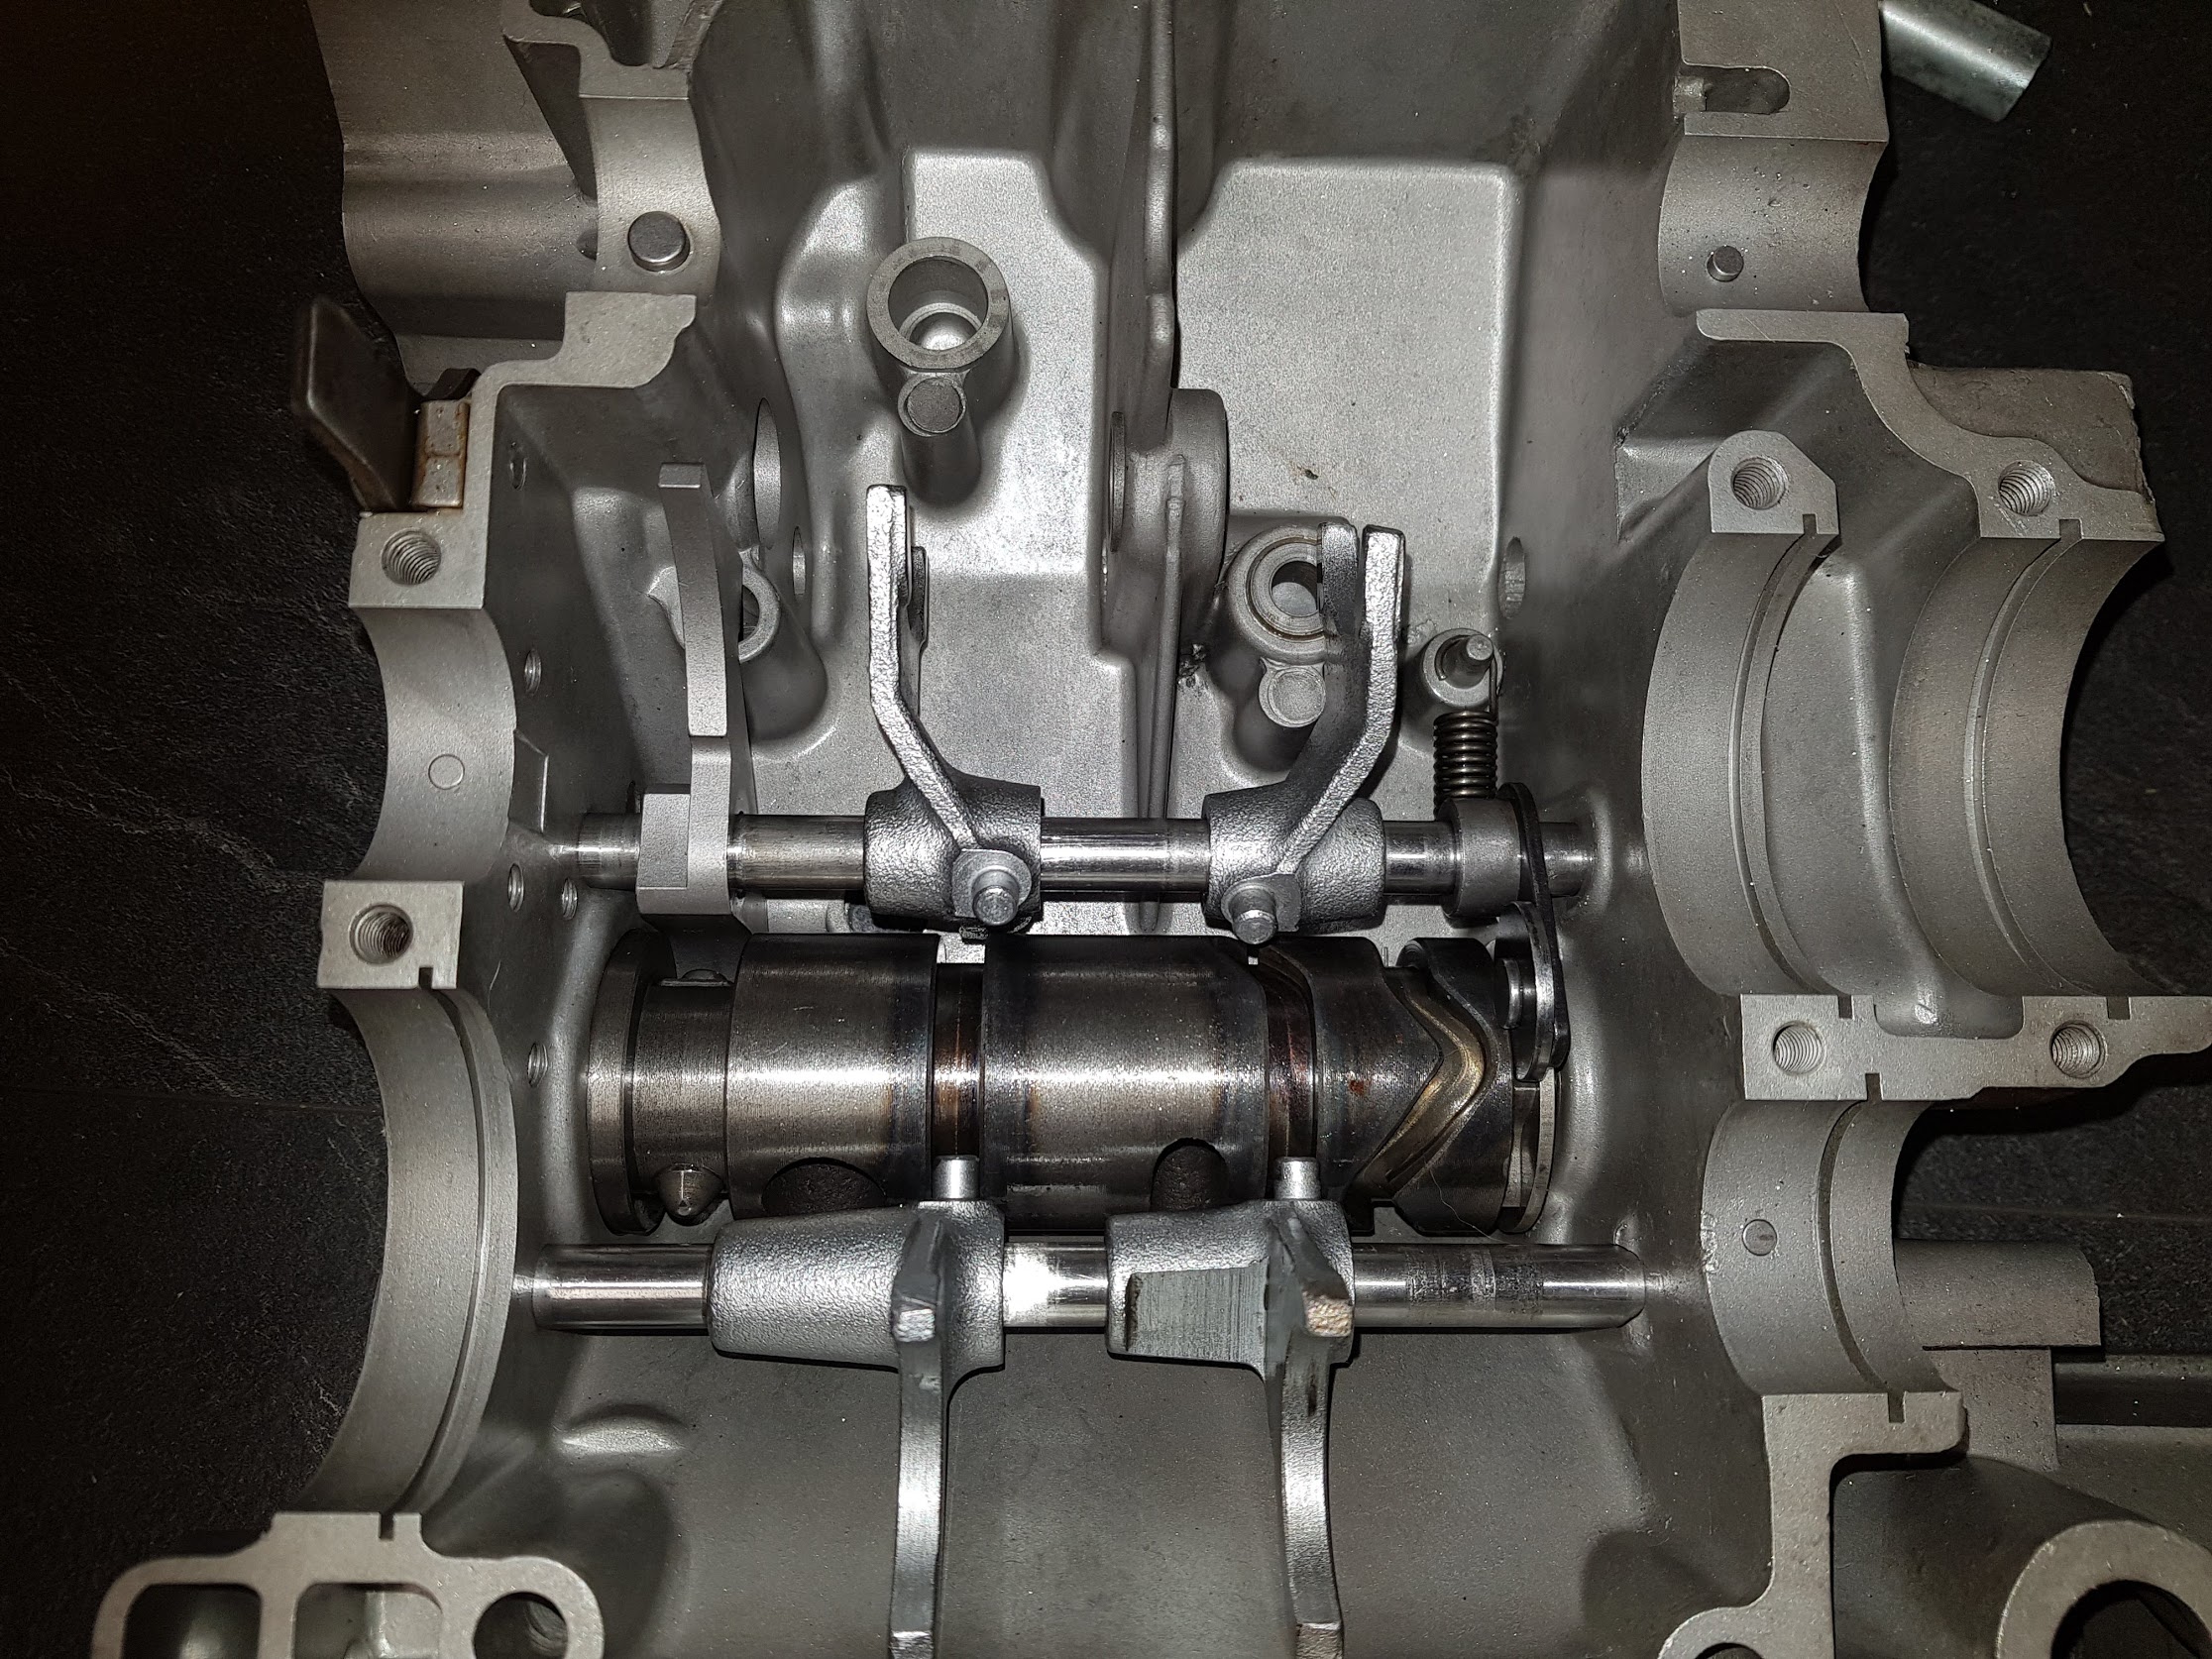
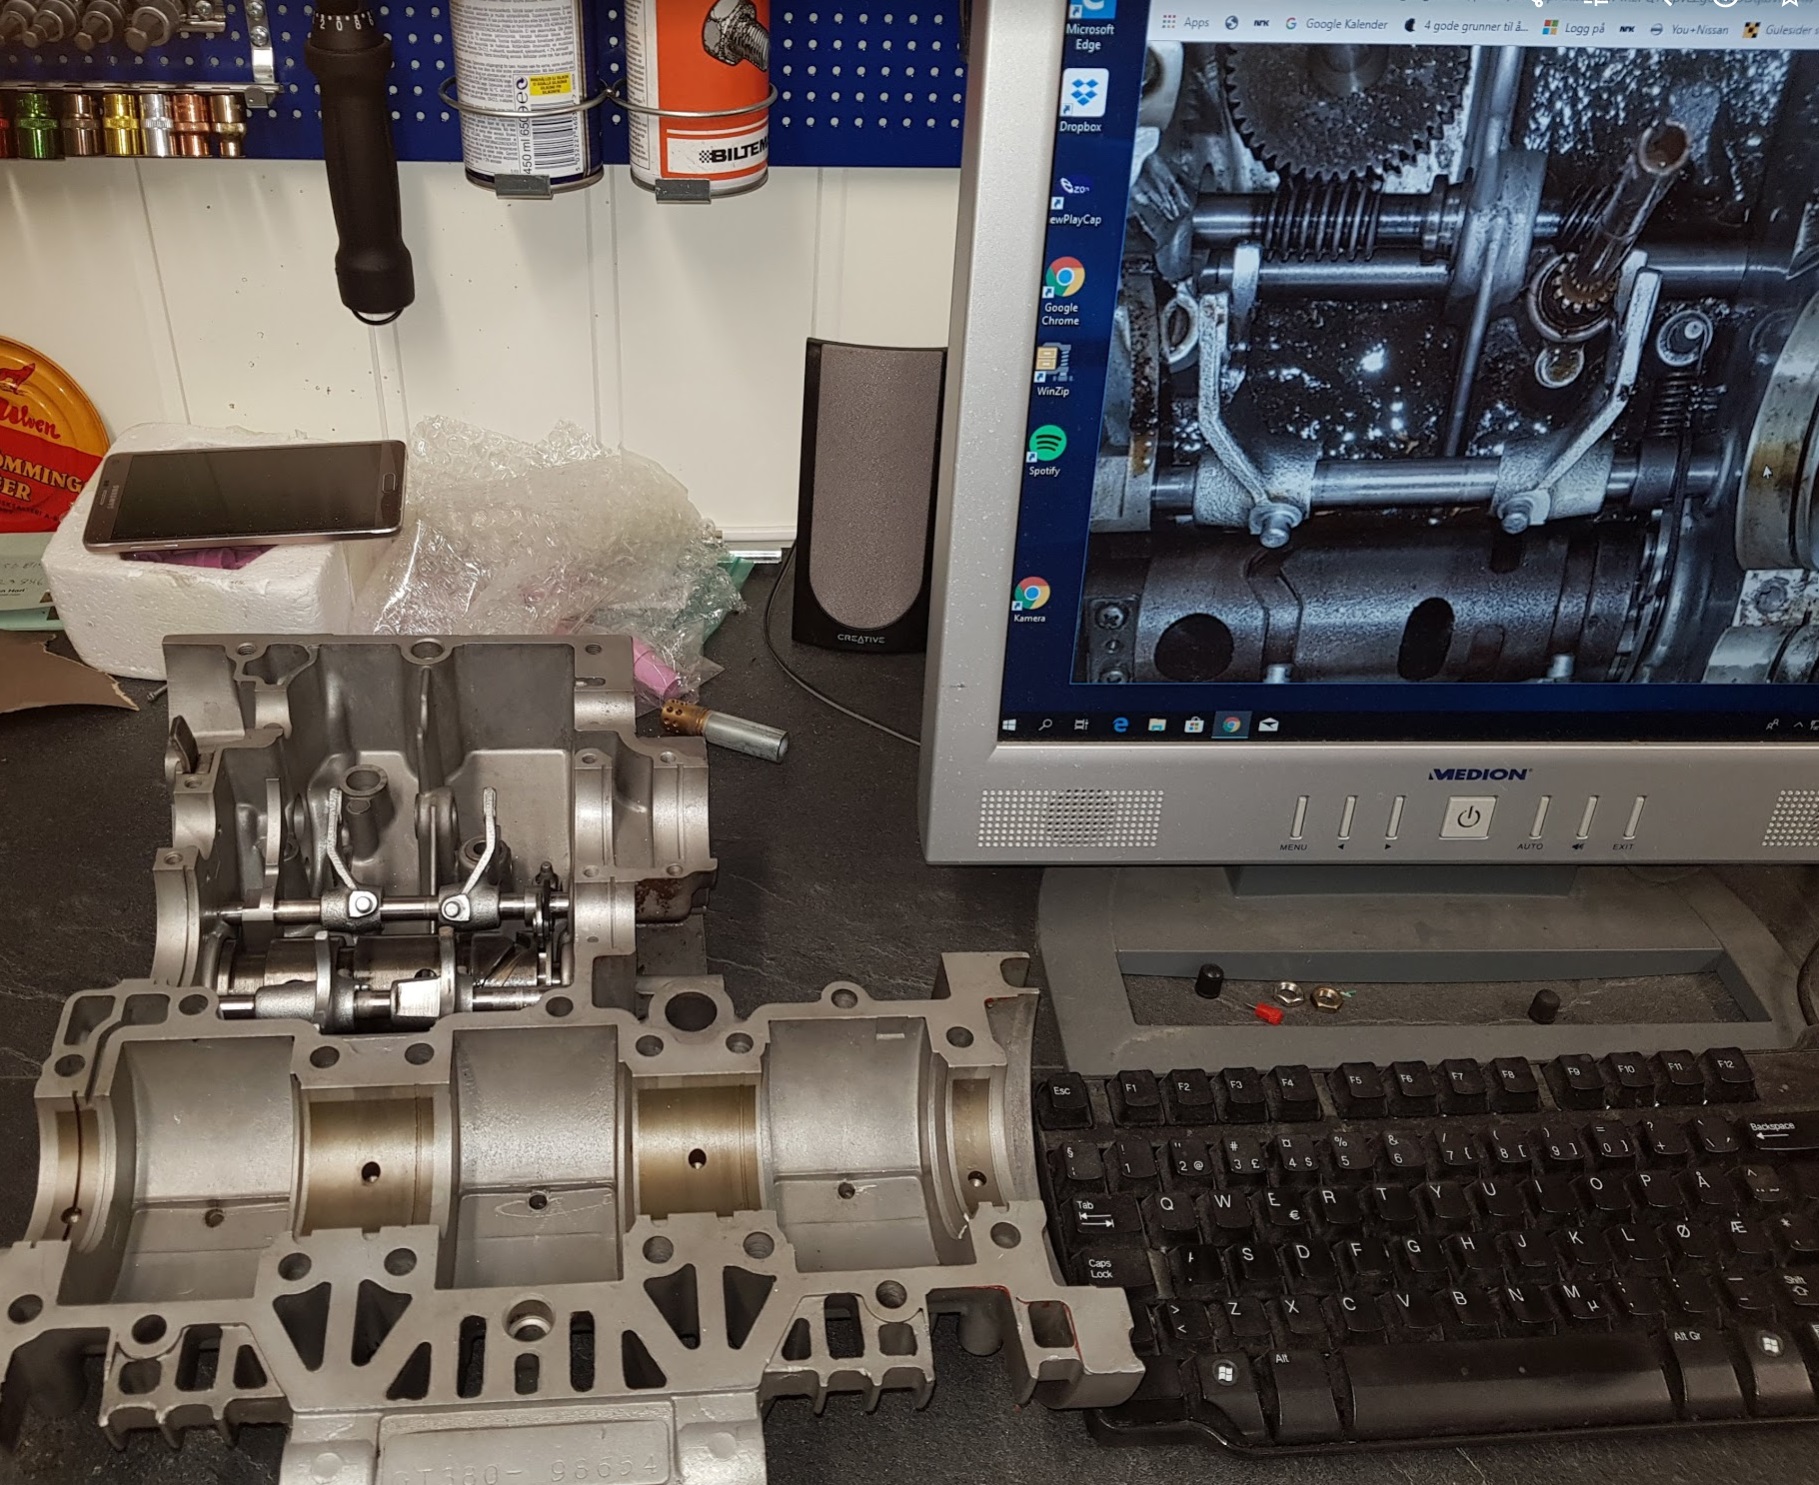
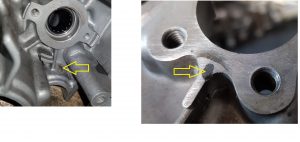
Two of the lock pins holding the bearings at the gear shaft in place were squeezed all the way down into the crankcase. I should have spotted this at a previous stage, but what now. Is it game over. Do I have to get a new case ? Cracks on the other sides as well due to the brutal force into the aluminum.

Previous owner must have done this without thinking properly before assembling the engine. And on both gear axles…This is what happens when you rush into unknown stuff without taking the time needed to think twice and think it through.

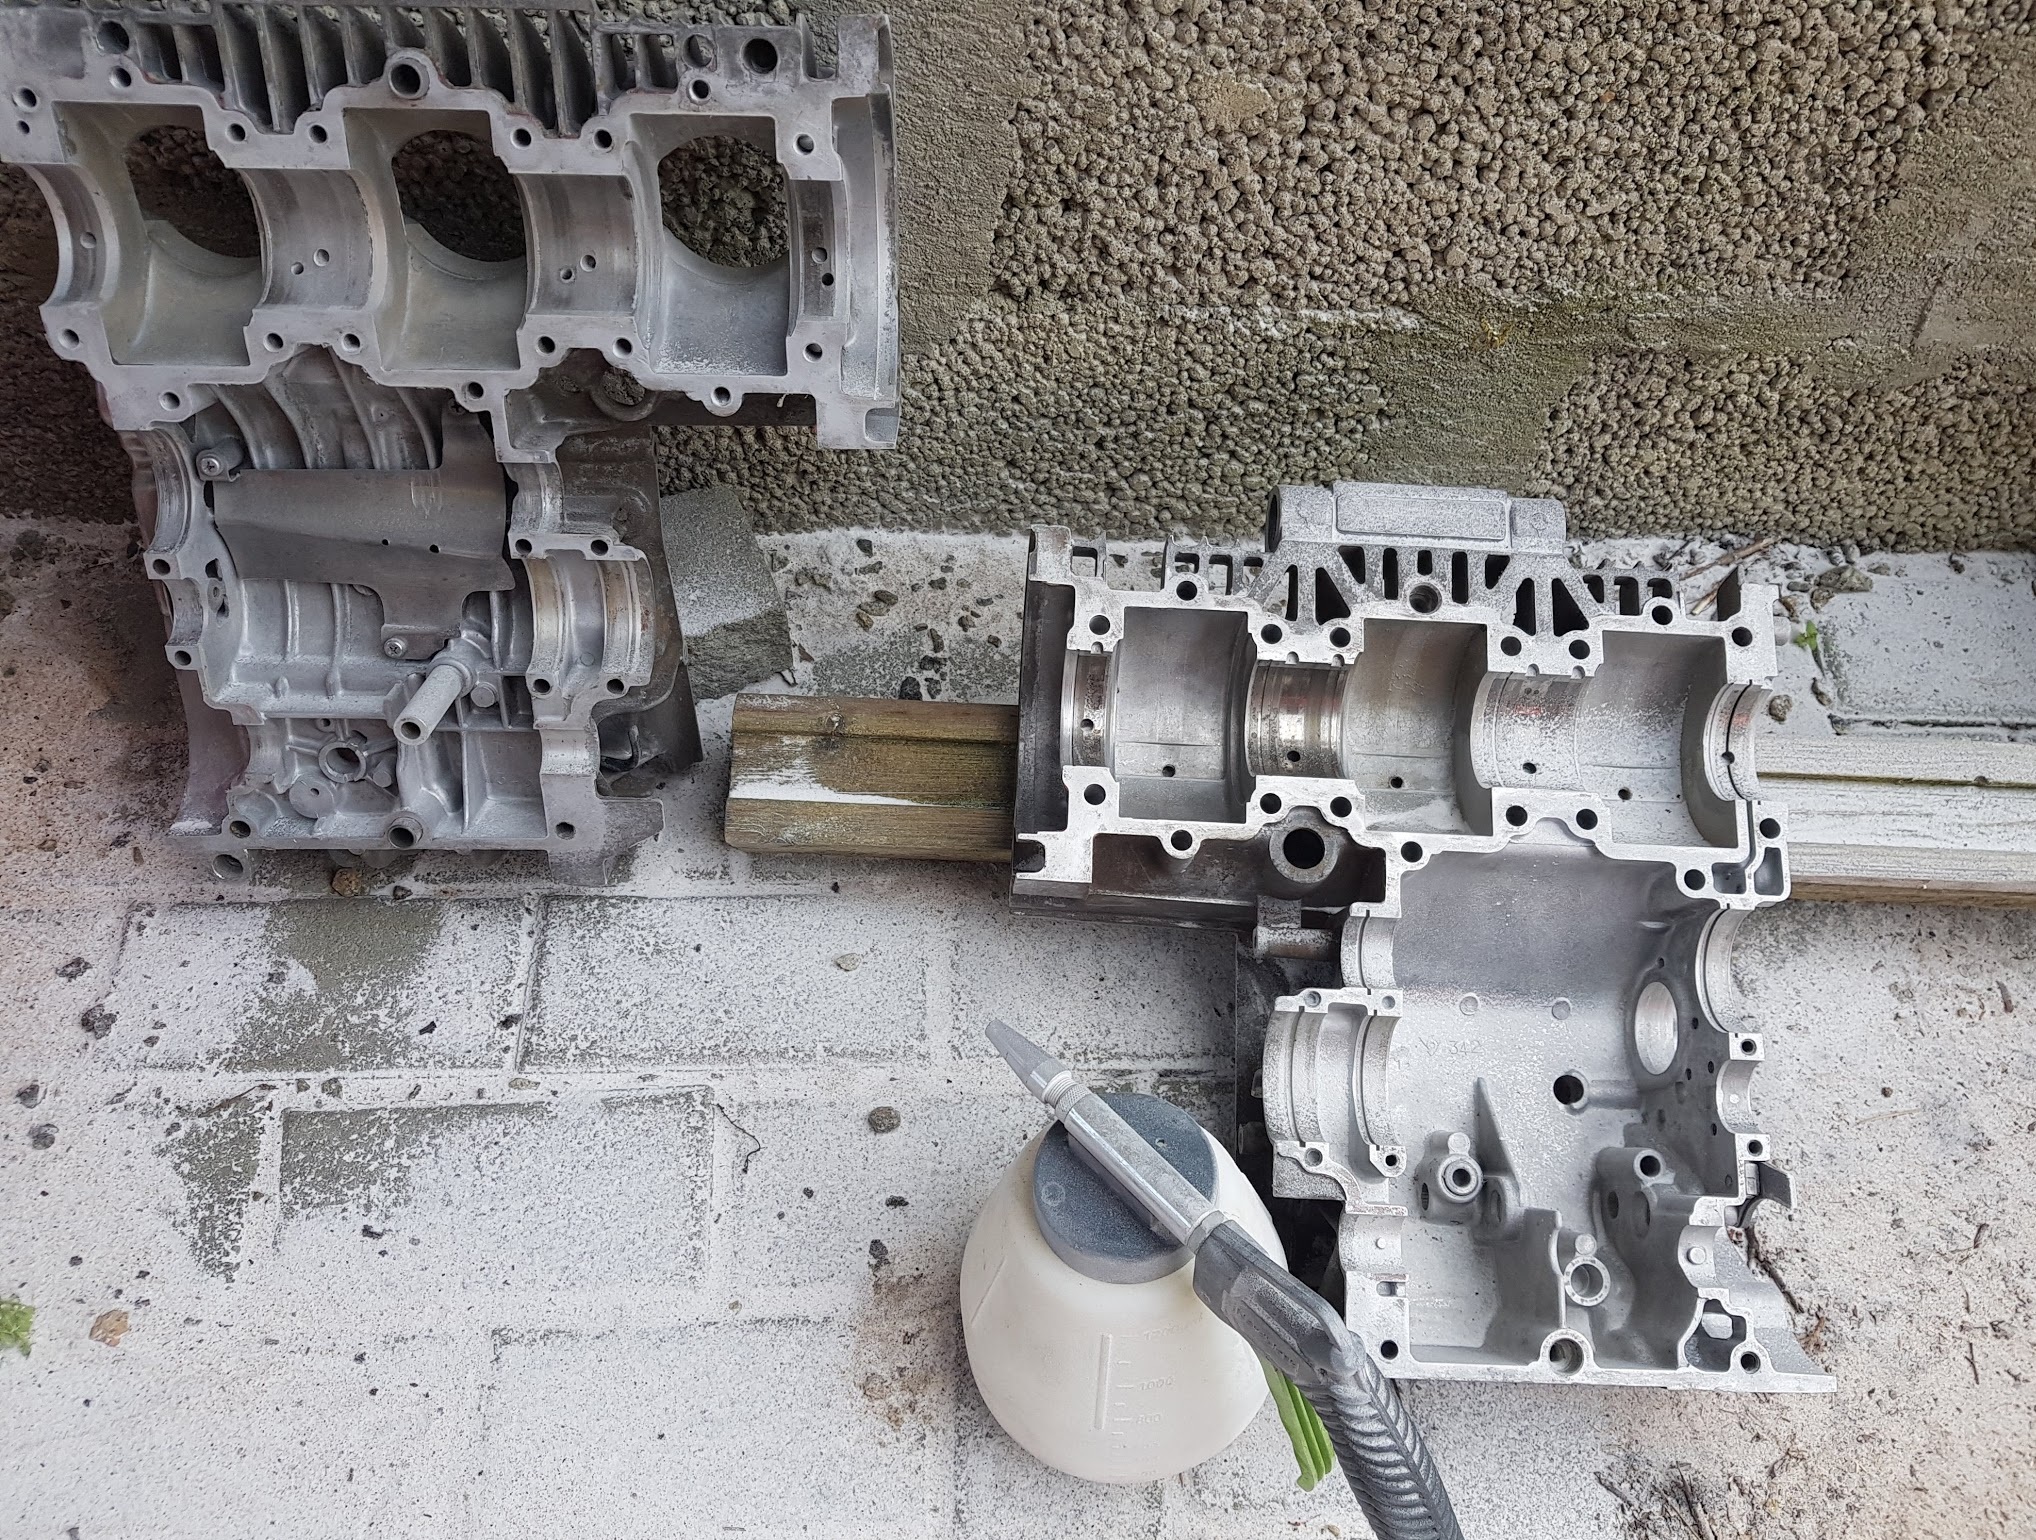
I have a spare engine I can use,  but consider all the work I had put into this it’s worth giving it a try to fix this one. And if it works I will still have two GT380 engines.  This is how i did it :
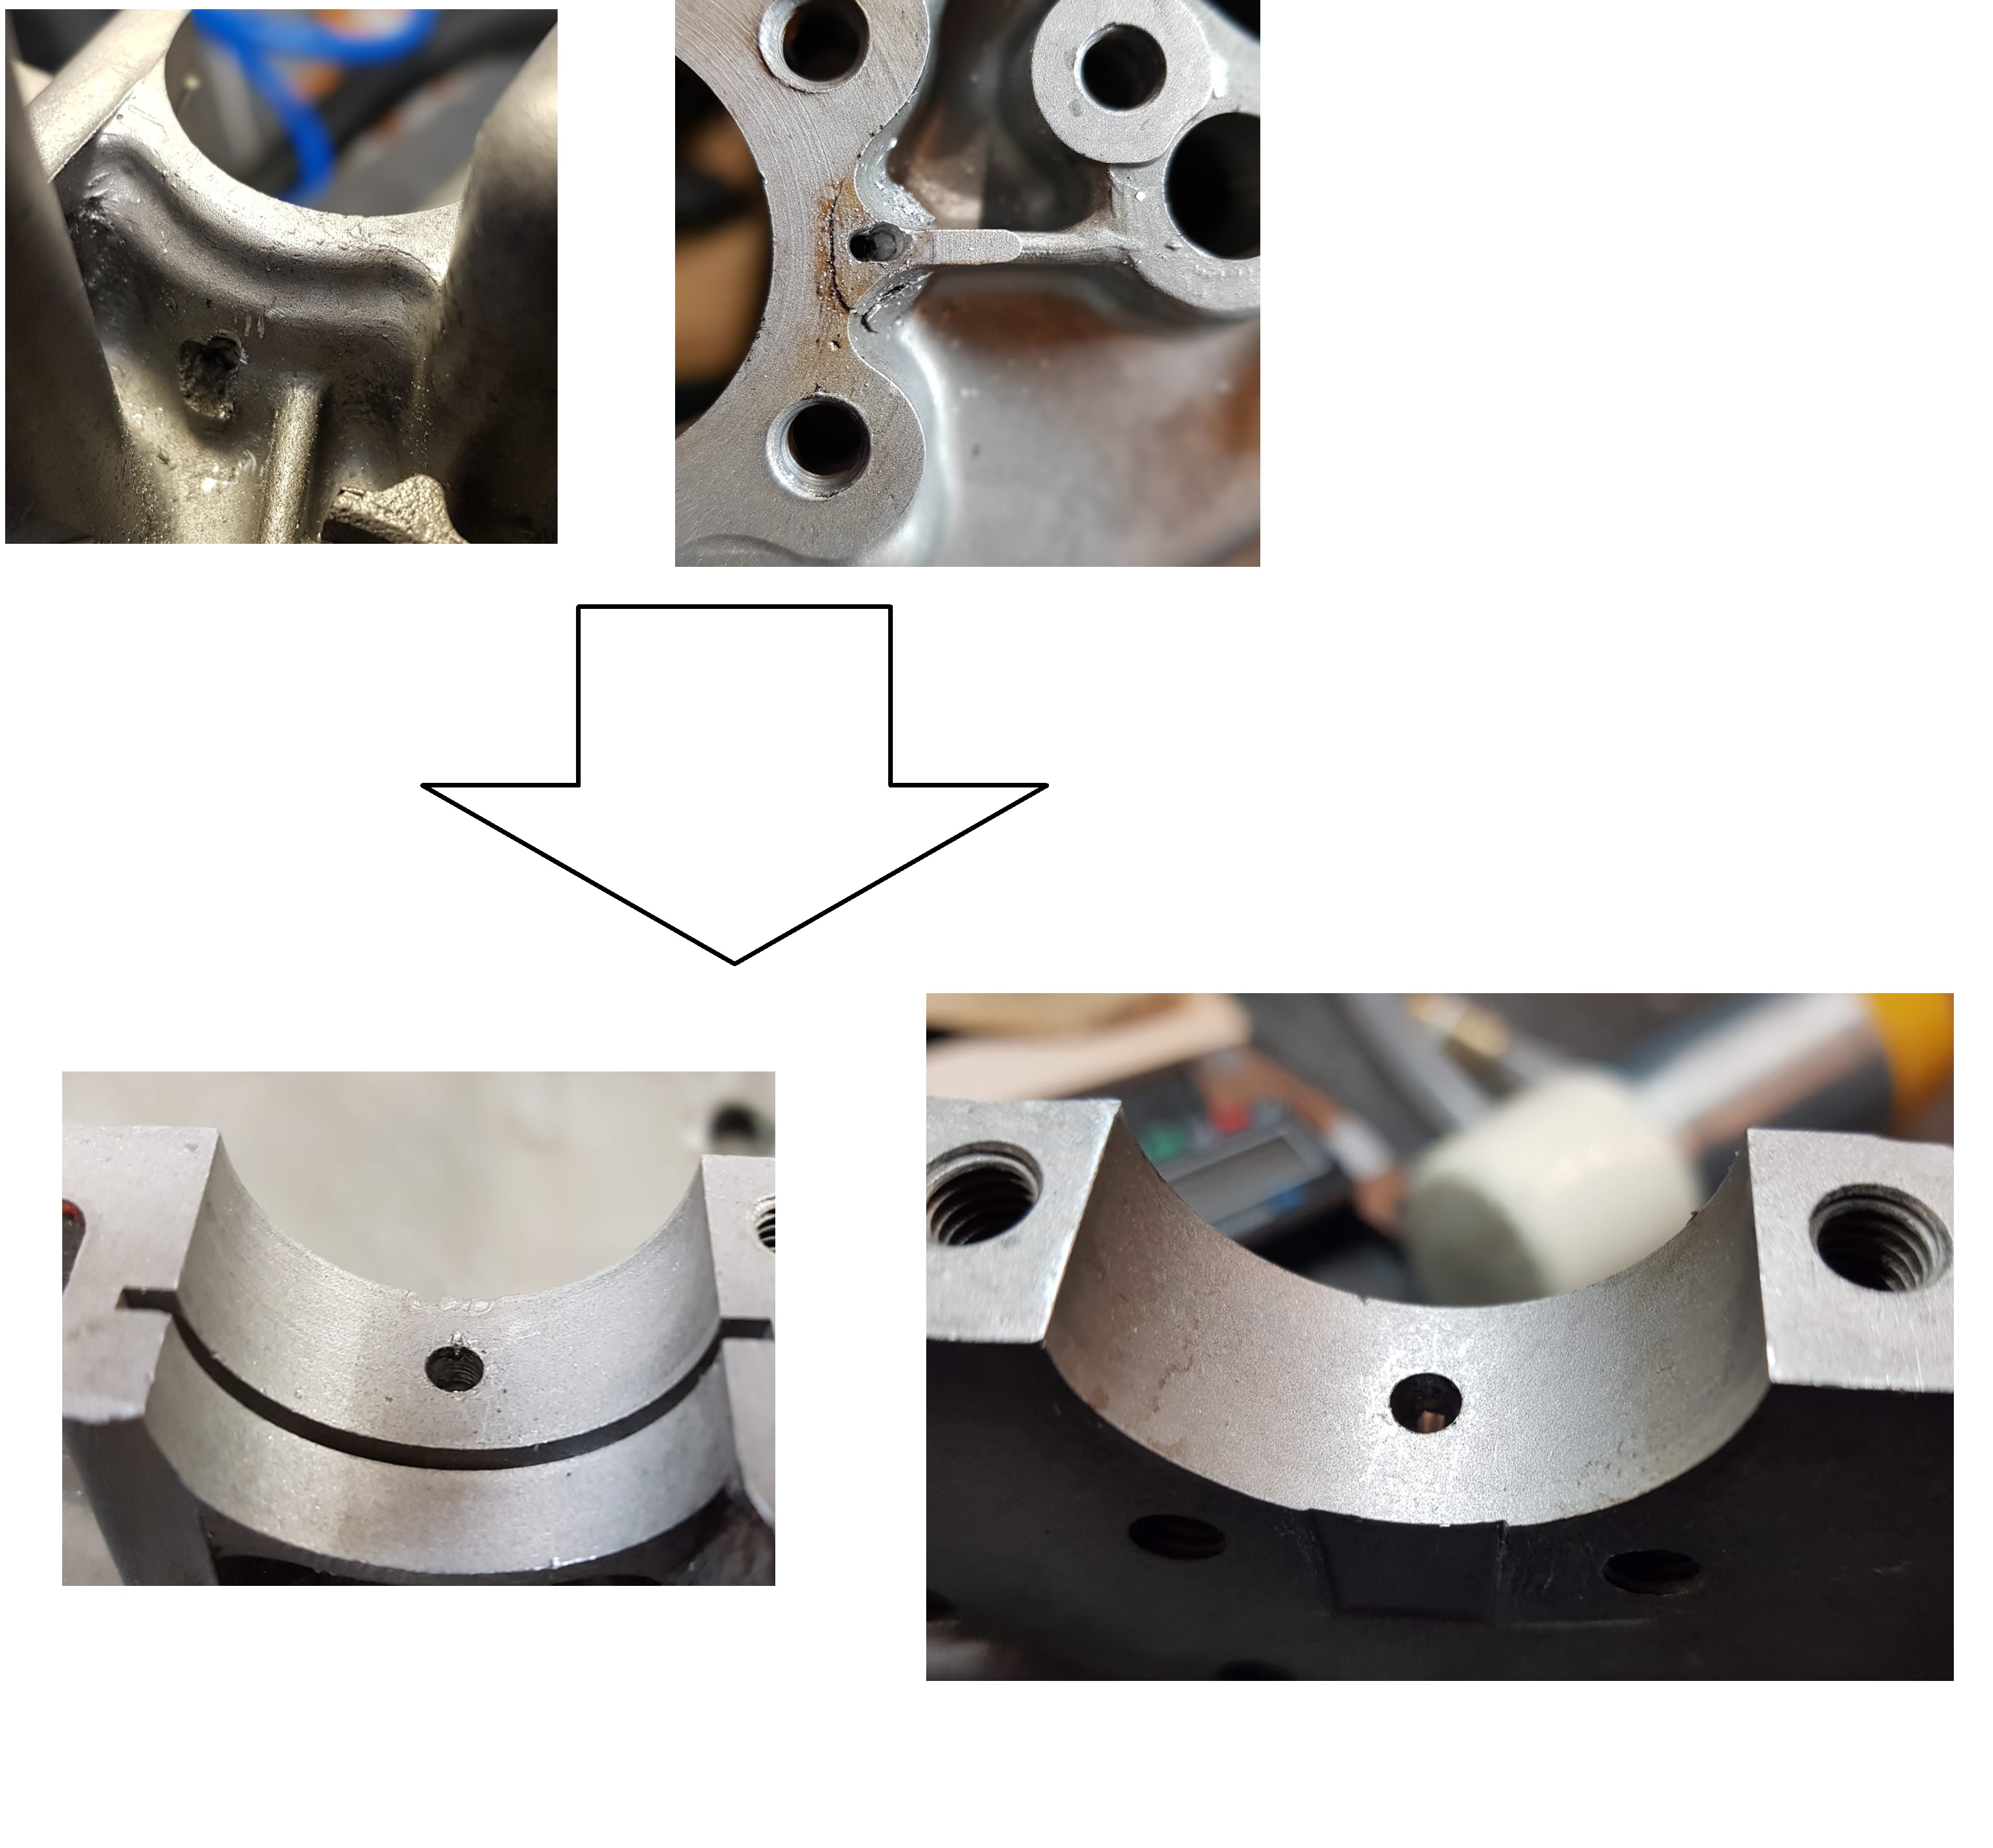
Step 1:

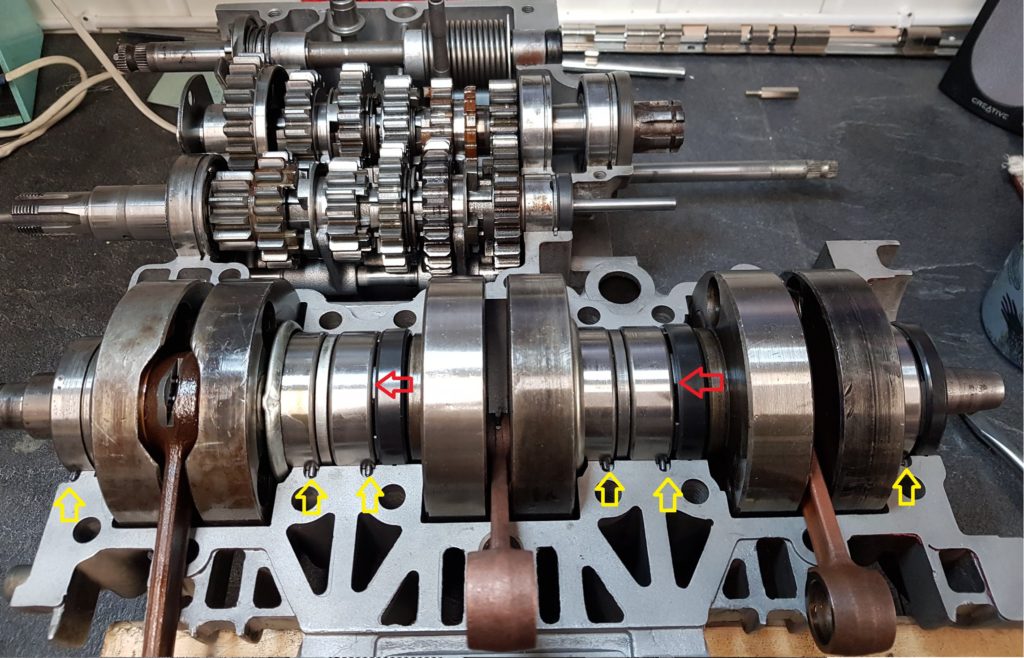
Drilled and milled holes at the rear side and was able to push the pins out.

Step 2:

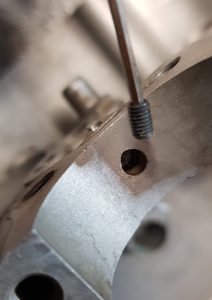
Drilled 2,5mm hole from the top side. Threaded 3mm and inserted a set screw and adjusted to the correct depth.
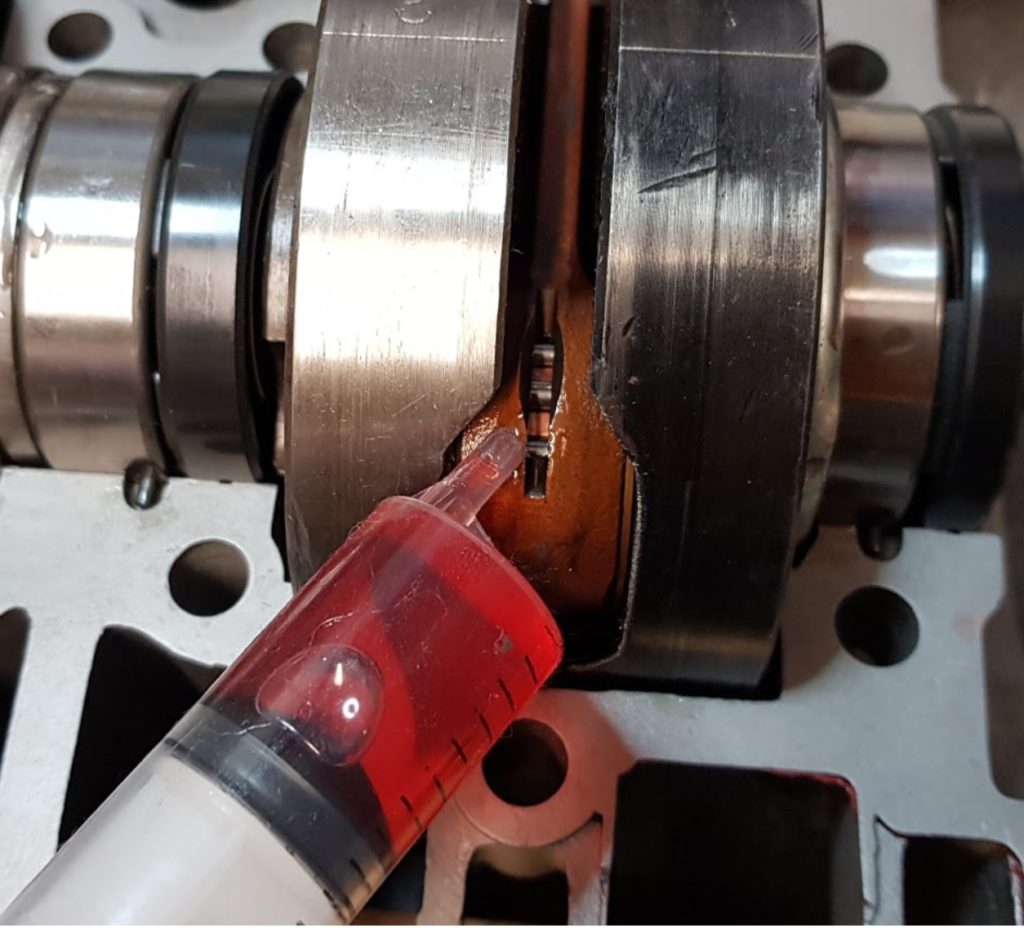
Step 3:

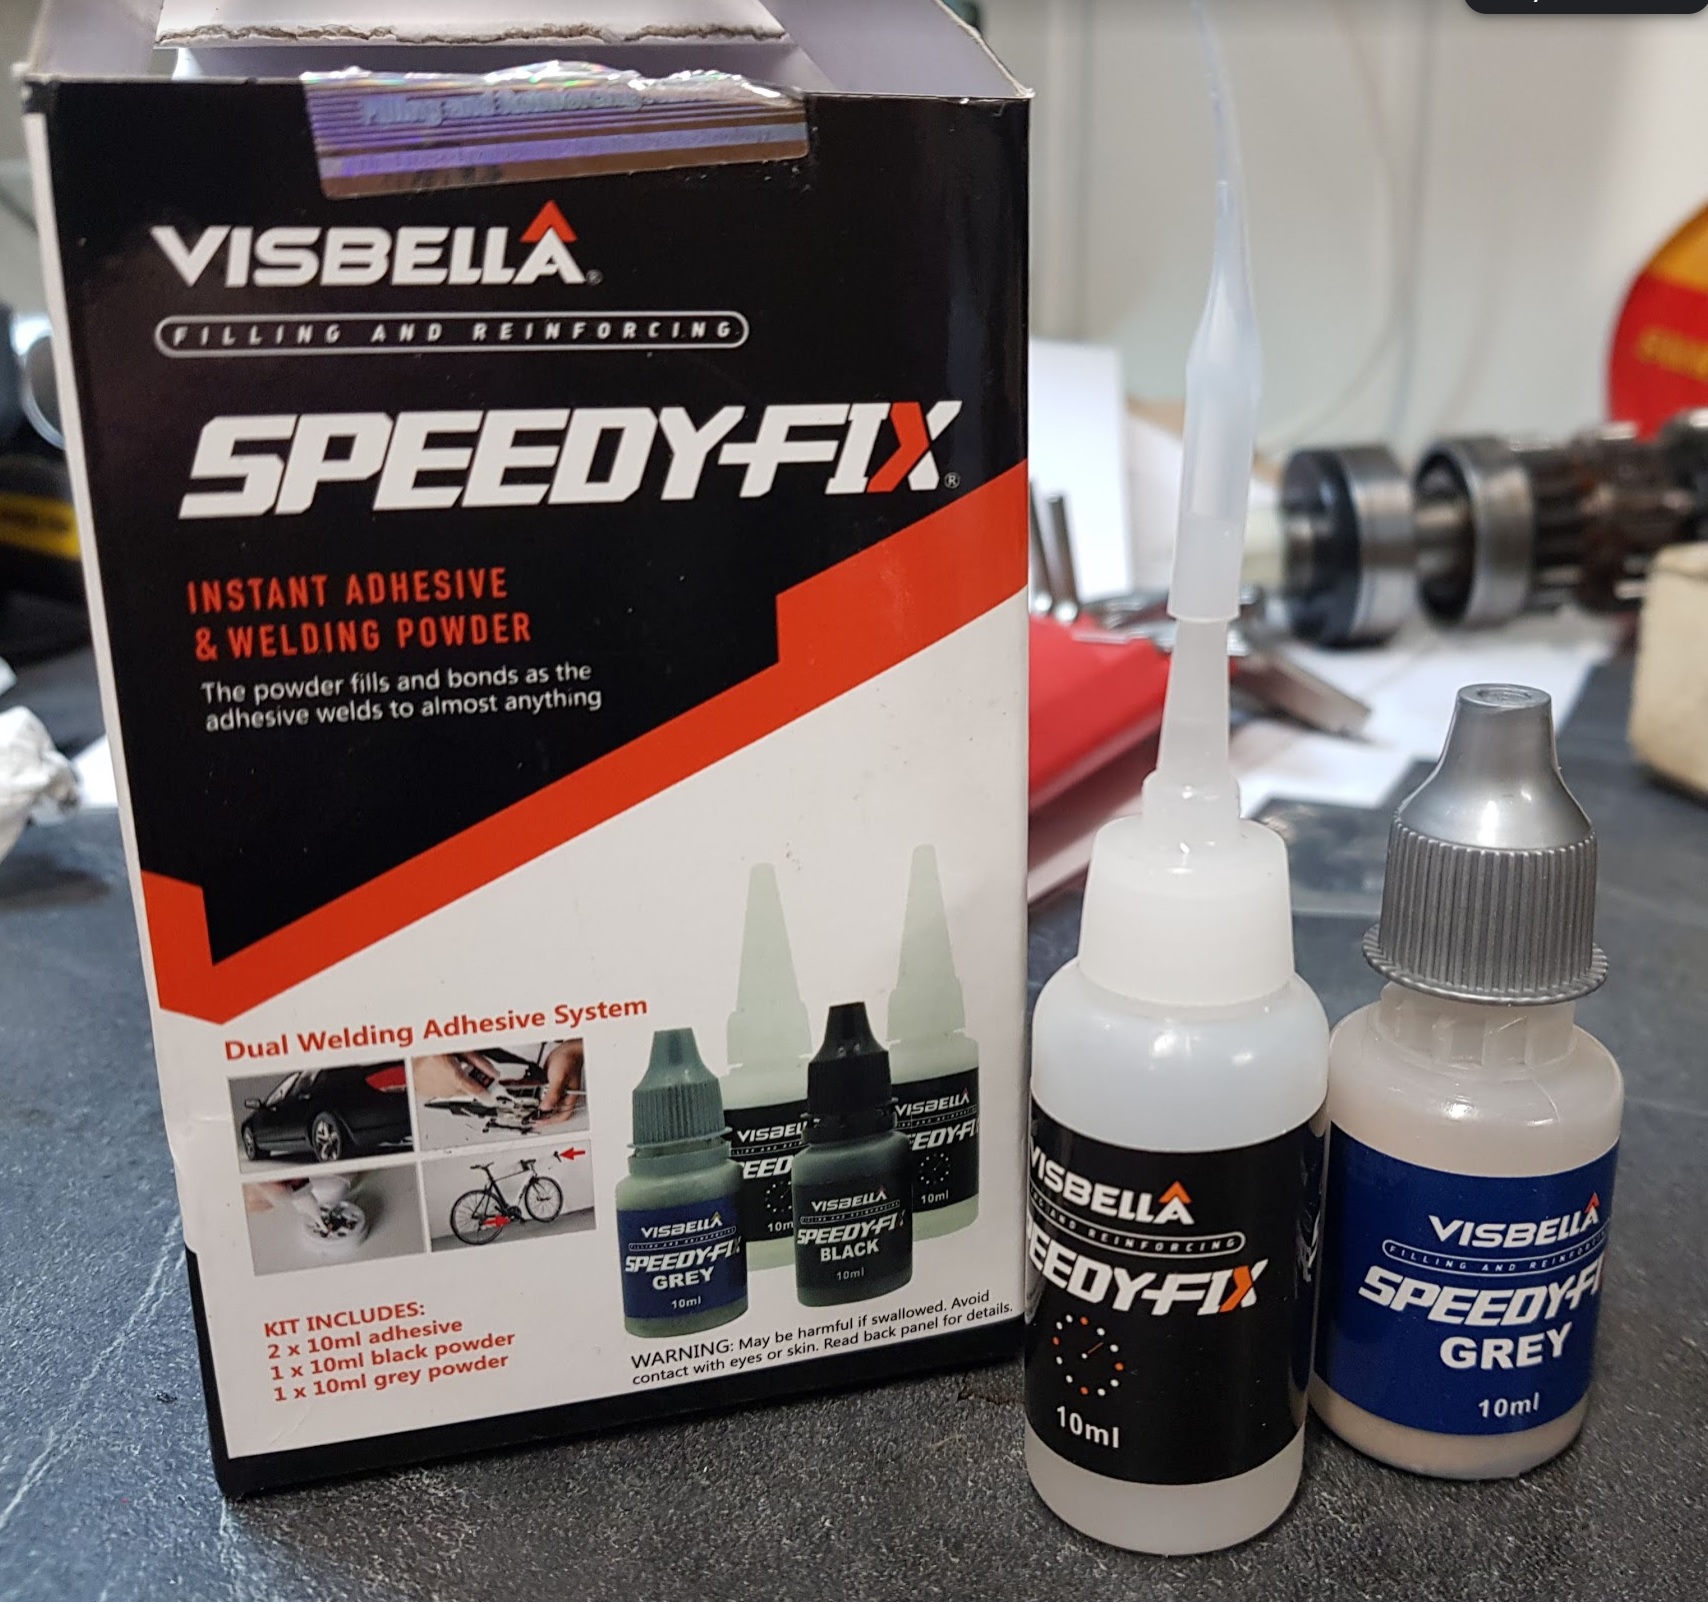
Gluing using Speedy-Fix

If something is too good to be true, .. it’s not true. That was also what I thought about Speedy-Fix, cost nothing from E-bay. Can it work ? Yes, I have tested it extensively on plastic, wood and metal. It really works. A totally damage plastic side cover was saved using this powder and hardener.

I could have TIG welded a tap onto the pin and pulled it out, but I don’t have any welding tools. Since the aluminium already had cracks I don’t think it added much structural damages to do the drilling and milling. A lot of materials left and if the gluing fails the set screw will still be in place.


GT380 Gear shifting

Step 1:

The needle bearing for gear shifting cam must be installed again. Use a socket to drive the bearing in place.

The needle bearing seen from the inner and outer side of the crankcase.


Step 2:

Cam and forks mounted:


A greate help to look at the pictures taken while stripping down the engine :


GT 380 Crankcase and cylinders

Cleaning :

All parts were laid in a bath of pure paraffin overnight to loosen up the old burned materials.

Thereafter, cleaning with a brush and flushed with water.


Powder blasting:

The powder blasting came out pretty well, but it’s messy, powder all over the place, everywhere. Inside my body as well… The biggest benefit is clear, no dangerous particles to damage the engine. It’s baking soda and can be flushed away. The moste resistant parts are hard to get off with only powder blasting and the finish of the alu parts get’s not that nice using powder.

Since I already have invested in a sandblasting cabinet I decided to stop the messy powder thing and loaded up the cabinet for glass blasting.


Glass blasting:

As always on my blog, click on the images for a more detailed view.

Much cleaner and more fun to do the glass blasting. The biggest issue will be to be to get rid of all the glass particles. Rinsing in water and blow dry with compressed air is important.


Coating with oil:


The parts looks shiny and nice after glass blasting but will soon start to oxidize. I was recommended to use a good penetrating oil, like Omega 636 to preserve the crankcase. Let it soak for one day before drying off.

And again, blow very well using compressed air to get rid of all remains from the blasting media.

So much more fun to start the assembling of the engine when all the parts are cleaned and shiny.  🙂  🙂

  • 1
  • 2