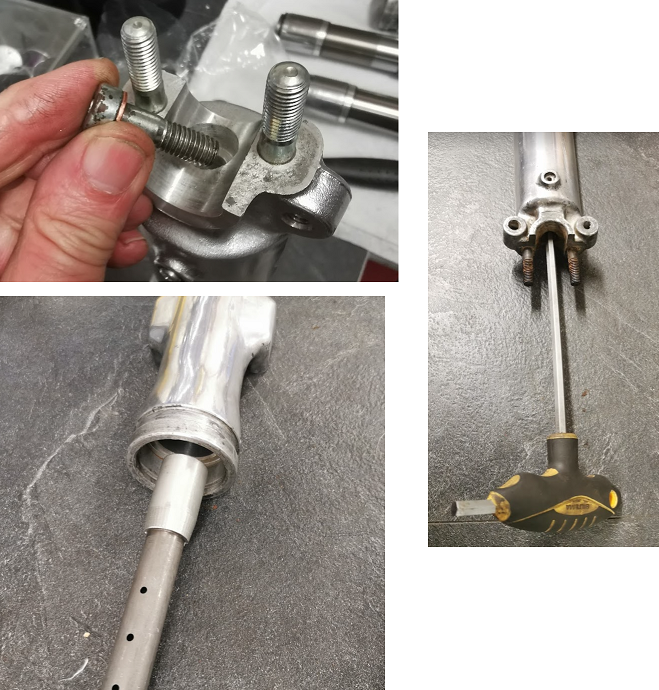
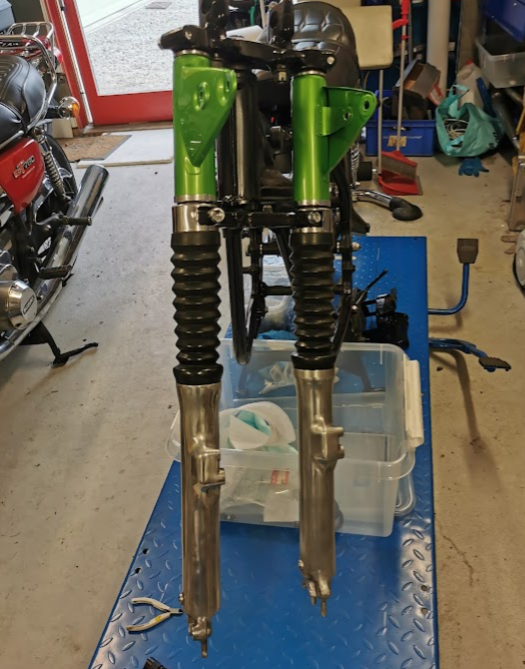
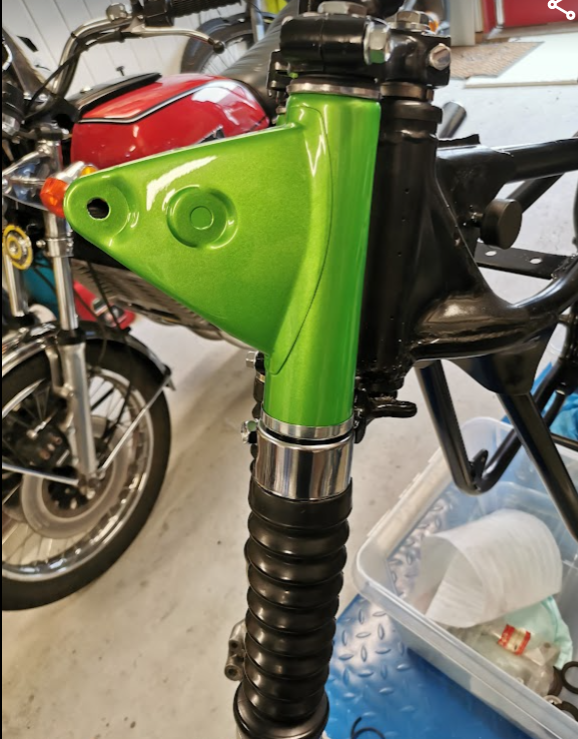
Mounting the fork

The fork was mounted according to the parts manual (GT380k)

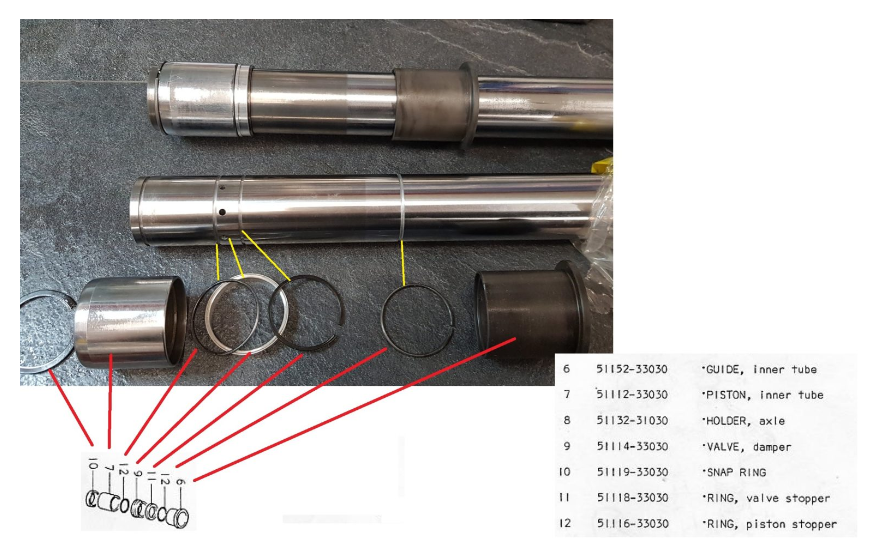
Parts no can be found in the manual, go to the: Documents at my blog.

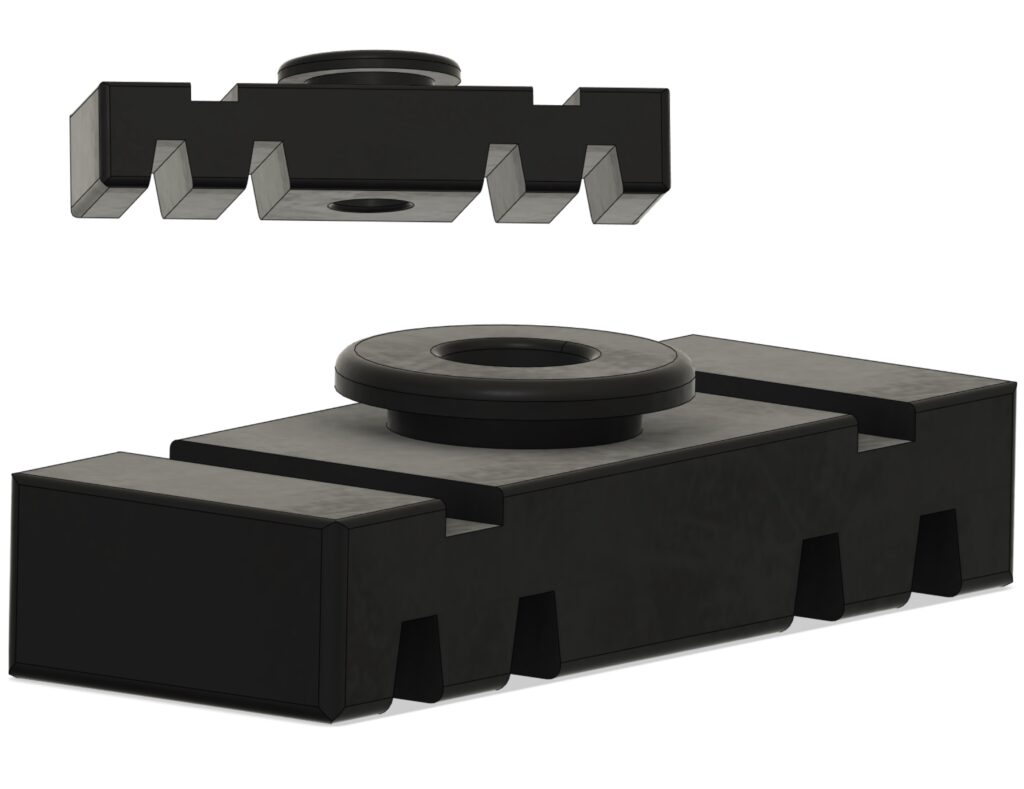
Resin print of 51553-3300:

I was missing some cushion parts. I only had one of the cushion for the headlamp bracket, the: 51553-3300

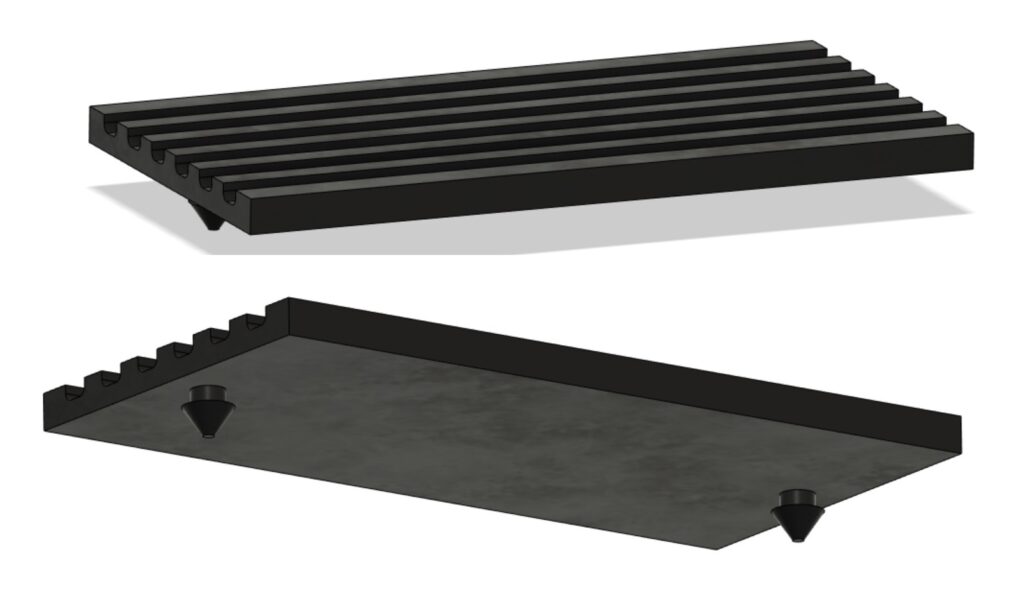
The resin 3D printer had some issues this time printing rubber resin, not sure why but still able to use the parts. I also tested the filament printer using flexible filament. Not 100%, but ok to be used.

Assembly of the front fork

Mount the damping rod (unknown part no) into the outer tube. Don’t forget the copper washer.

Oil seal:

Mount the inner tube and slide the oil seal down to the outer tube.

Next step can be difficult. Apply som grease around the seal, but it can be hard to drive the oil seal all the way down to the bottom. I did it “my way”

Since I have a lathe, I made a tool for the purpose.

With a plastic tube on top of the tool and a hammer it was easy to drive the seal all the way down.

Secure the oil seal with the circlip and the spacer.

Fork oil:

Install the fork spring and apply 210ml of oil. Screw on the top bolt and you are done ๐Ÿ™‚

Don’ forget the drain screw at the bottom.

Mounting the fork boot:

This part turned out to be very difficult. The lower end of the boot was very stiff and not flexible at all, and looked too narrow to get around the outer tube.

Soften the boot with hot air helped, and by using some plastic stripes as a guid I was able to squeeze it on.

Inner tubes

Finally, after two years of nothing I’m back on track with the restoration process.

Luckily I did some research last time about what part to be fitted in the correct order.

I used images from my previous post about the topic and went a head and did the assembling of the inner tubes.

7 Steps:

Carburetor synchronizing

Sorry for a long time of doing nothing on my blog. Hope to do better in 2022….

I come to mind I did a upload some years ago on YouTube showing an alternative way of synchronizing the carburetors, but I never posted the link on my blog. So, here it is:

The service manual explain how to balance the carburetors, but it can be hard to get it right, and annoying surging will occur at low rpm. Some adjust the butterfly valve looking at the air/light gap holding the carbs up agains a light source, but again, not an easy task.

In the video I pour methylated spirit ( petrol smells too much) into the carburetors and get the time of the drainage. Adjusting the carbs to about the same speed of drainage and the surging is gone at low rpm.
I learned this from Steve in Melbourne, Australia when I visited his sister Donna Ann 5 years ago.

Welcome to my man cave

Man cave
A proud owner of a new Man Cave

Welcome to my blog where I describe my journey in Suzuki GT restoration.

Hopefully at help for myself an others with the same interest. Scroll down for for new posts.

The main idea with this blog is to use it as a reference guide for Suzuki GT 750Aย  and GT 380J model.

Donโ€™t hesitate to give me feedback and guidance if you see me doing it wrong.

3D file Battery box large CUSHION

item: 09320-08012

Please feel free to download the STL file:

Latest update: Got the resin yesterday and did a test print.

Was very pleased and easy to fit the part. A bit stiffer compare to the “real” rubber, but still flexible. Get much softer at temperature. Let it rest in hot water for some minutes before mounting.

Link to the resin supplier: https://wanhao.store/collections/wanhao-brand-resins/products/3d-printing-resin-rubber-resin-1000ml-bottle?fbclid=IwAR2NYoEK_n_4imI9BA3BnFjWl97fM67uk2CWa8I3e1a5bZNwuBYF3sFkxRk