Rectifier
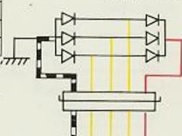
GT380 schematics
The figure above is a copy from the wiring diagram. It shows the 3-phase rectifier with three yellow wires as AC input and the plus (red wire) and GND(ground 0V black and white wire) as DC output.
The wiring diagram also shows the housing (one of the heatsink) is grounded.
Note! I had a look on my GT750A model. An other type of rectifier (the smaller one) and the black and white GND wire is missing. All the grounding is done direct through the mounting bolt. Only four wires, three yellow and one red to the connector. A bit confusing, because the detailed wiring diagram for GT750 shows the GND wire, but not in the owners manual for GT750A. I assume it’s done different from 72-77 models.

GT750A version, no black & white GND wire.
If you are uncertain how the rectifier works with all 6 diodes, please review my previous post about the alternator for GT750 and GT380. There you will also find link to YouTube explaning how it all works.
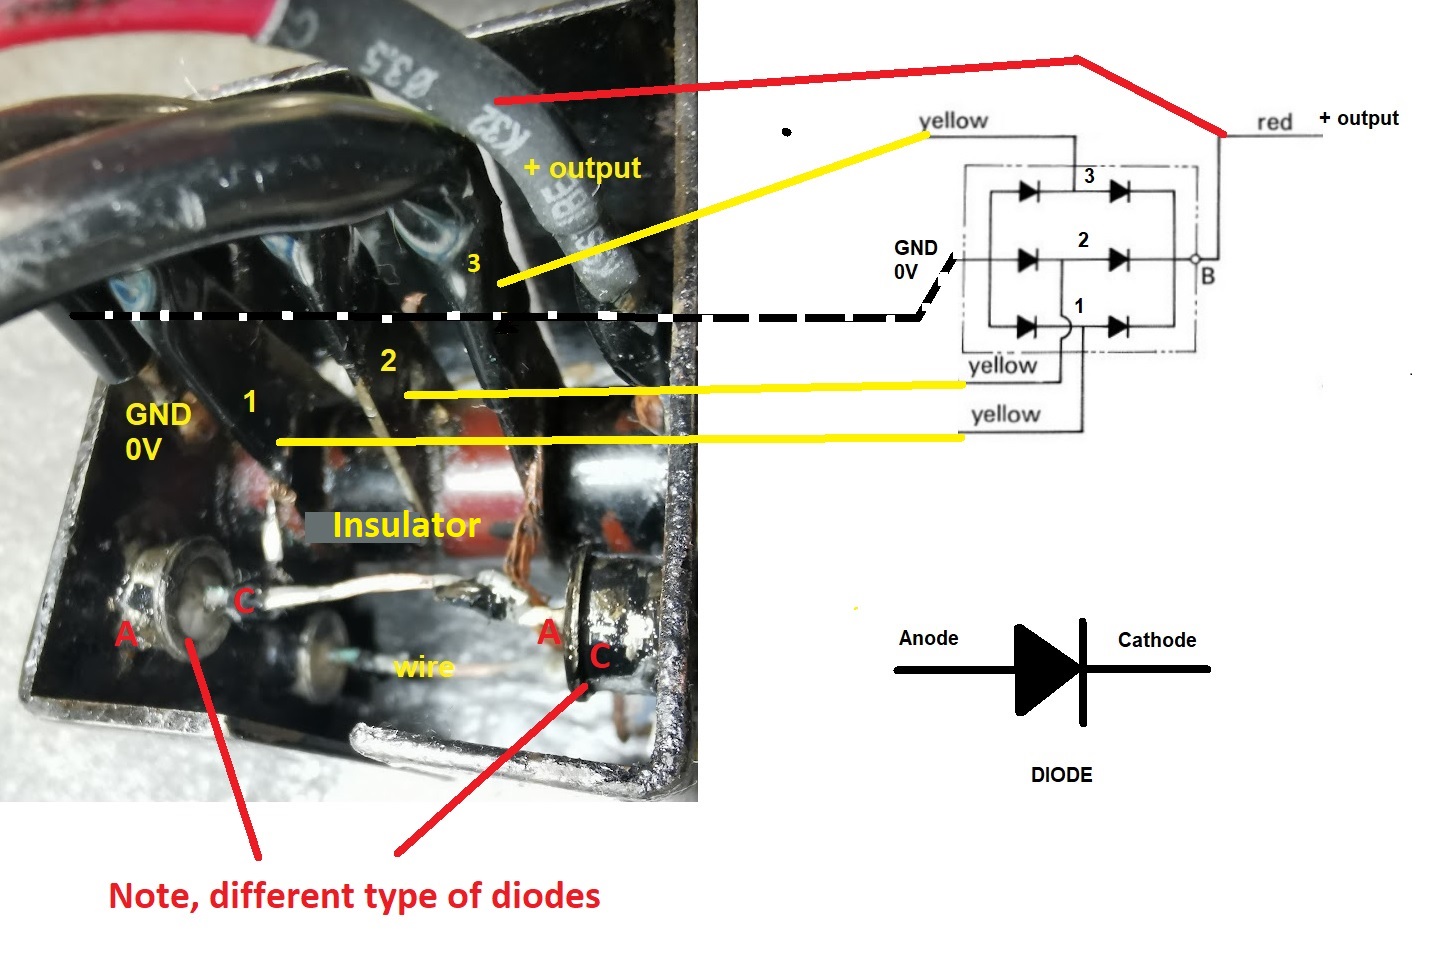
The rectifier in the image above is from the J model. You can might find a different package on later models with smaller heatsink, but they all works in the same way.
You have six diodes, three with the anode connected to the case and three diodes with the cathode connected to the case.
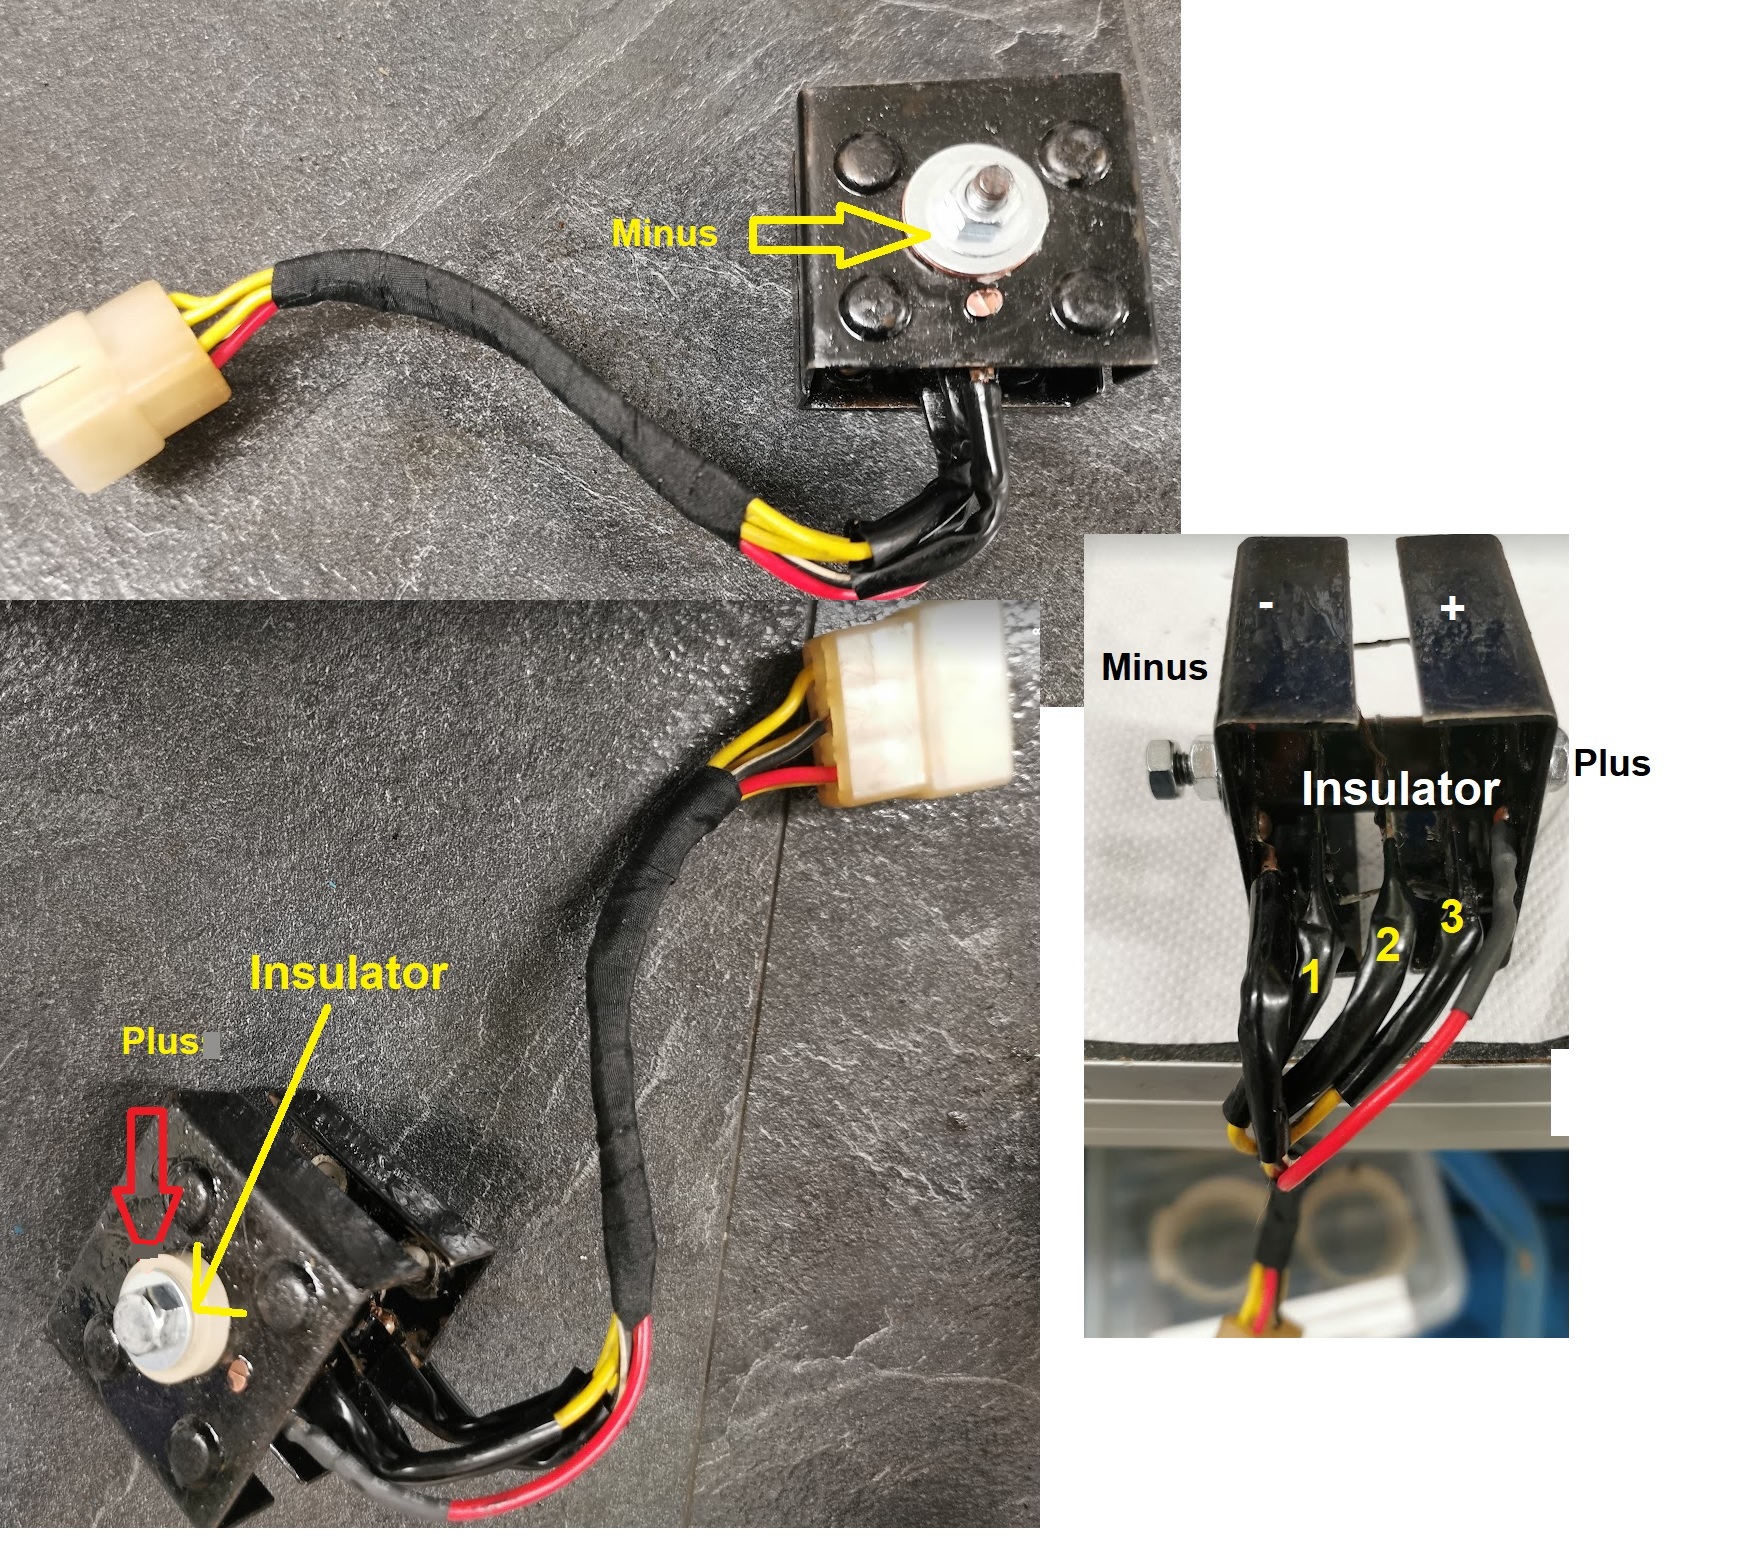
Please note, the rectifier has the heatsink splitted in two parts. One is the pluss output ond the other one the minus output (GND) . If you scratch off the pain from the positive heatsink and by accident short the heatsink to GND you short all of the voltage to ground on your bike. Note! the heatsink is connected to plus, not the bolt. The image shows how the bolt going thrugh is insulated. I did a small mod using making the insulator in peek material to improve the design a little bit.
The other part of the heatsink shall be grounded to GND according to the schematics. Mine was not and I’m not sure if it was wrong mounted or it is common not to do do. Anyhow, both options will work, but if not grounded all of the current to GND has to go through the black and wire to GND. I did it in my way and made better connection to GND from the heatsink.

Remember to remove paint to achieve a proper connection to GND.
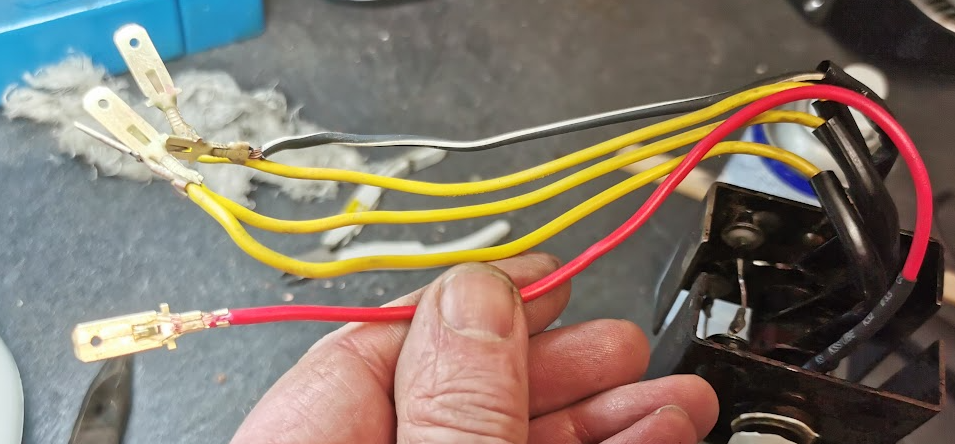
All of the connectors where polished and the red wire who was broken got replaced with a new wire and connector.

To remove the terminal from the connector, use a flat screw driver to bend the lip down and pull the terminal out from the rear side. Remember to bend the lip back to normal position when inserted.
Diode testing:
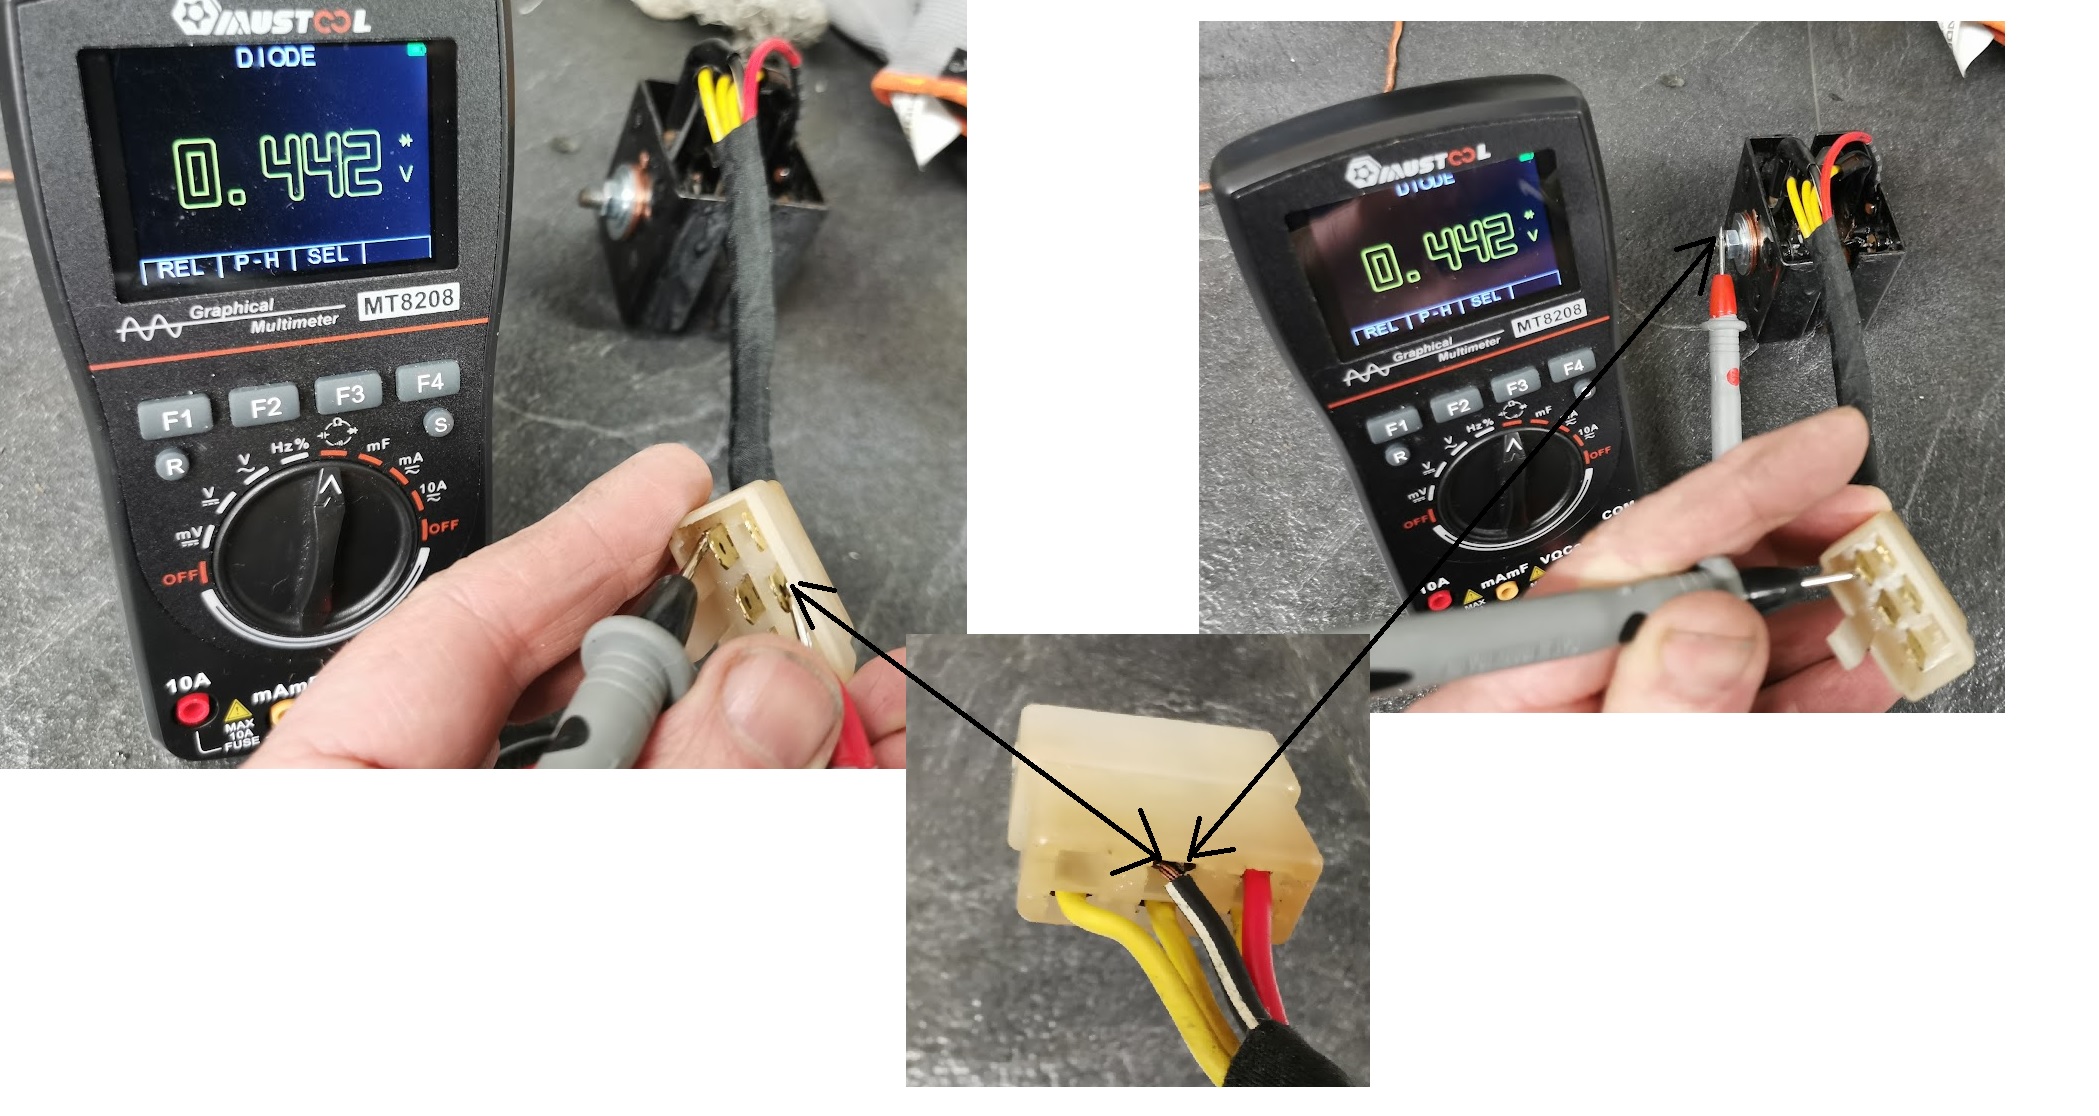

When using a multimeter for testing, switch to diode testing and do the measurements. Positive terminal(red test lead) on the anode and negtive terminal (black test lead) on the cathode. Measure all six diodes, but keep track of anode and cathode. Since the three of the diodes have the anode to GND you can also measure to the heatsink insted of the black and white GND wire/treminal

The instruments shall give you a value for about 0,45V, and no voltage if you swap the terminals ( positive on cathode and negative on anode).
Measure all six diodes, but keep track of anode and cathode. Since the three of the diodes have the anode to GND you can also measure to the heatsink insted of the black and white GND wire/treminal.
If you don’t have any multimeter you can use a small 9V battery as input and and a test lamp at the output. When you swap the polarity on the 9V battery applying power to the yellow 3-phase input the lamp shuld still light, and do the same betwen all phases.


Done !