Browse Category: Gauges/Clocks

How to restore the speedometer and tachometer

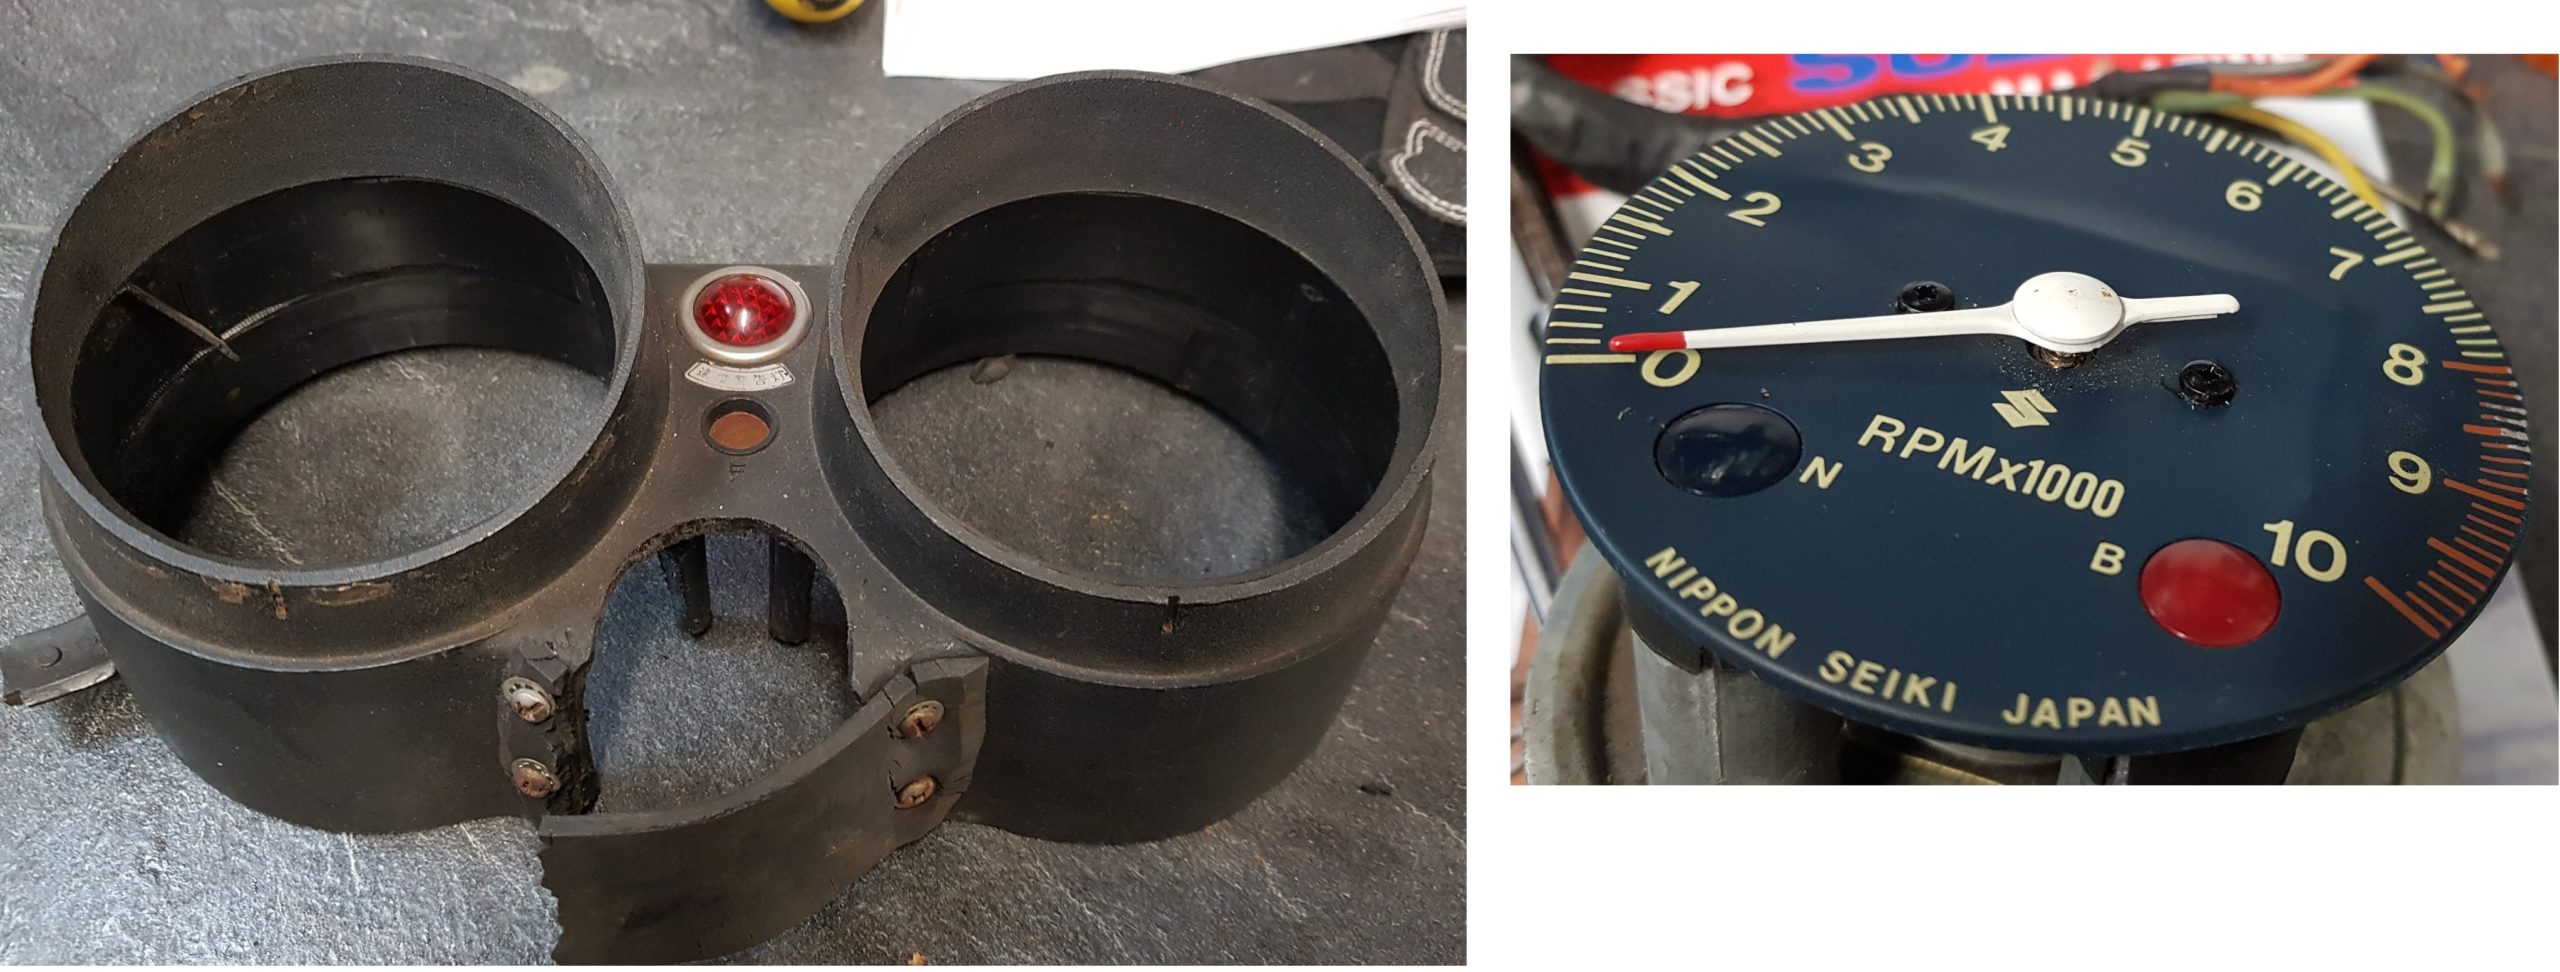
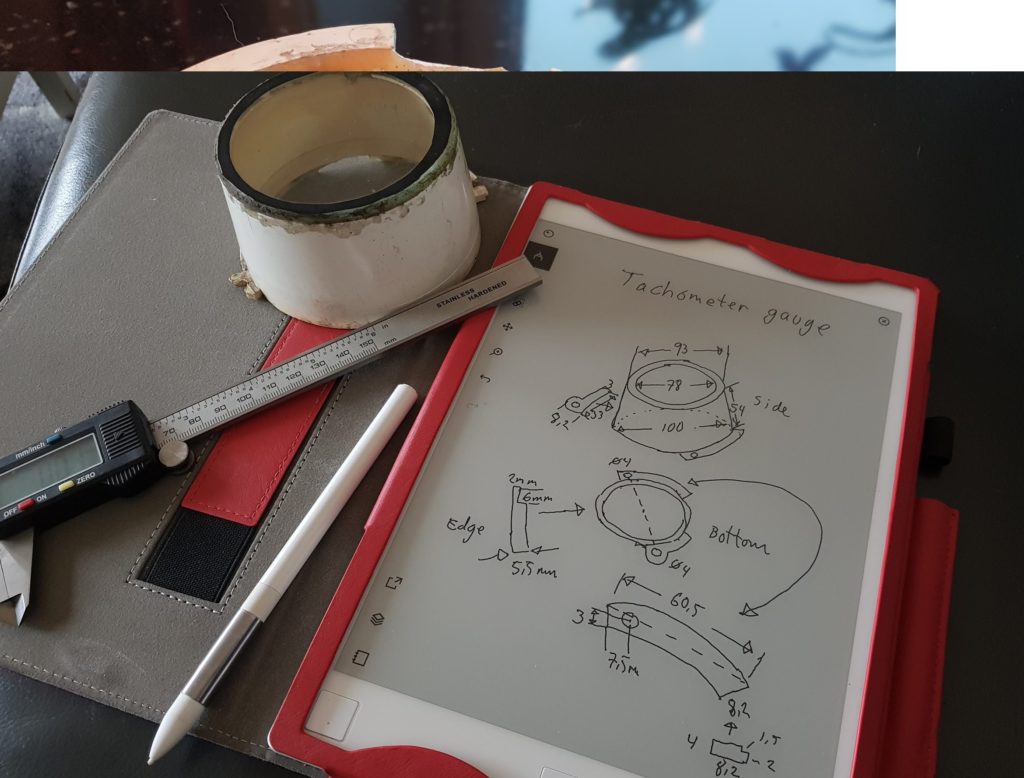
Speedometer / Tachometer assembly

Time to start the assembly process, four years after it was taken apart. The following days and weeks will show if I miss something. Some parts have already been 3D printed new or bought new.

Starting with the bracket:

All the rubber parts where stripped off and I think all of them can be reused. The bracket got sandblasted and painted.

Remounted the greenhouse tent I used when painting the frame. Ready for new paintworks to be done.

First one layer of primer.

Then, two layers of paint.

The tent will soon be upgraded with ventilation since it will be used for bigger parts as well. An oven gave a nice temperature inside the tent.

Rubber parts mounted.

The paint finish could have been better. Perhaps I had to high temperature while spraying? I don’t care since this is a non visible part, covered by the clocks. Now it’s well protected against rust.

Inner parts were painted and glued to the mounting plate.

The rubber hose was made from an old rubber tube.

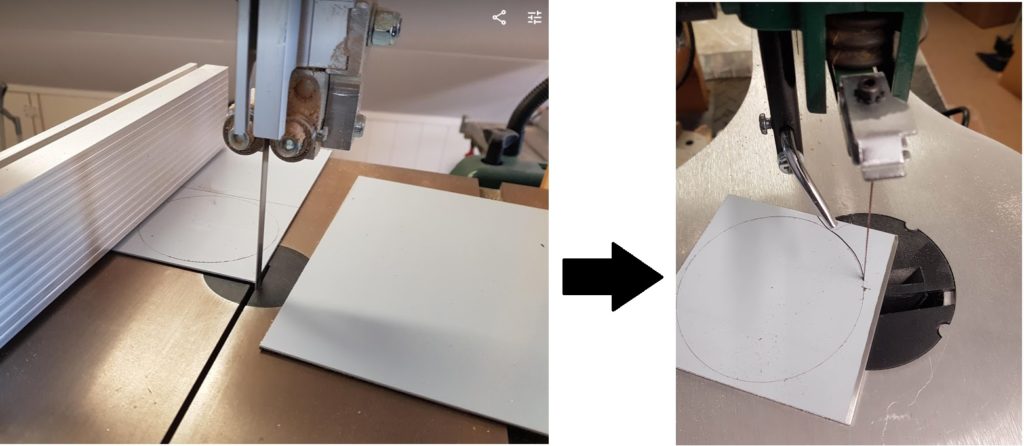
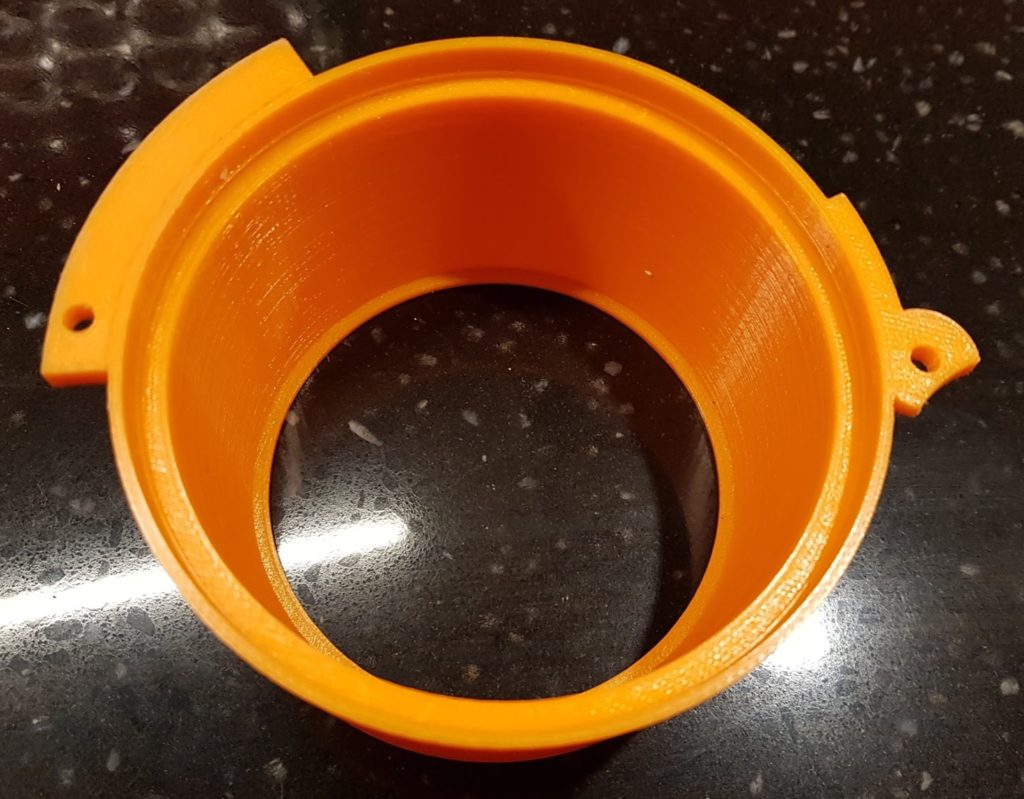
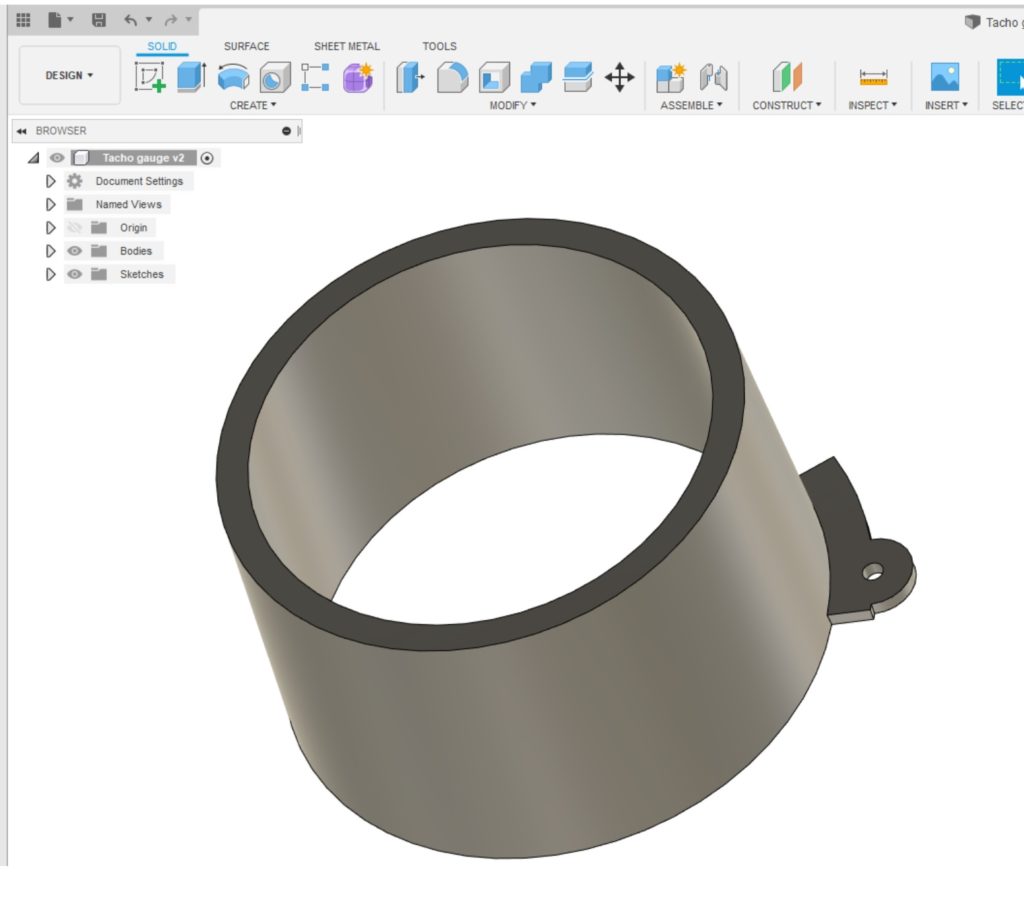
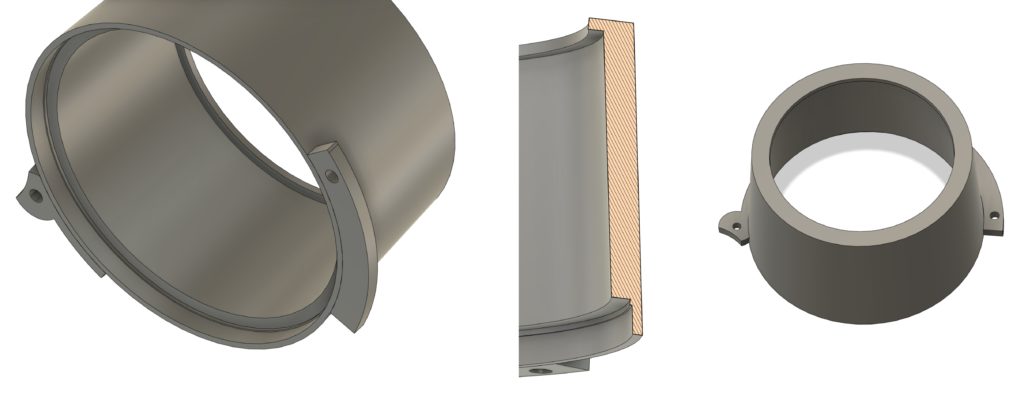
I made a test fit using the new 3D printed part and also cut a new glass …. but not sure.

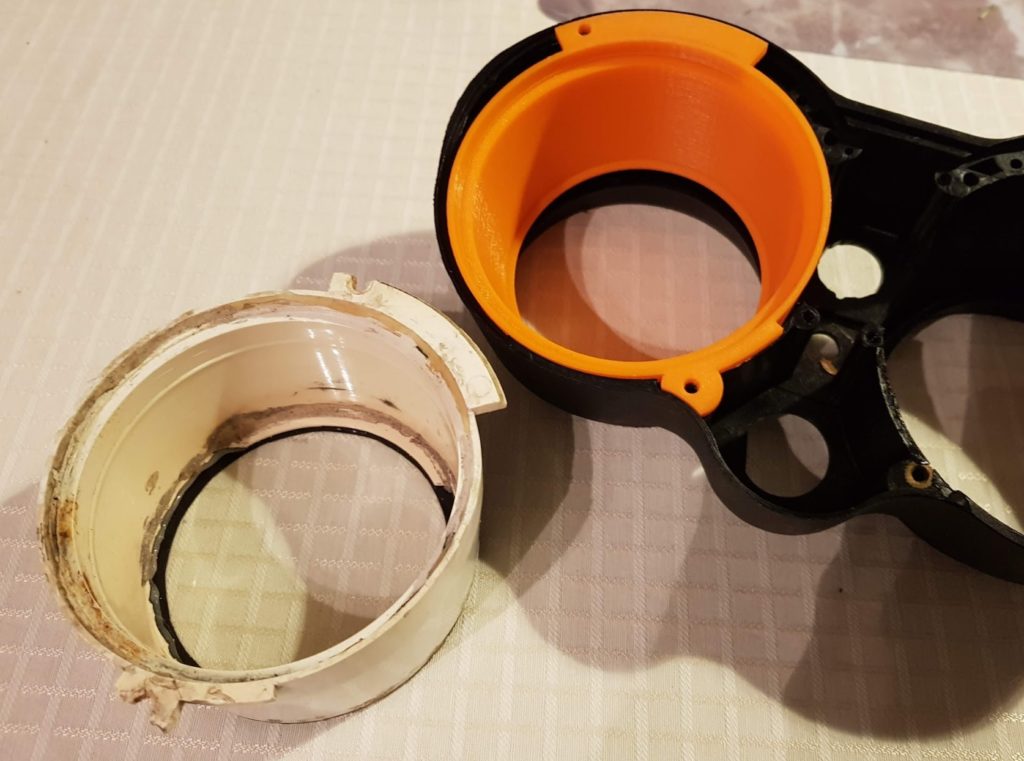
Ended up using the old ones from 1972. They have some cracks but seems to fit well after all.

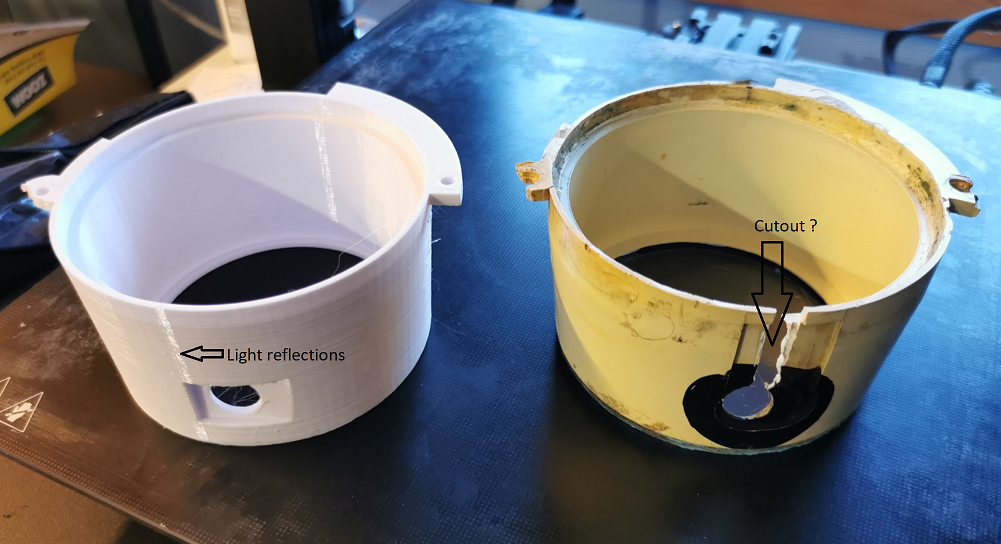
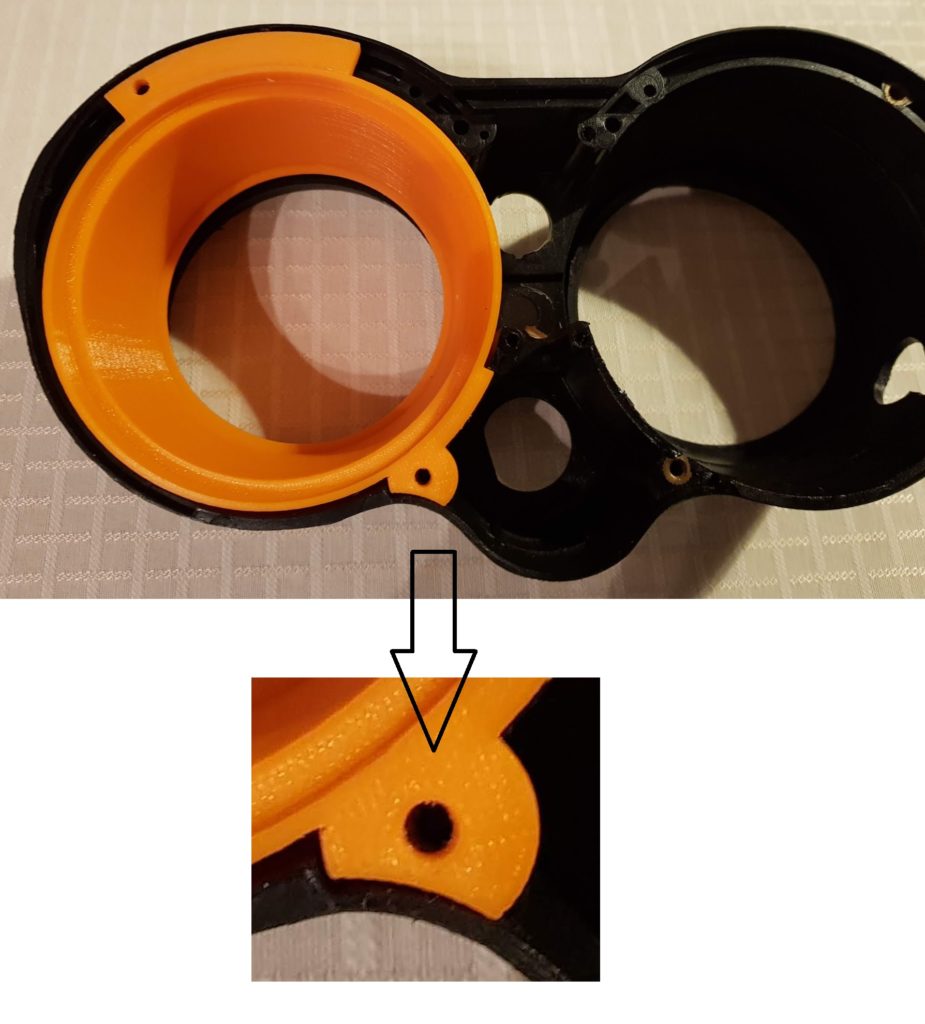
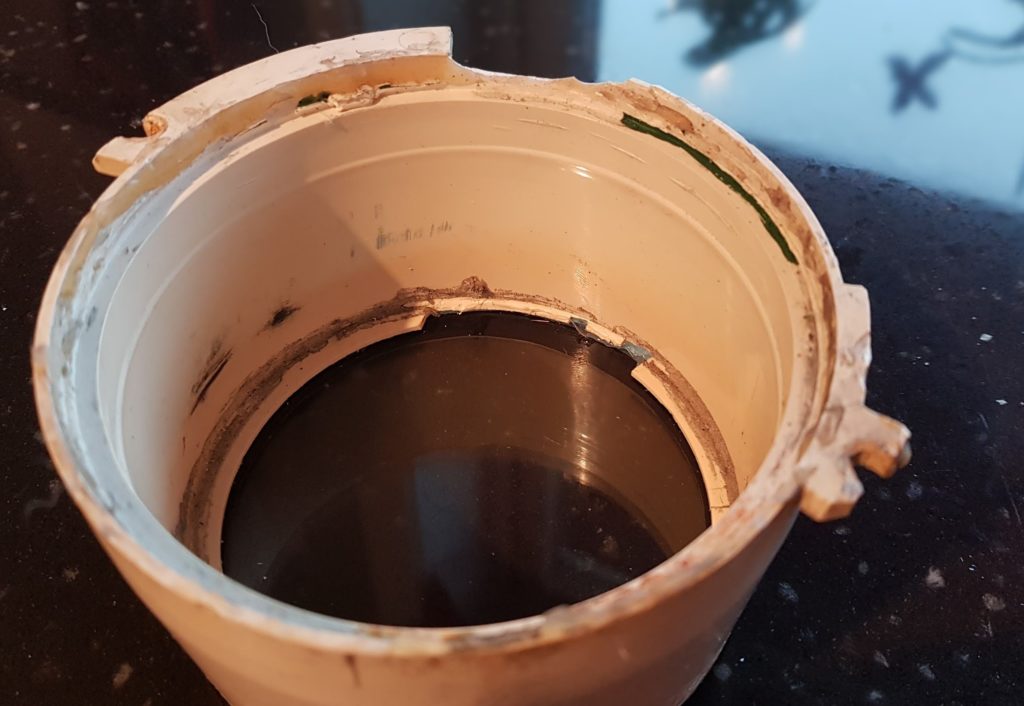
Mad a rubber seal from the old rubber tube and glued onto the cutout in the speedometer housing.

Note! Previous owner has made an ugly cut out to be able to fit the speedometer. That’s not needed if you mount the speedometer without the rear metal disk. Thereafter you mount the disk. But now it’s done I don’t care.

On this part I used textile tape instead of rubber.

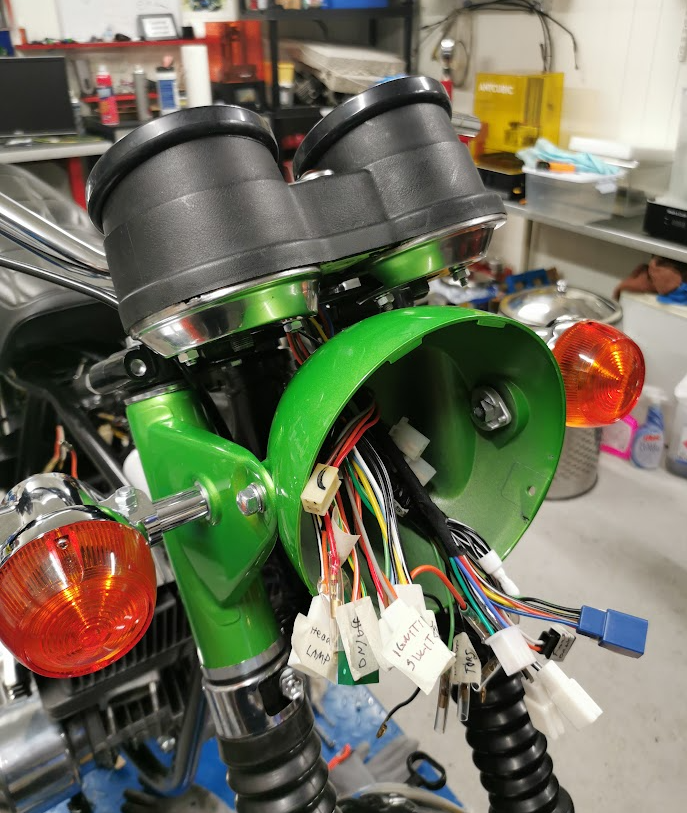
The clocks need to be glued to the inner housing. I prefitted to the bracket and made a mark to be sure it’s all aligned before gluing.

Glued and all the lamps are mounted ( and tested)

The upper rubber covers are quite loose and will be glued before I get the bike on the road.

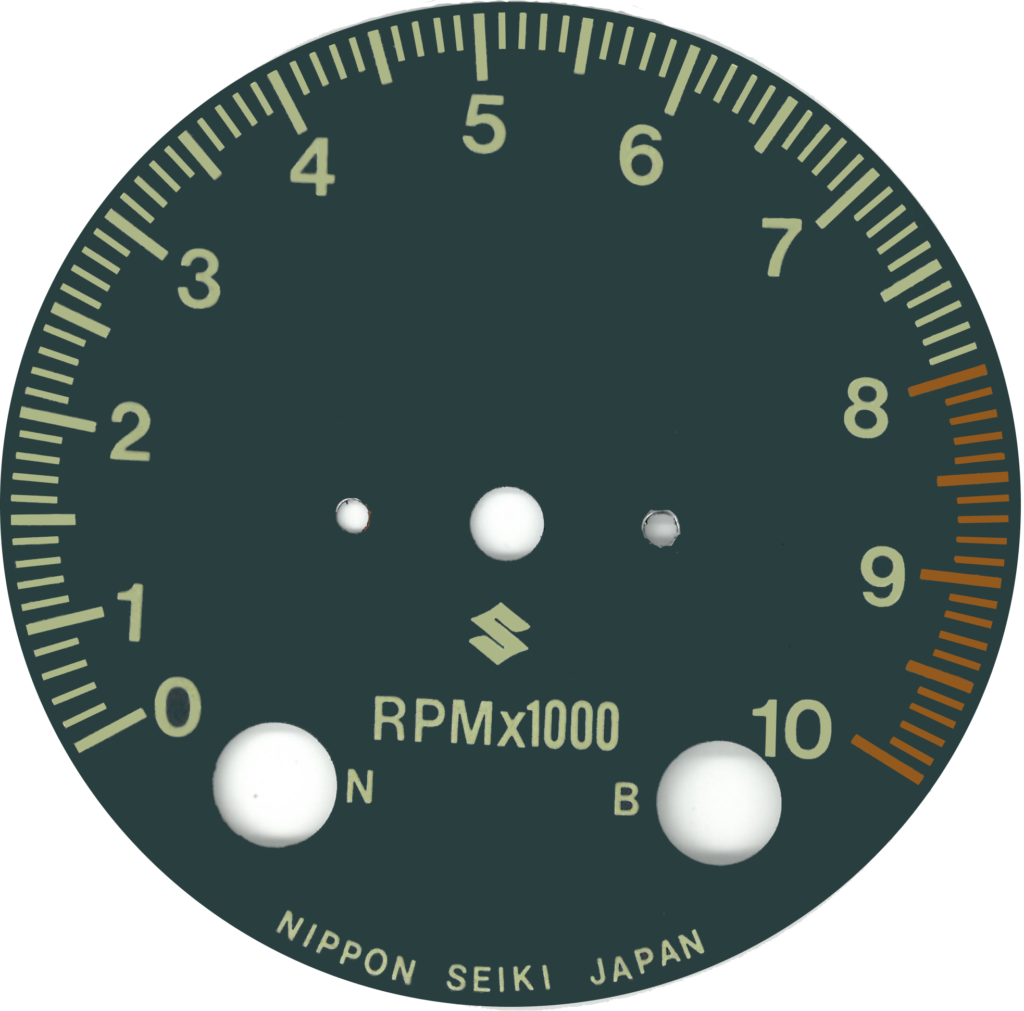
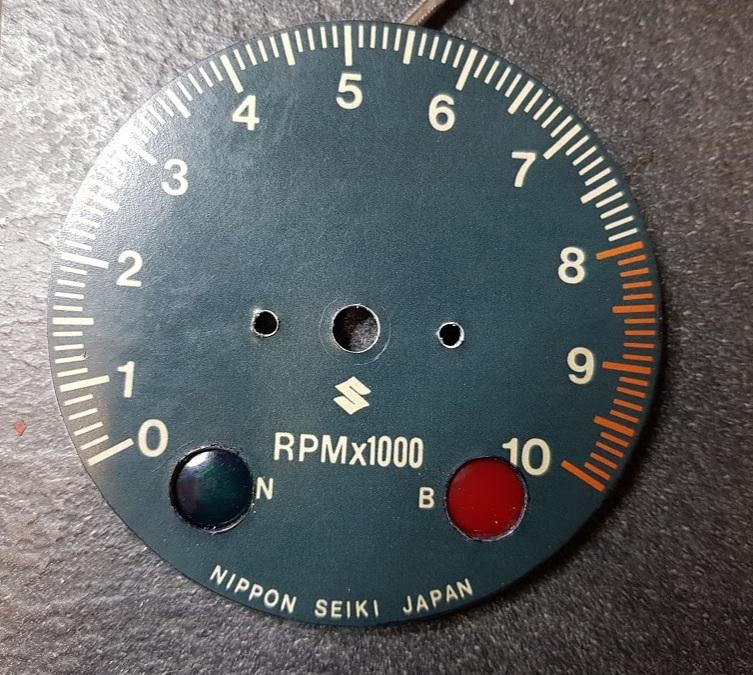
the red lamp in the middle was meant to give a signal above 80km/h and is not in use. I will use it as an indicator to alarm if I forget the retrack the side stand.

Speedometer file for 3D printing

This is how I made the inner housing for the speedometer. I did the print in white PETG, able to withstand higher temperature compared to PLA filament. The STL file can be downloaded for free from the link below. Can be printed in with support to the build plate.

The original housing had a cutout for the reset-knob for the trip counter. Don’t know why, but it is probably done because difficulties when mounting the clock with the knob attached?

For the rubberpart sealing the reset-knob shaft, I will make my own fix. Can’t be bought so I will try to make something from a rubber tube and see how it works. If I face any difficulties when assembling and need to modify the 3D model, I will upload a new STL files on this site.

Tachometer face

Making new tachometer face. This is learning by doing. Very much experiential engineering. Just have to give it a try and see how it works.

Not difficult to cut the 1 mm aluminum plate using bandsaw. To make the circle using the scroll saw went even more easy then expected. Made the disk a bit wider than the printed tachometer face. Since the faces are printed as sticker lables it’s easy to mount on the alu disk. Holes were drilled and the edge grinded.

Not 100% happy with the result. The alu disk is much thicker compare to the original, giving pros and cons. Stiffer and more solid, and more easy to drill. But look at the lenses, they don’t match the thicker plate. I can mill on ther rear side using a 12mm end mill (don’t have that) or make new lenses on my lathe, if I can get hold of proper acryle material. Time will show what I do.

3D printed gauge house

My very first 3D print ever….

Still a sample print. The final one will be printed in white filament.

Spot on target, not bad for the first 3D print ever done by me 🙂

The material seems to be more solid compare to the 48 years old fragile plastic.

Gauges

The outer housing for the gauges was a disaster. Previous owner had cut off a big piece to get space for an unoriginal ignition switch. Was lucky and got a new housing in a good condition.

The face of the speedometer looks nice. The tacho face has dents and is quite worn.

The needle is also different on the clocks. The 72 model should have chrome in the middle, not white as on the tachometer. The speedometer is all OK.

In addition, both inner housings are in bad shape. Cracks and missing parts.

Can replace it all, but not easy to get 48 years old gauges in a good condition. I also want keep it as original as possible when it comes to the look of it. Therefore I will not mount later models. And I have always wanted to restore gauges and this is the perfect time to do it.

New tachometer face:

The one to right is the damaged one. I scanned the tachometer face and got it edited in SW on my PC. Handed the file over to a printing service and got six new prints as stickers. I’m very pleased with the results and the colour looks to be spot on.

Will make a new aluminium disk without dents.

Inner housing:

The image above is for the tachometer and the one for the speedometer is just as bad. What to do? Hmm, lets give it a try. I can draw new ones and get them 3D printed.

Sketching up the measurements on my sketching pad and will try to do the design in Autodesk Fusion 360.

But first I have to learn how to use the SW, Fusion 360 is all new to me.

A simple trial design:

This was fun. Pretty sure I will get it done, and it will be good as new. The image above is not correct, only a test piece. I will post the final files on my blog if anyone wants to download and print their own.

Not sure when, but it will for sure be done if I get this right. The face of the tachometer will also be uploaded.

Next day:

The learning curve of Fusion 360 was not steep, quite easy after few hours of watching YouTube and I did some trial design.

A bit more tricky to figure out the correct measurements from the worn clock housings I have. The drawing from the K parts manual can’t be correct, will never fit.

After studying Ebay and watched carefully on photos from J/K types, this must be the correct one. Fits well comparing against my broken parts.

Image from Ebay:

Think I got it, the first design of the Tachometer house is done. I left out some of the profiles since I don’t see any need for them.

Hope to get the first trial print at work in about two weeks time. Not sure about the quality, but later on I will have access to a much better printer and can use white filament as well. The first one has to be painted white. I’m so exited to see the result 🙂 One week of vacation now before I continue with any 3D printing.