Coils
Before and after refurbishing

The coil wiring was in a bad shape like the rest of the electronics. Wrong colors on the wires and missing connector.
If you don’t know how the coils and ignition is working, please have a look at my post i did 8 years ago when working on my GT750:
How to start: All parts were dismounted and cleaned. I was not able to clean the coils properly so I decided to paint them white.
The metal brackets holding the cables were sandblasted and nickel plated.

I had to use impact driver to loosen the screws. Don’t forget to use JIS tools ( Japanese Industrial Standards)

The bracket was sandblasted and polished.

All of the wires had to be extended or replaced. Each individual strand in the wire must be sanded before soldering. After soldering the joint was covered in epoxy and painted.
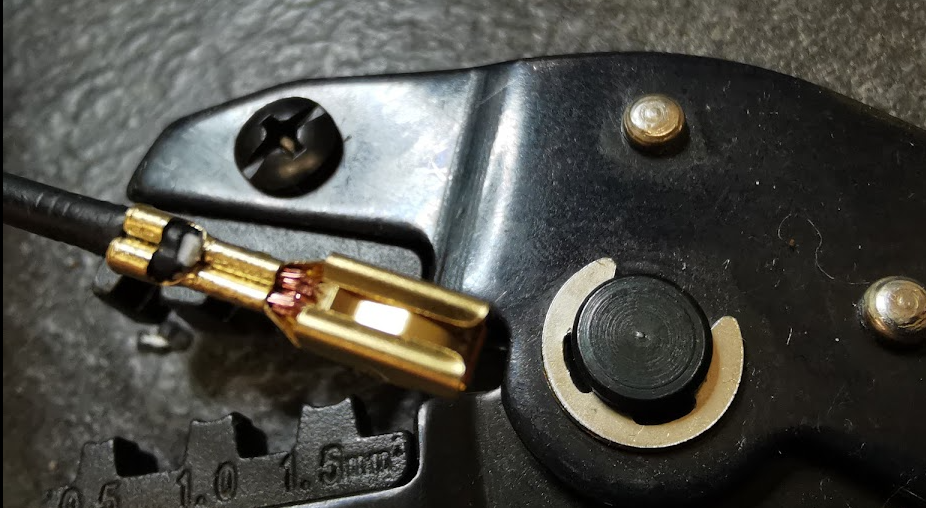
The other end of the wire got new terminal and was crimped.
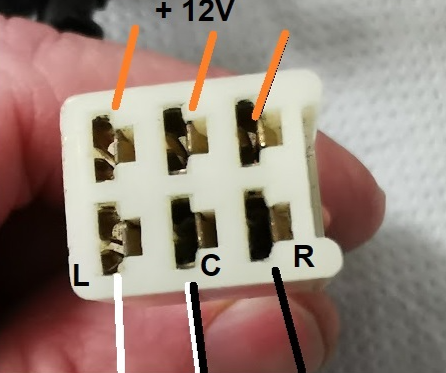
This is the color coding and placement of the wires into the connector.
The orange wires are all connected to a common +12 supply and the placement on the upper row does not matter. On the lower row, it’s very important to do it right, if not the bike will misfire on wrong cylinders.

Mounted with new wires and connector.
Before mounting I also did a spark plug test to verify all of the coils. Connect 12V to the orange wire and short the other wire to GND( 0v). The body of the spark plug must also be grounded. When you release the wire from ground the park plug will fire. ( Just tap the wire on/off to GND and you will see the spark) Do the same on all coils to verify the function.
The resistance in the coil winding should be around 4,5 ohm. The current in each coil when grounded will therefore be 12V/ 4,5 ohm= 2,7 Amp. That’s the reason why you drain the battery very fast when leaving the ignion on and the bike is not running.