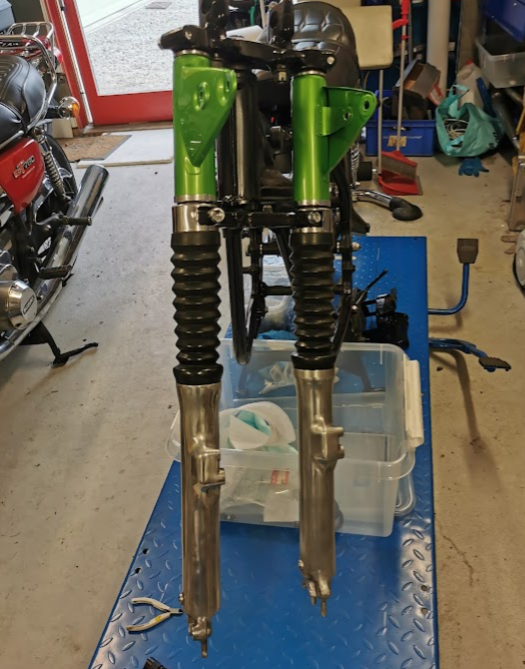
The fork was mounted according to the parts manual (GT380k)
Parts no can be found in the manual, go to the: Documents at my blog.
Resin print of 51553-3300:
I was missing some cushion parts. I only had one of the cushion for the headlamp bracket, the: 51553-3300
The resin 3D printer had some issues this time printing rubber resin, not sure why but still able to use the parts. I also tested the filament printer using flexible filament. Not 100%, but ok to be used.
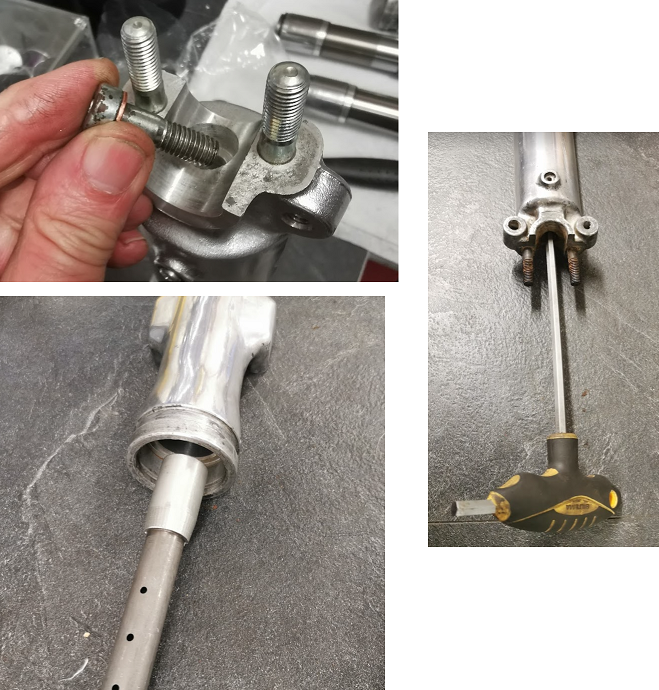
Mount the damping rod (unknown part no) into the outer tube. Don’t forget the copper washer.
Oil seal:
Mount the inner tube and slide the oil seal down to the outer tube.
Next step can be difficult. Apply som grease around the seal, but it can be hard to drive the oil seal all the way down to the bottom. I did it “my way”
Since I have a lathe, I made a tool for the purpose.
With a plastic tube on top of the tool and a hammer it was easy to drive the seal all the way down.
Secure the oil seal with the circlip and the spacer.
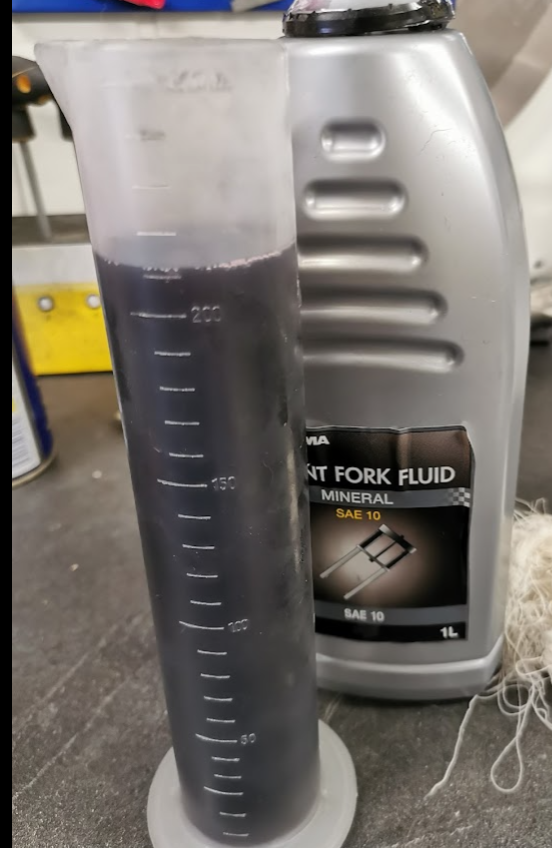
Fork oil:
Install the fork spring and apply 210ml of oil. Screw on the top bolt and you are done 🙂
Don’ forget the drain screw at the bottom.
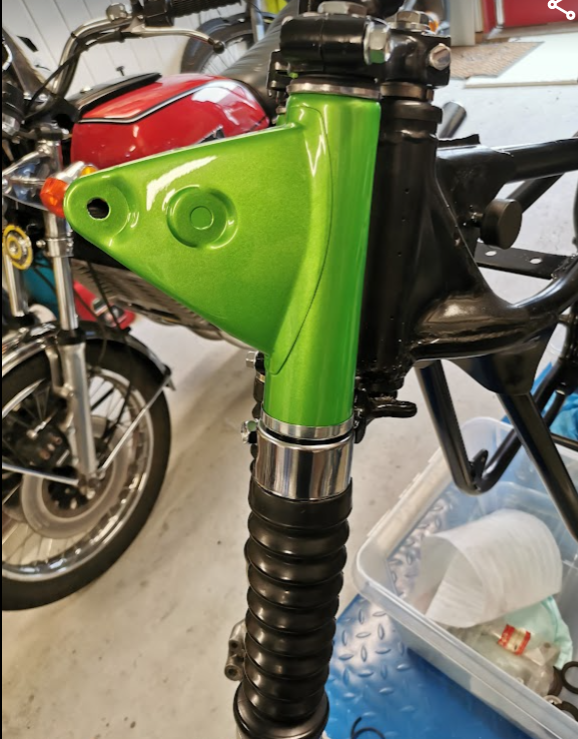
Mounting the fork boot:
This part turned out to be very difficult. The lower end of the boot was very stiff and not flexible at all, and looked too narrow to get around the outer tube.
Soften the boot with hot air helped, and by using some plastic stripes as a guid I was able to squeeze it on.
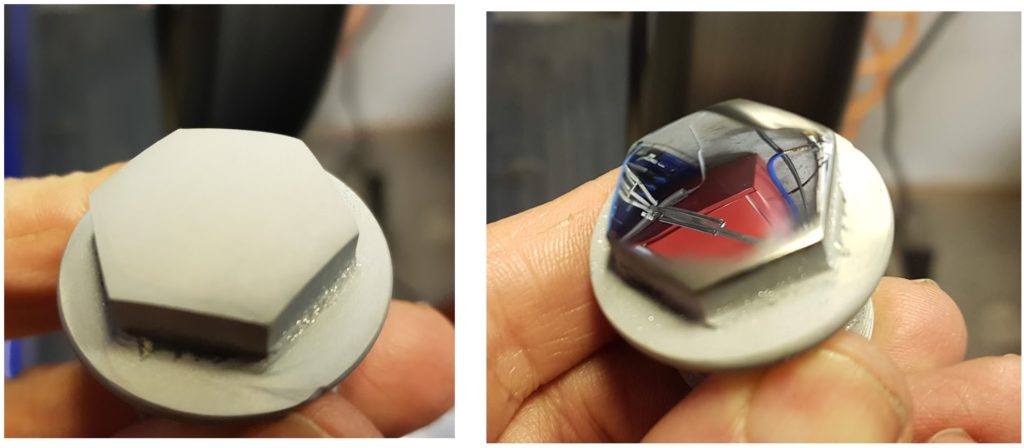
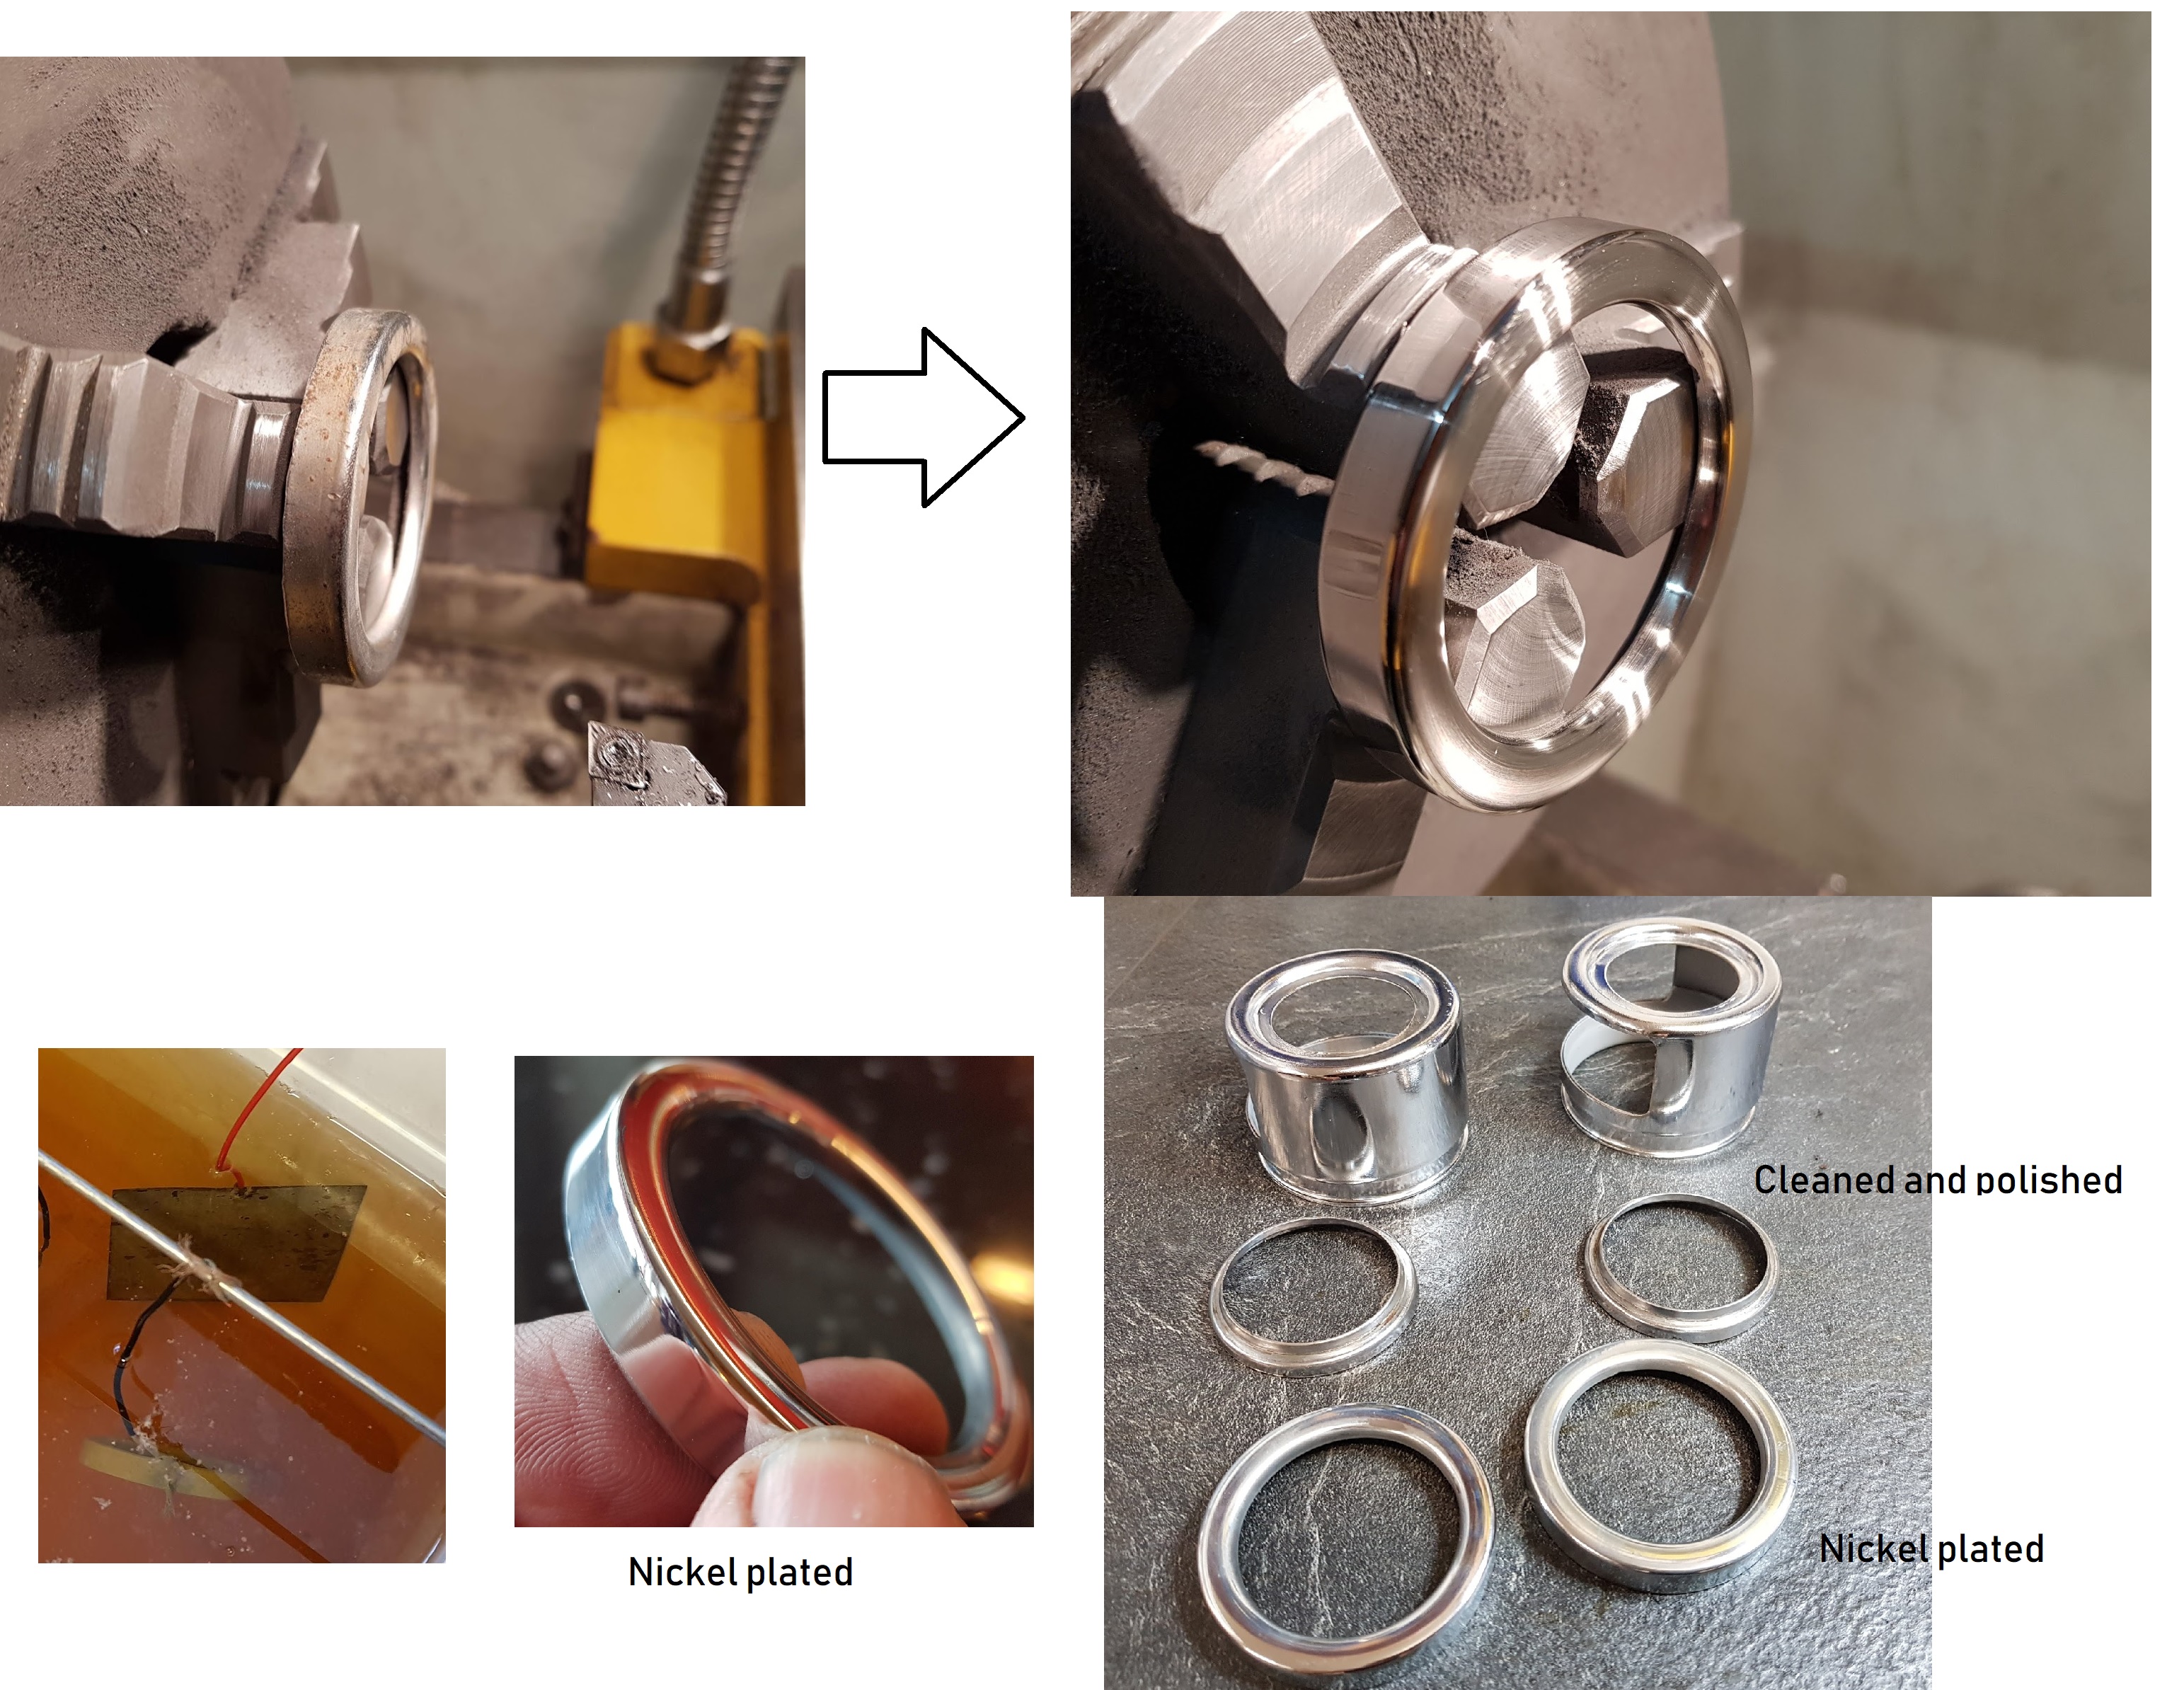
Step 1: Sand blasting as shown on the picuture above.
Step 2: Grind and get rid of all remains from the old chrome.
Step 3: Use fine grit size on the sandpaper to obtain a shiny surface.
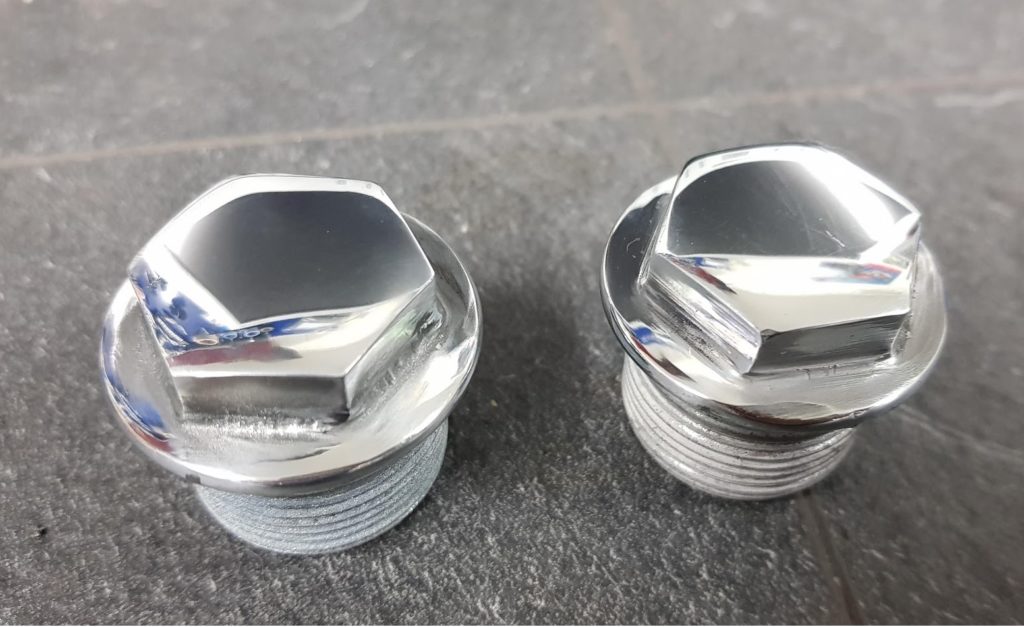
Step 4: Start electro nickel plating. As shown previous on my blog I use the same old bath with the same solvent I made 7-8 years ago. The nickel anode is the only part that needs to be replaced after some time.
After few hours (4-8 hours total electrolyze time) the bolt will be covered with nickel. The gray surface needs to be polished to get shiny.
Almost a year after last time I looked into this I’m still a bit confused. Difficult to figure out, but I think I’m on the right track now.
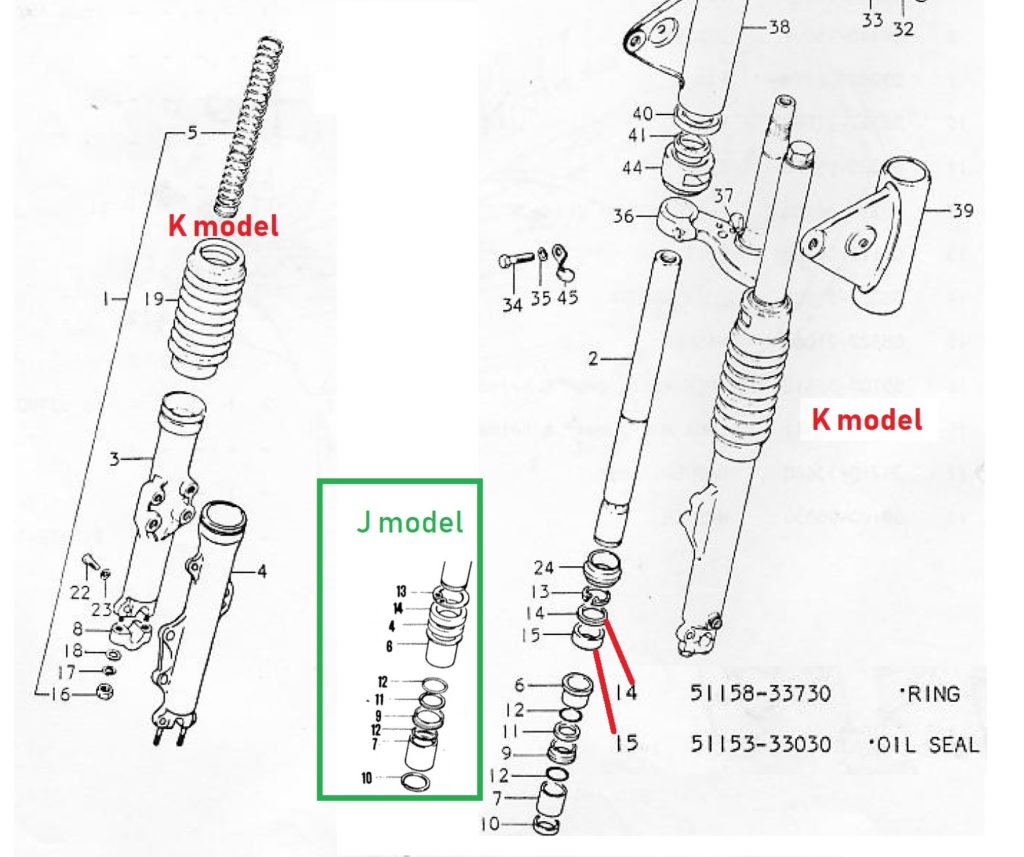
Not easy to find parts manual for the J-model. Manuals claiming to do so always starts with the drawings from the K-model. And if I find drawings from the early J version, they are without any part no.
After a lot of research I think I got it. Look at the green box for the J model. No 4 and 14 are both oil seals. For the K-model no 15 is the oil seal and 14 is a ring above the oil seal to lock the seal in position before the no 13 clip.
And why is no 24 part of the drawing, don’t see the need for a dust seal, or if it can be fitted underneath the no.19 boot ?
Anyhow, I will order parts according to the K-model since it’s an upgrade from the J. All other parts seems to be the same.
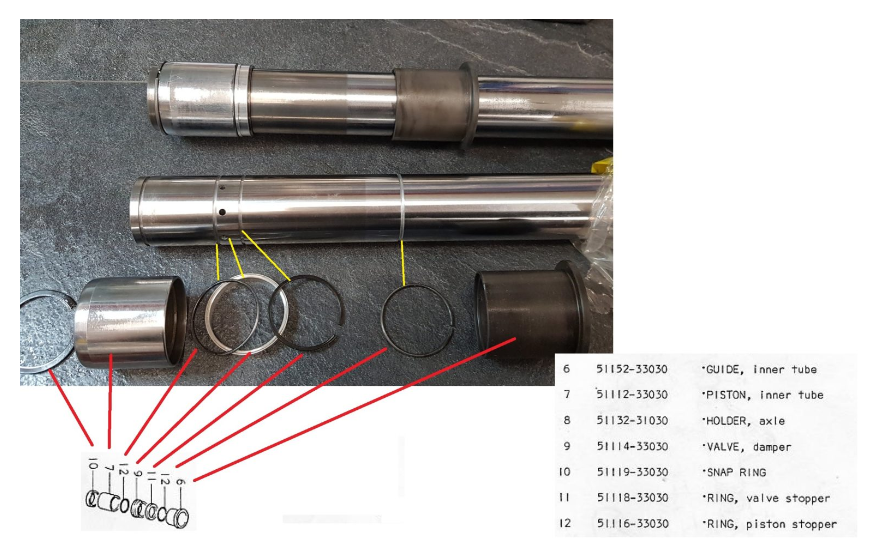
Next headache:
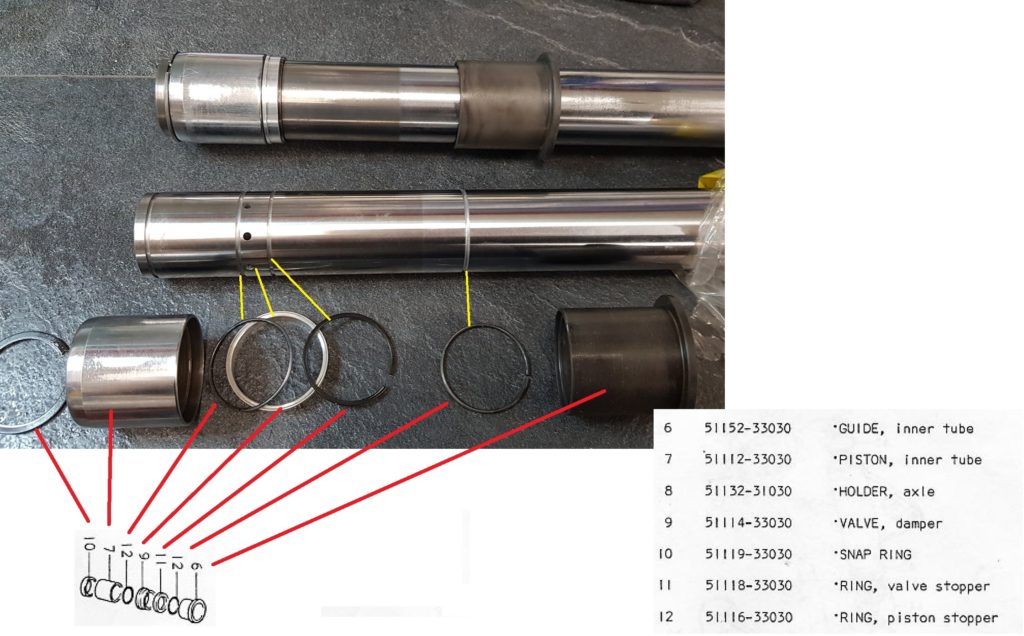
Can’t use the photos I took while dismounting the fork. It’s a mess from previous owners. No 9, the valve damper was mounted upside down. No 11 and 12 had swapped placements. The order of the parts at the picture above shuld now be correct.
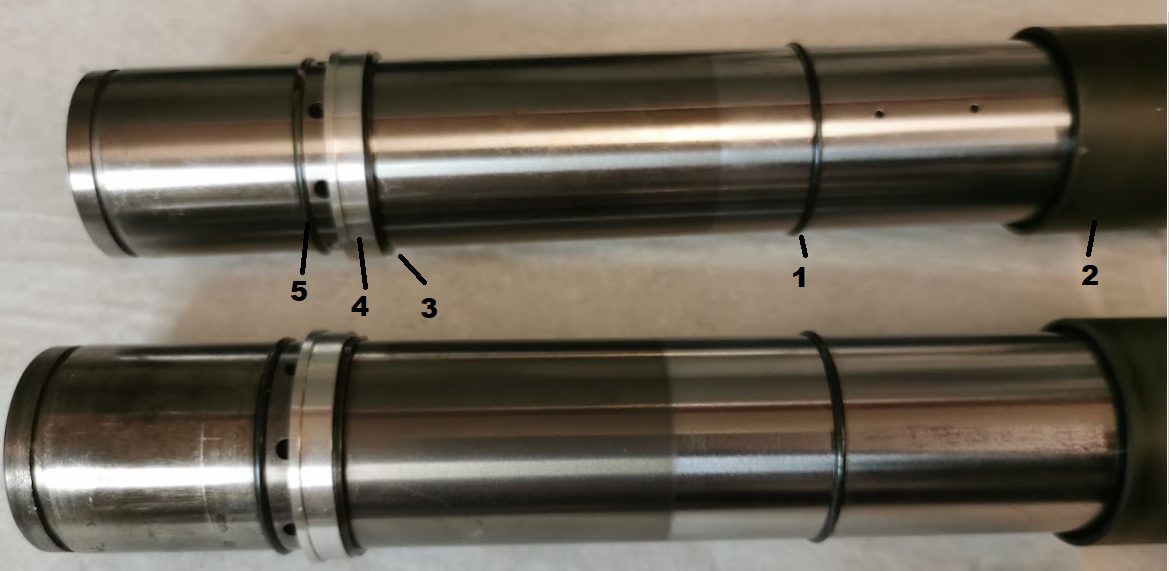
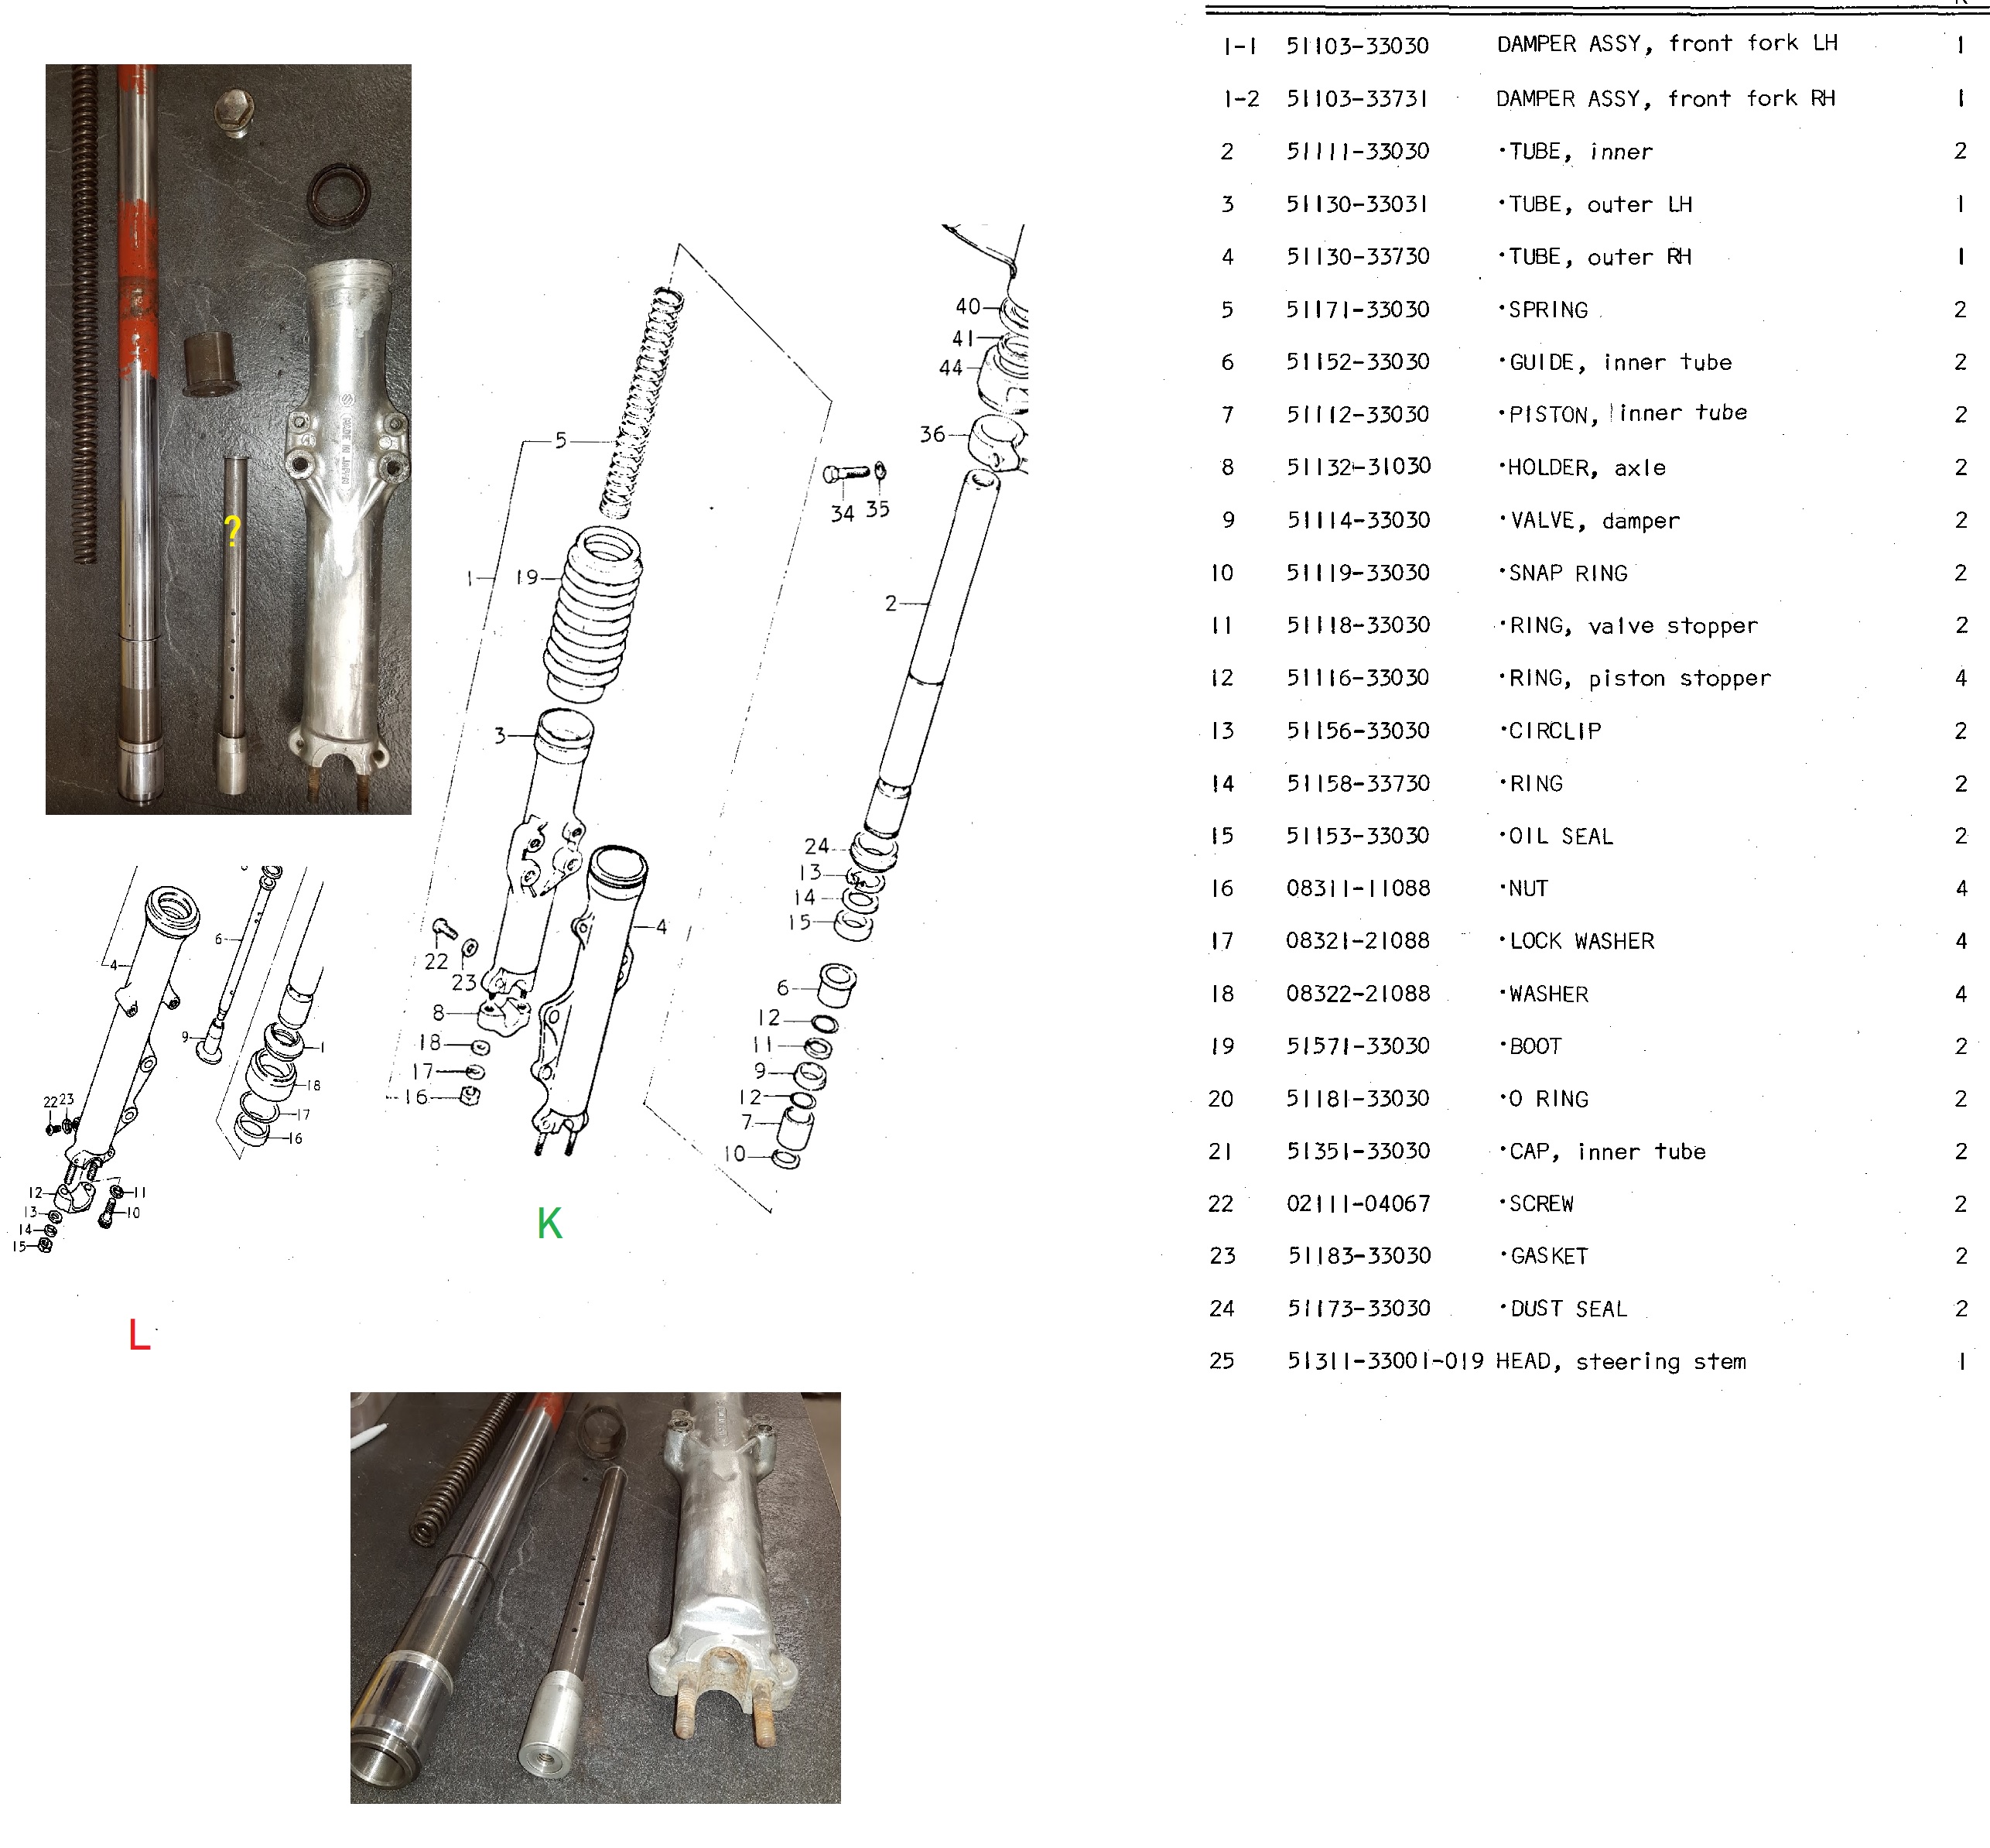
Was lucky to get hold of a brand new outer tube and a new inner tube. In addition I bought a used inner tube in a good condition. I can therefore replace both of the old inner tubes.
Final headache:
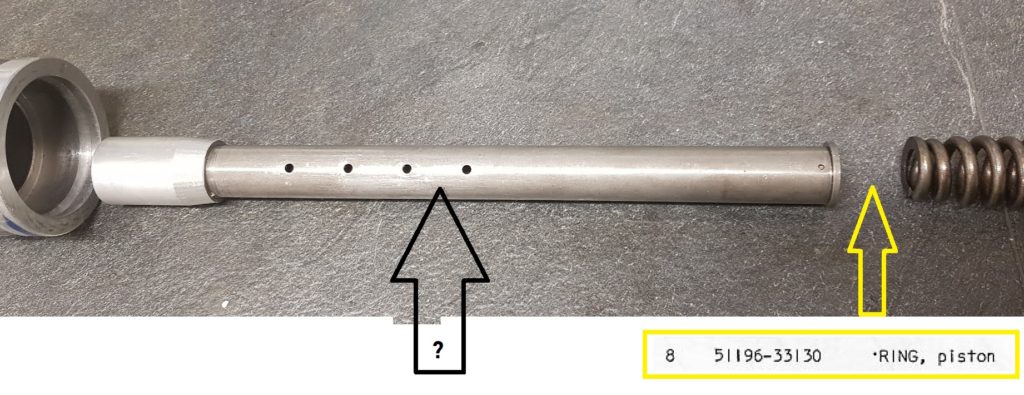
The tube at the picture above, screwed down into the bottom of the outer tube can’t be seen on any drawing. From the L-model and off, the tube is part of the drawings, but an other type tube. From the L models and off, there is a piston ring in nylon mounted between the tube and the spring. I “guess” I don’t have to fit that part into the J/ K fork.
Hmm, a bit confused… Looks like the parts inside the fork is a mix of L and K (J) model ? Not sure, but both inner legs must be replaced with new ones. Marks and scratches on both.
At the moment I have ordered one of the inne tubes, 5111-33030. This is a hard to find part. Not sure if I can swap to later models. The lower part, the oute tube must be the J or K model because of the drum brake.
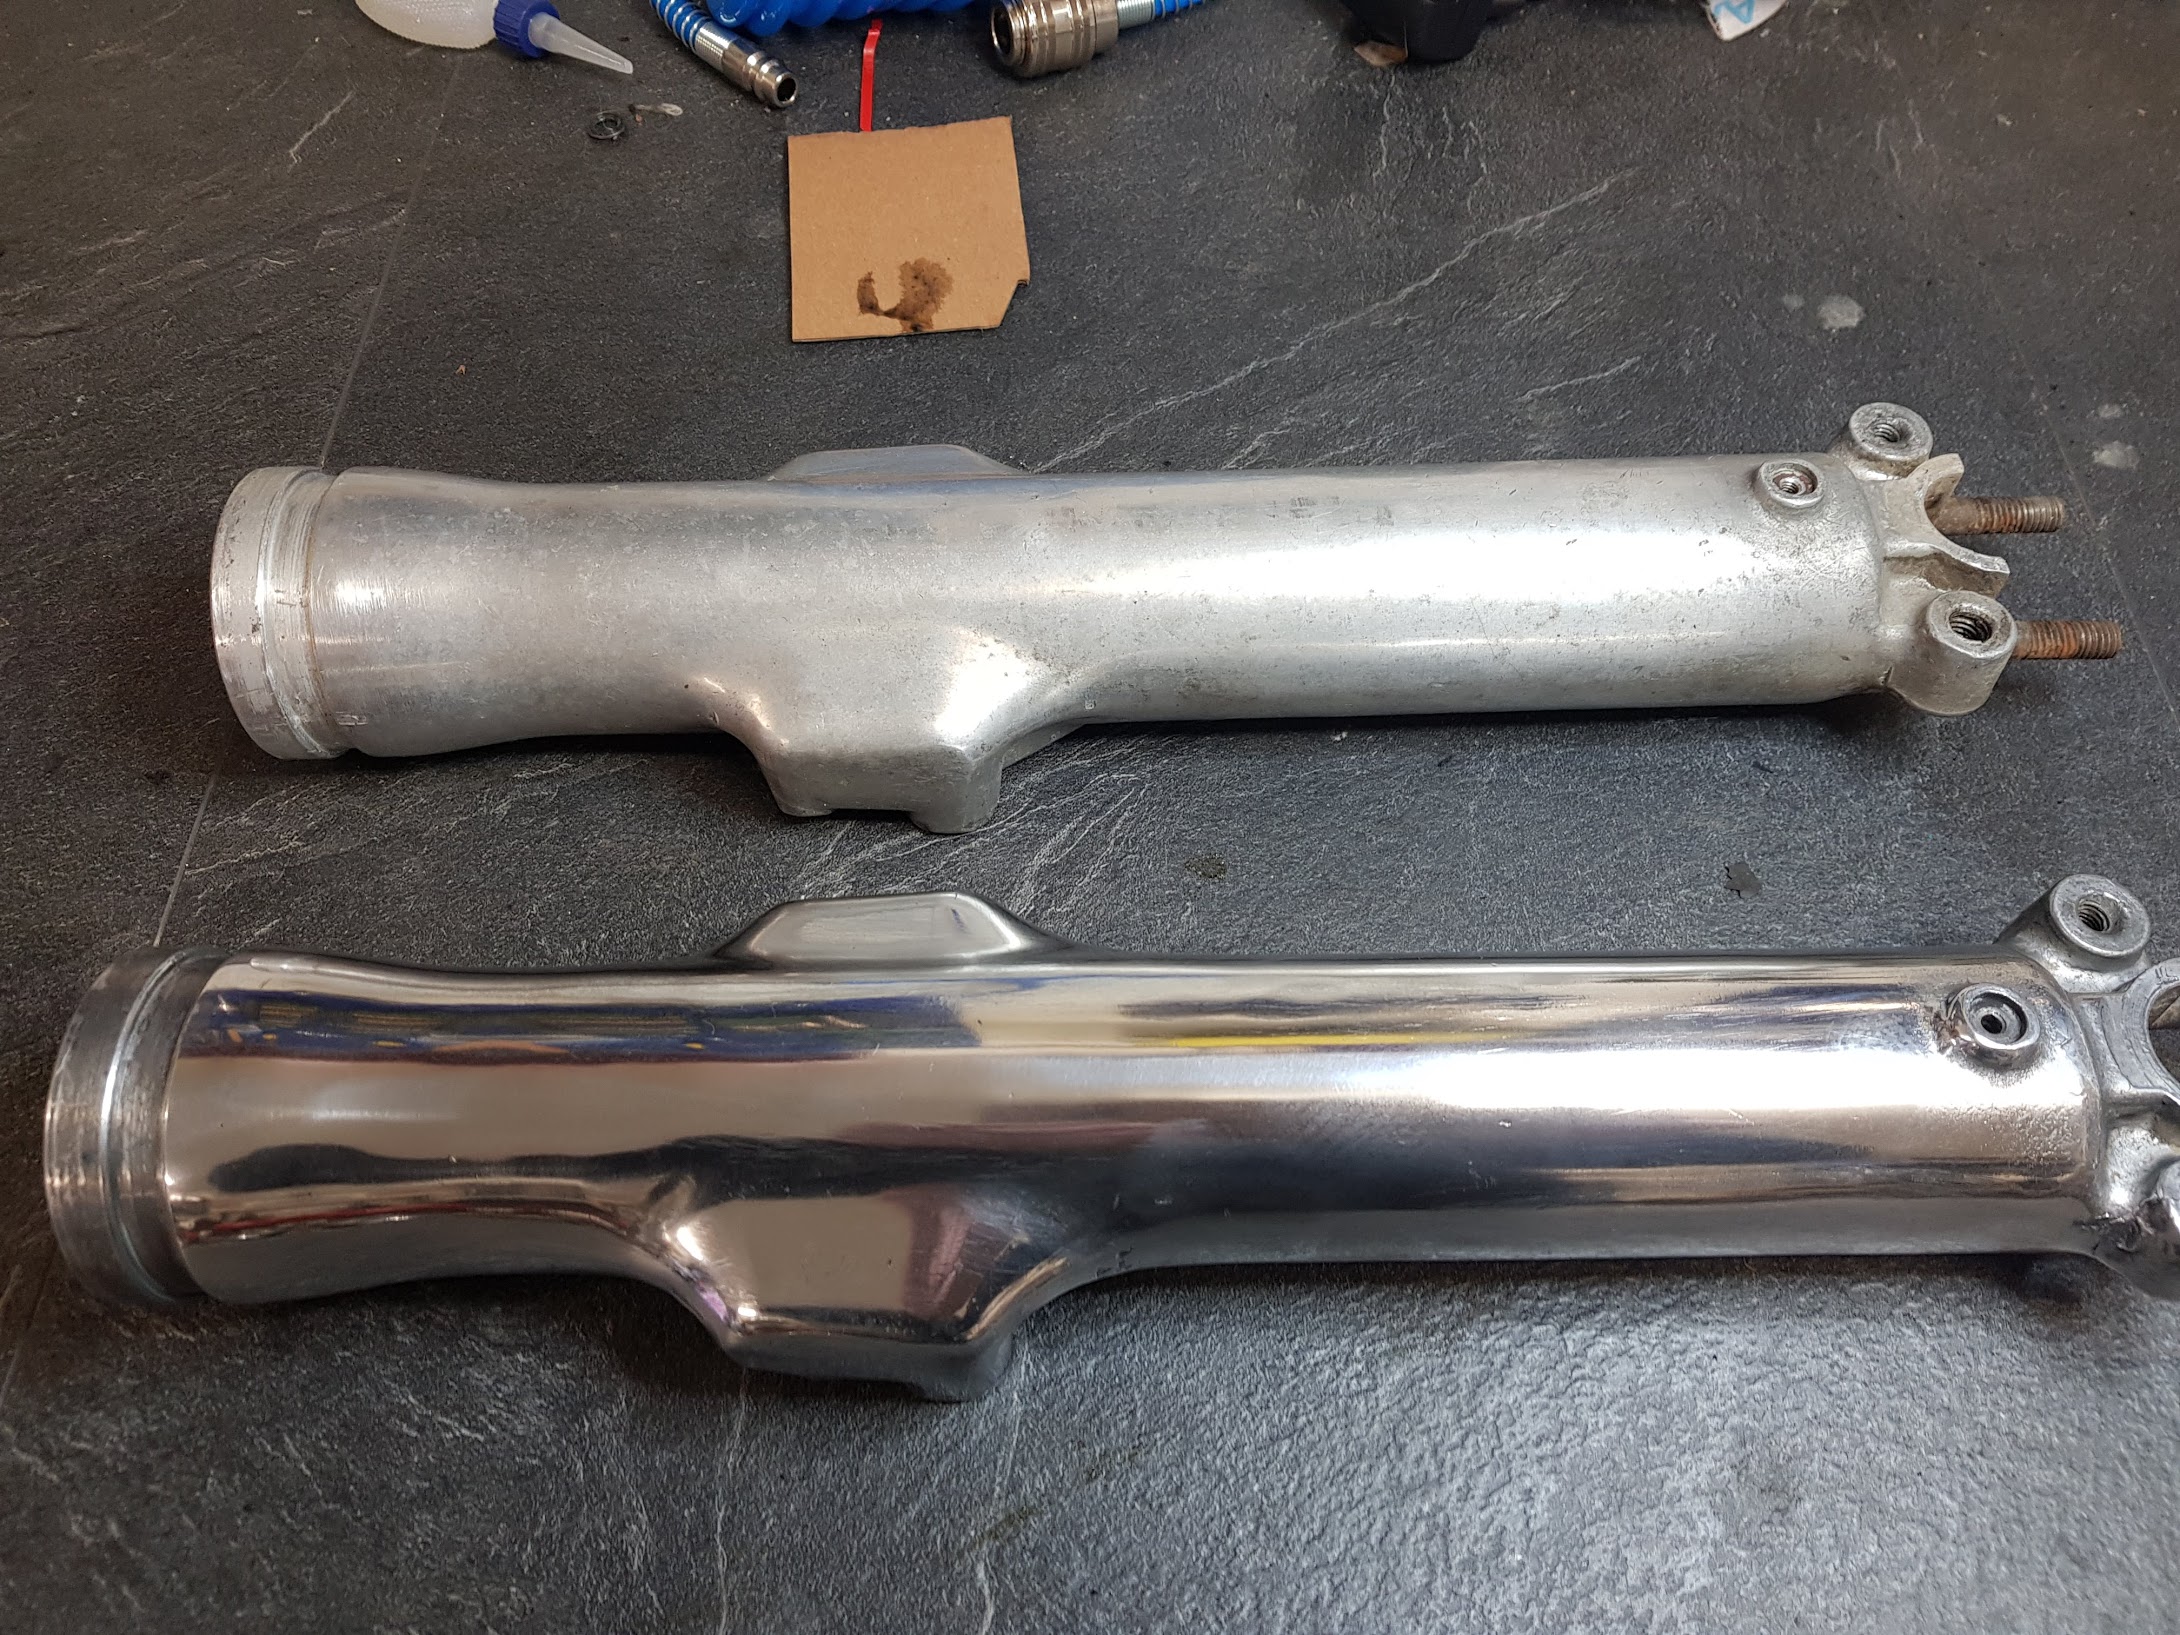
Sanding and polishing the outer tubes:
Lamp head , fork bracket parts:
What I did with the shiny parts: Sandblasted the rust at the inner side and painted. Cleaned and polished the outer part. One of the chromed parts was too bad to be cleaned. I had to turn off some metal using my lathe, sanded and polished well before I nickel plated the part. All the old chrome must be removed before the nickel plating.
Tore Grenasberg
An engineer in electronics with a passion for motorbikes.