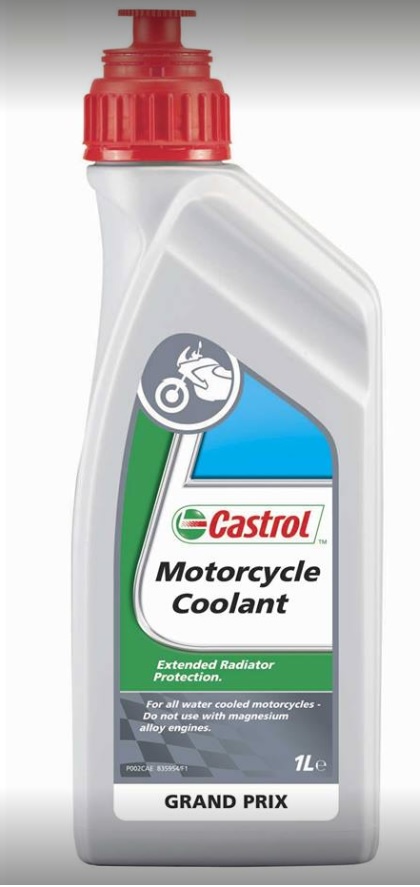
Coolant
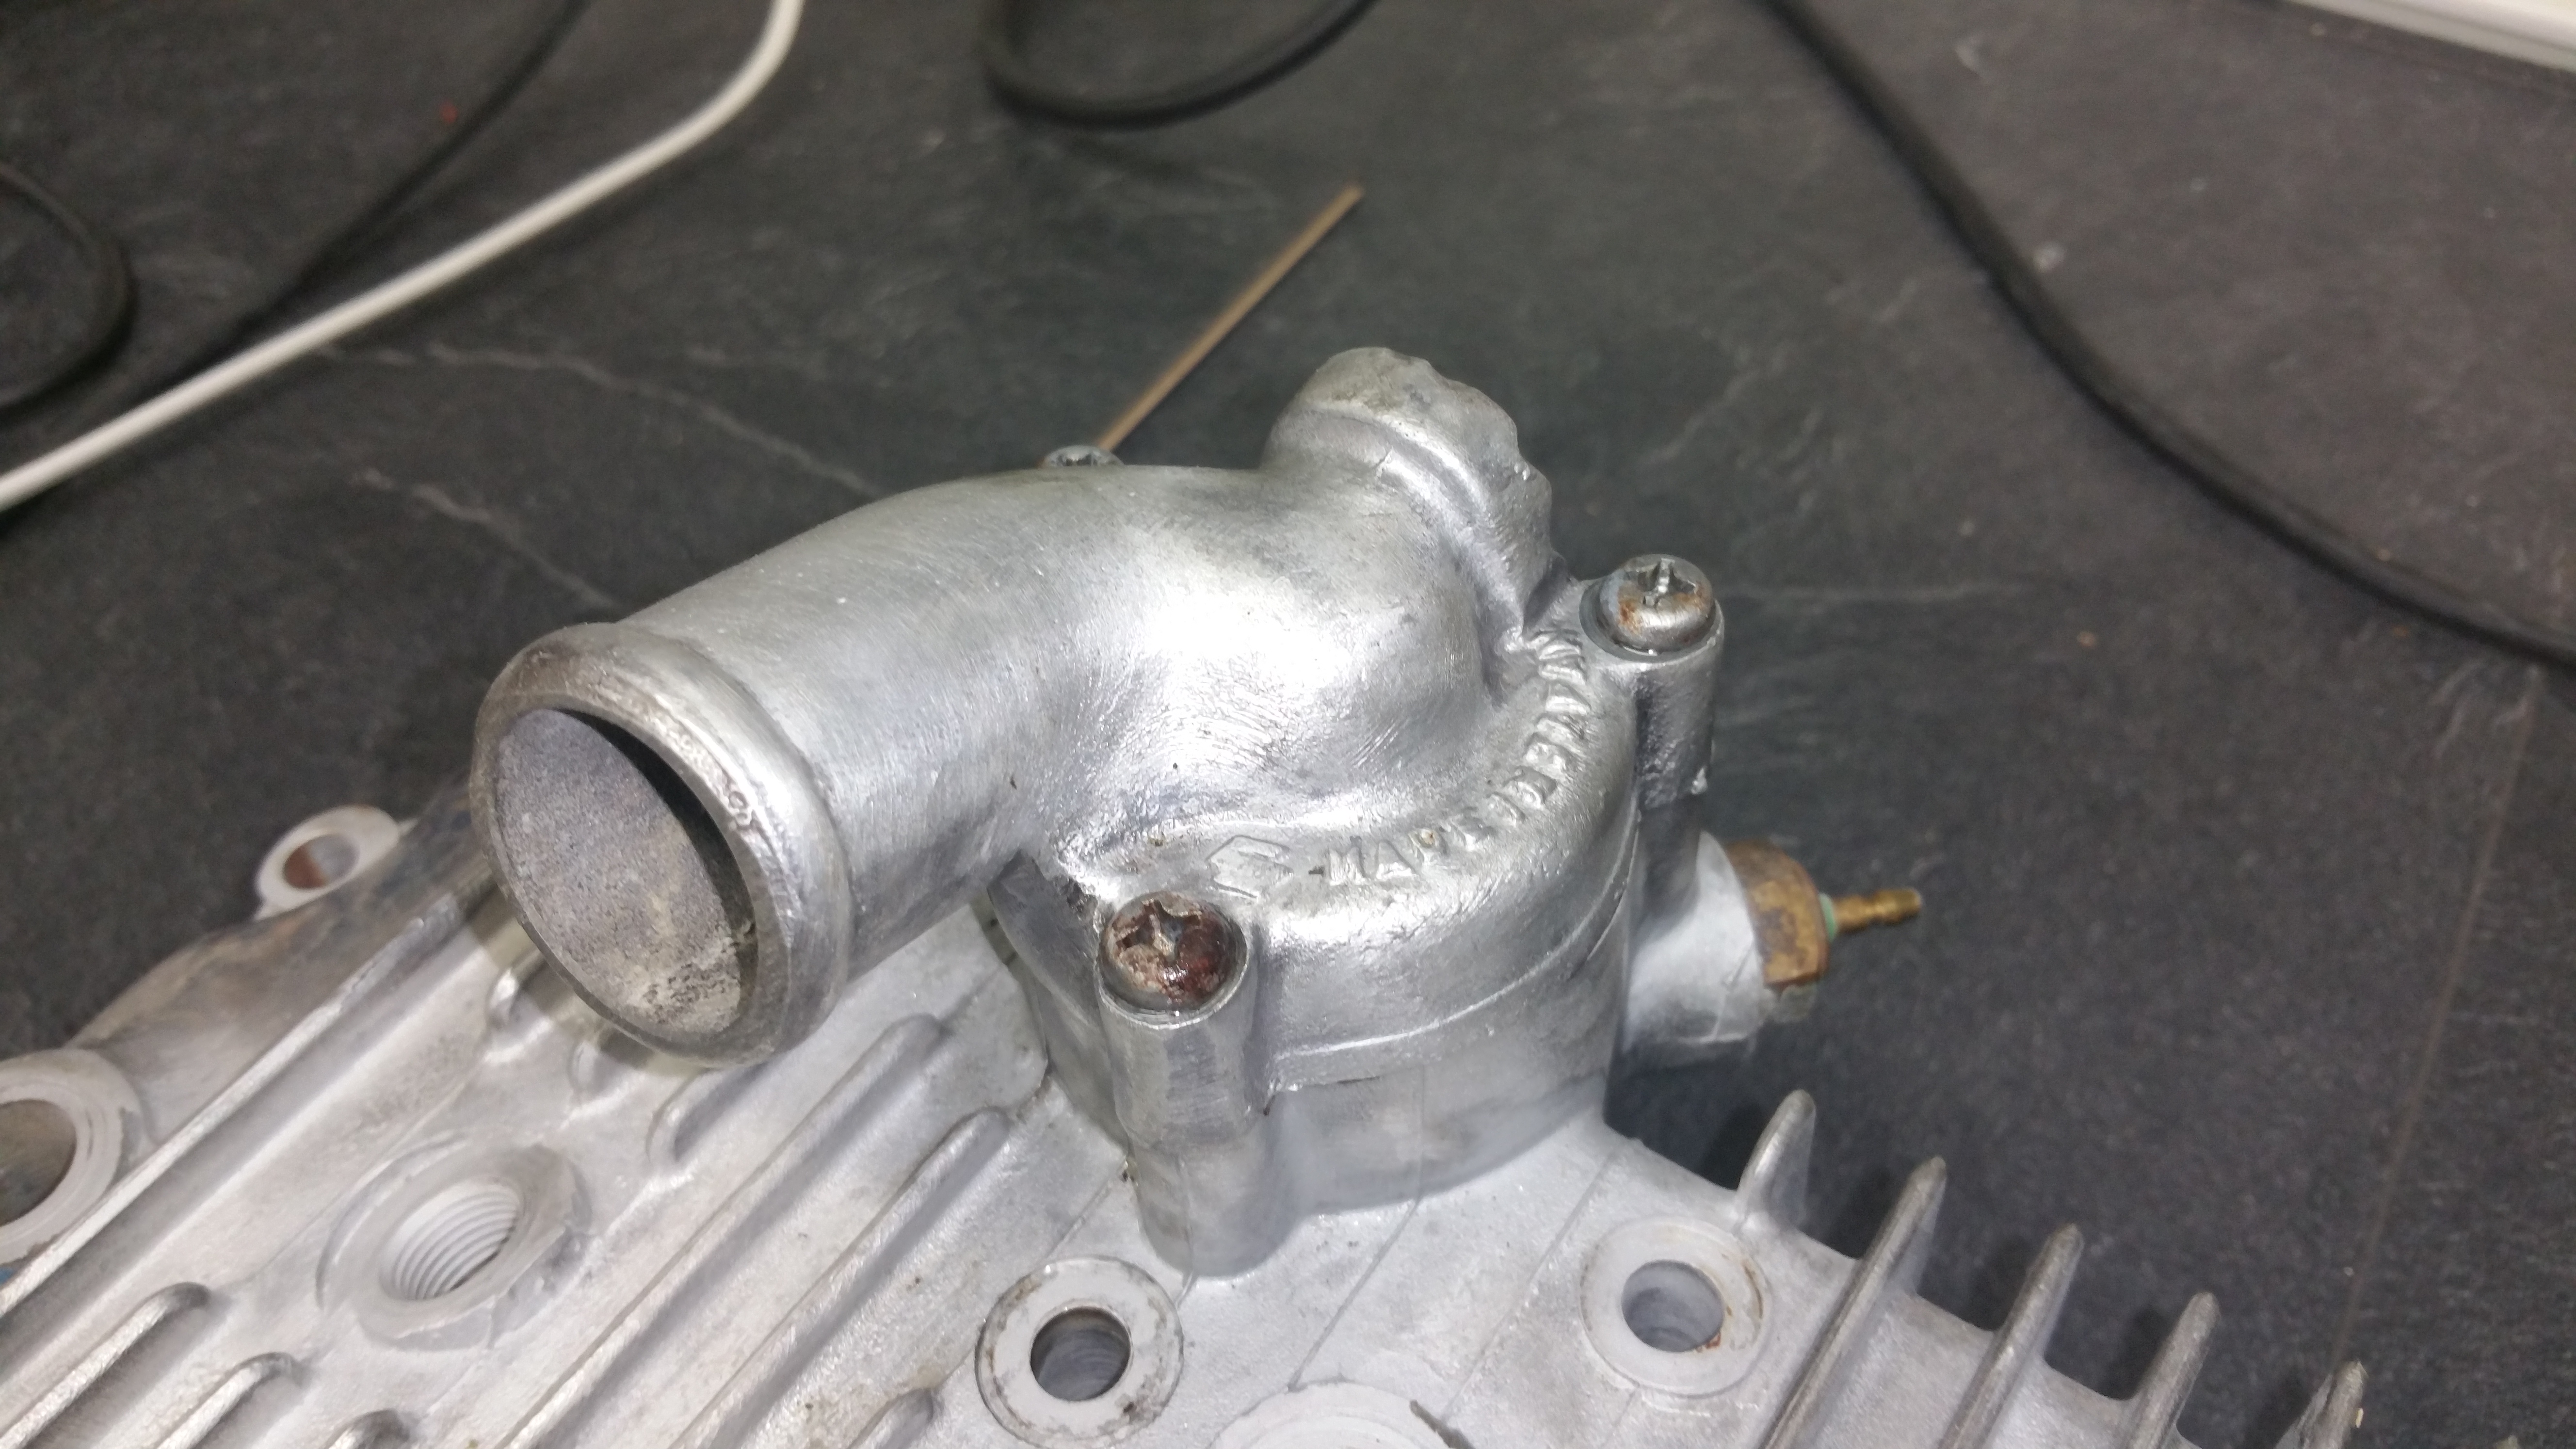
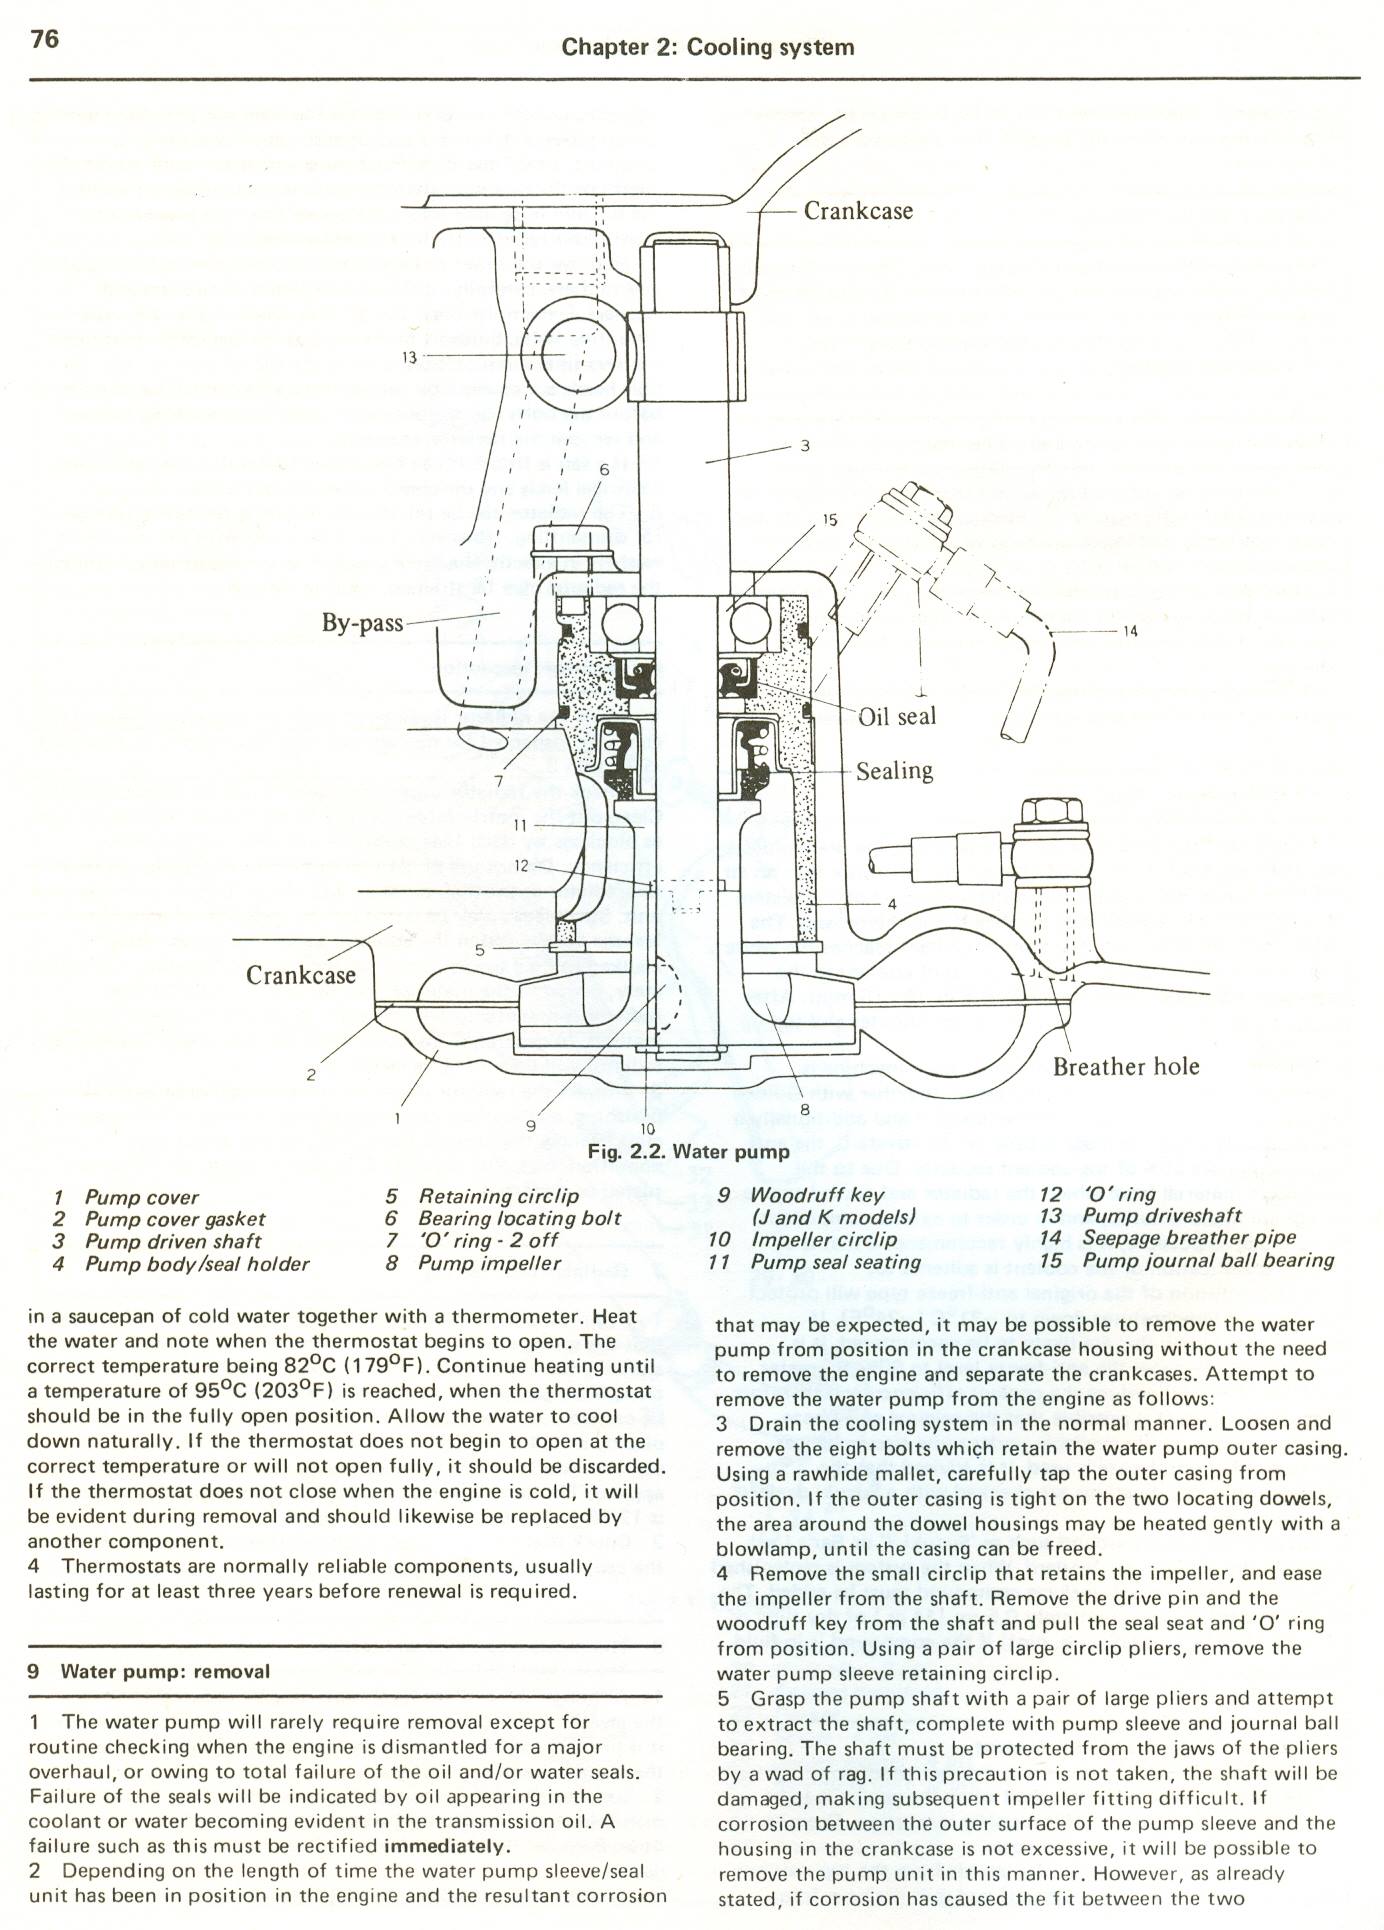
Step 1. Remove the thermostat housing
Not an easy task, all of three screws were stuck. Applied some anti rust solvent and went ahead with the job the next day.
The housing were heated up by using a butane torch and in addition I used an impact screwdriver to get the screws loose.
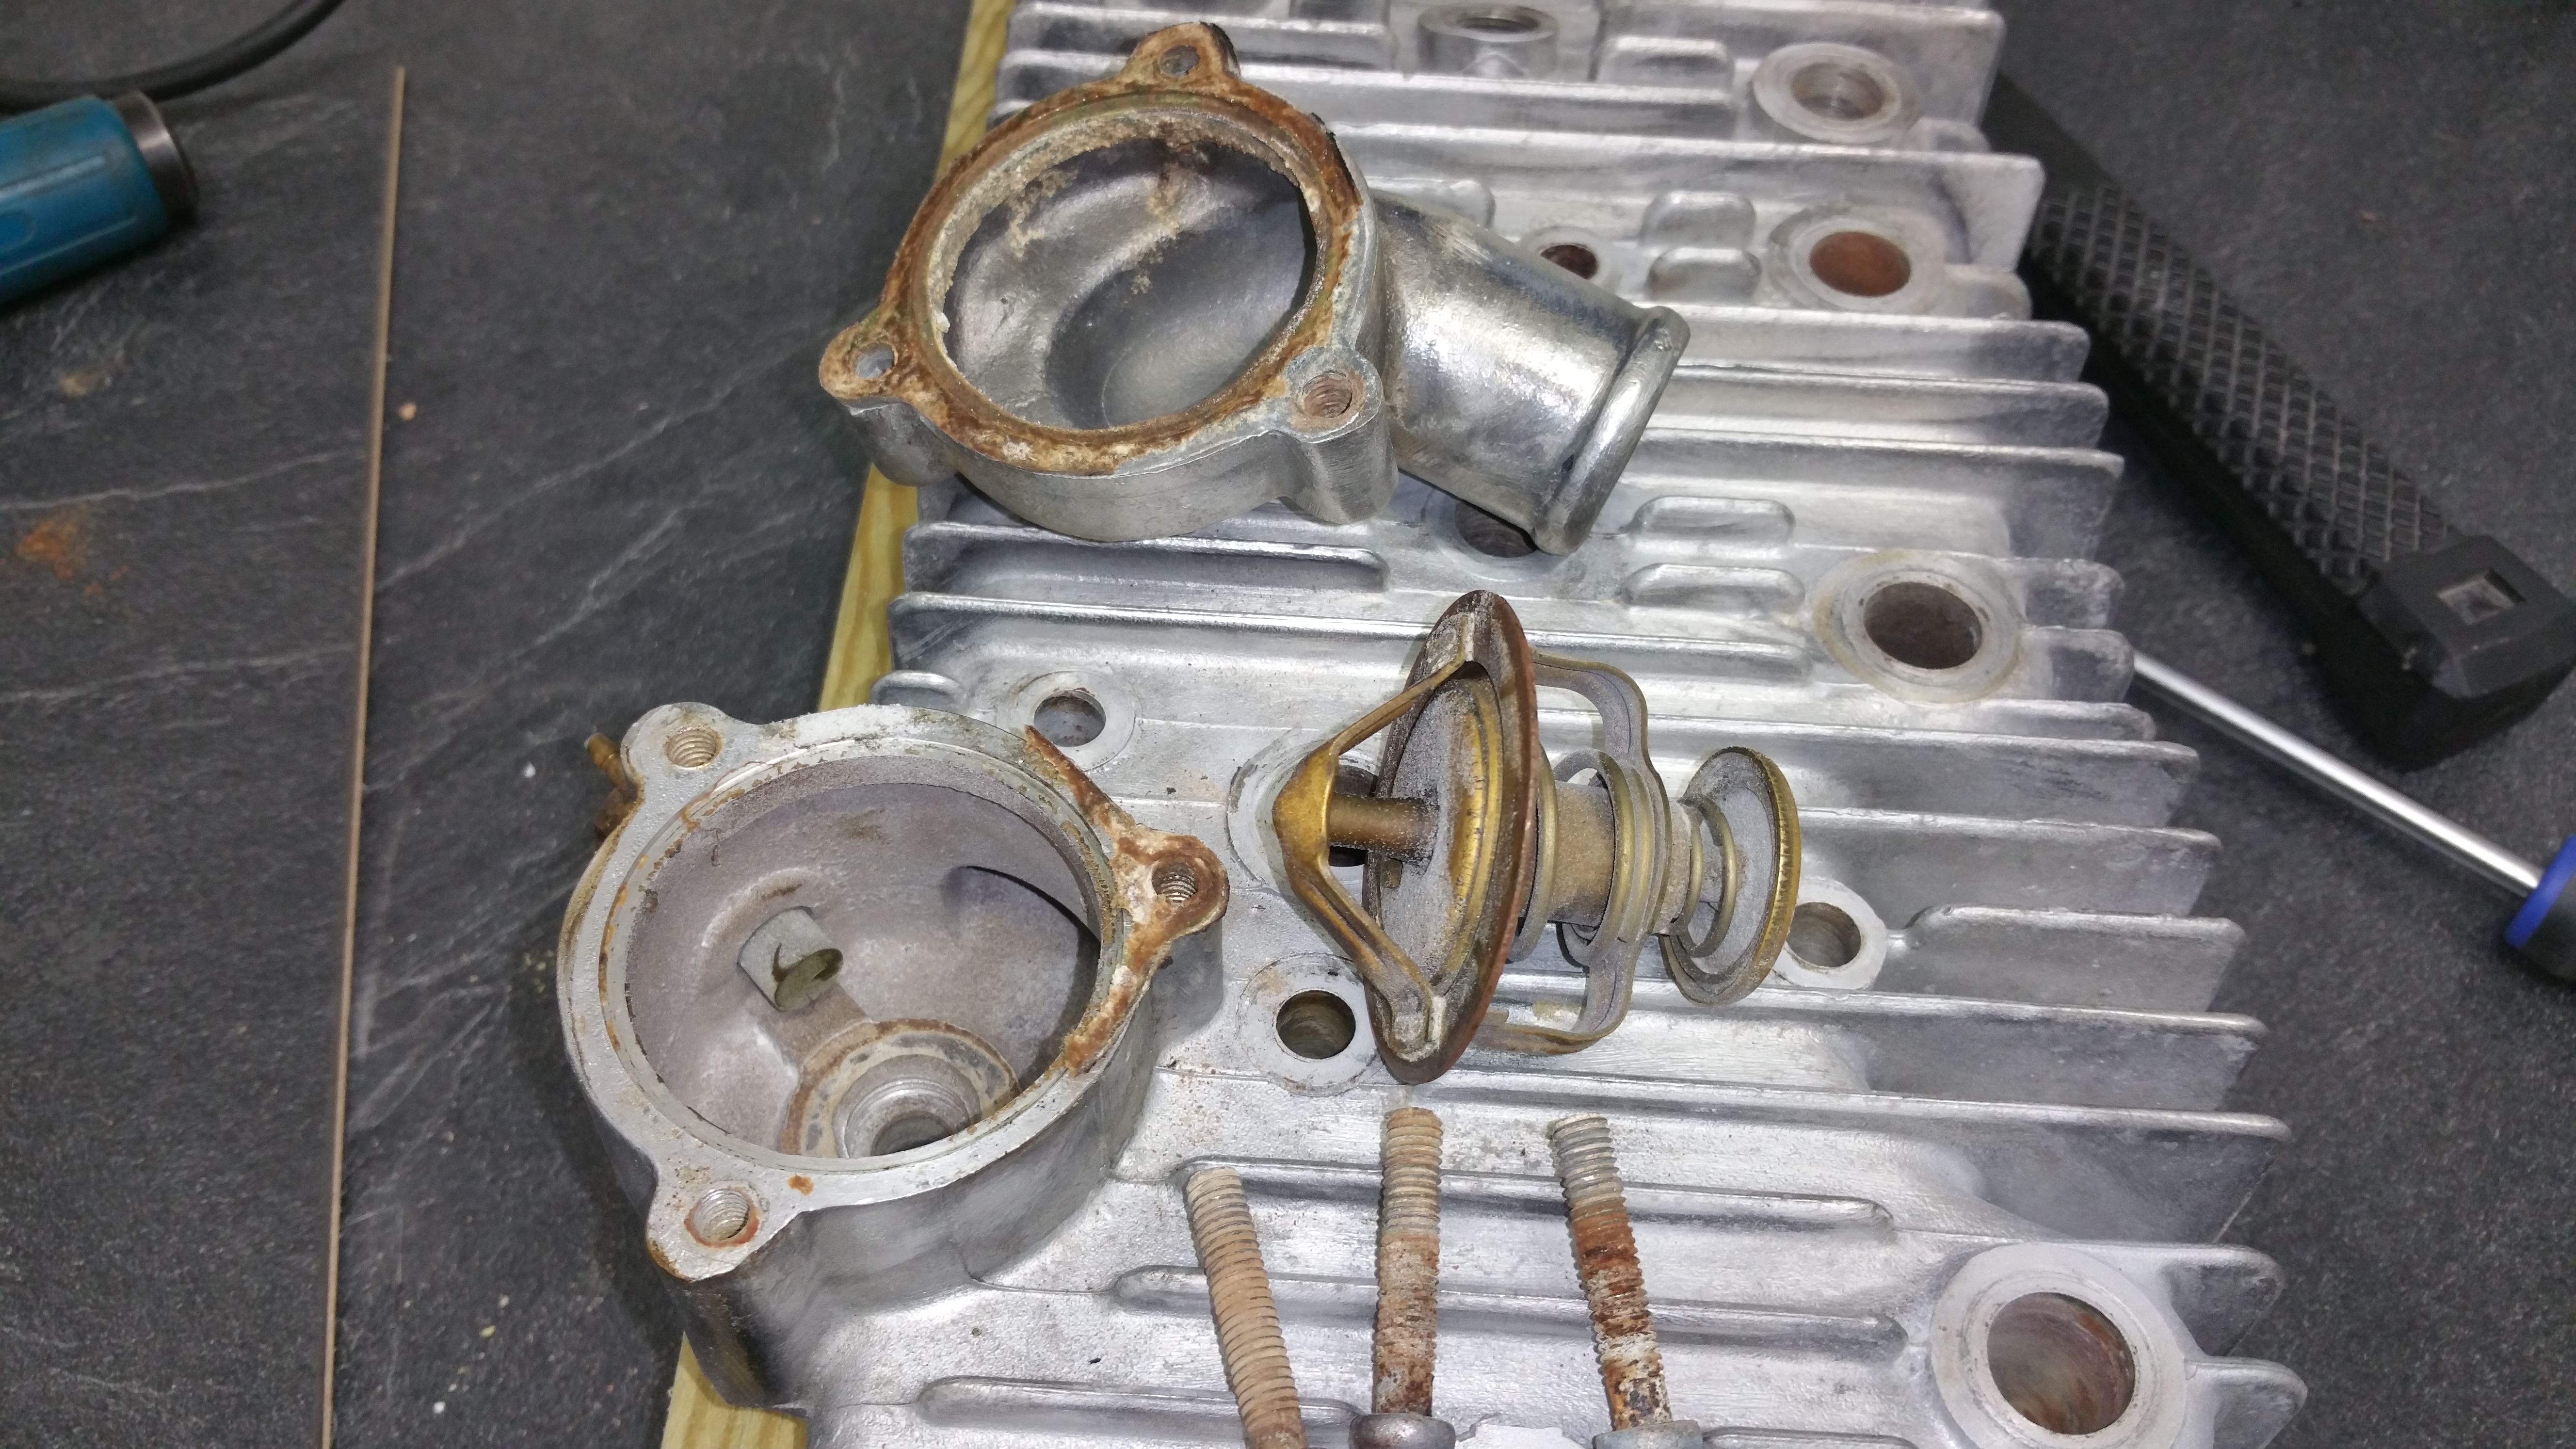
Finally I had the parts separated
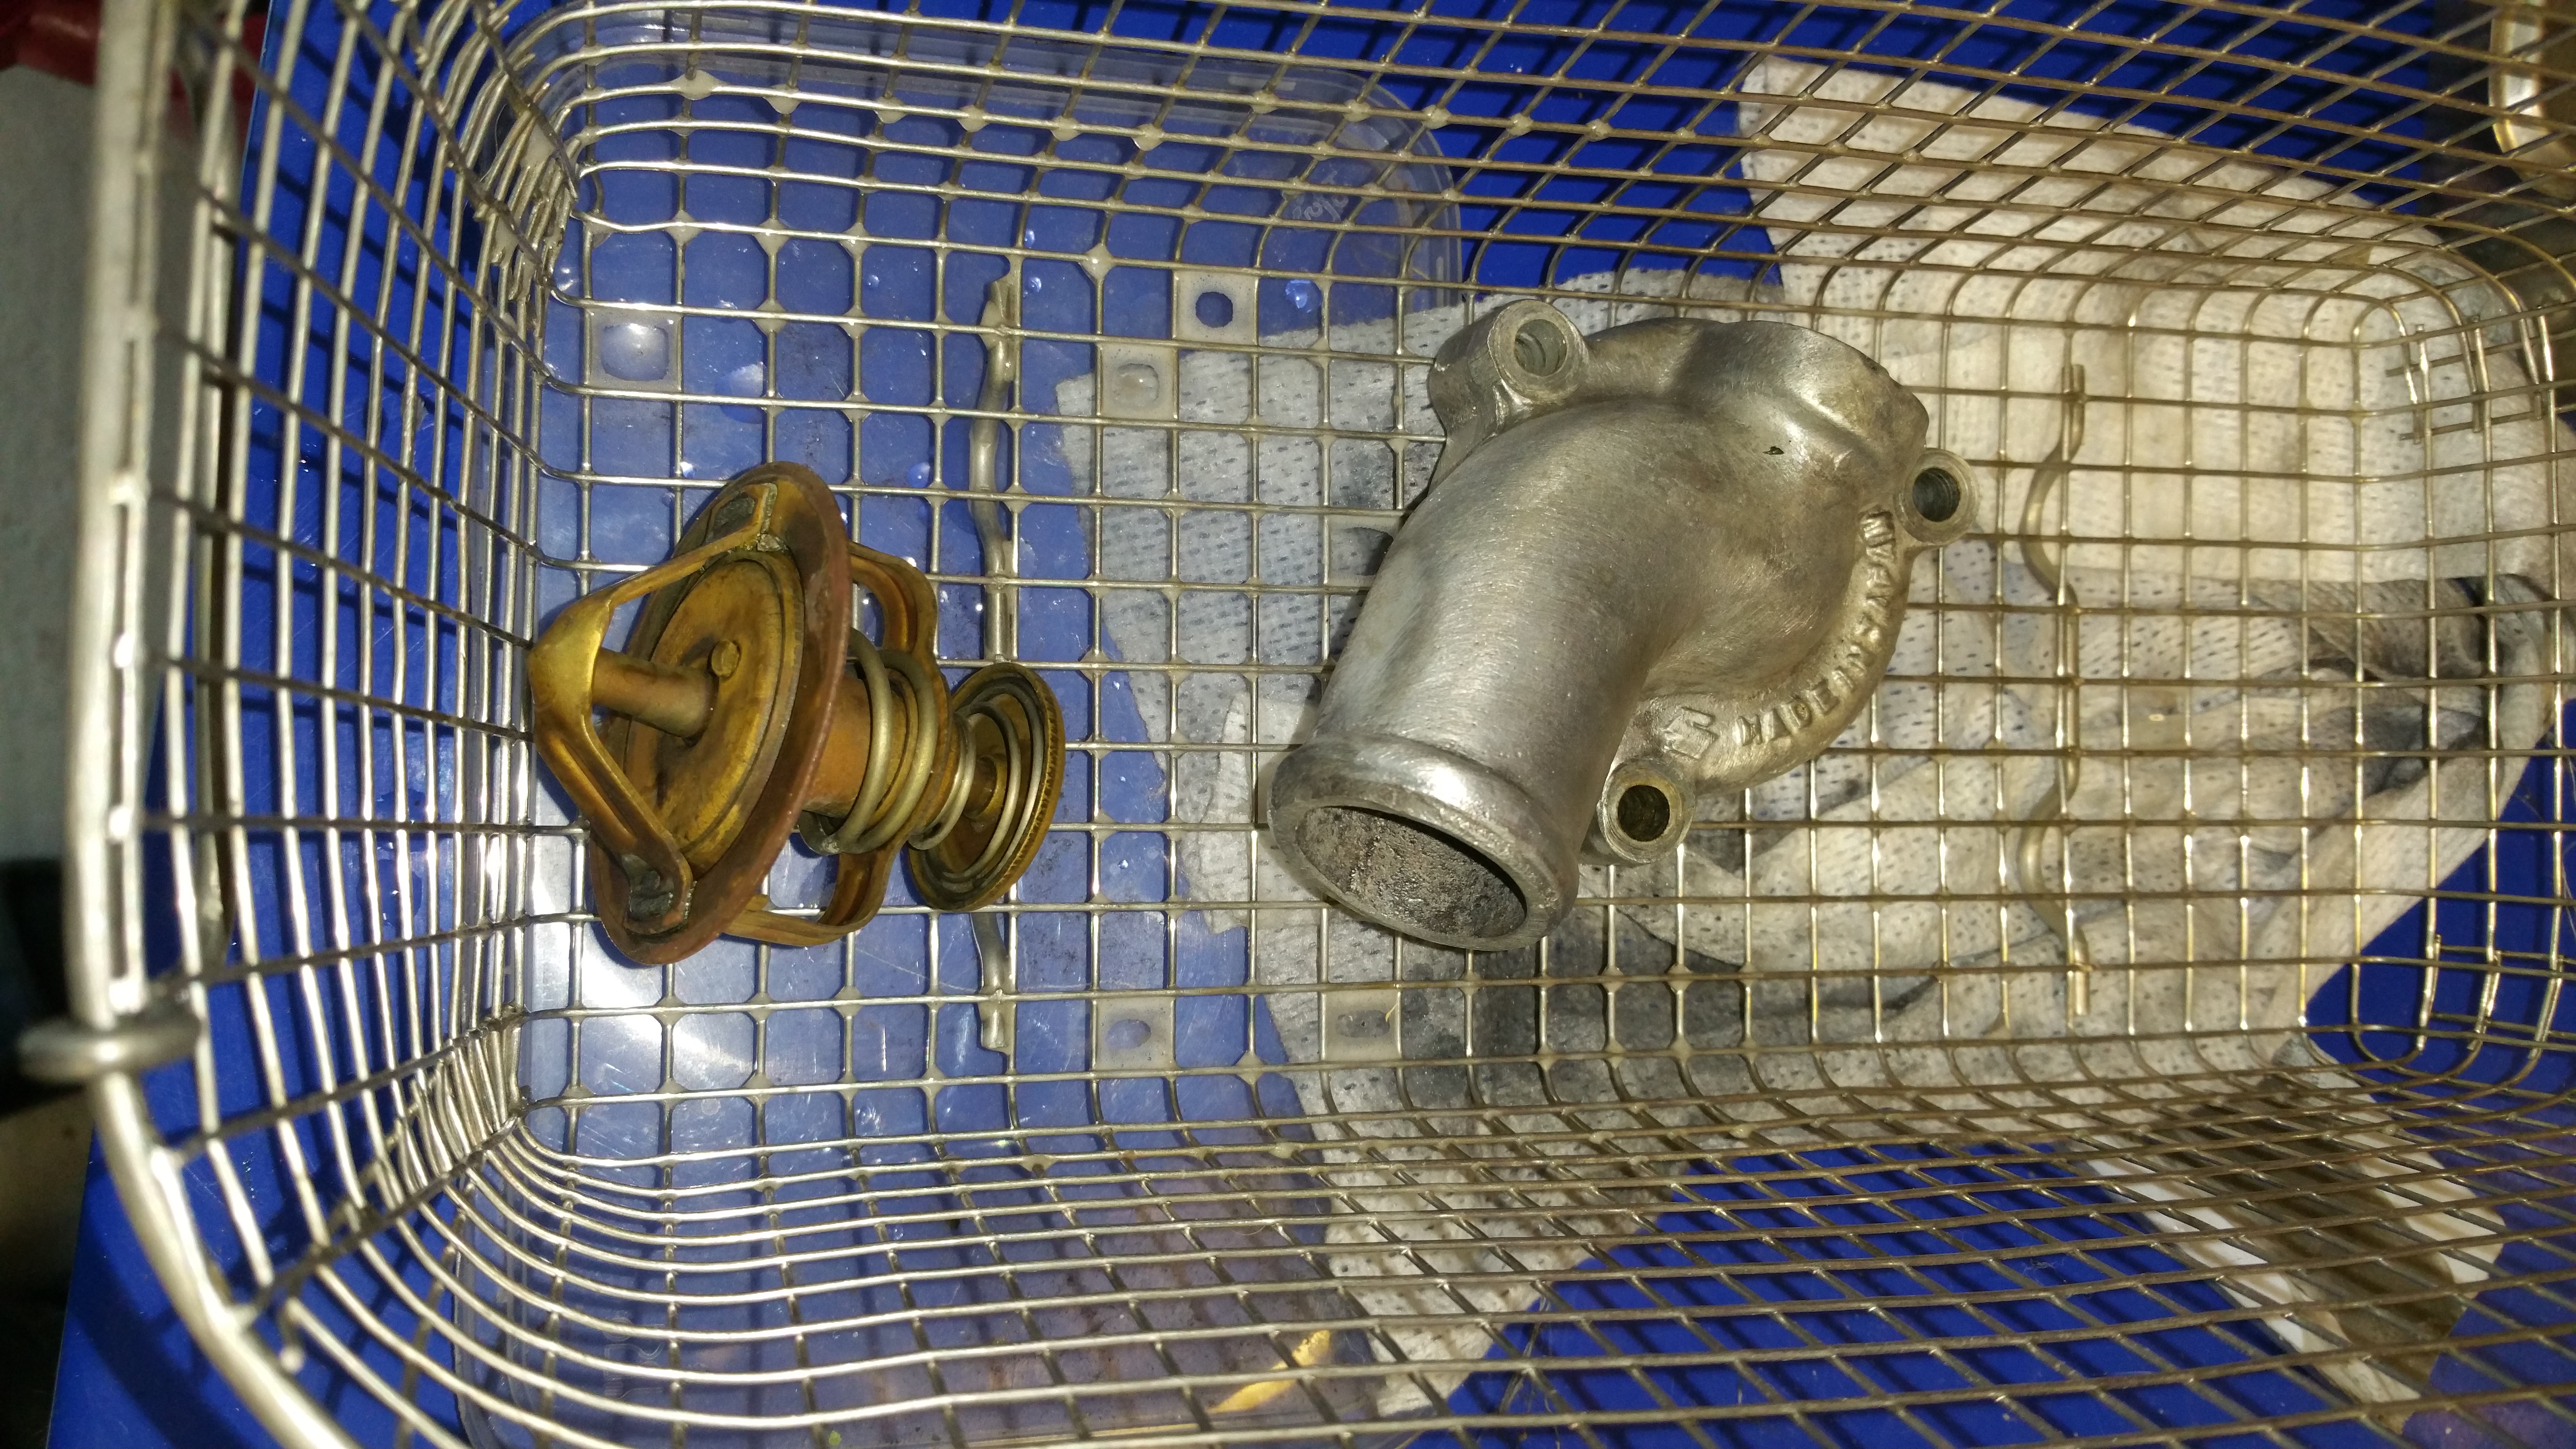
Cleaning of the parts using the ultrasonic washer
Step 2, verify the function of the thermostat:
According to the service manual the vale opening temperature is 82 deg C and wide open (8mm) at 95 deg C.
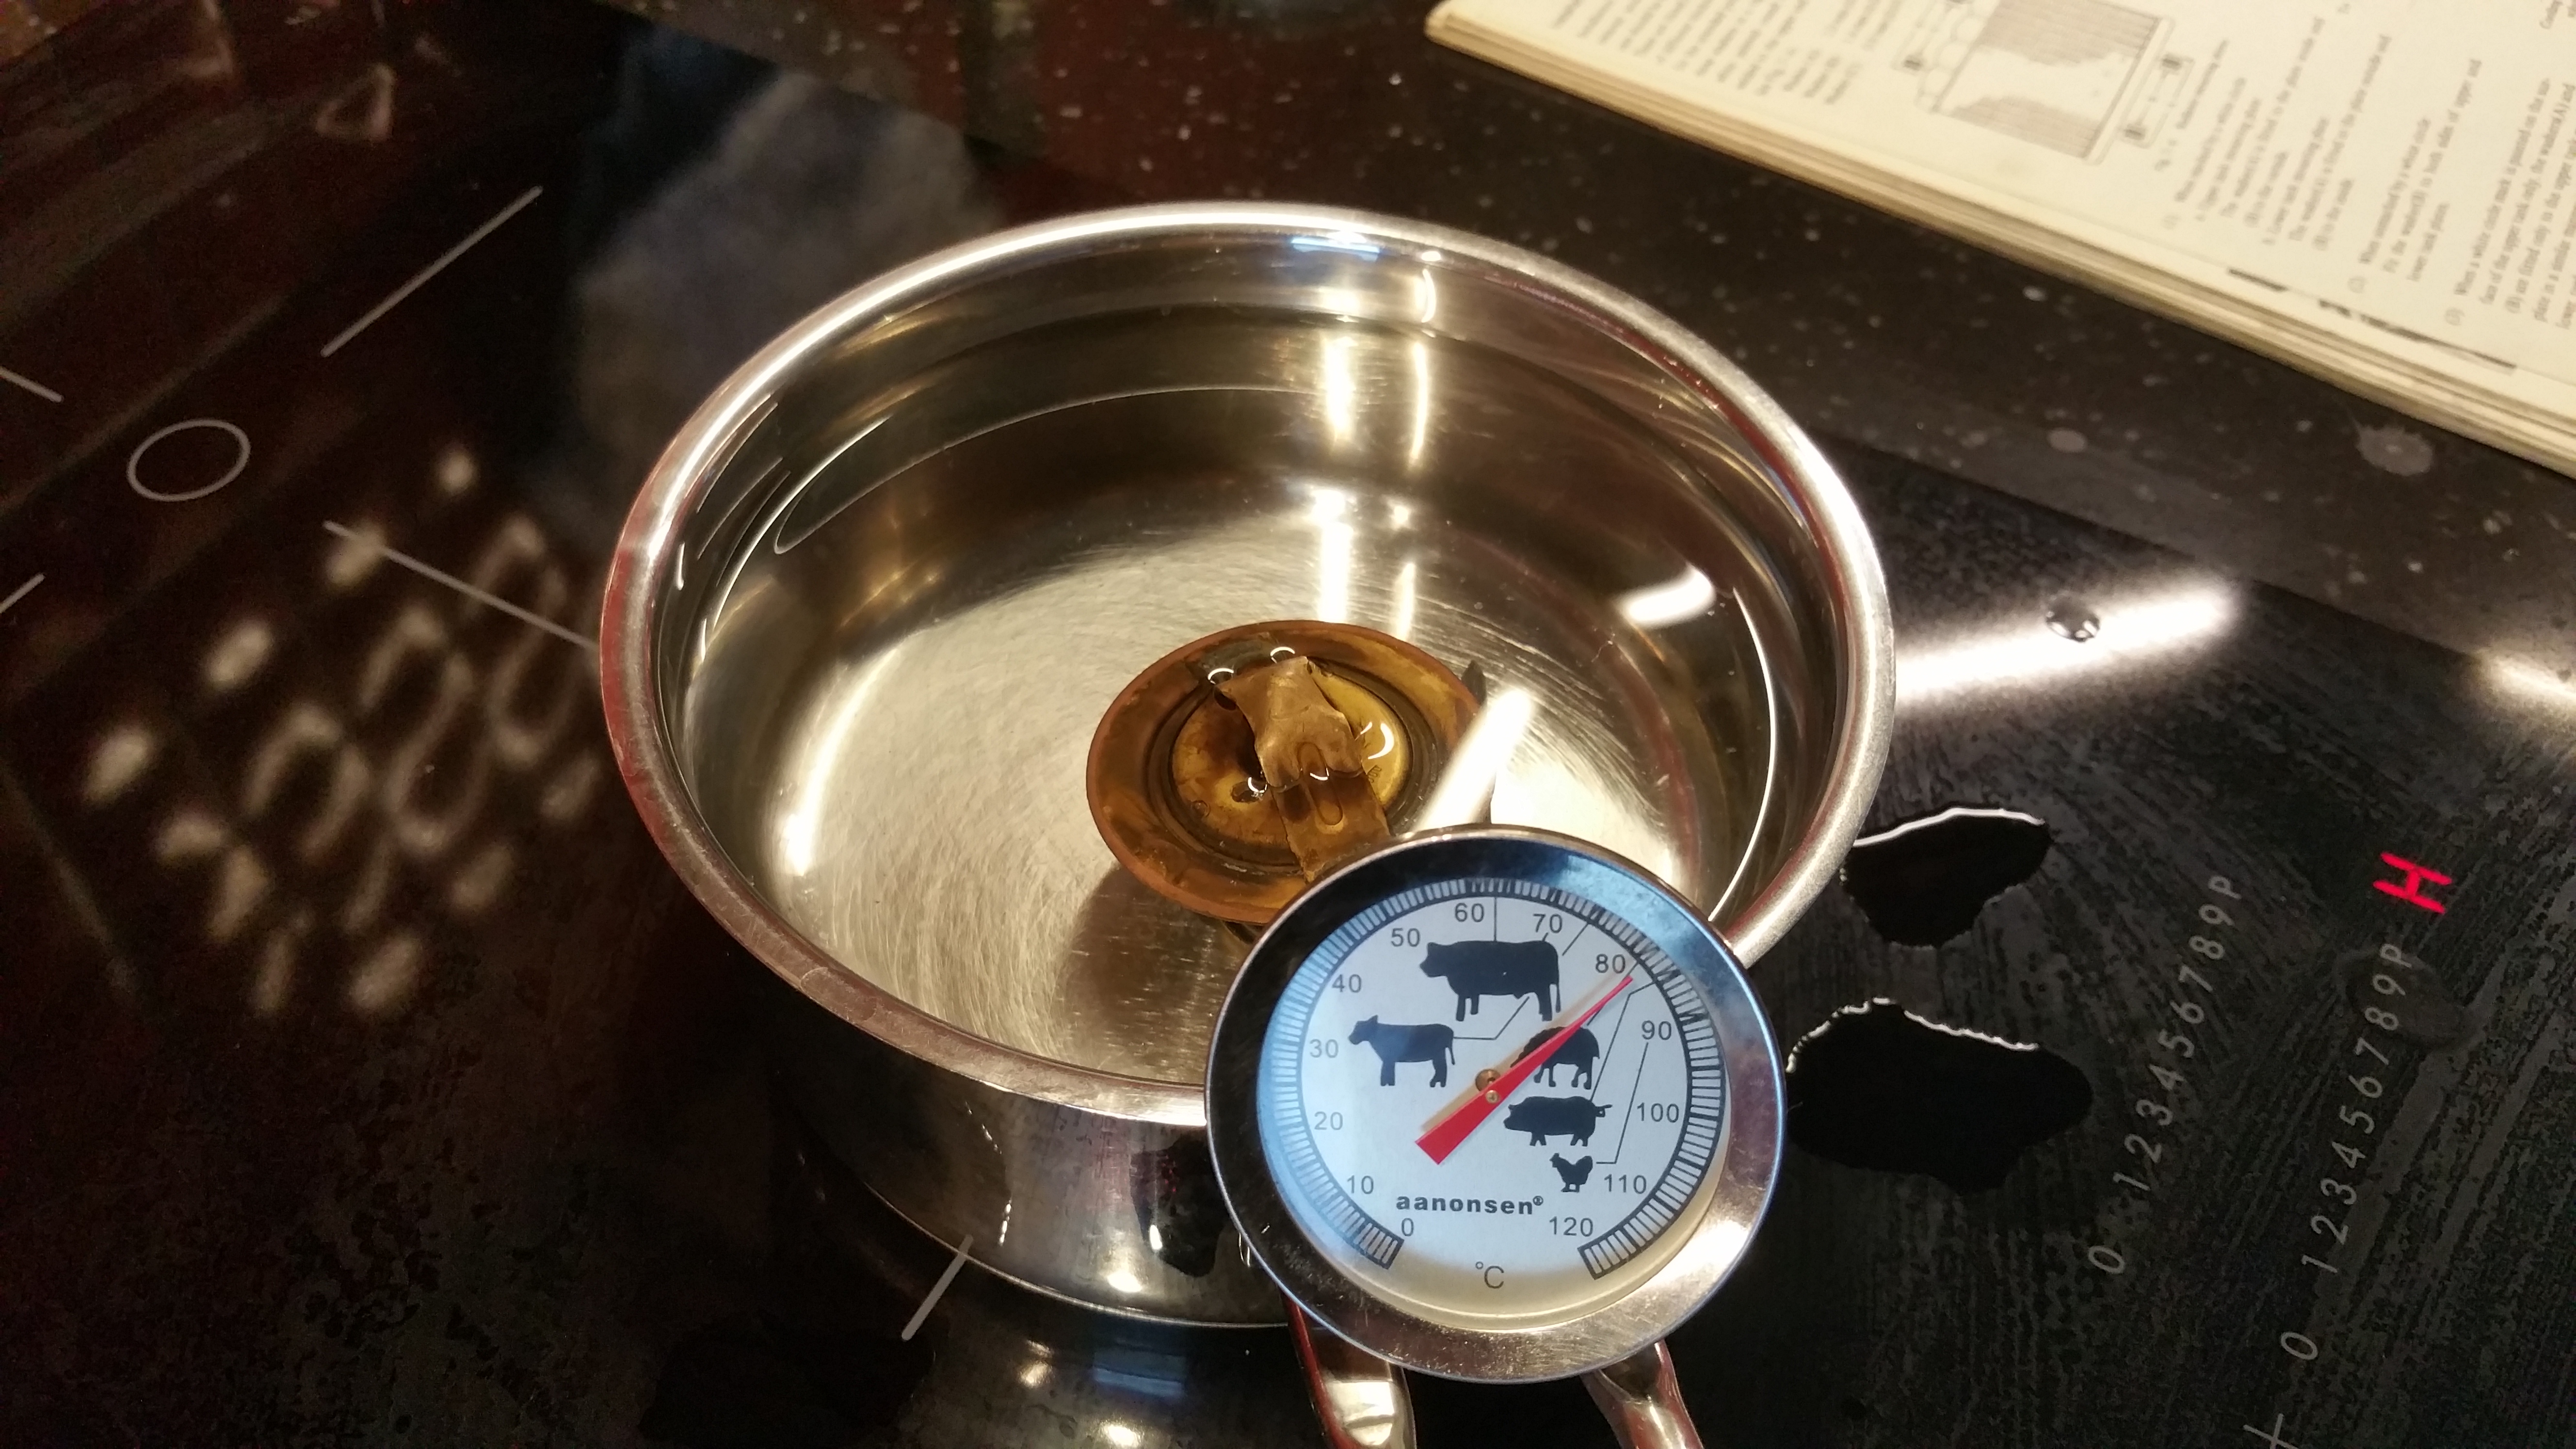
82 deg C and closed
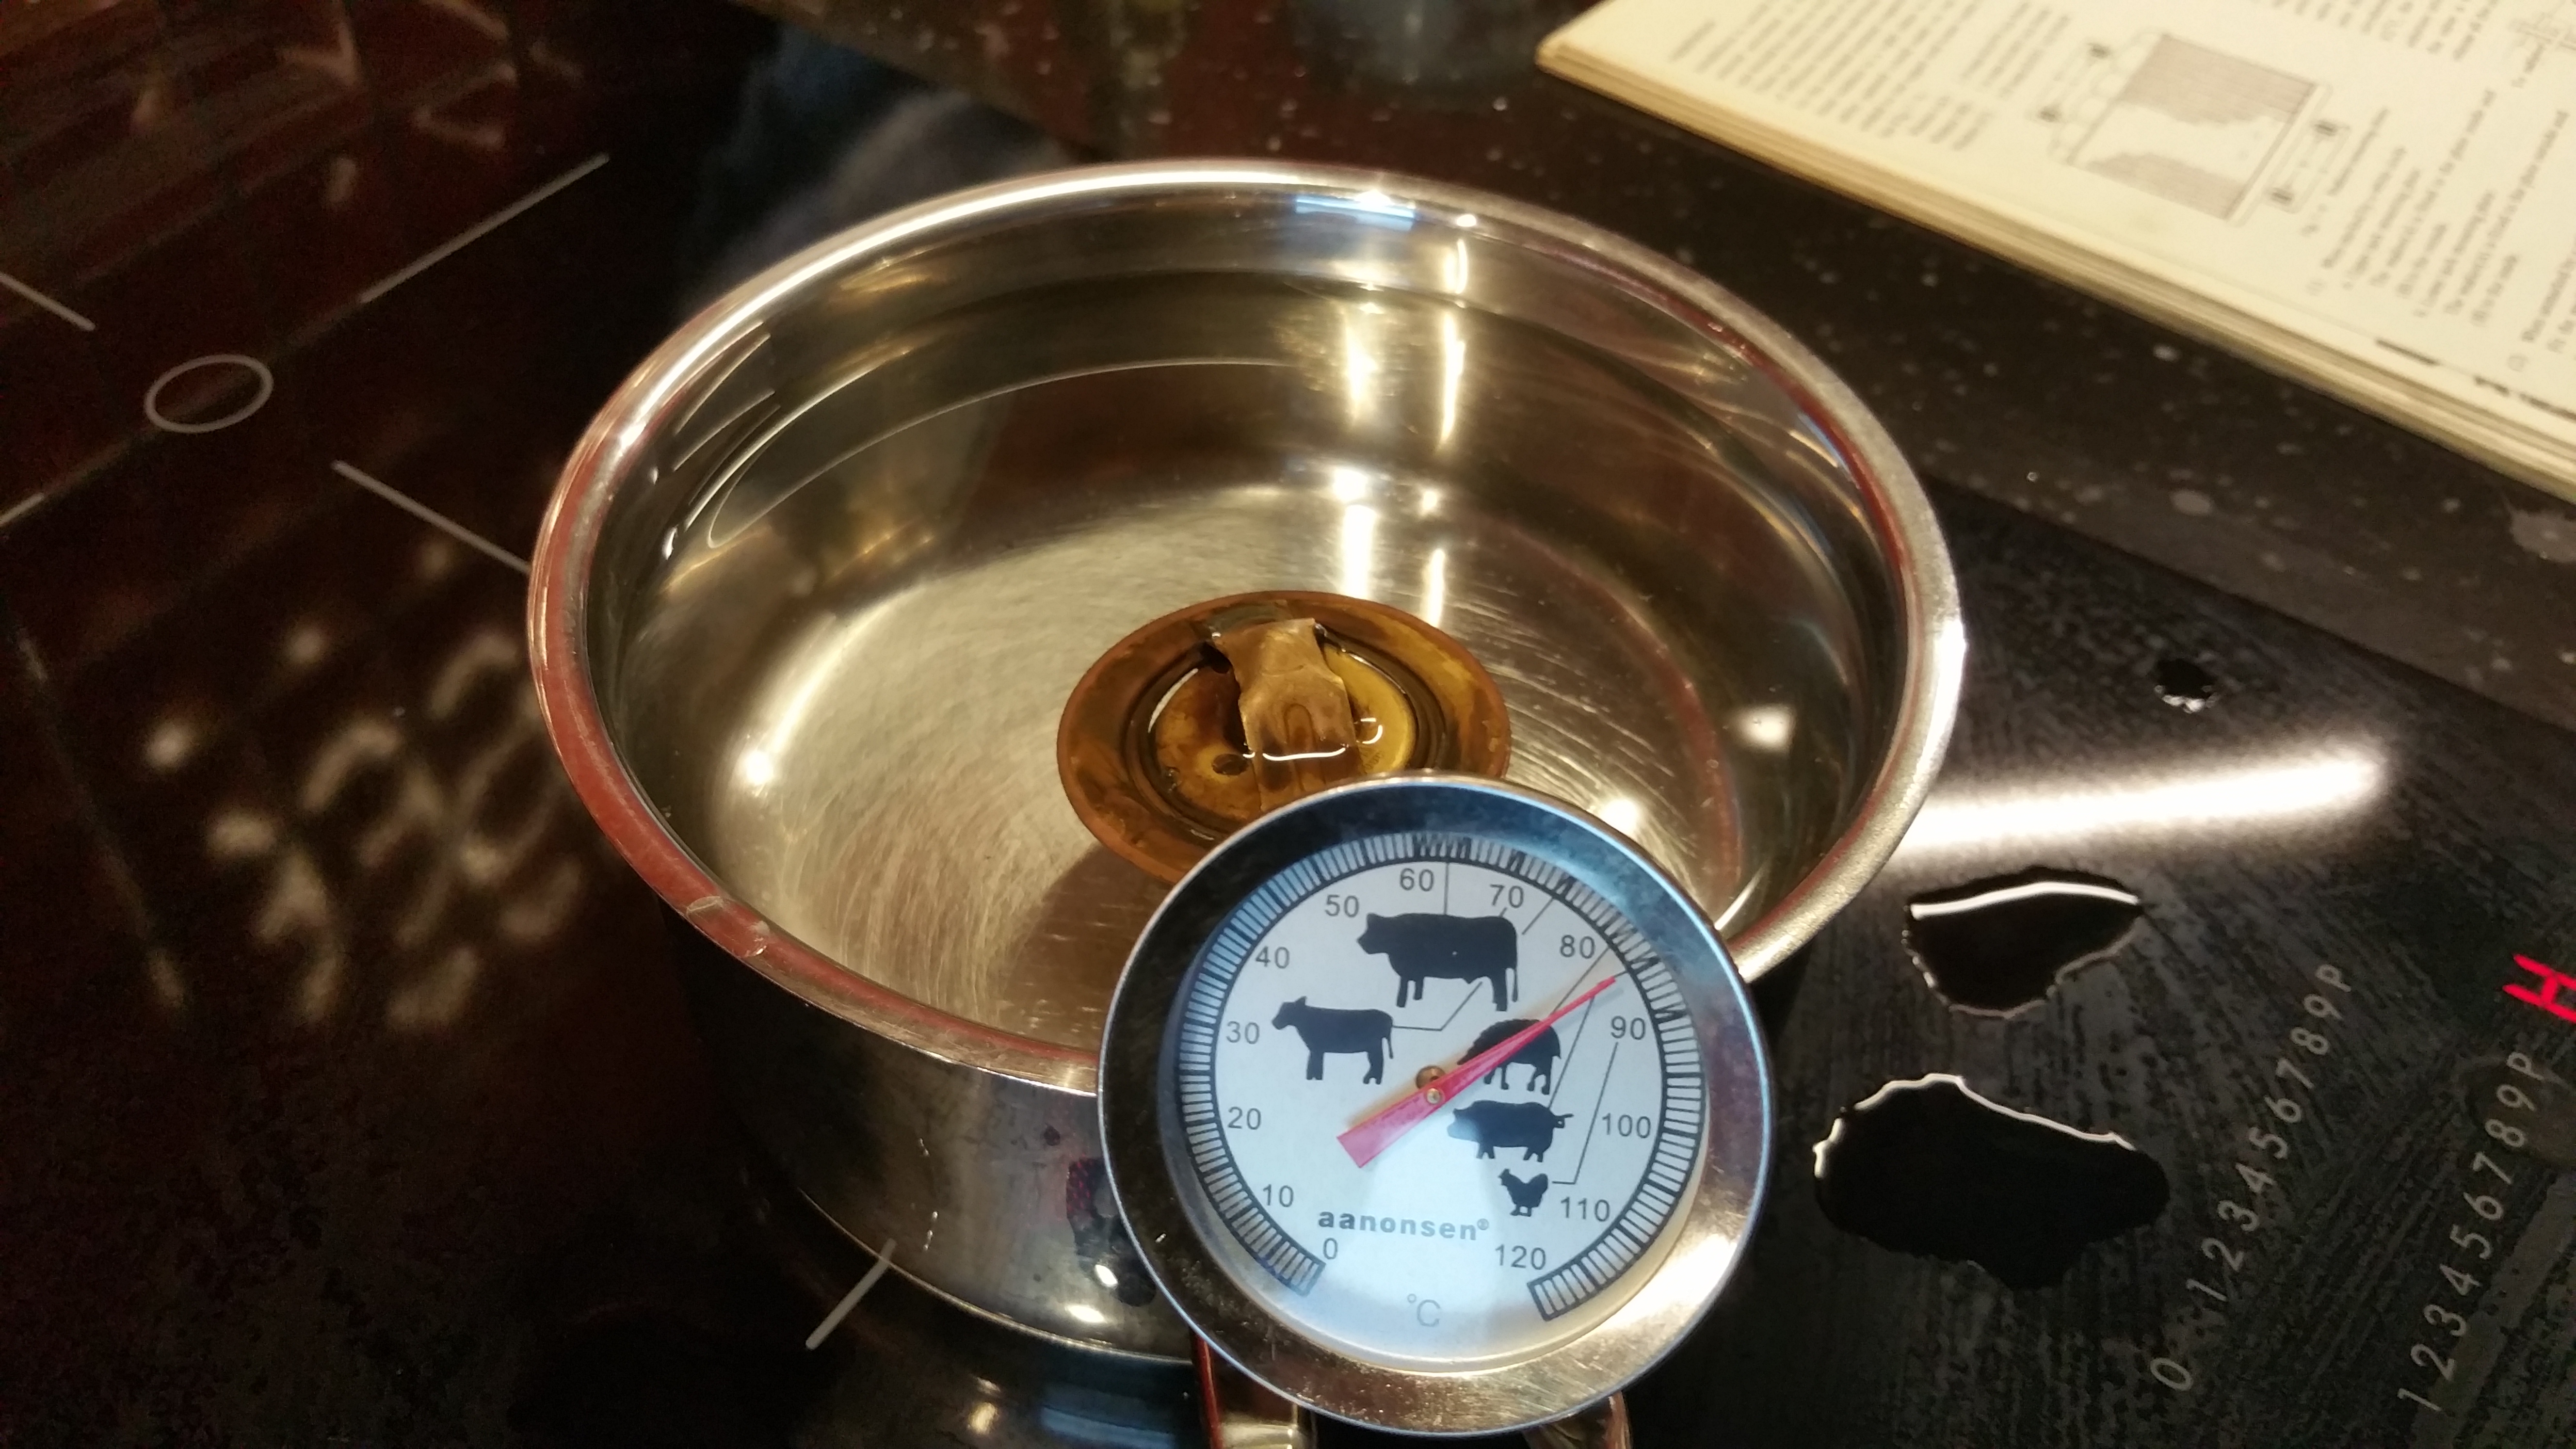
85 deg C and half opened
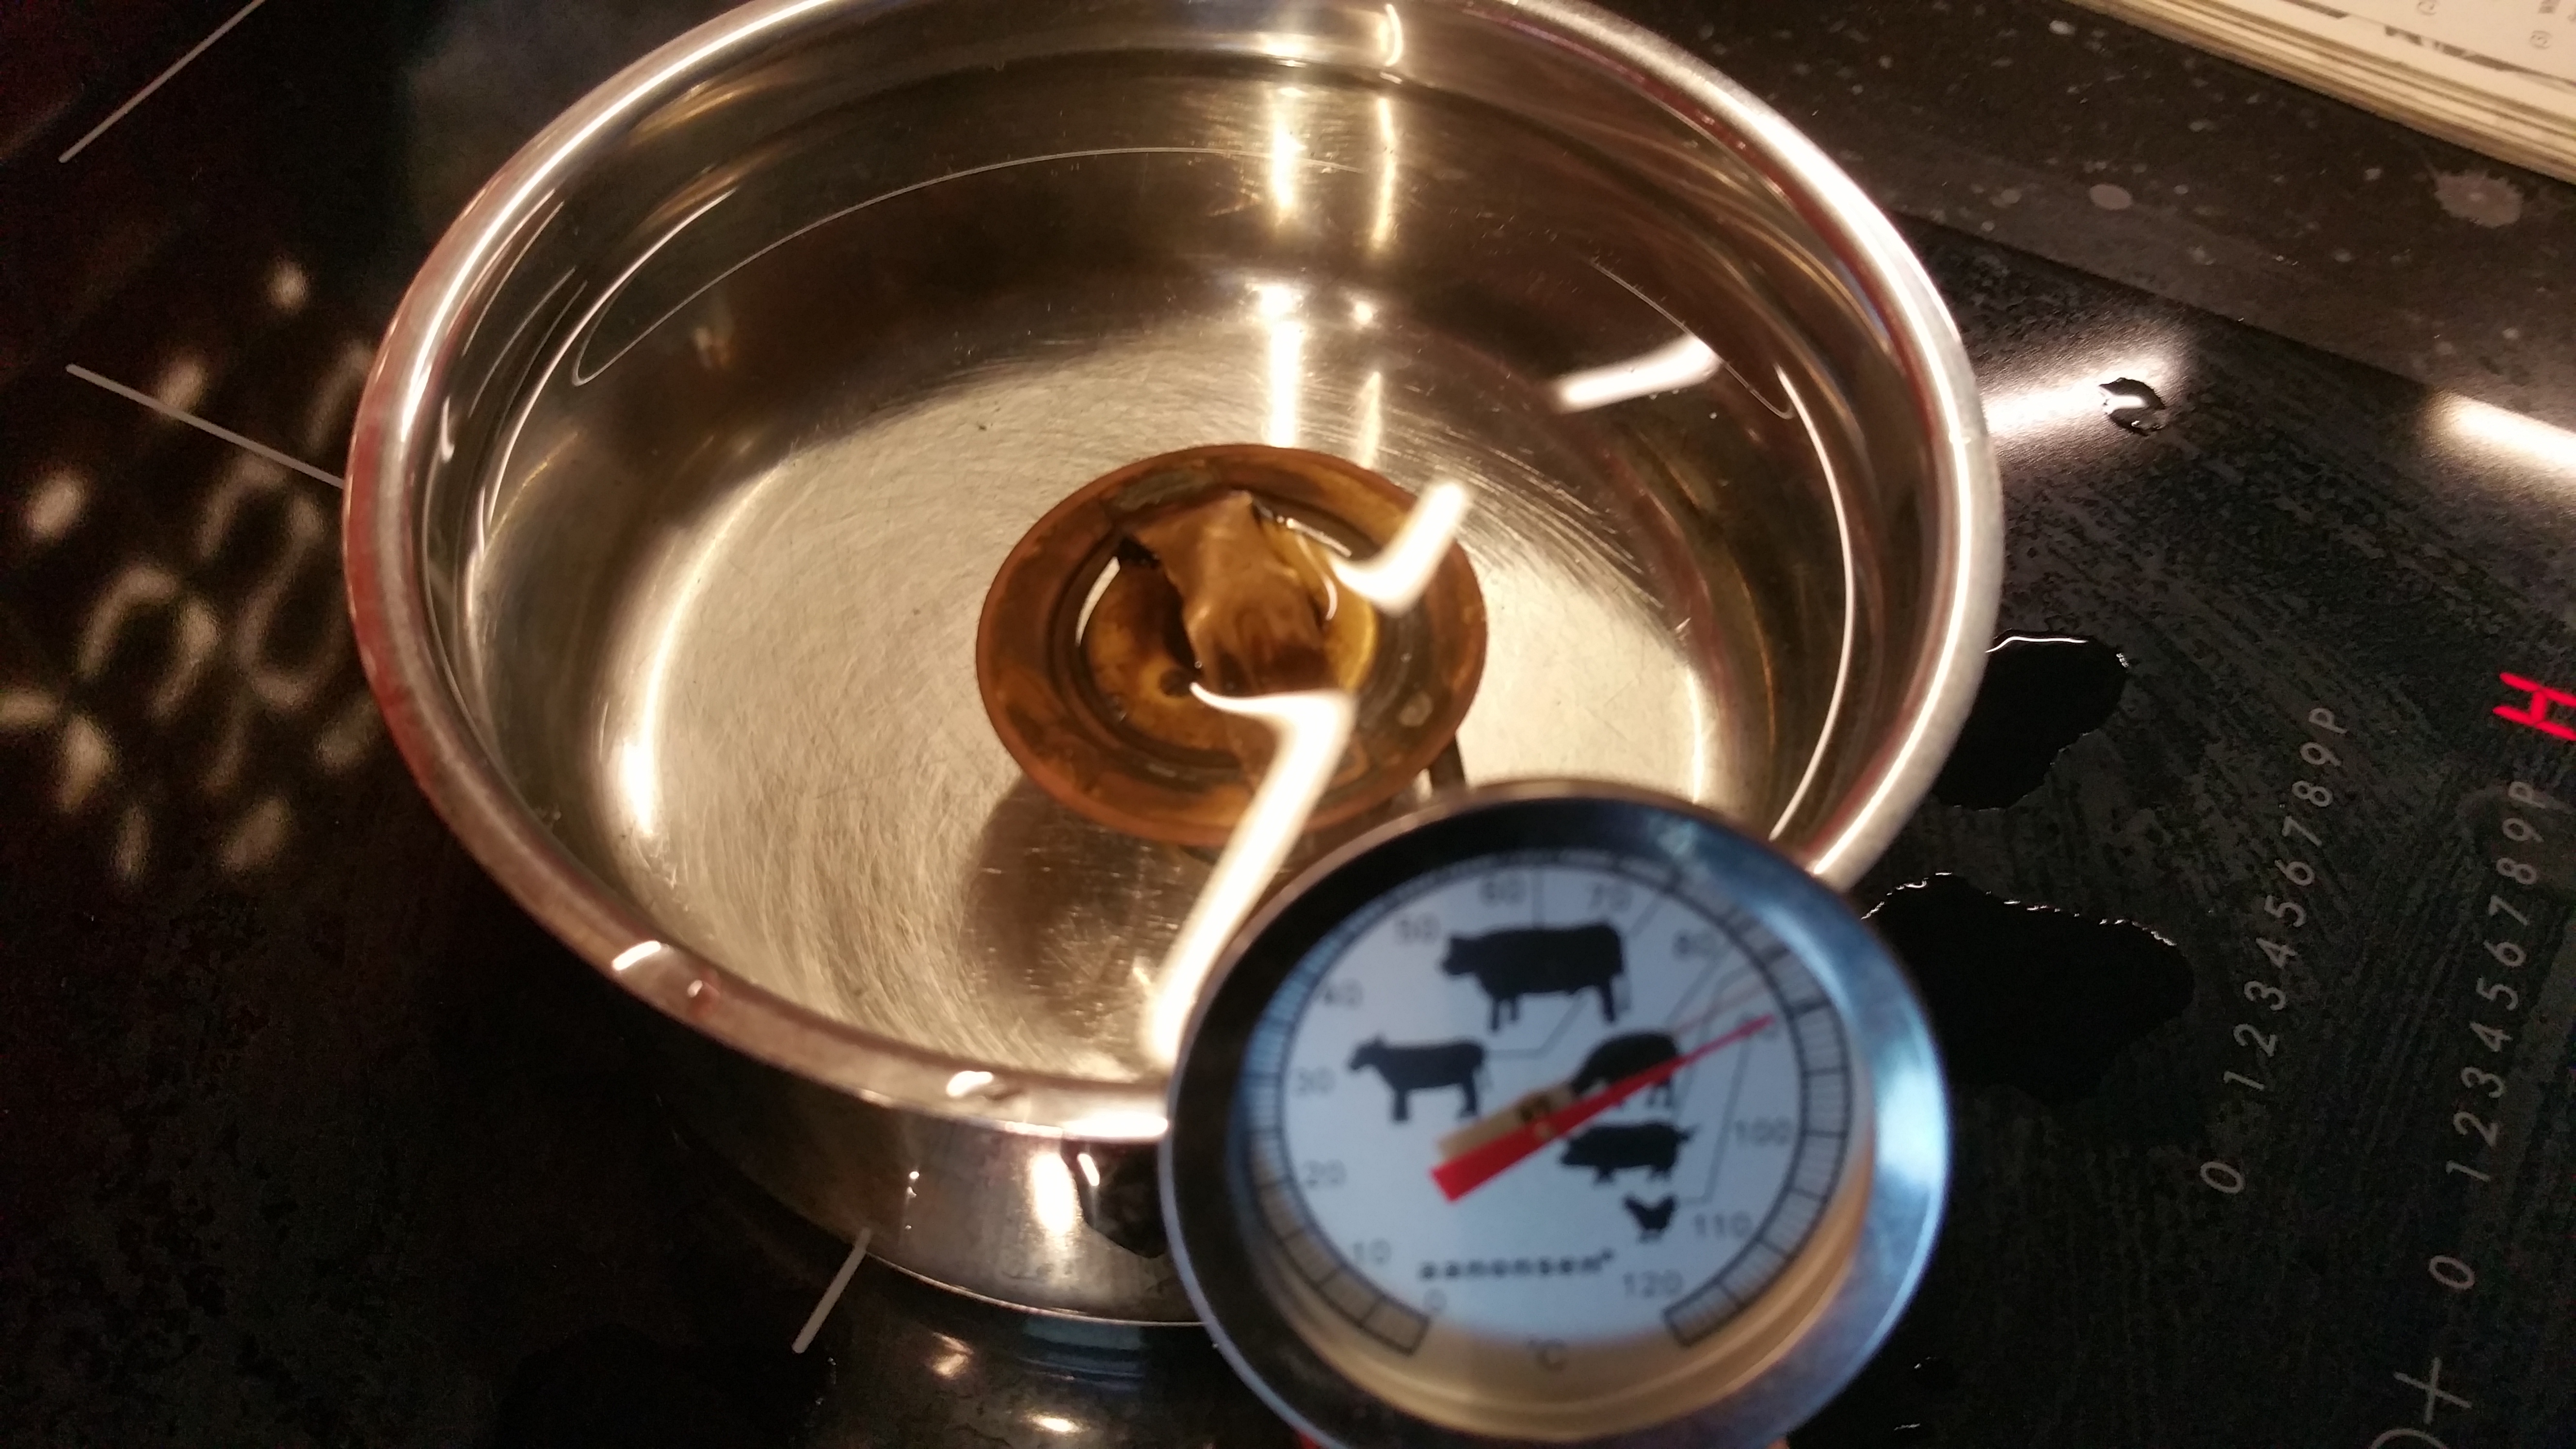
90 deg C and almost fully opened
Good to go, the thermostat is functioning as specified.
Thermostat response time:
See how it’s closing only seconds after it is out of the boiling water.
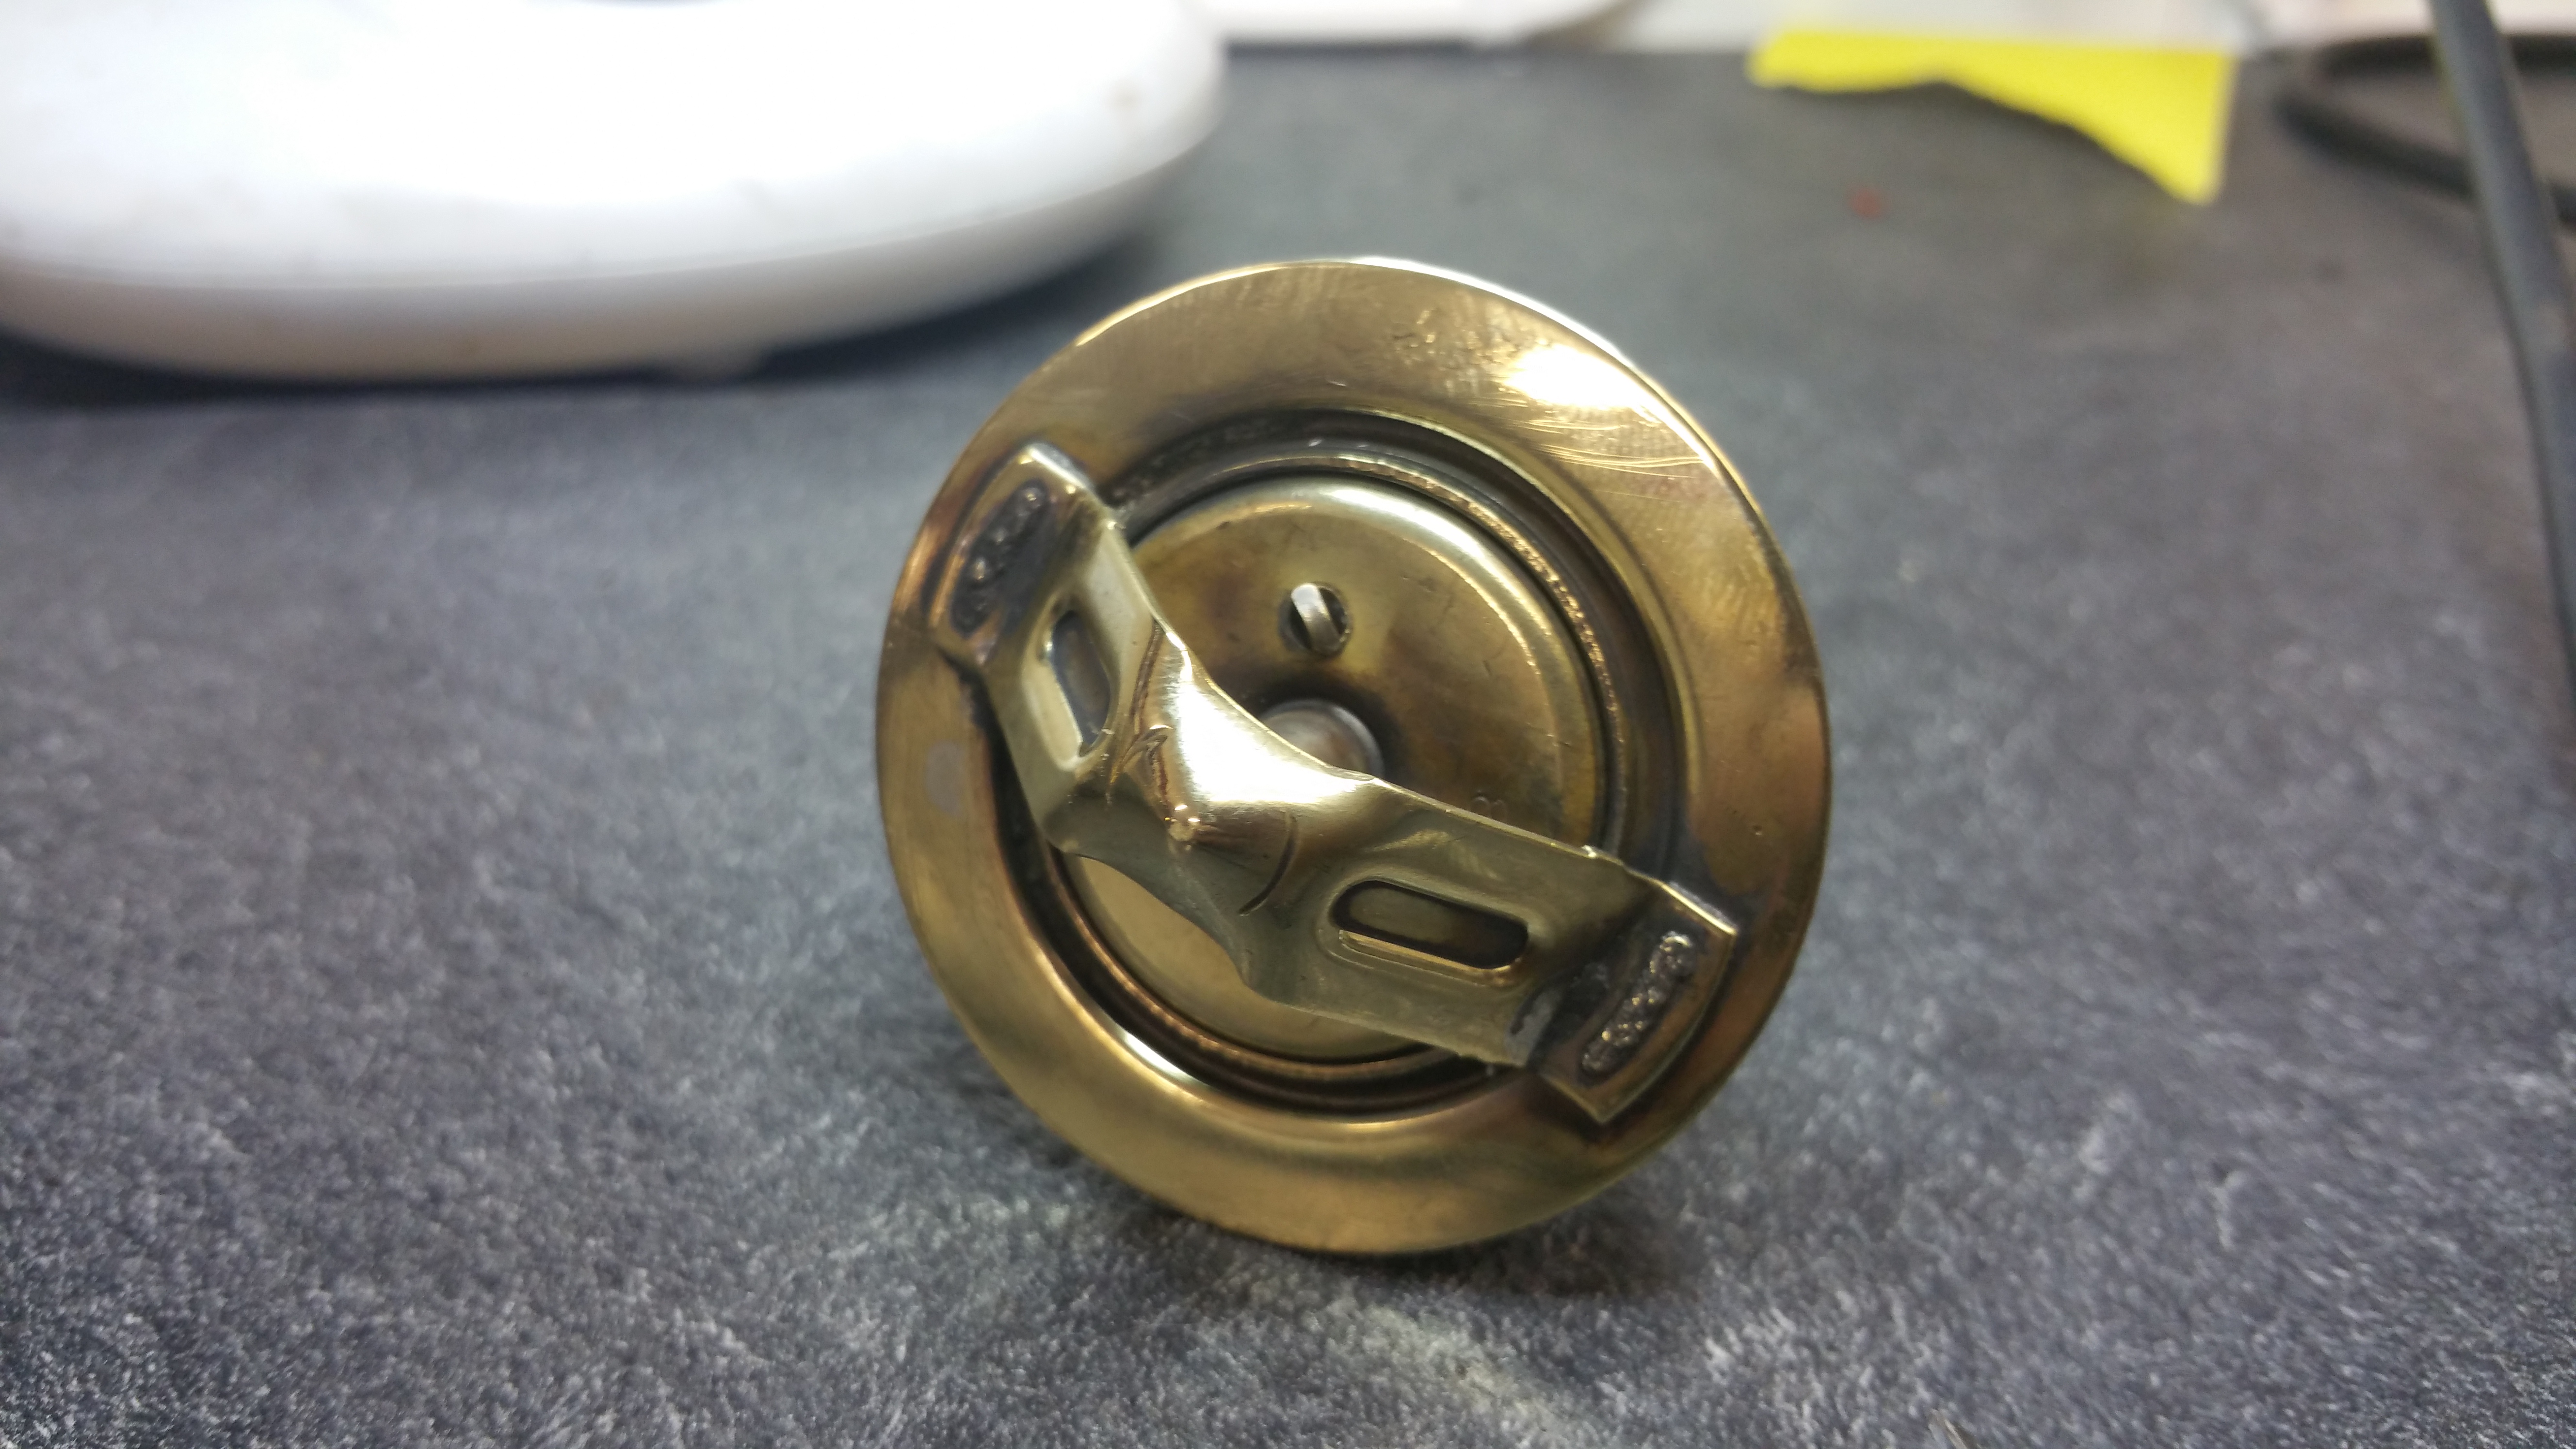
Step 3, polishing the thermostat housing:
Nice and shiny 🙂
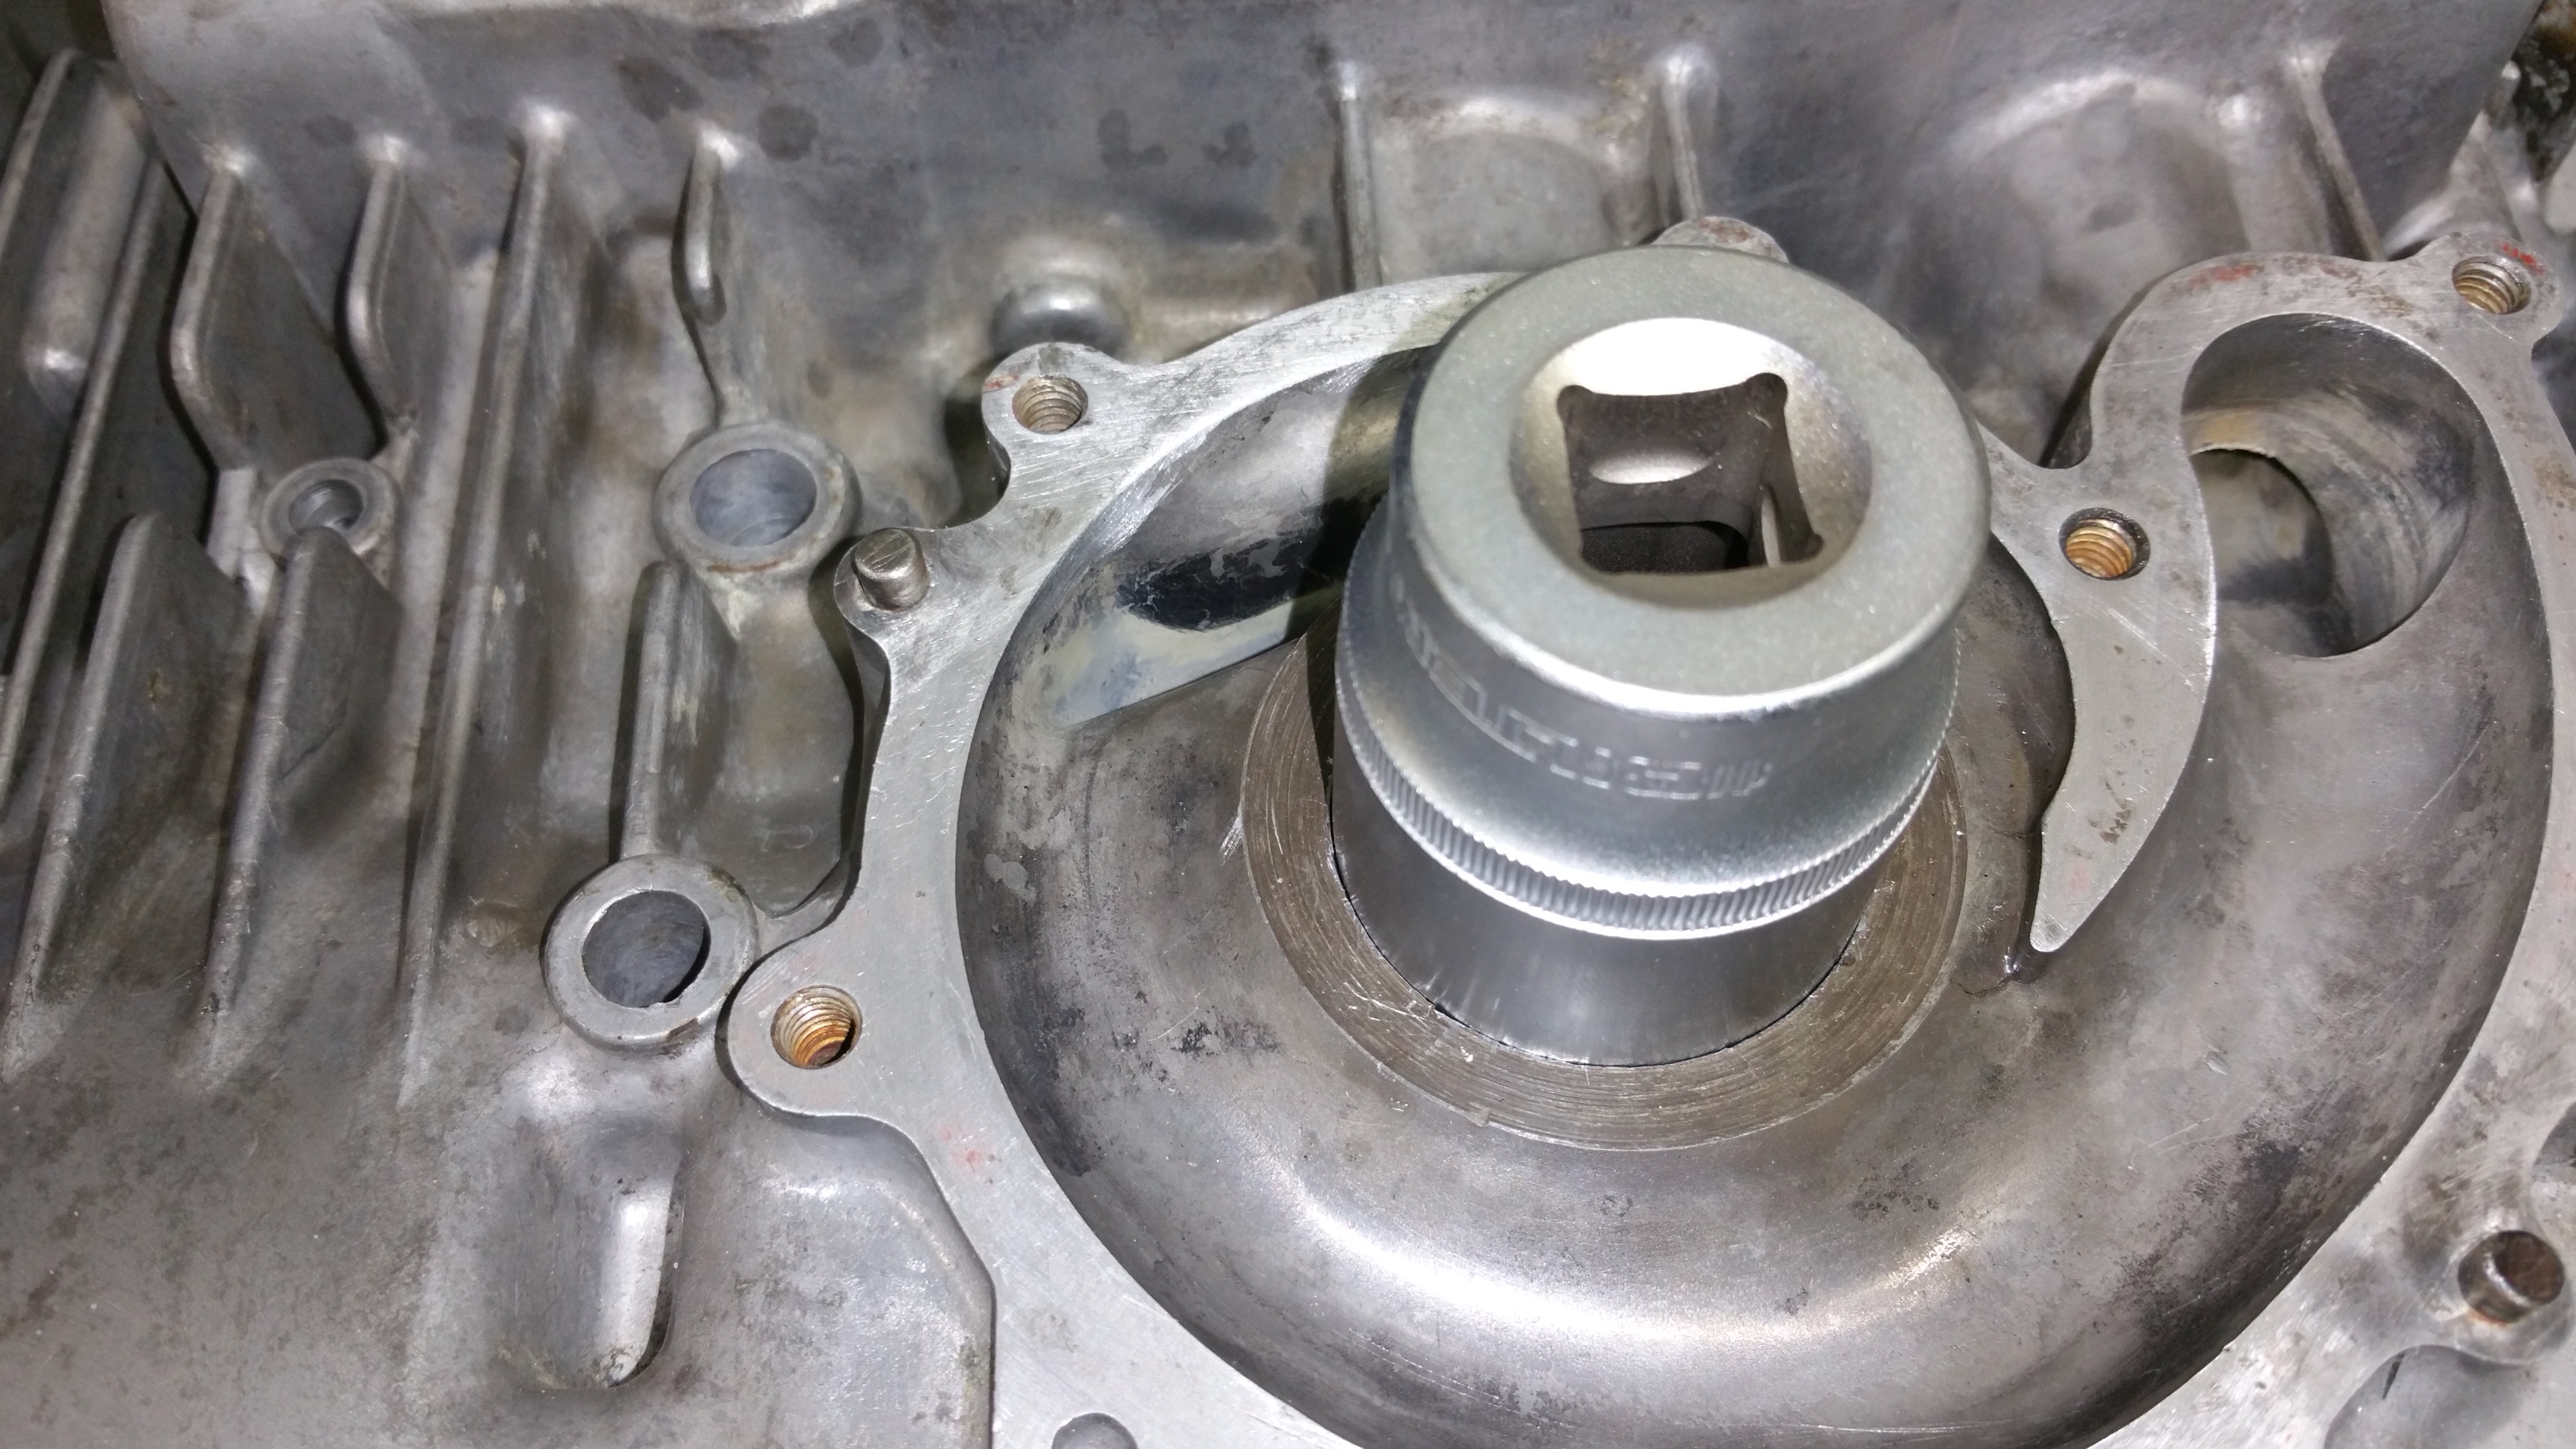
Finally, after a lot of discussion regarding the facing of an oil seal, it’s time to mount the water pump.
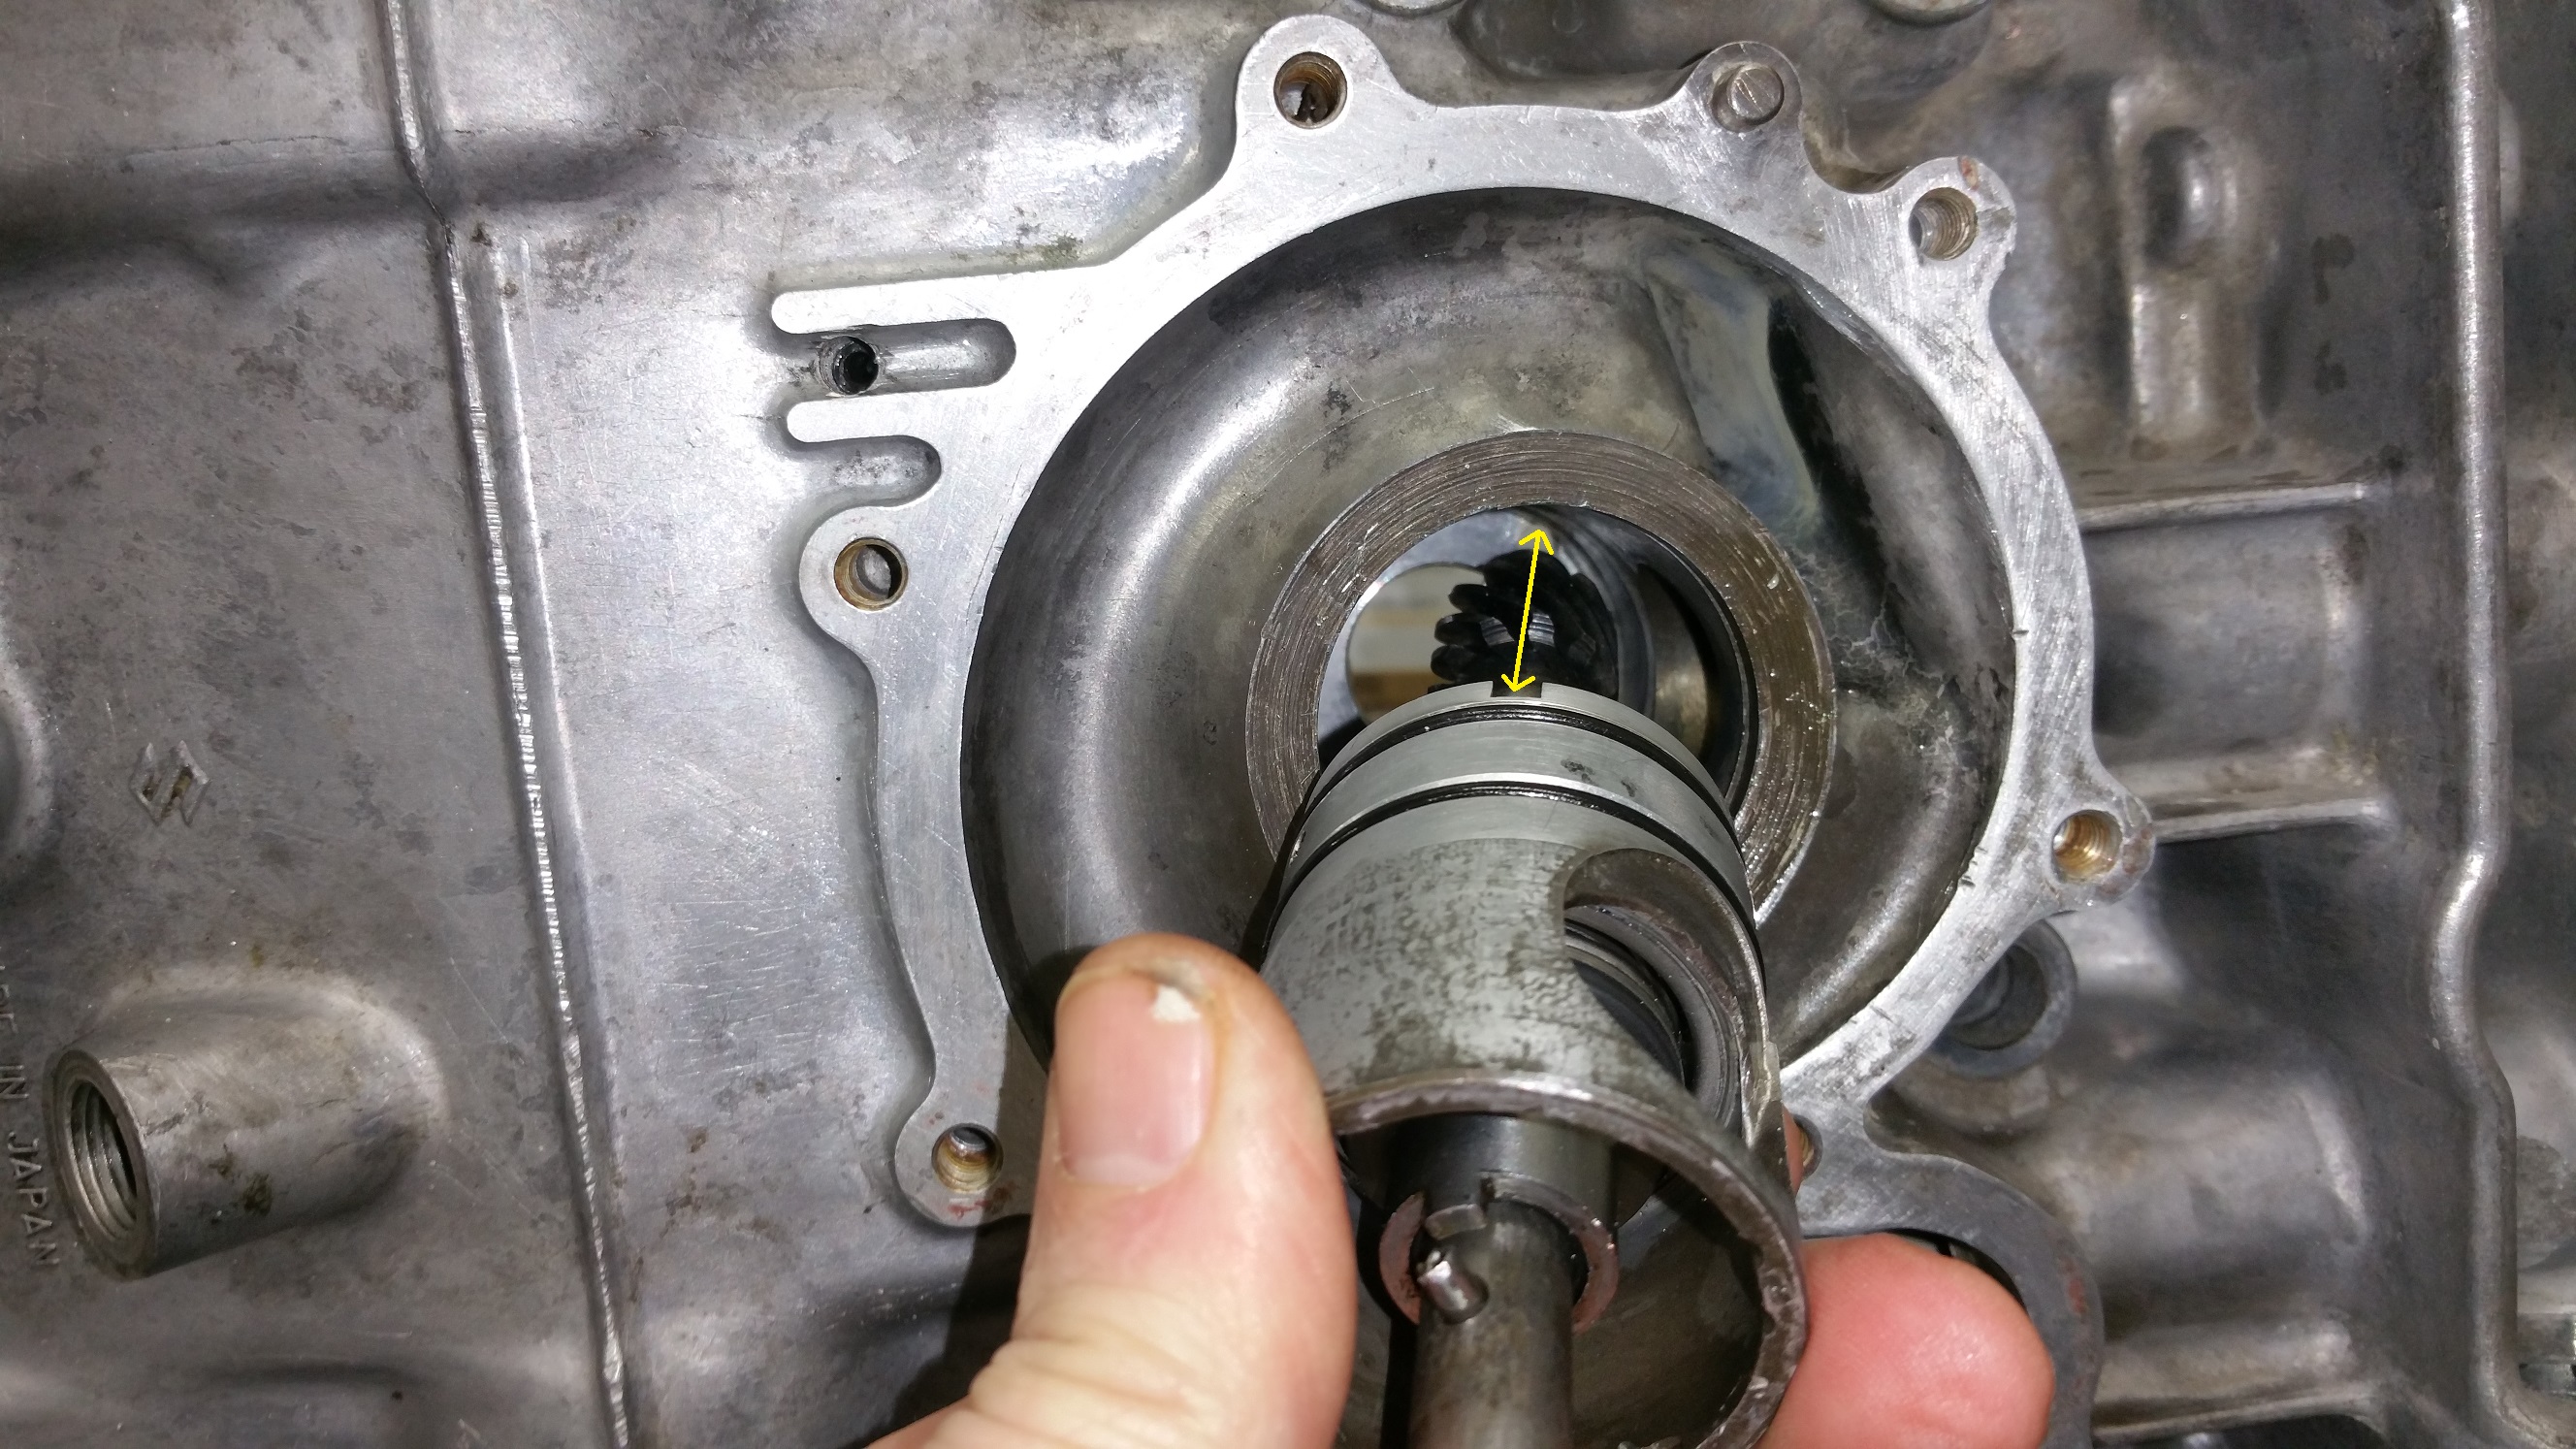
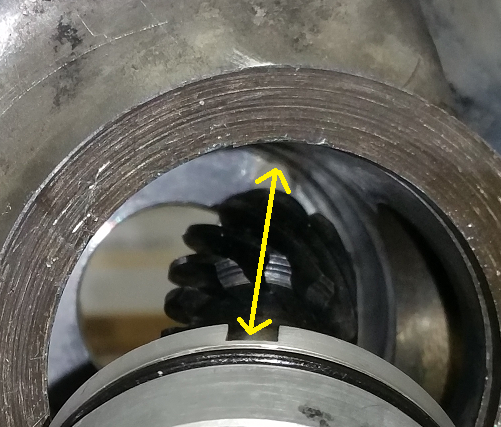
Align the pump:
Use the mounting hole inside the case and turn the pump until it’s aligned to the groove in the pump, see the yellow arrow.
Picture from the bottom side
Align against the mounting hole for the screw
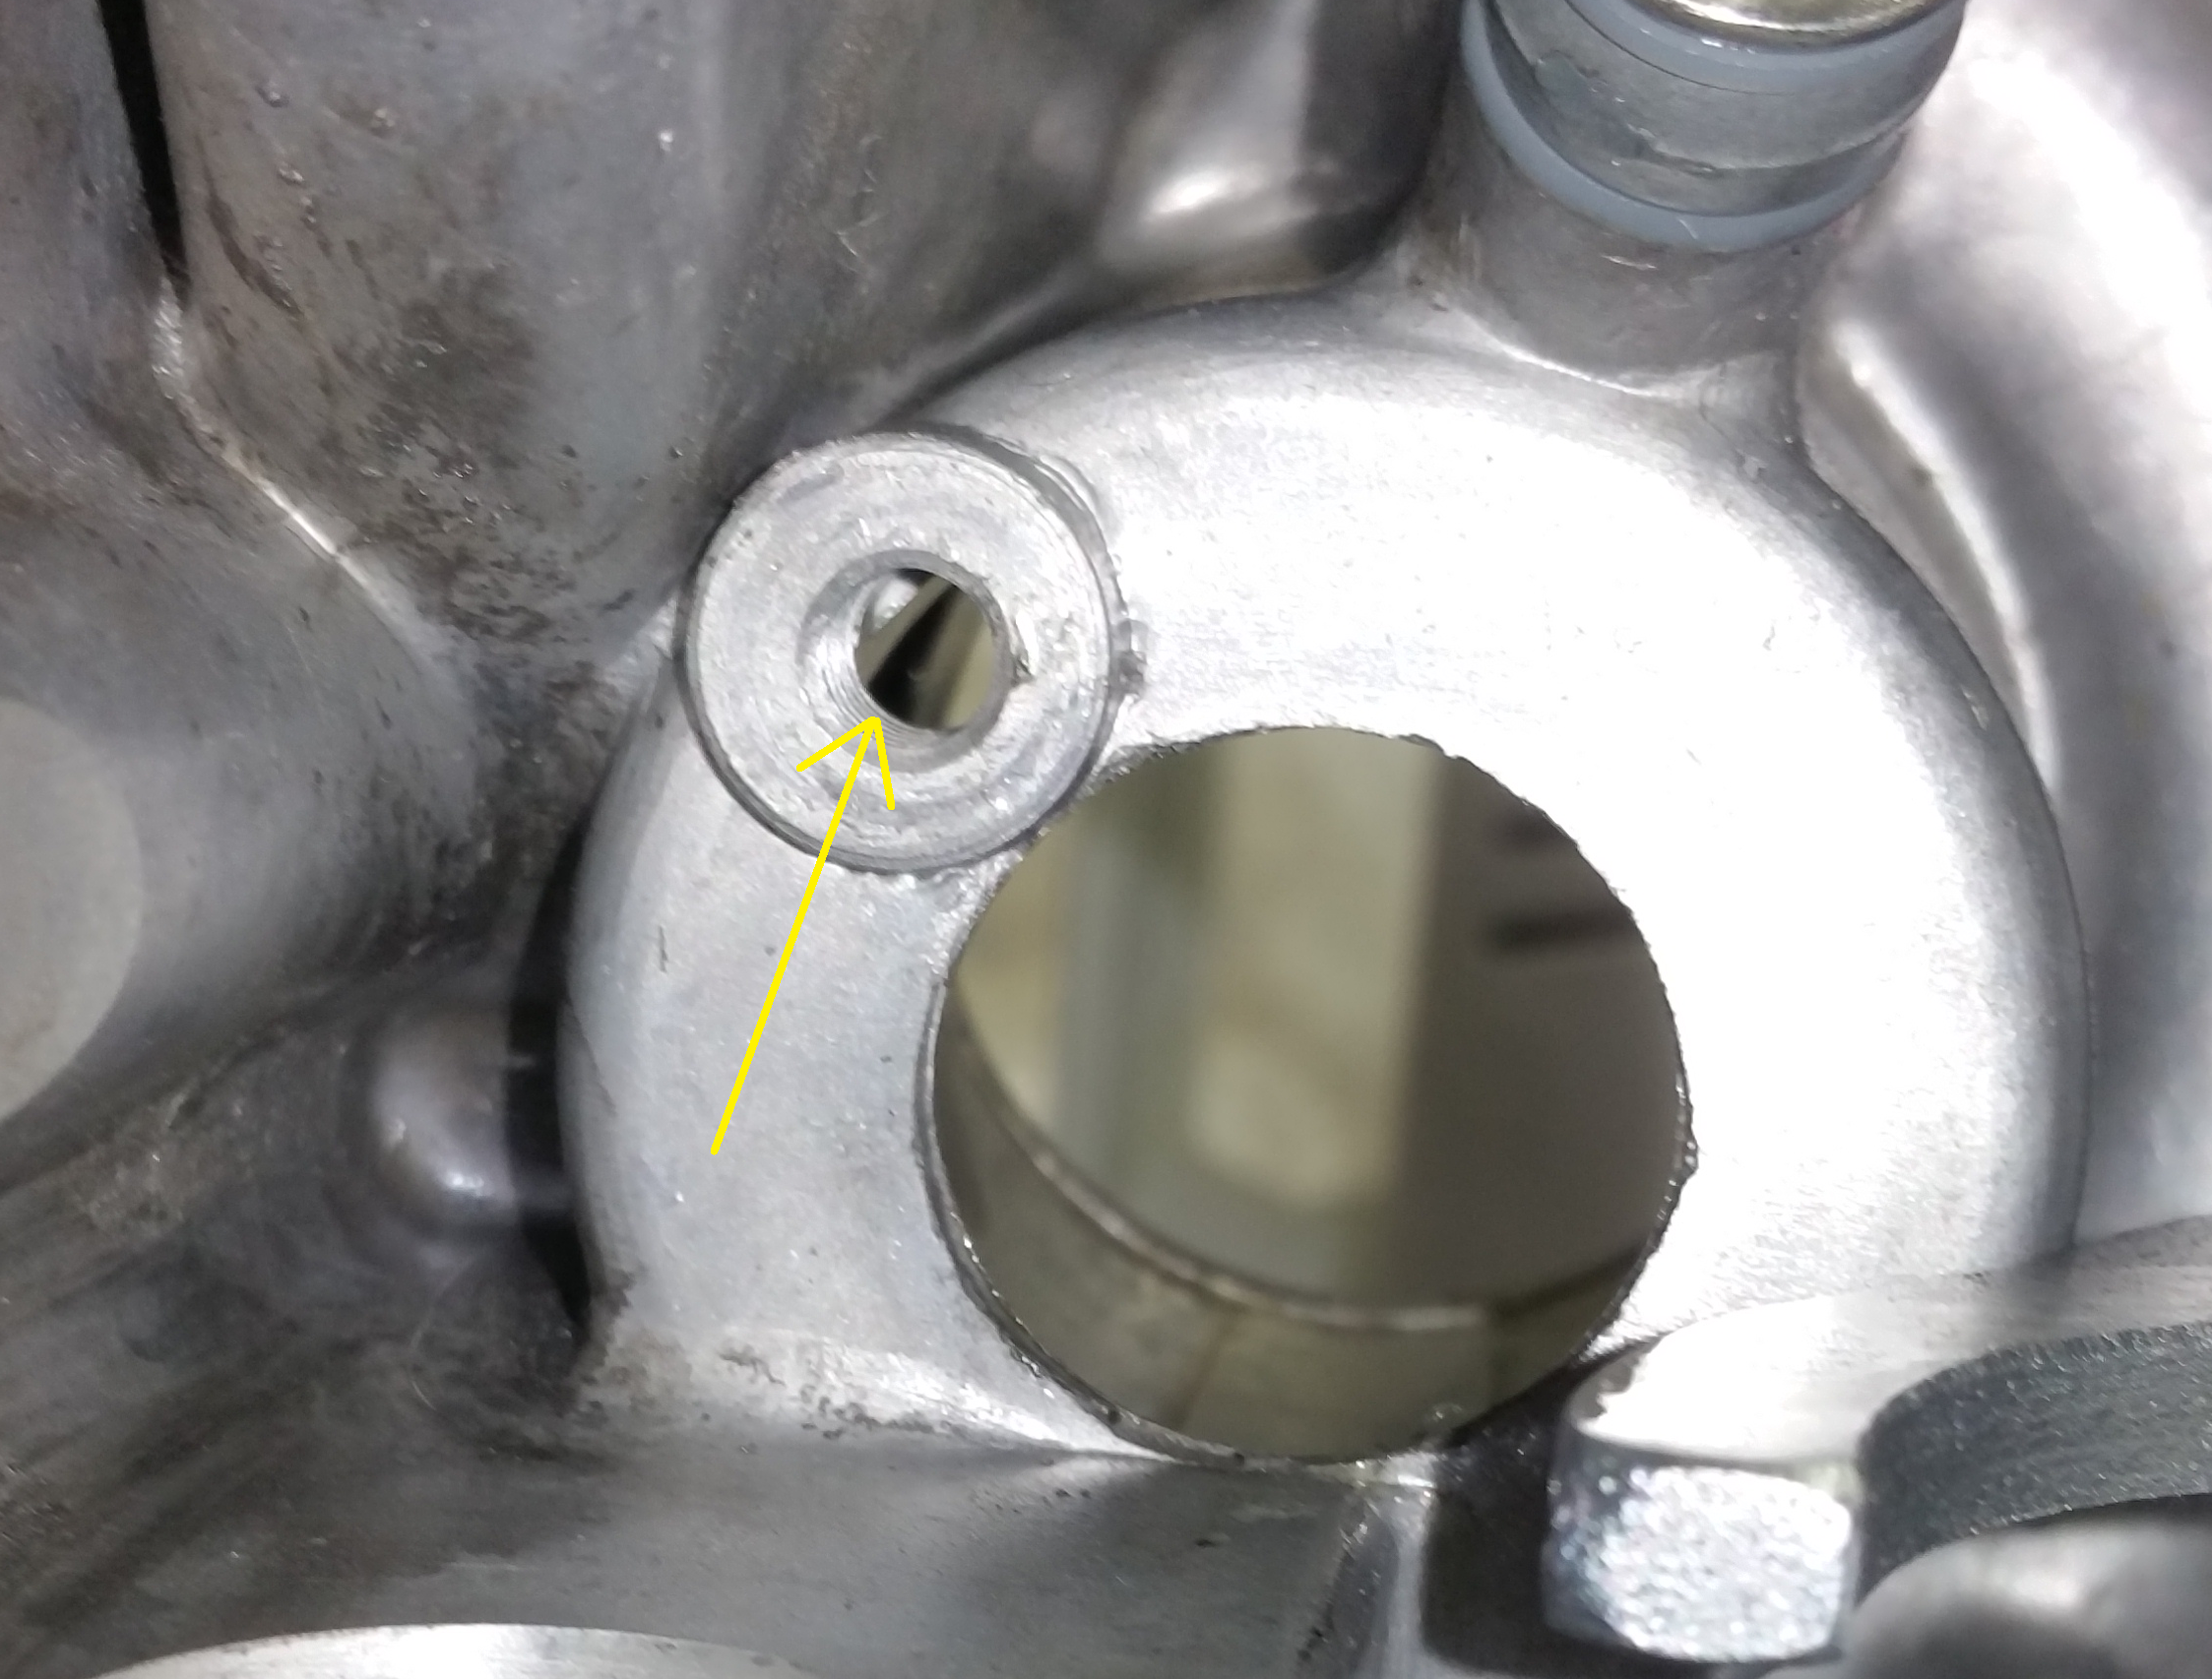
Mounting hole for the screw seen from the other side.
Use a socket for a more easy mounting. Push the pump all the way down.
When you see the groove for the big circlip you know it’s at the bottom.
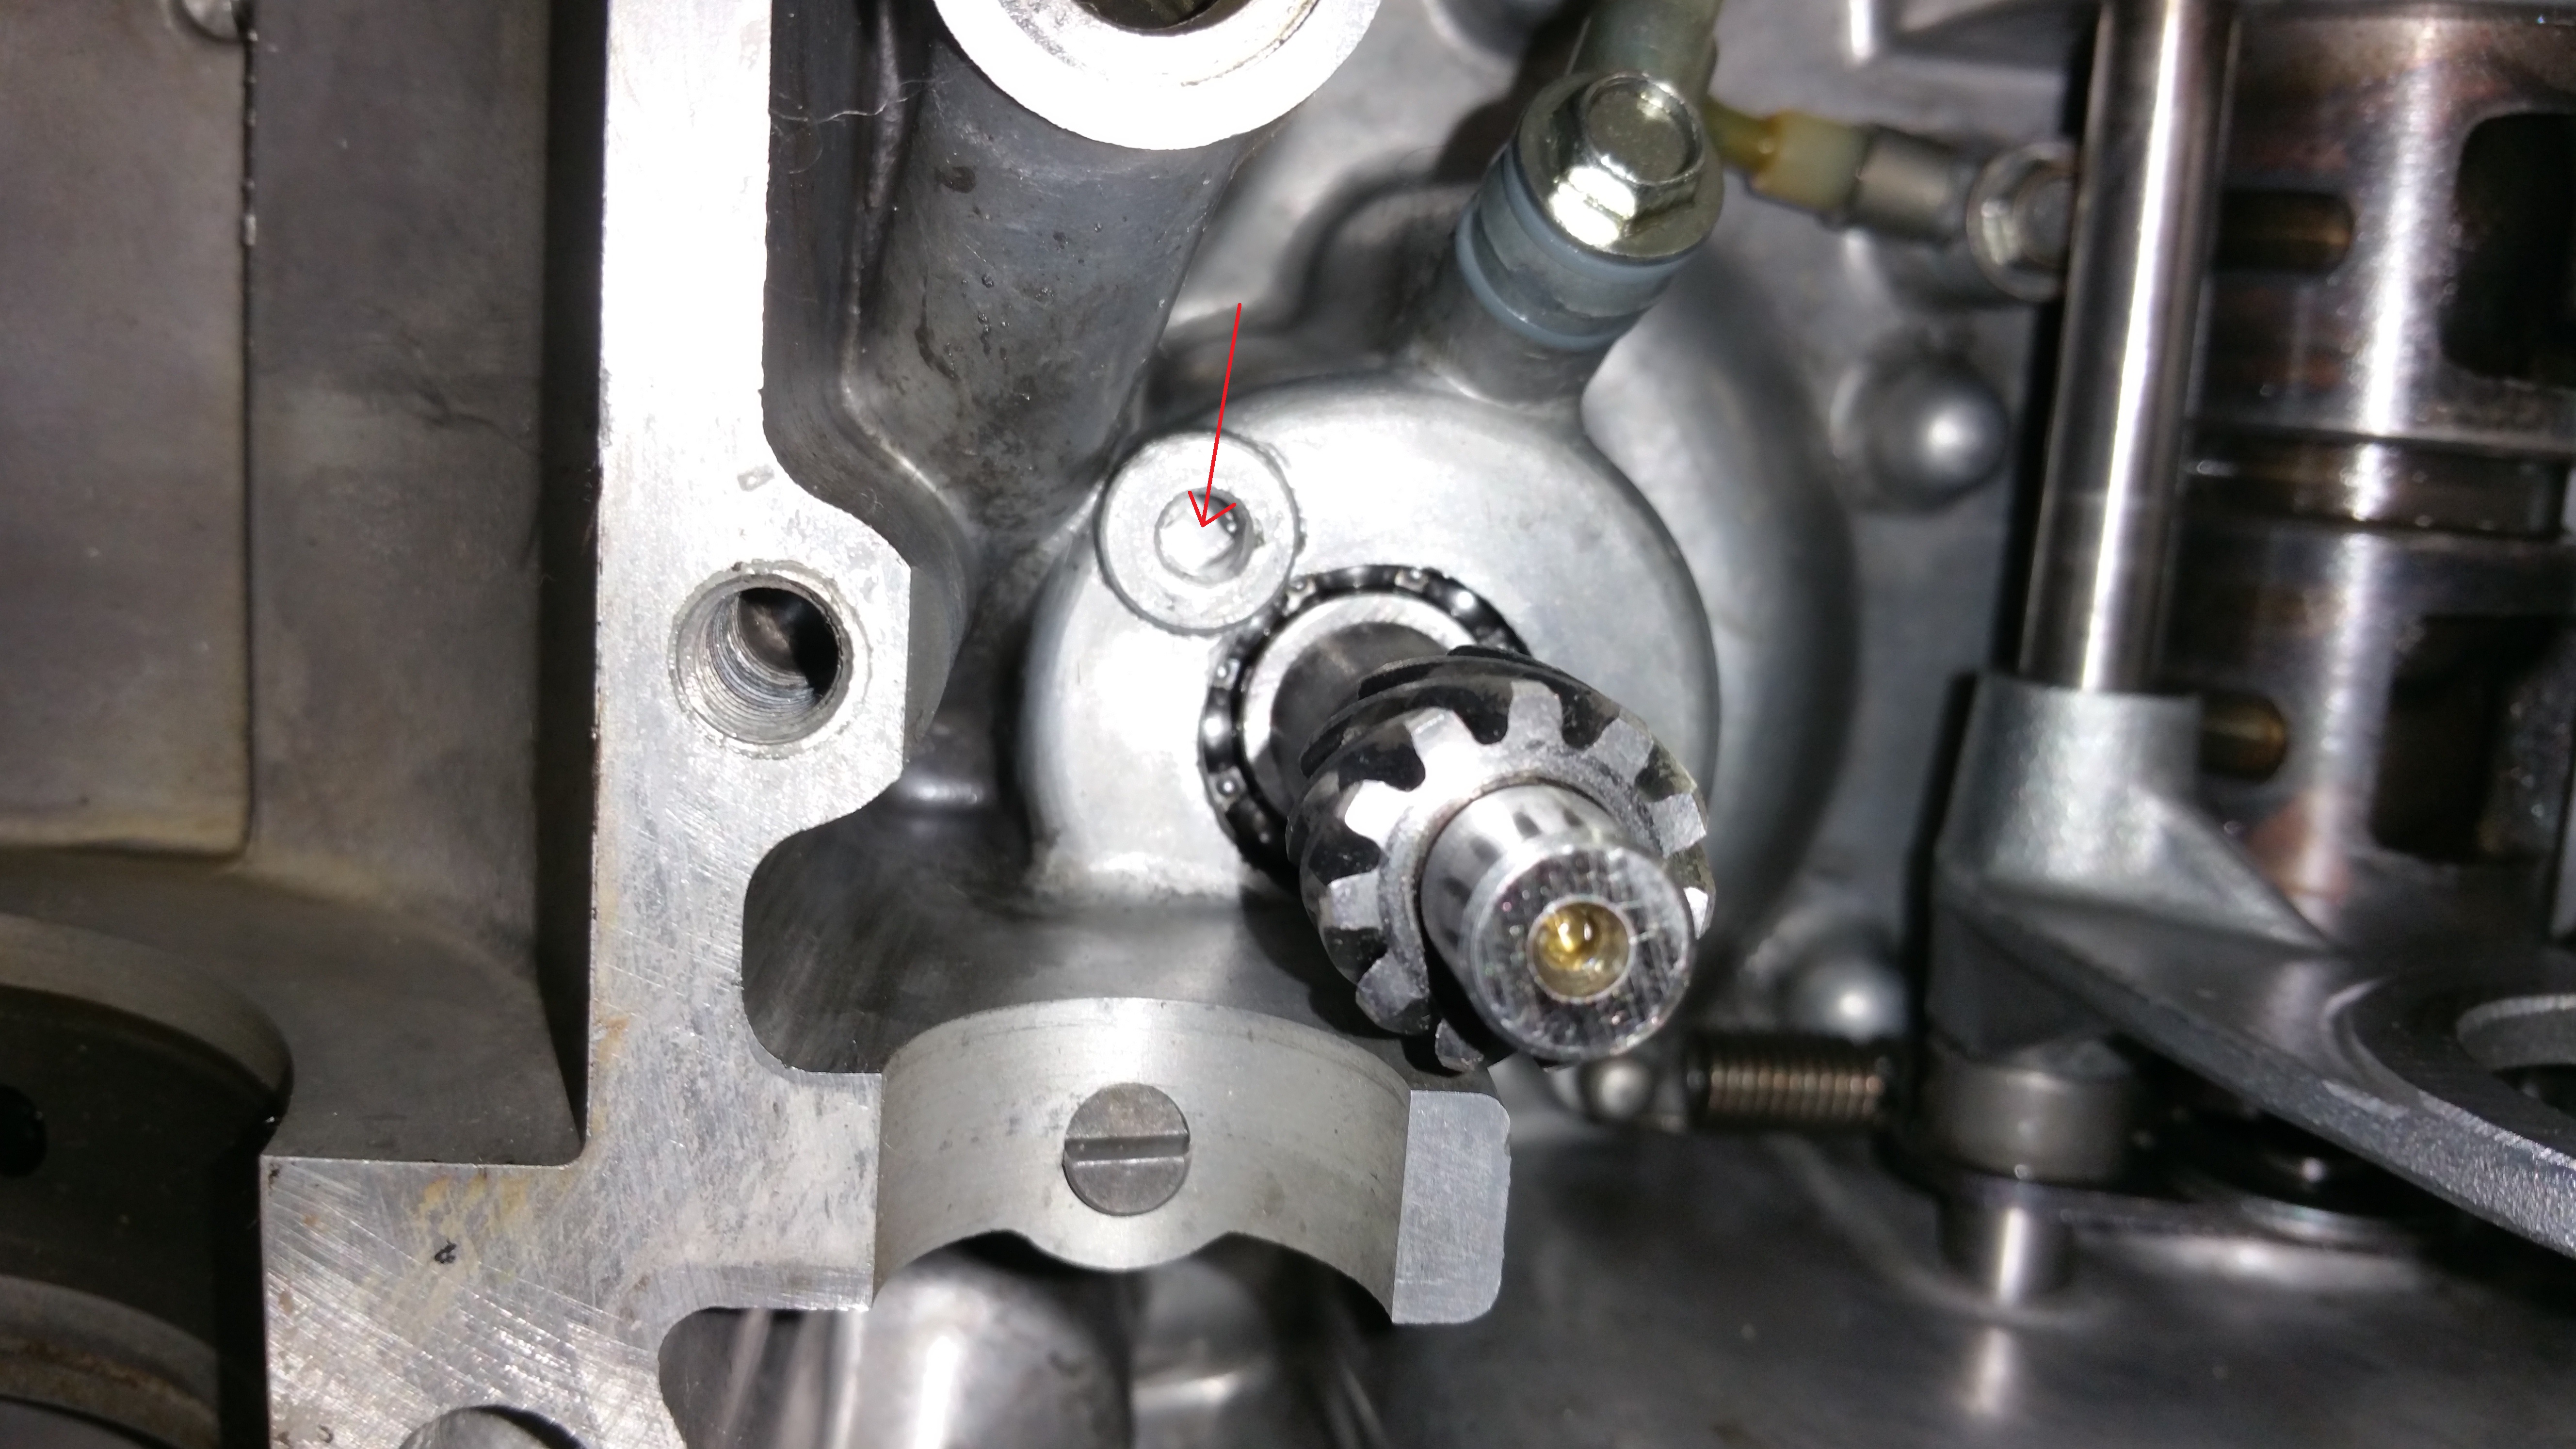
Check the alignment of the groove and the mounting hole, put a small screw driver into the hole and use it to turn the pump if it’s not in correct placement. Make sure the groove is underneath the hole. See the red arrow on the picture.
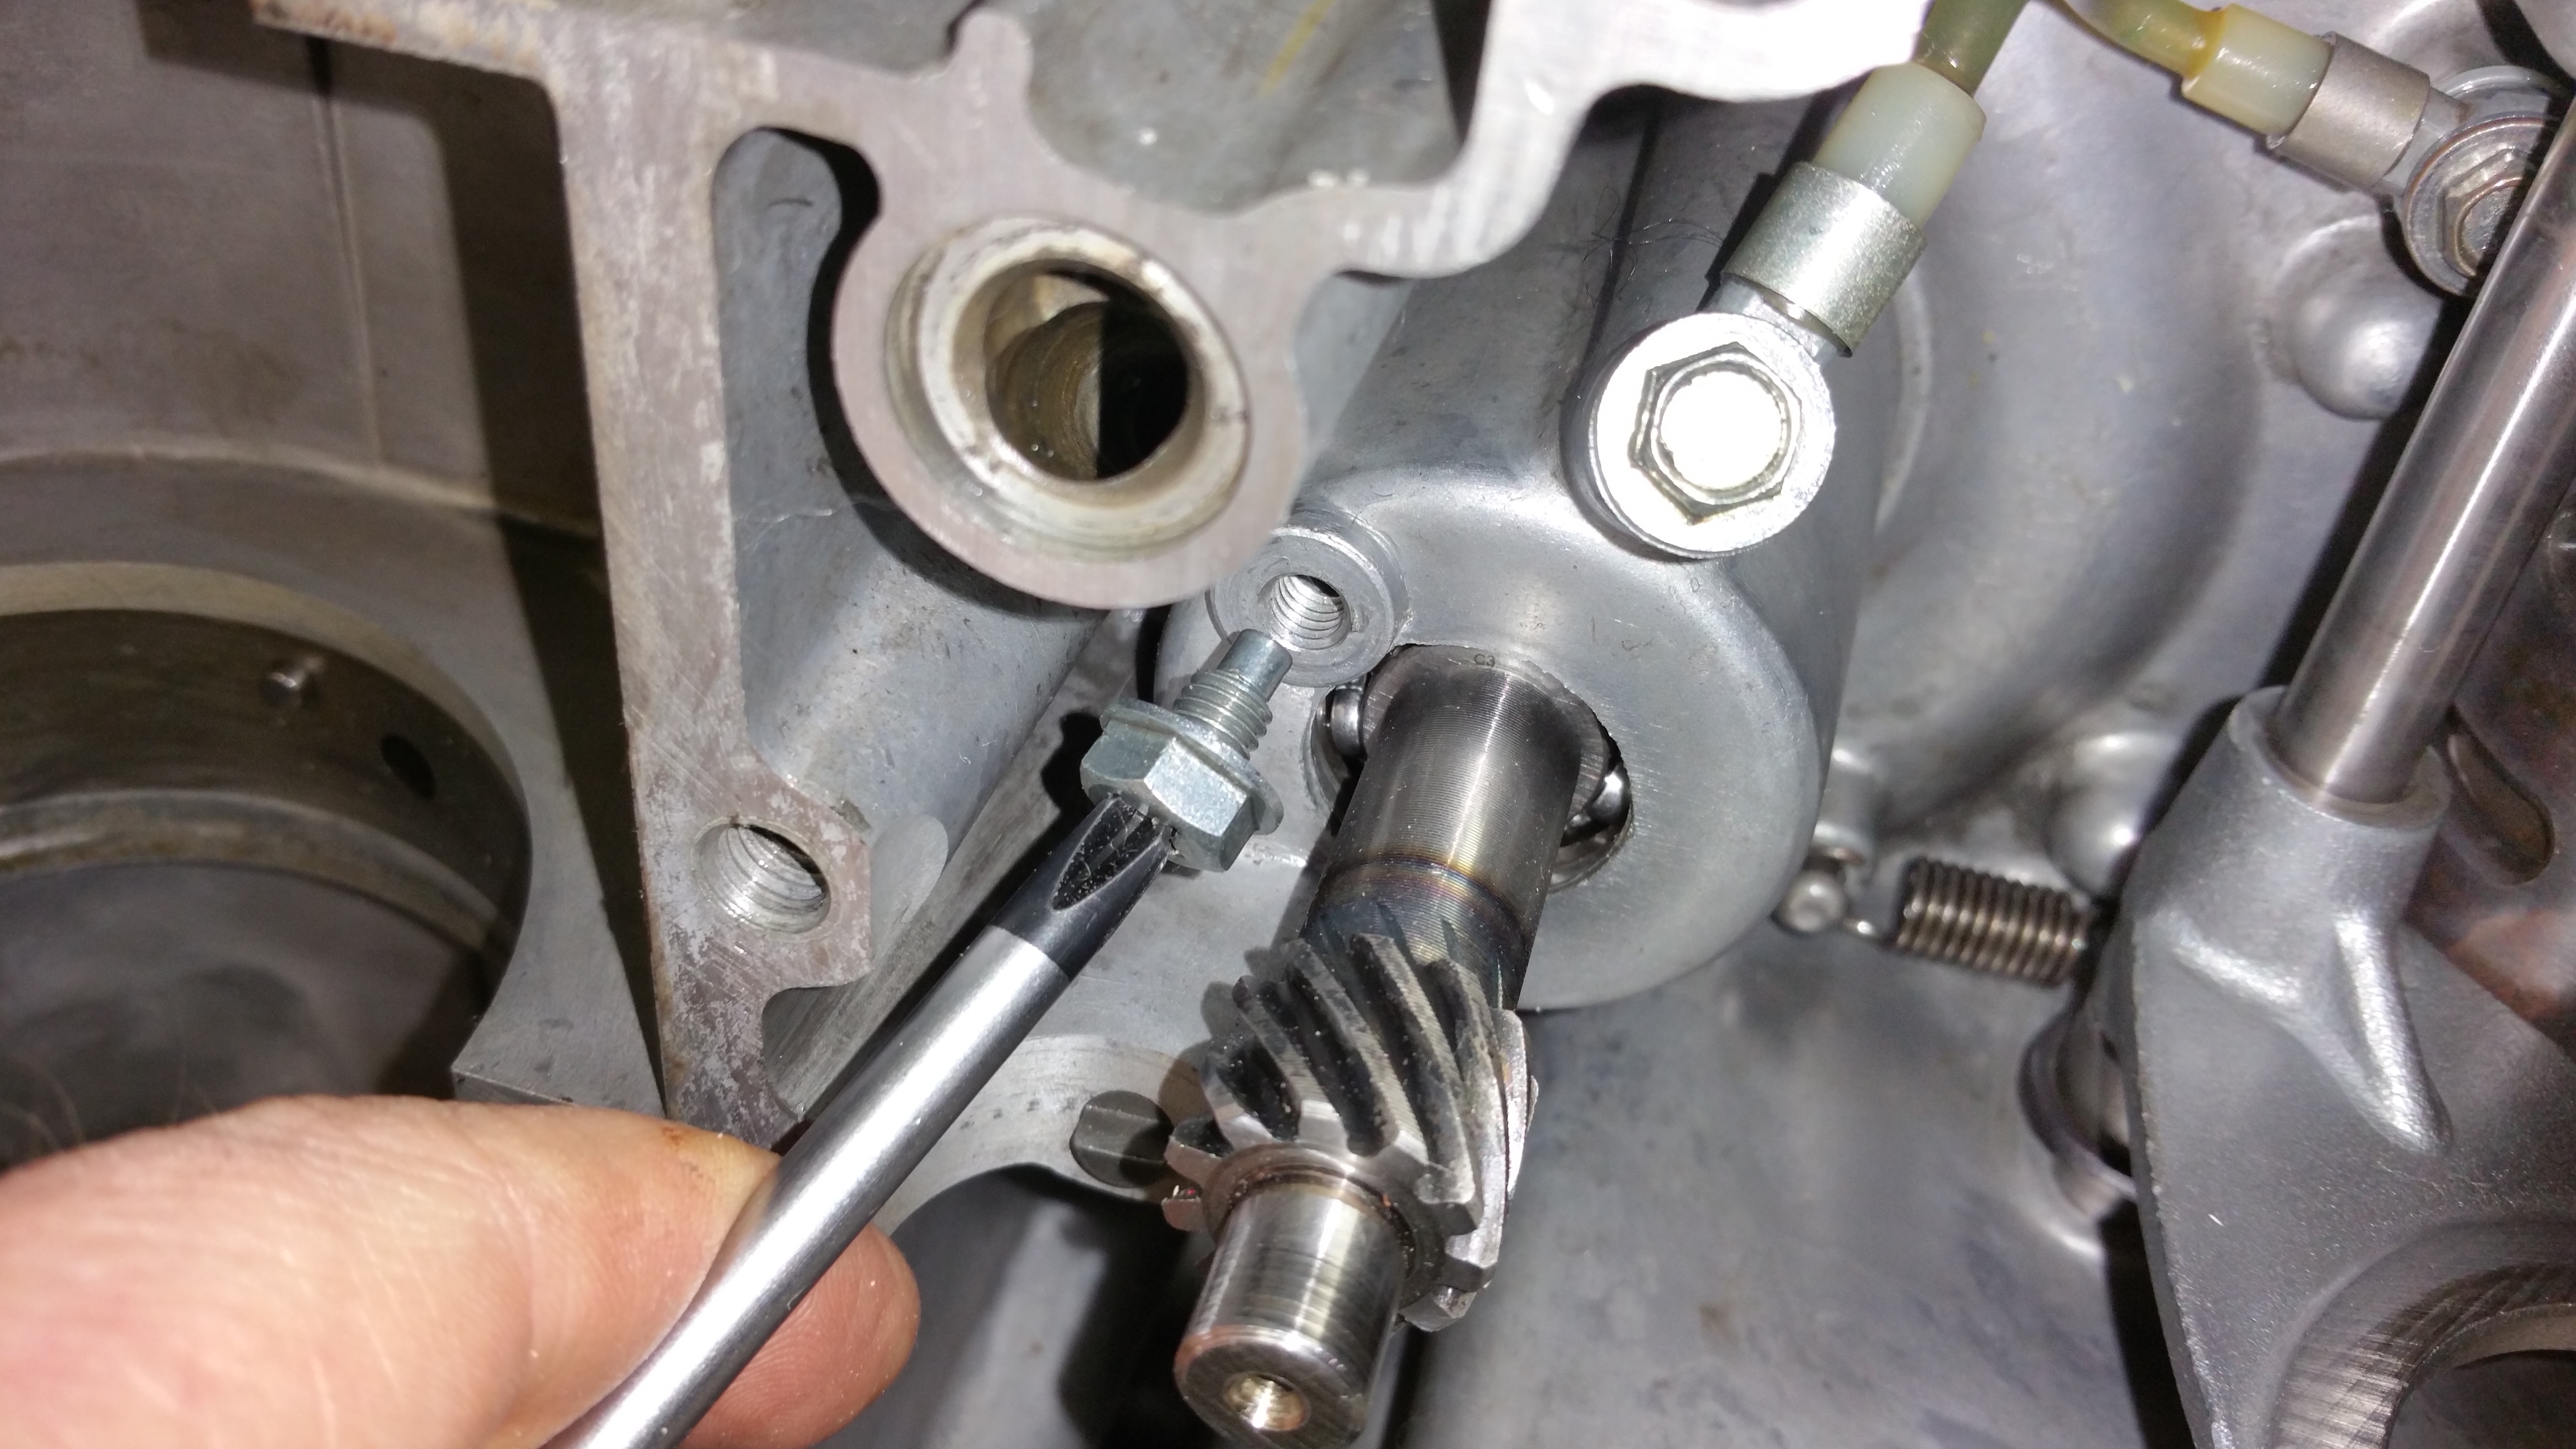
Secure the pump using the correct screw. 6-10 Nm.
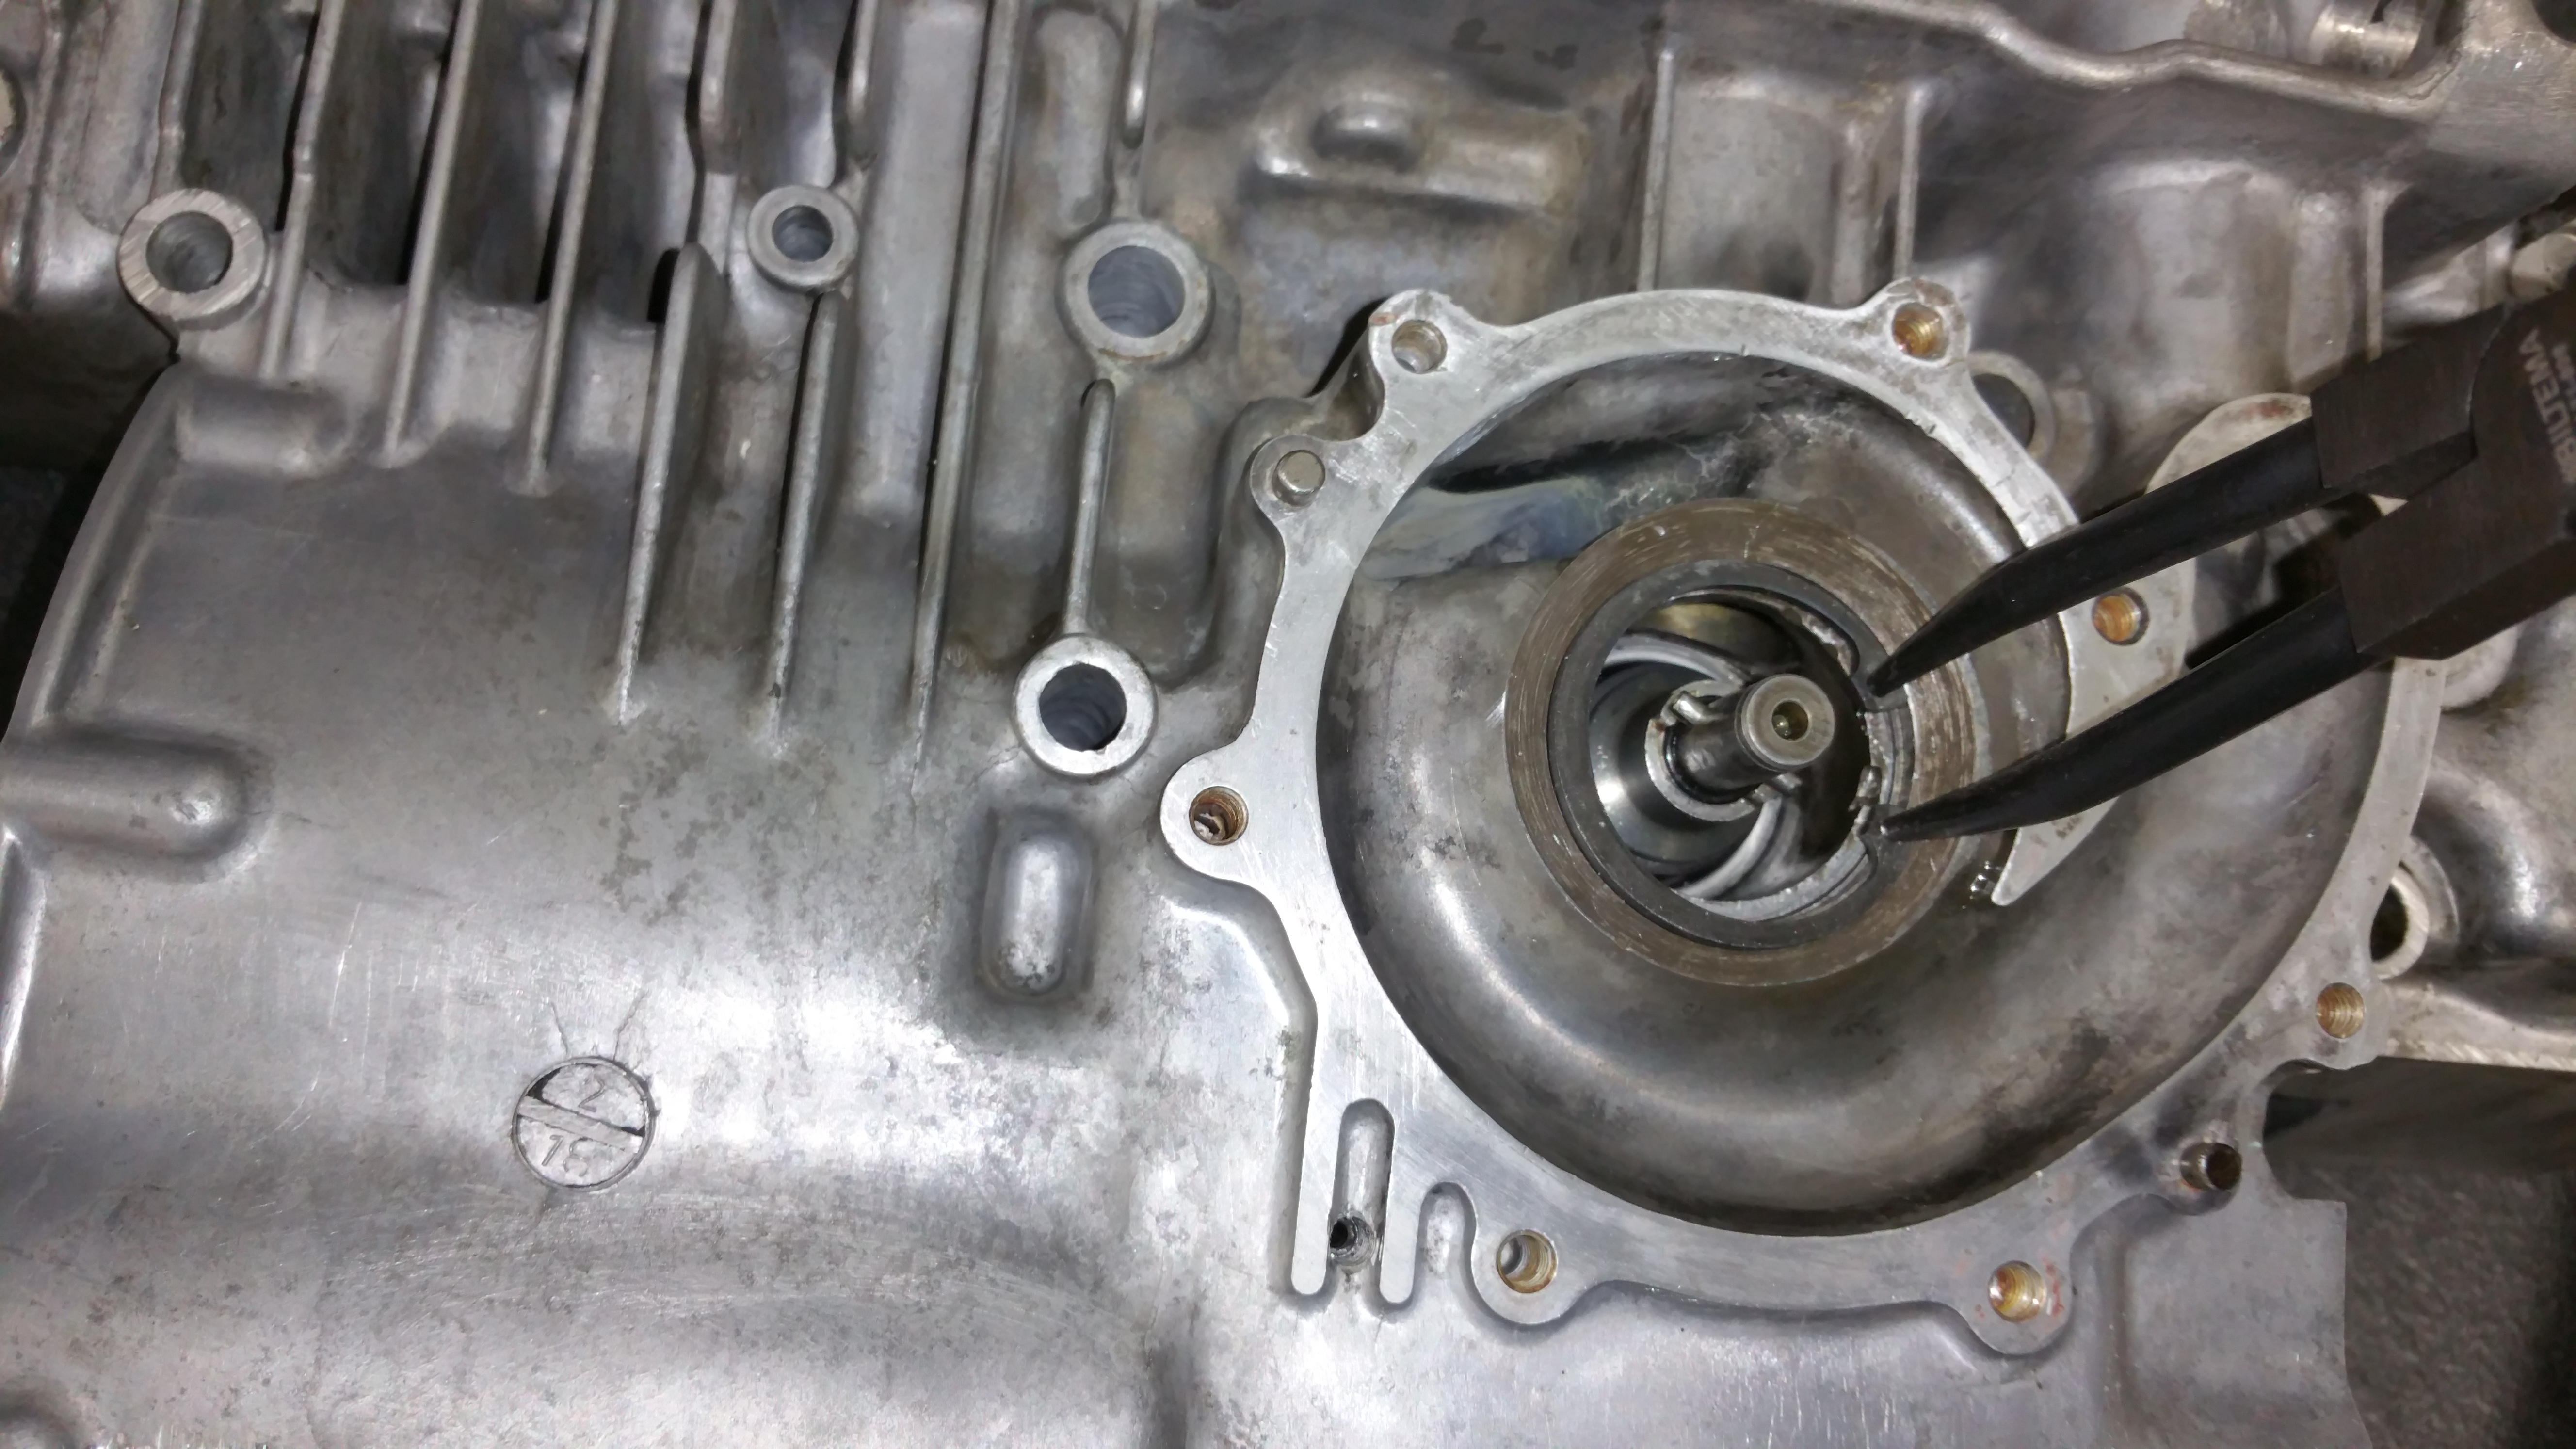
Mount the circlip

Mount the impeller
Mount the circlip

In addition to the new paper gasket you can add a thin layer of silicone gasket to secure the sealing

Fasten the bolts, 6-10 Nm according to the service manual.
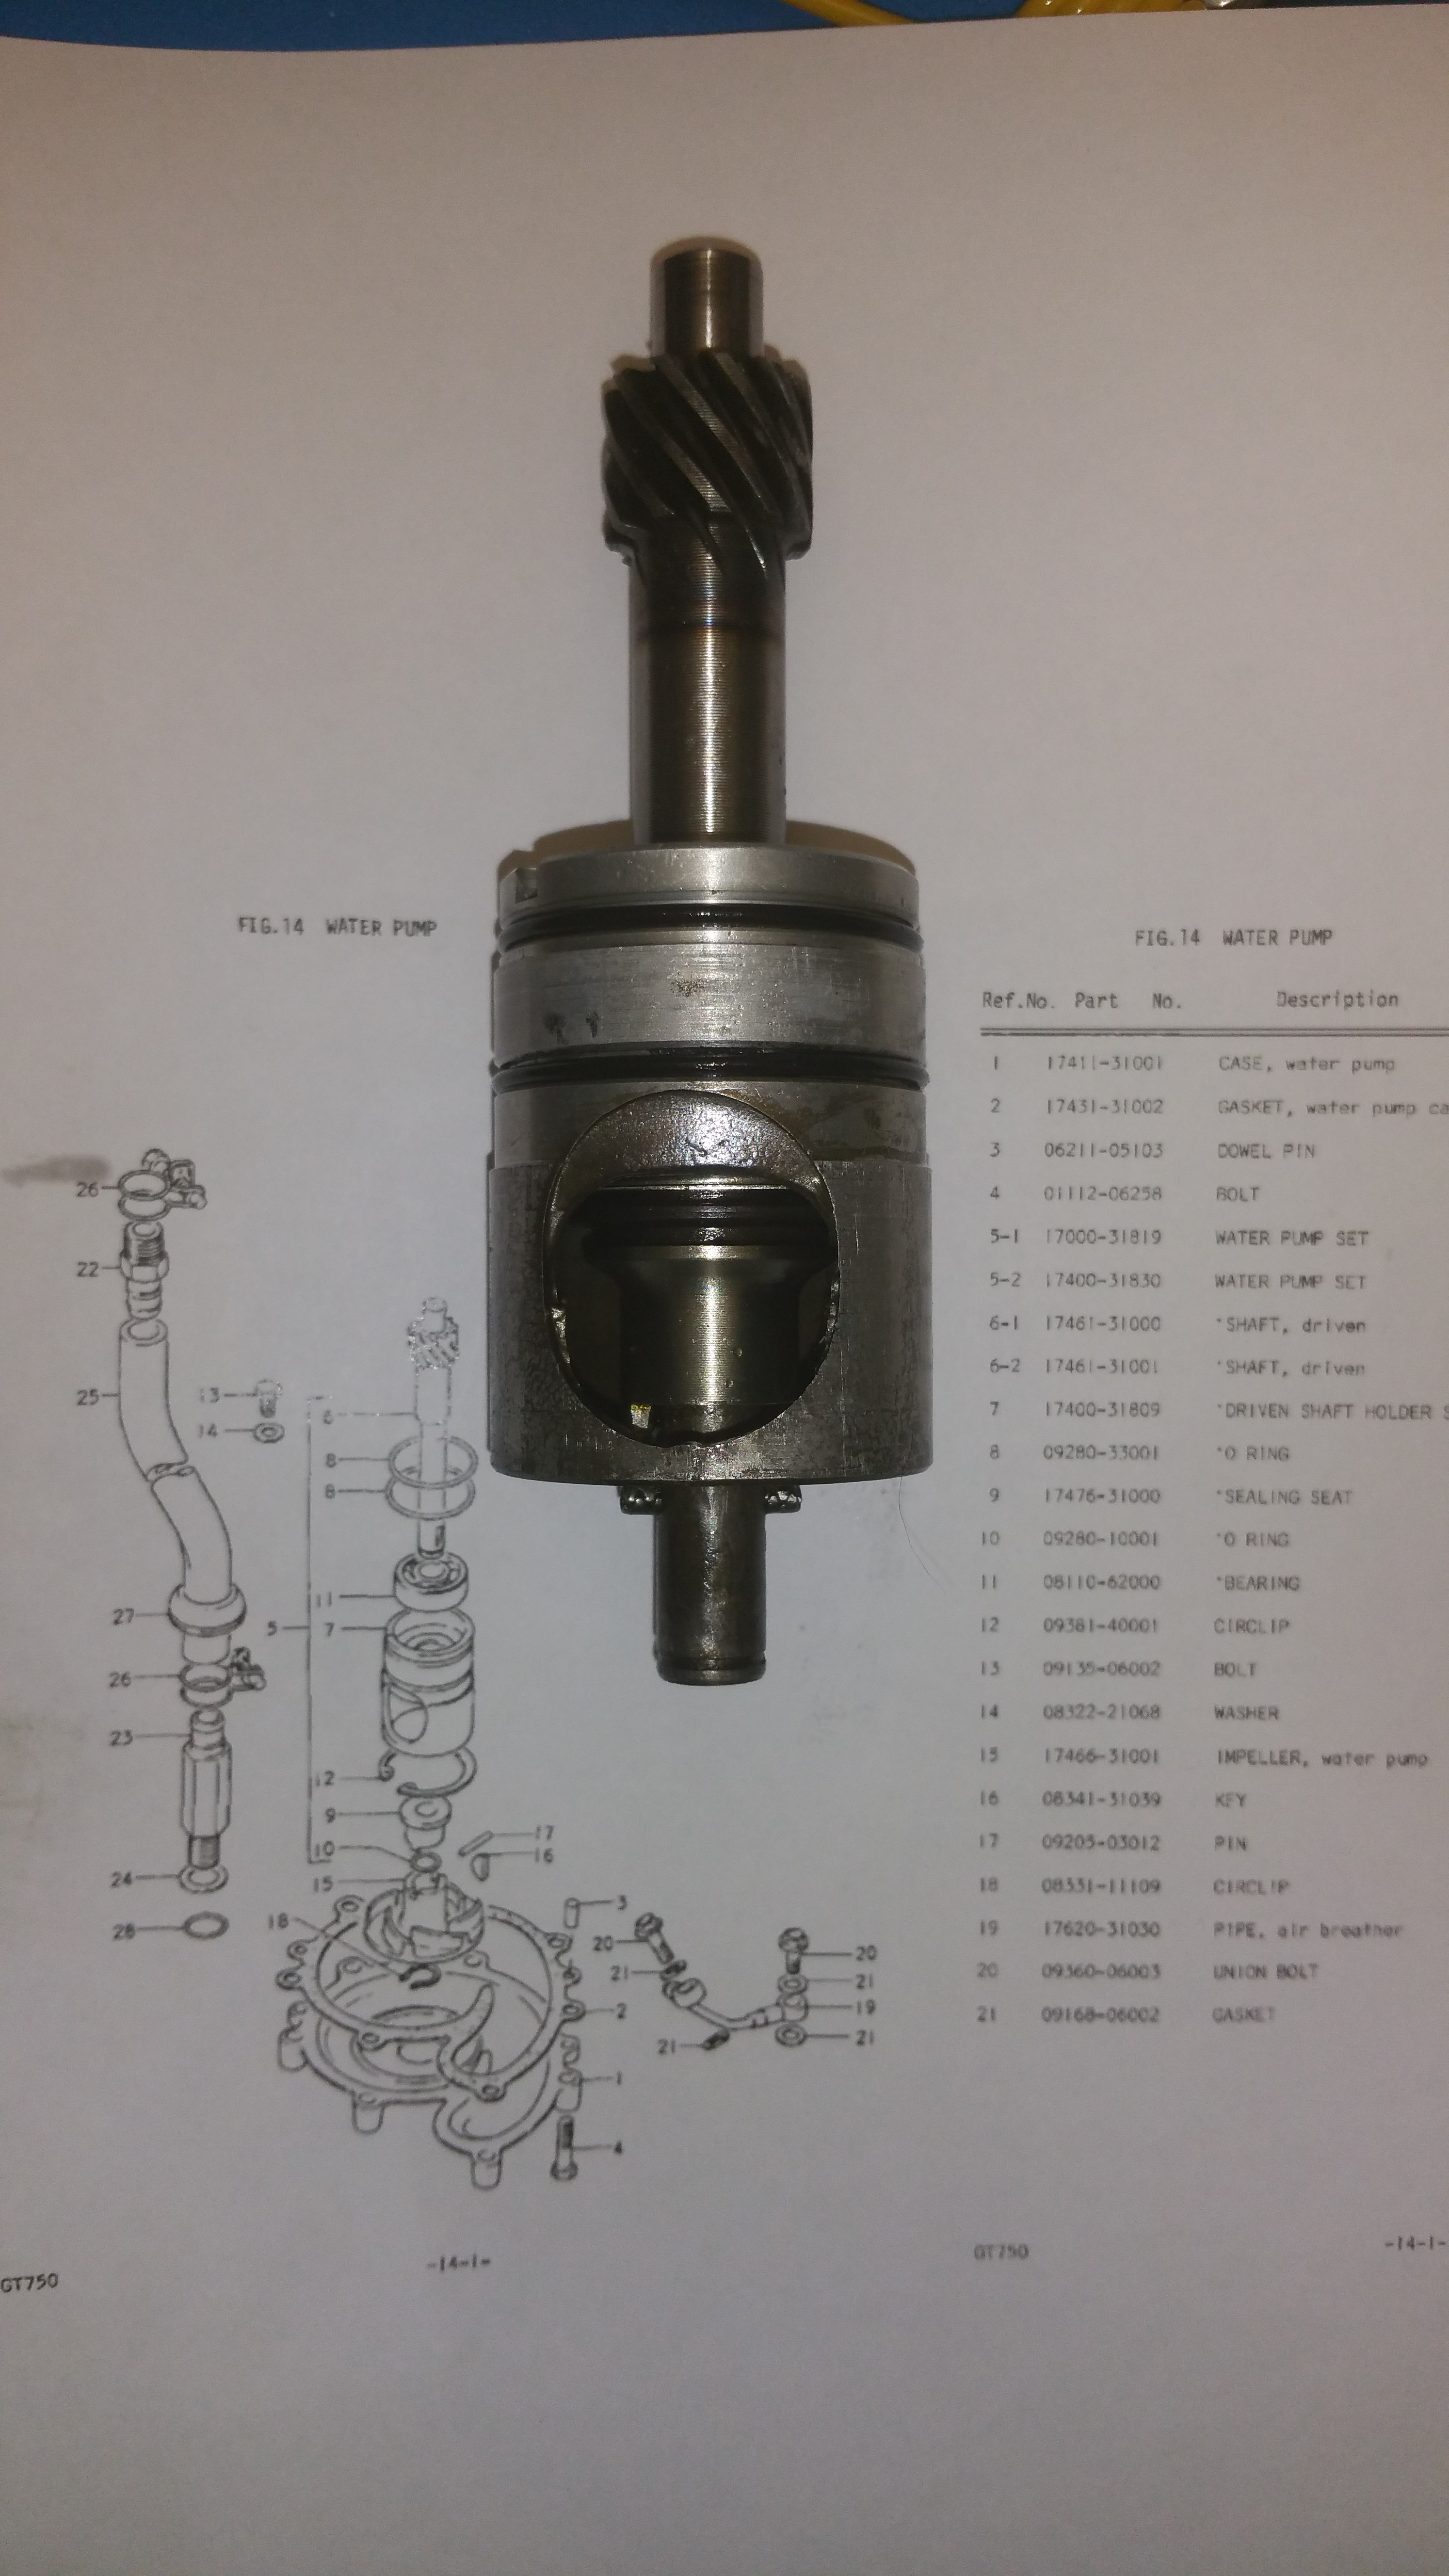
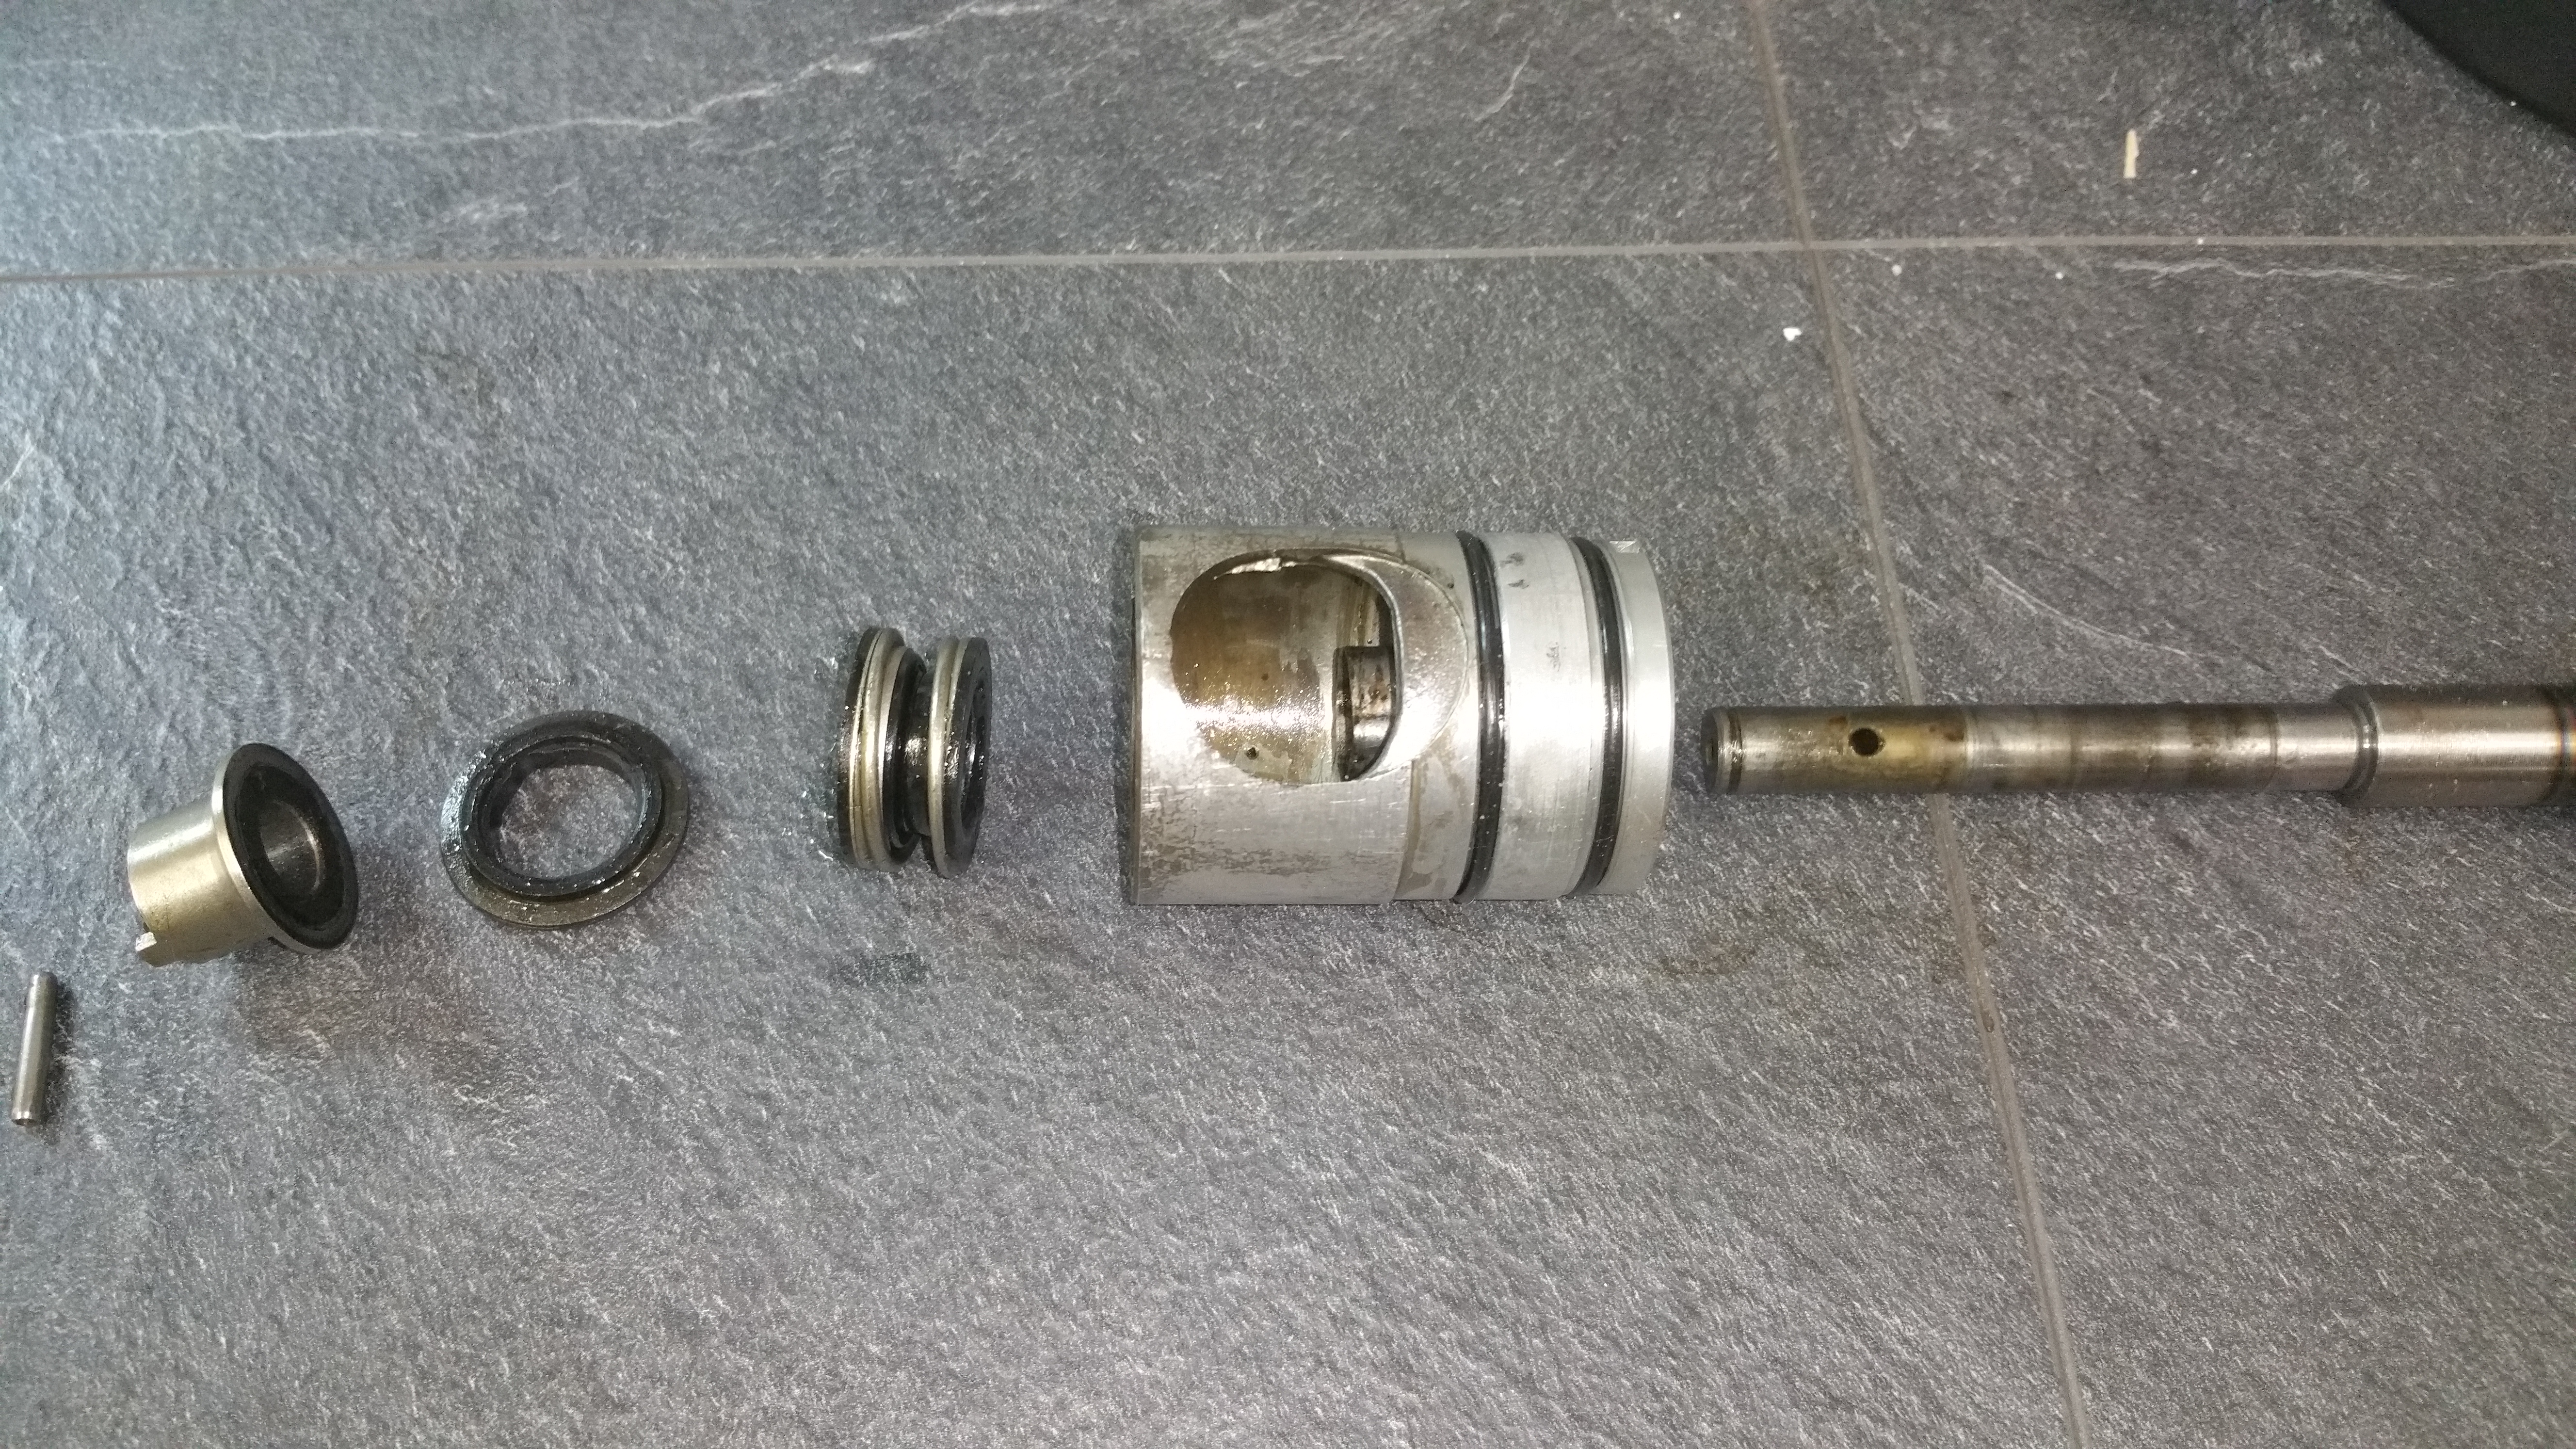
I have got the water pump kit from GT Reiner in Germany and done the overhaul of the pump today. Here is a summary of the job:
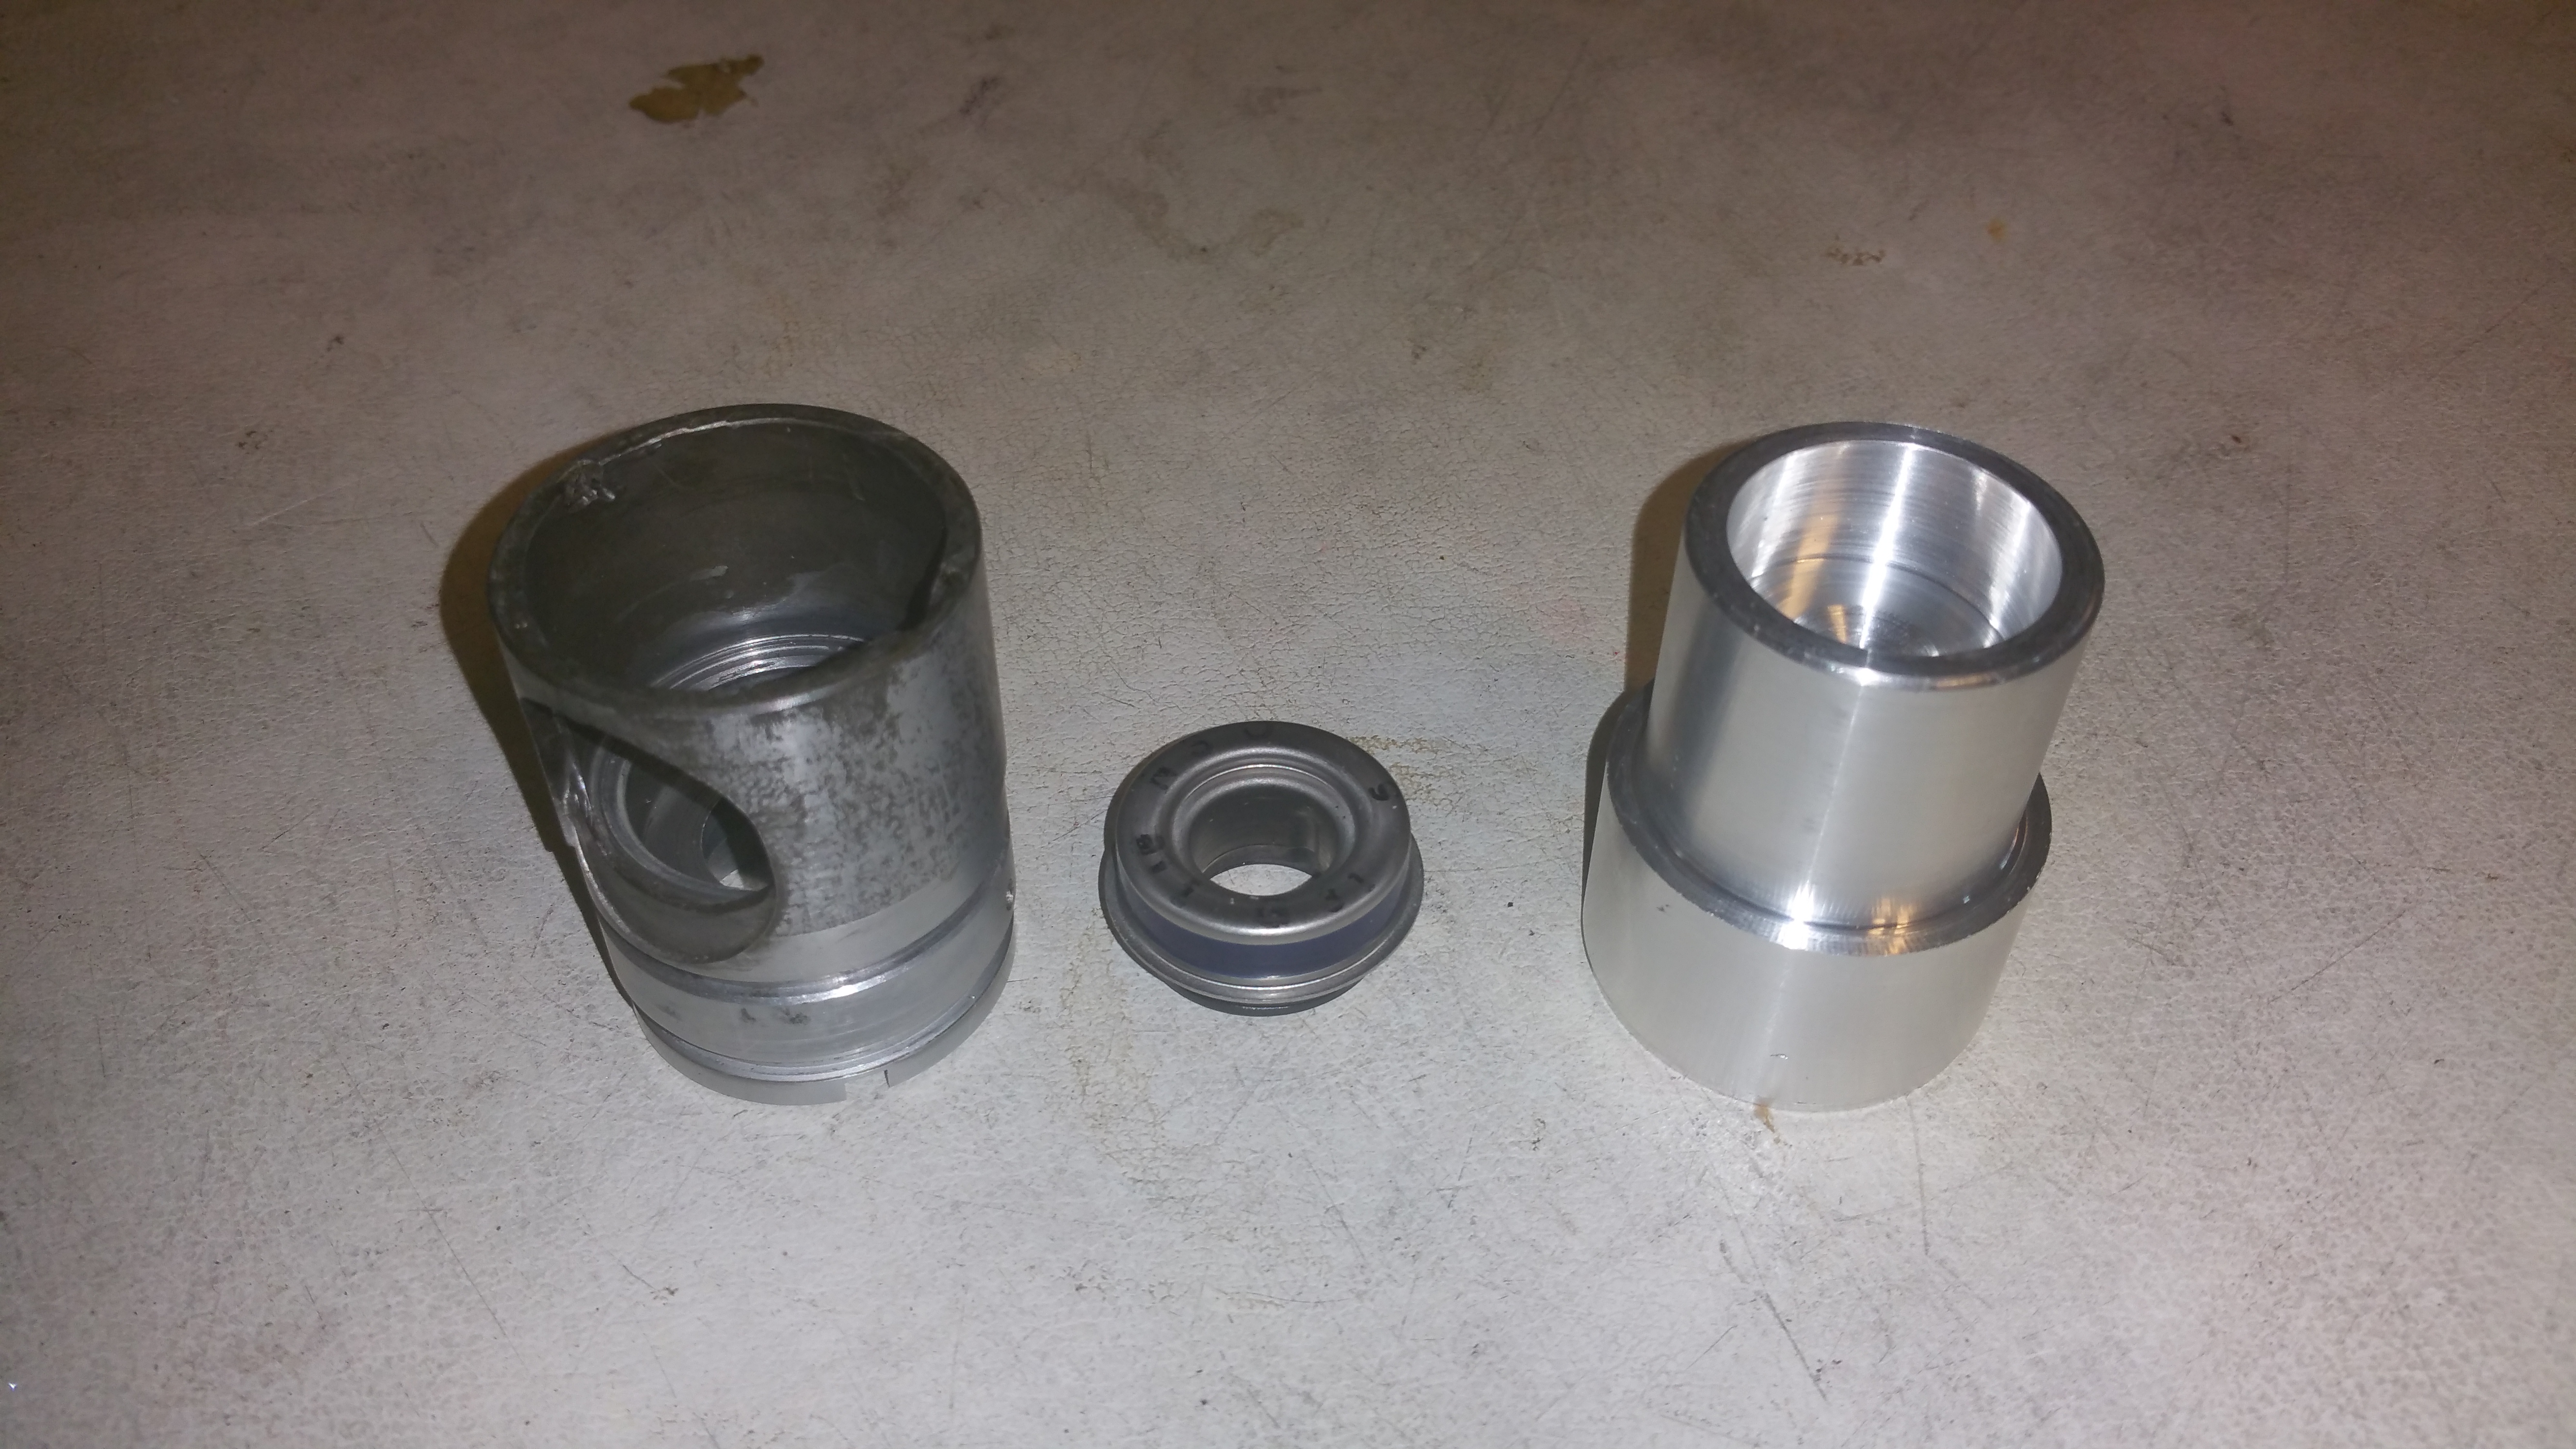
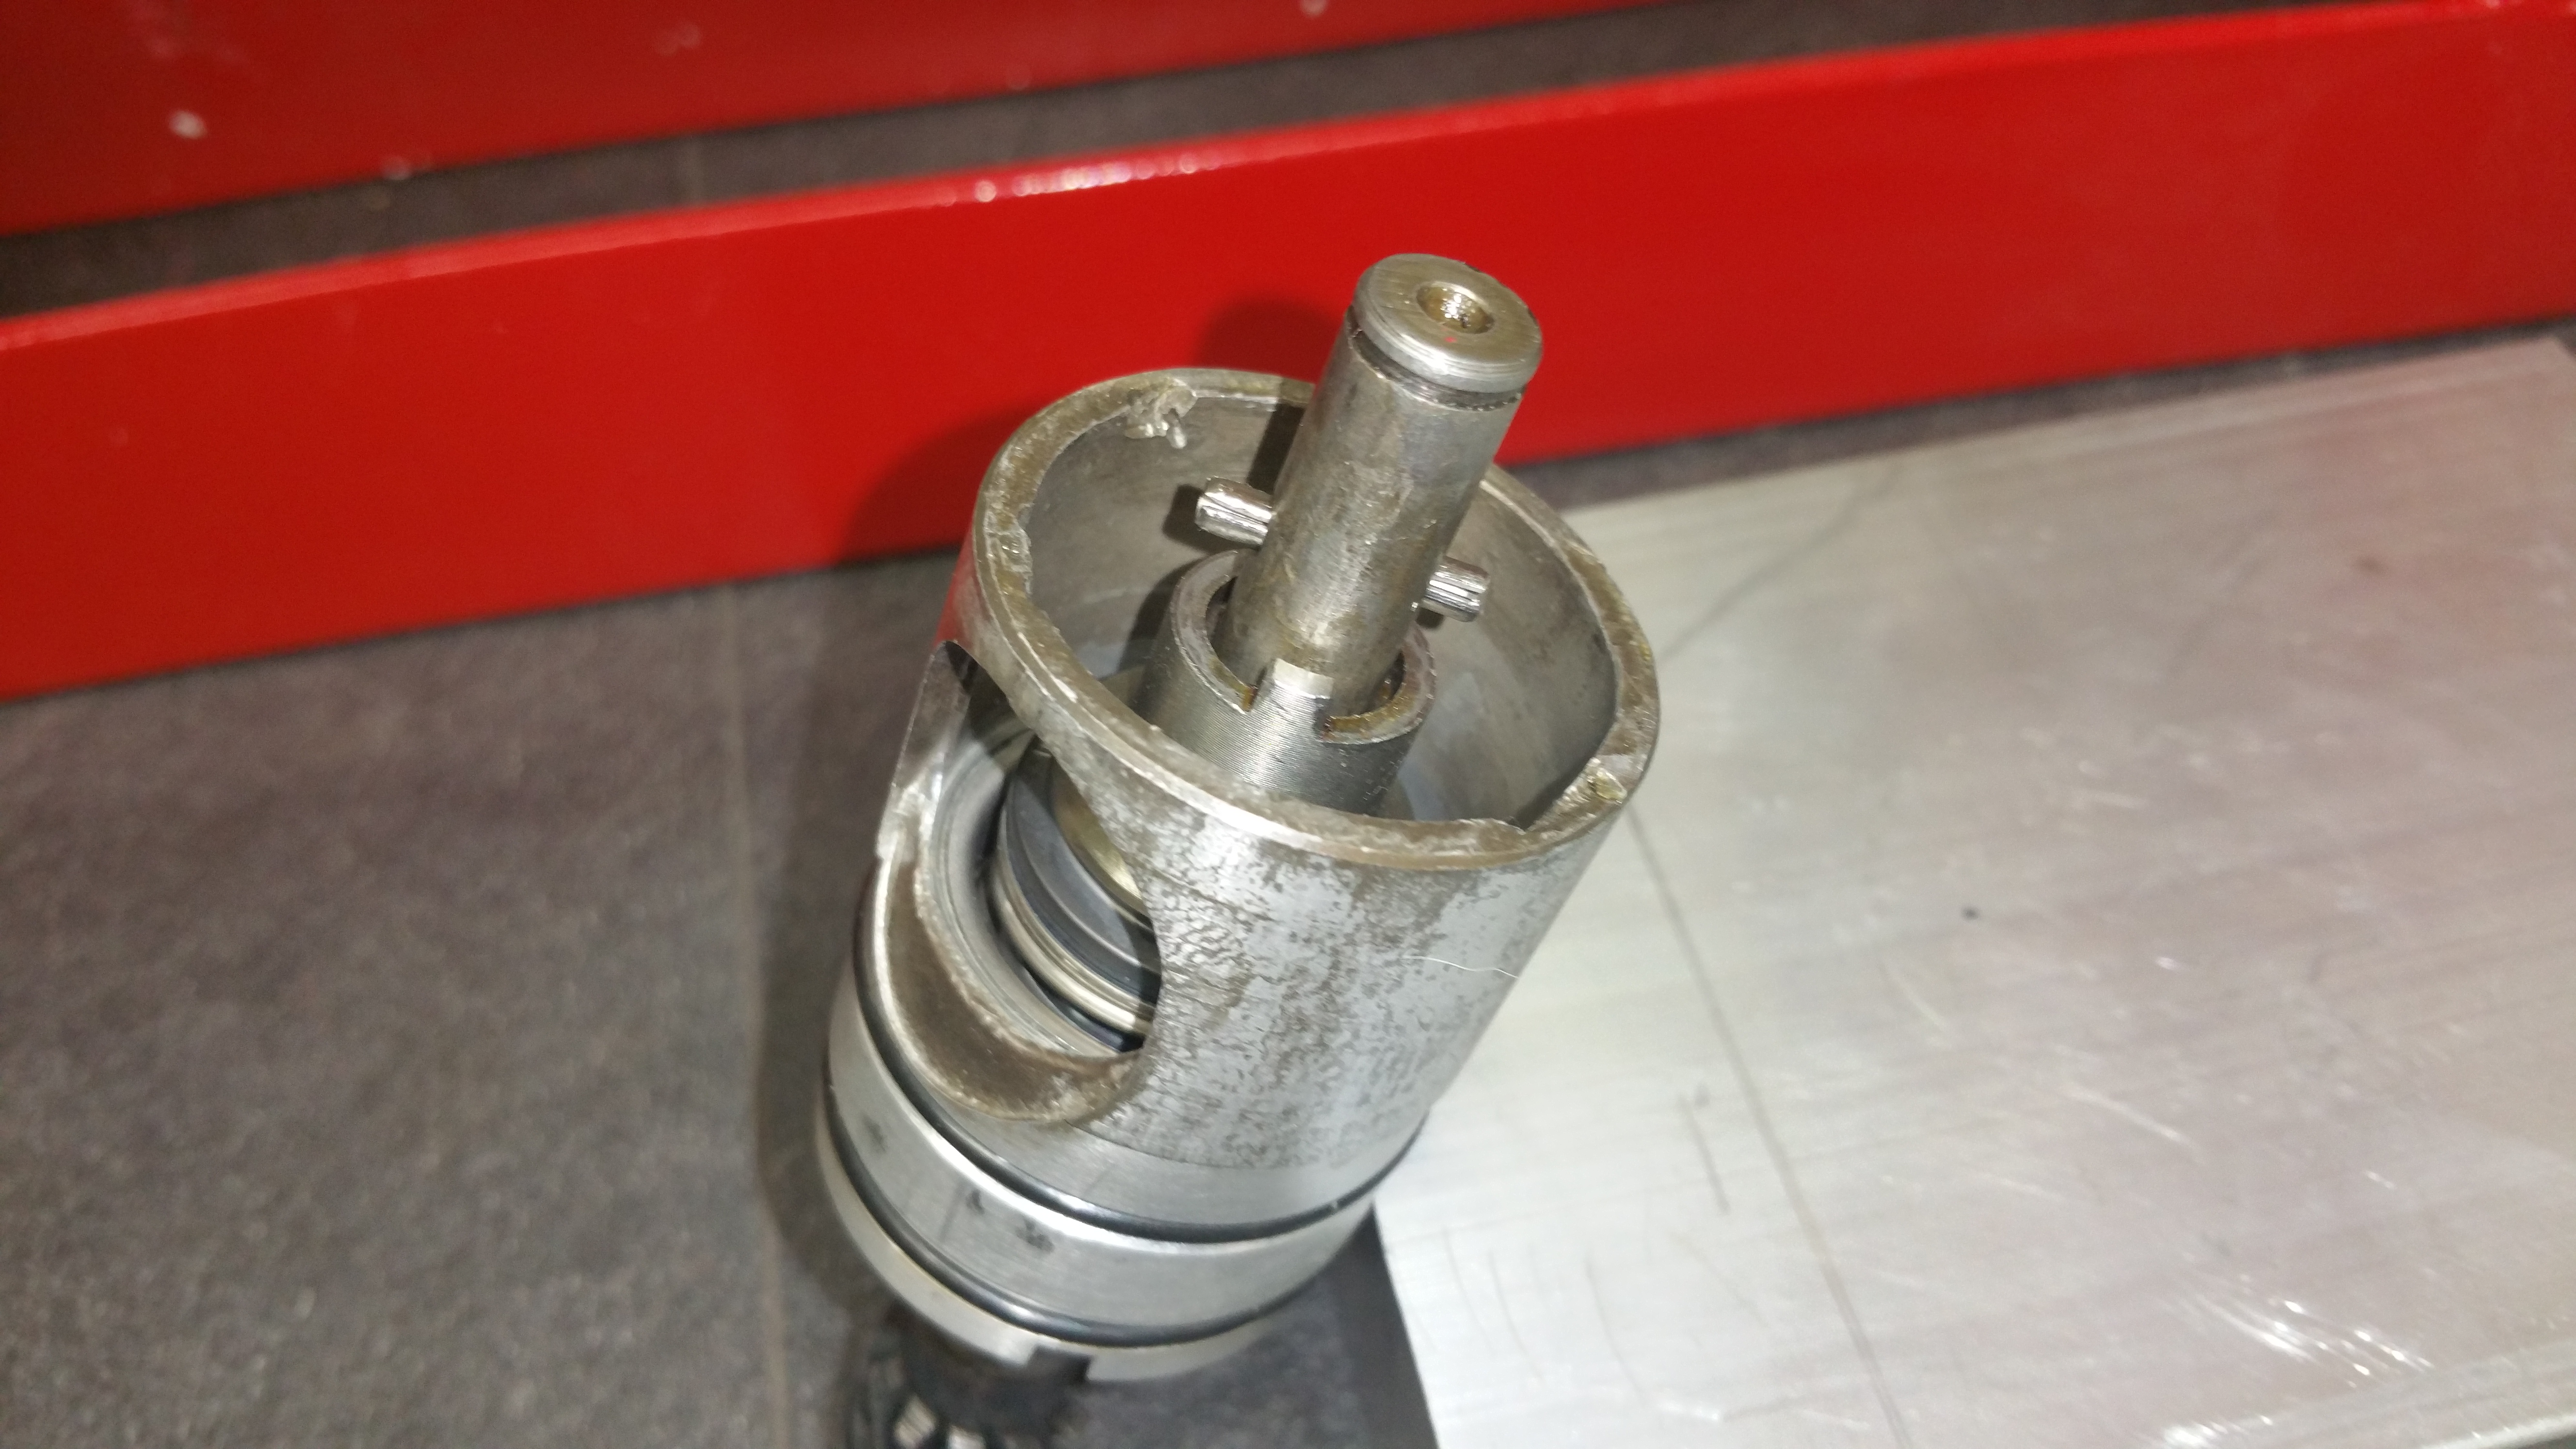
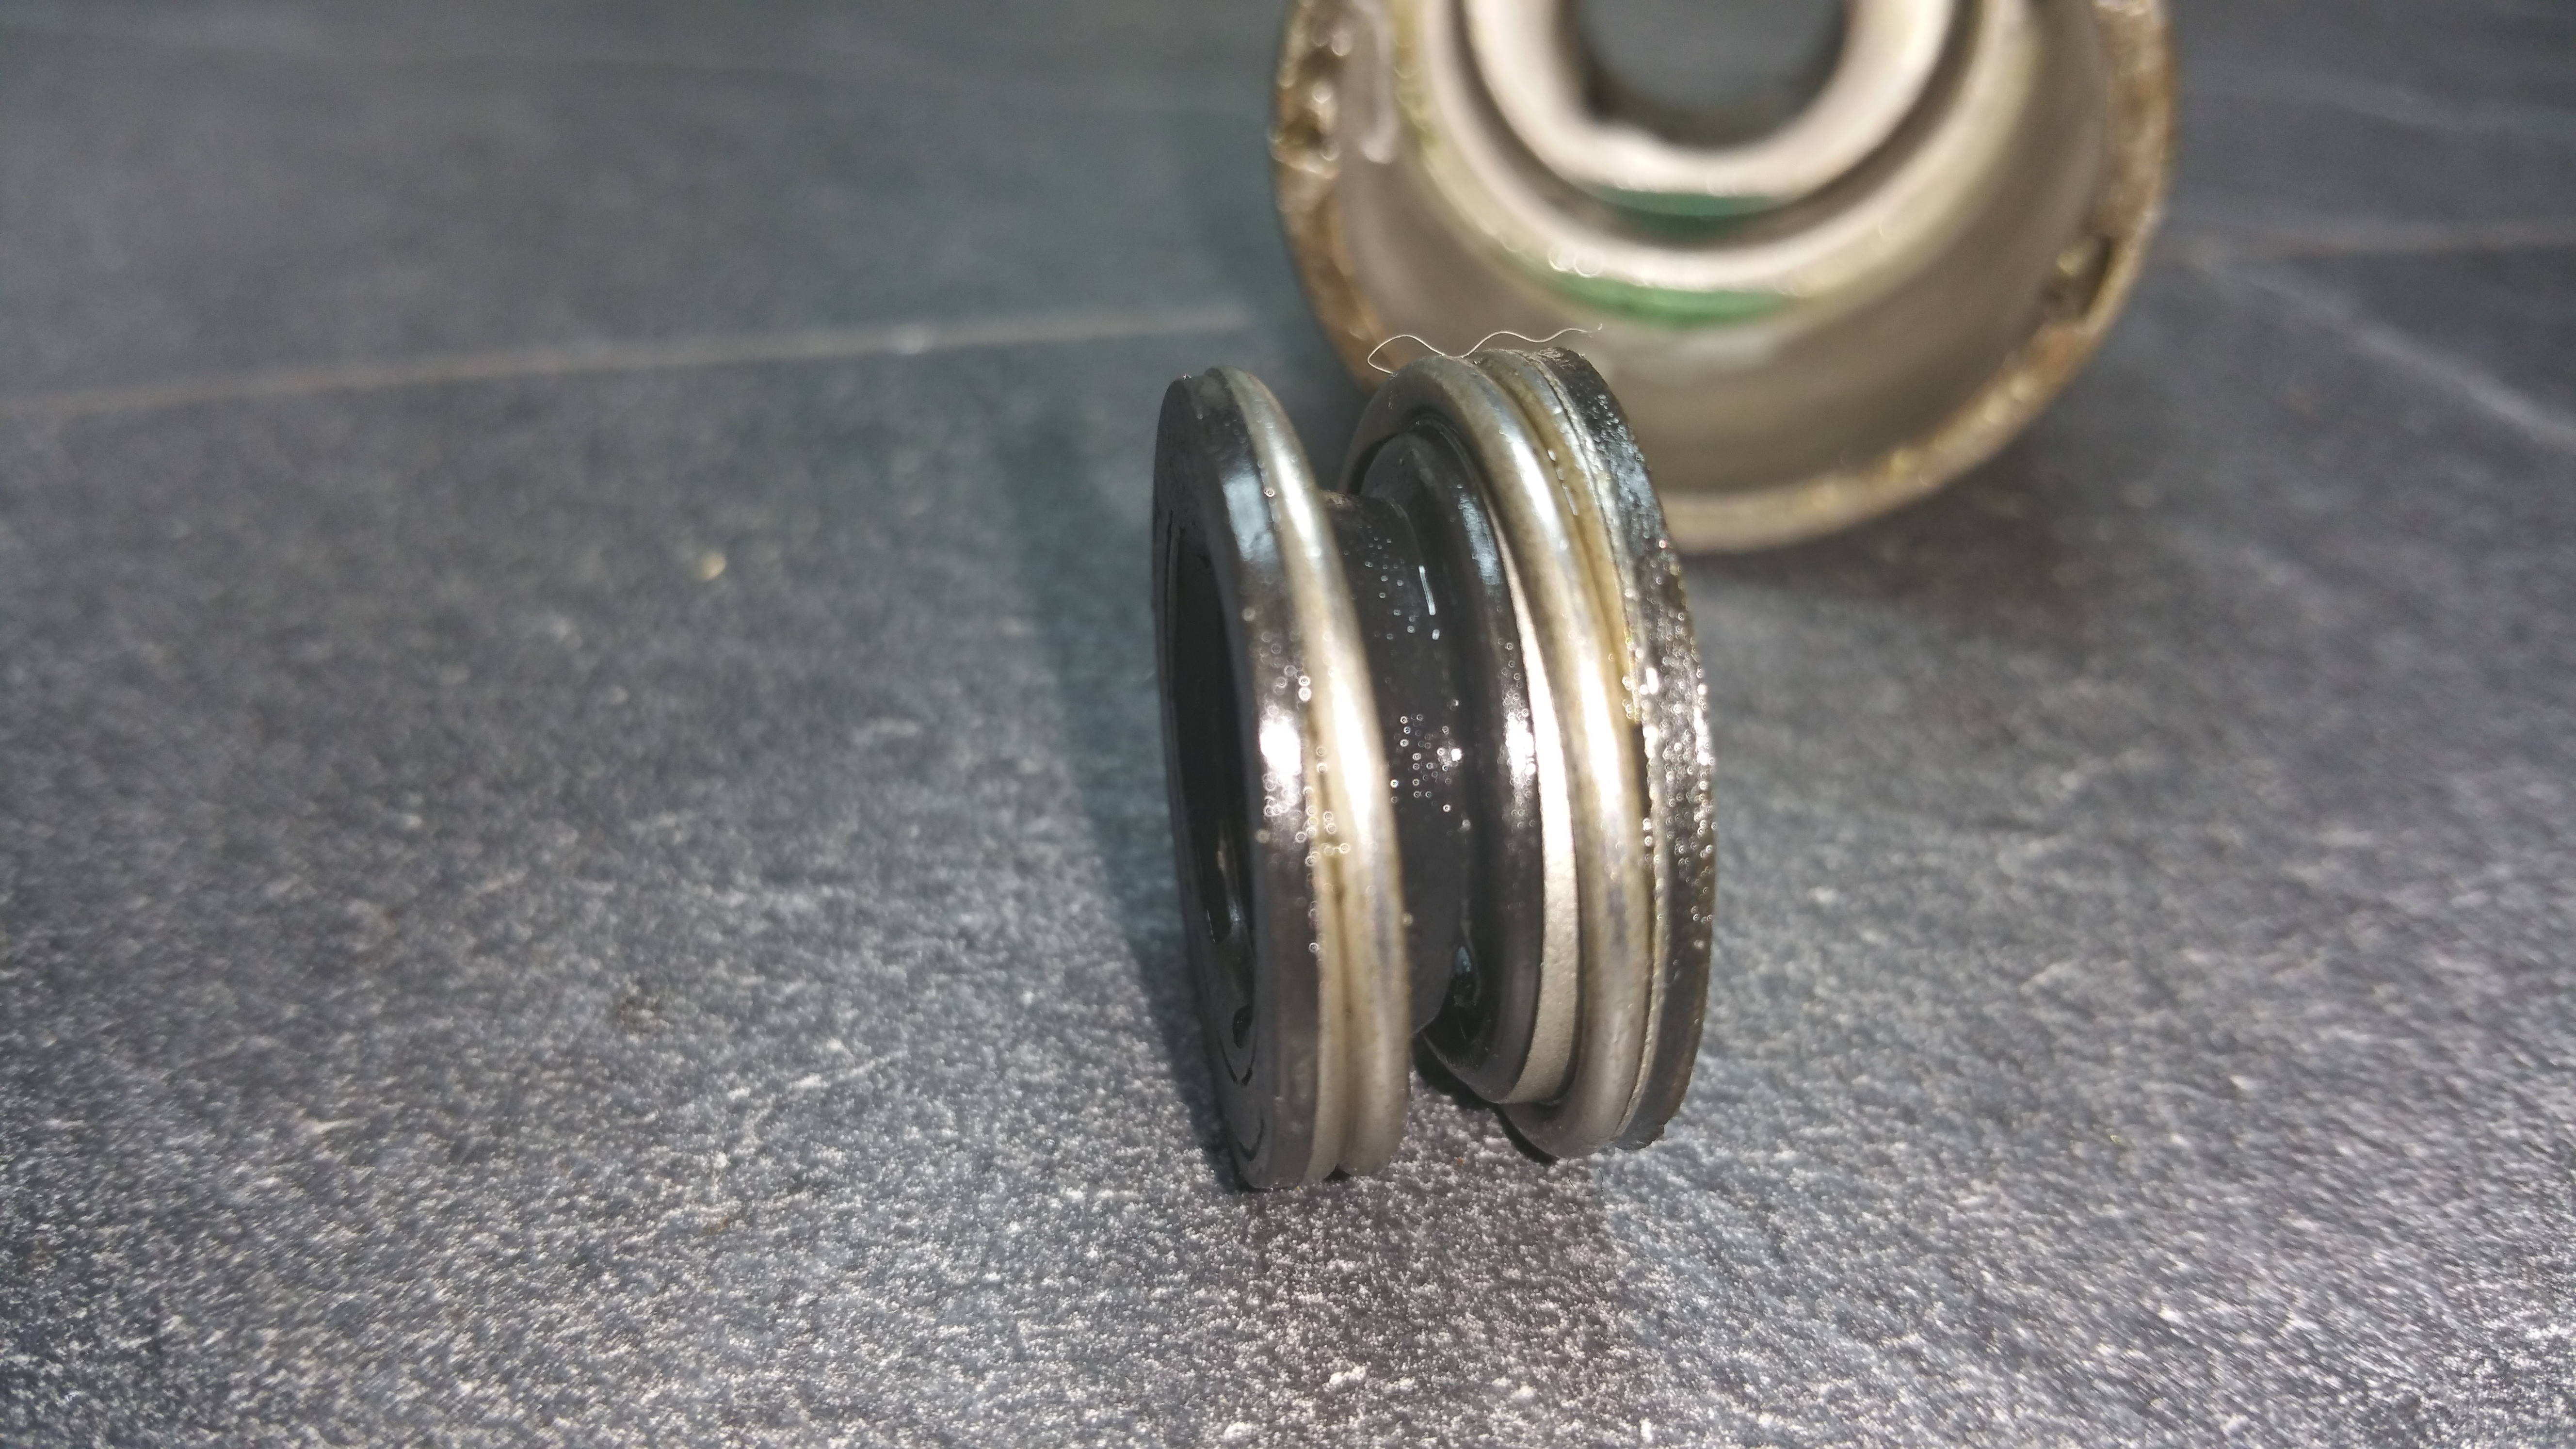
First of all, some explanation : There are two parts in the kit that is not part of any drawings in the service manual. It is not intended to repair the pump but exchange the old pump in a new one. Thanks to the kit it’s possible to repair the pump and the “hidden” parts are shown on the picture
Click on the image for details
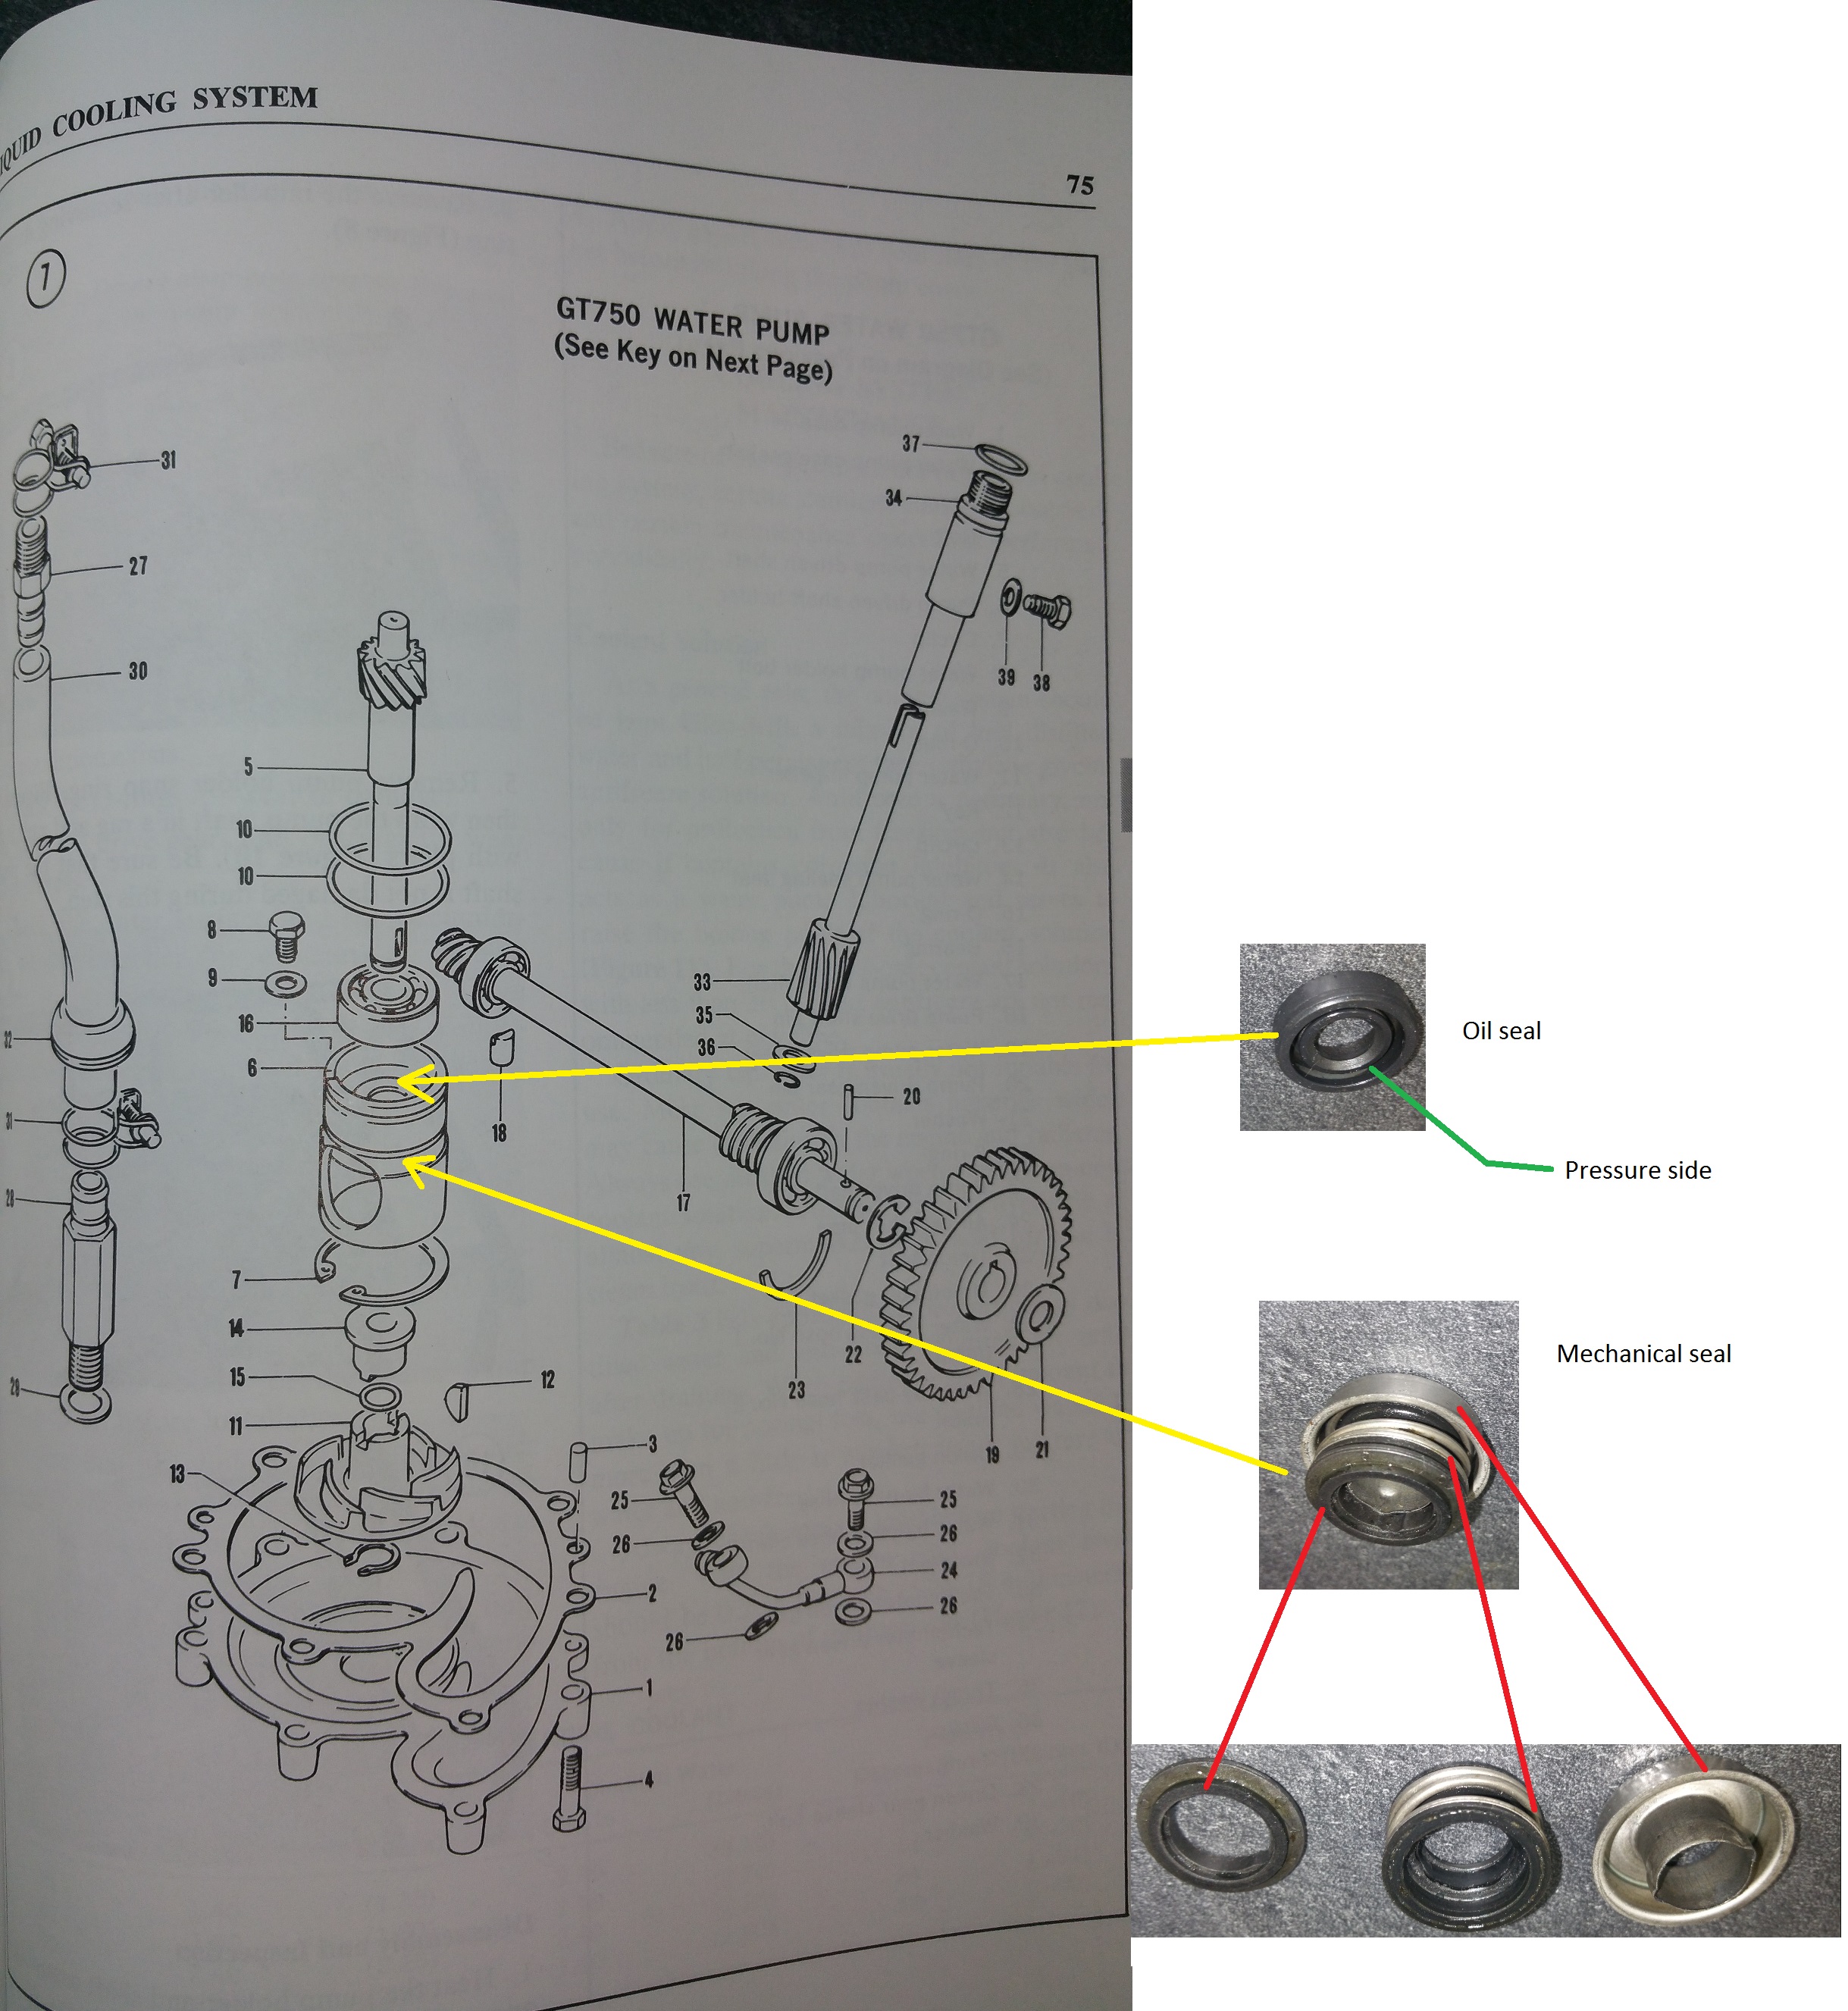
The parts not included in the drawing is the oil seal and the mechanical seal. Both labeled with a yellow arrow.
The upper part is the oil seal placed underneath the bearing.
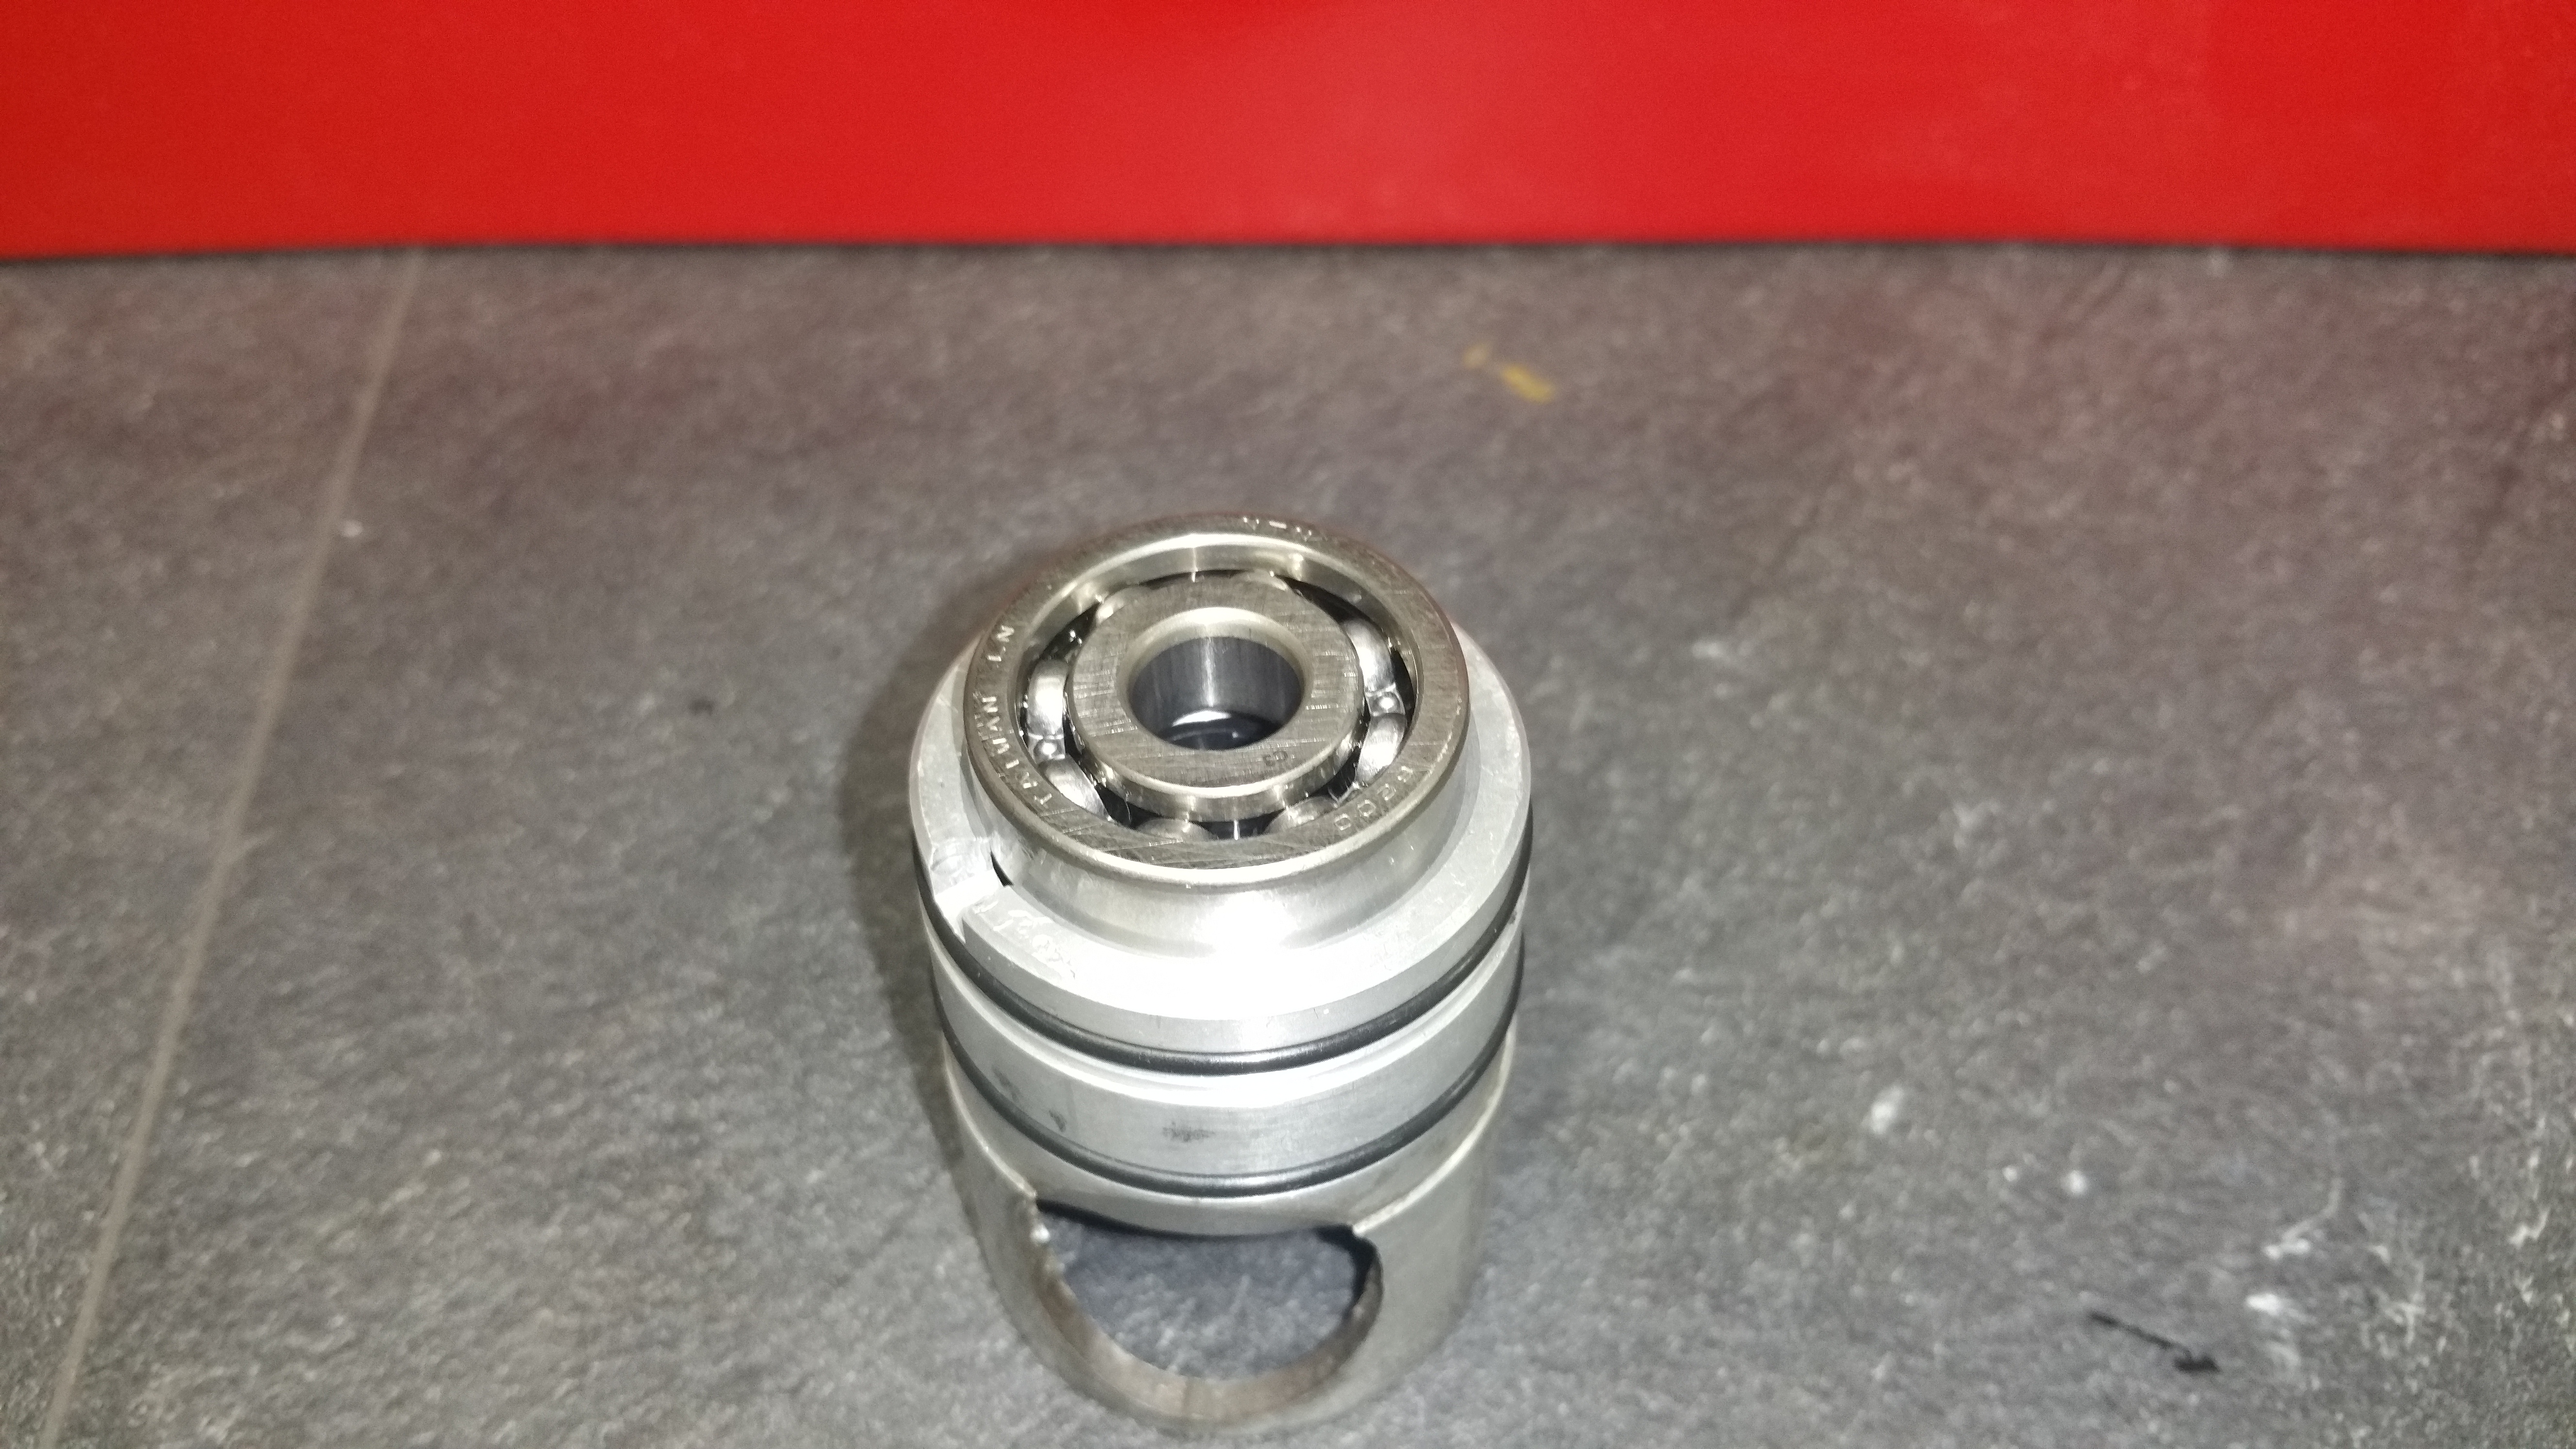
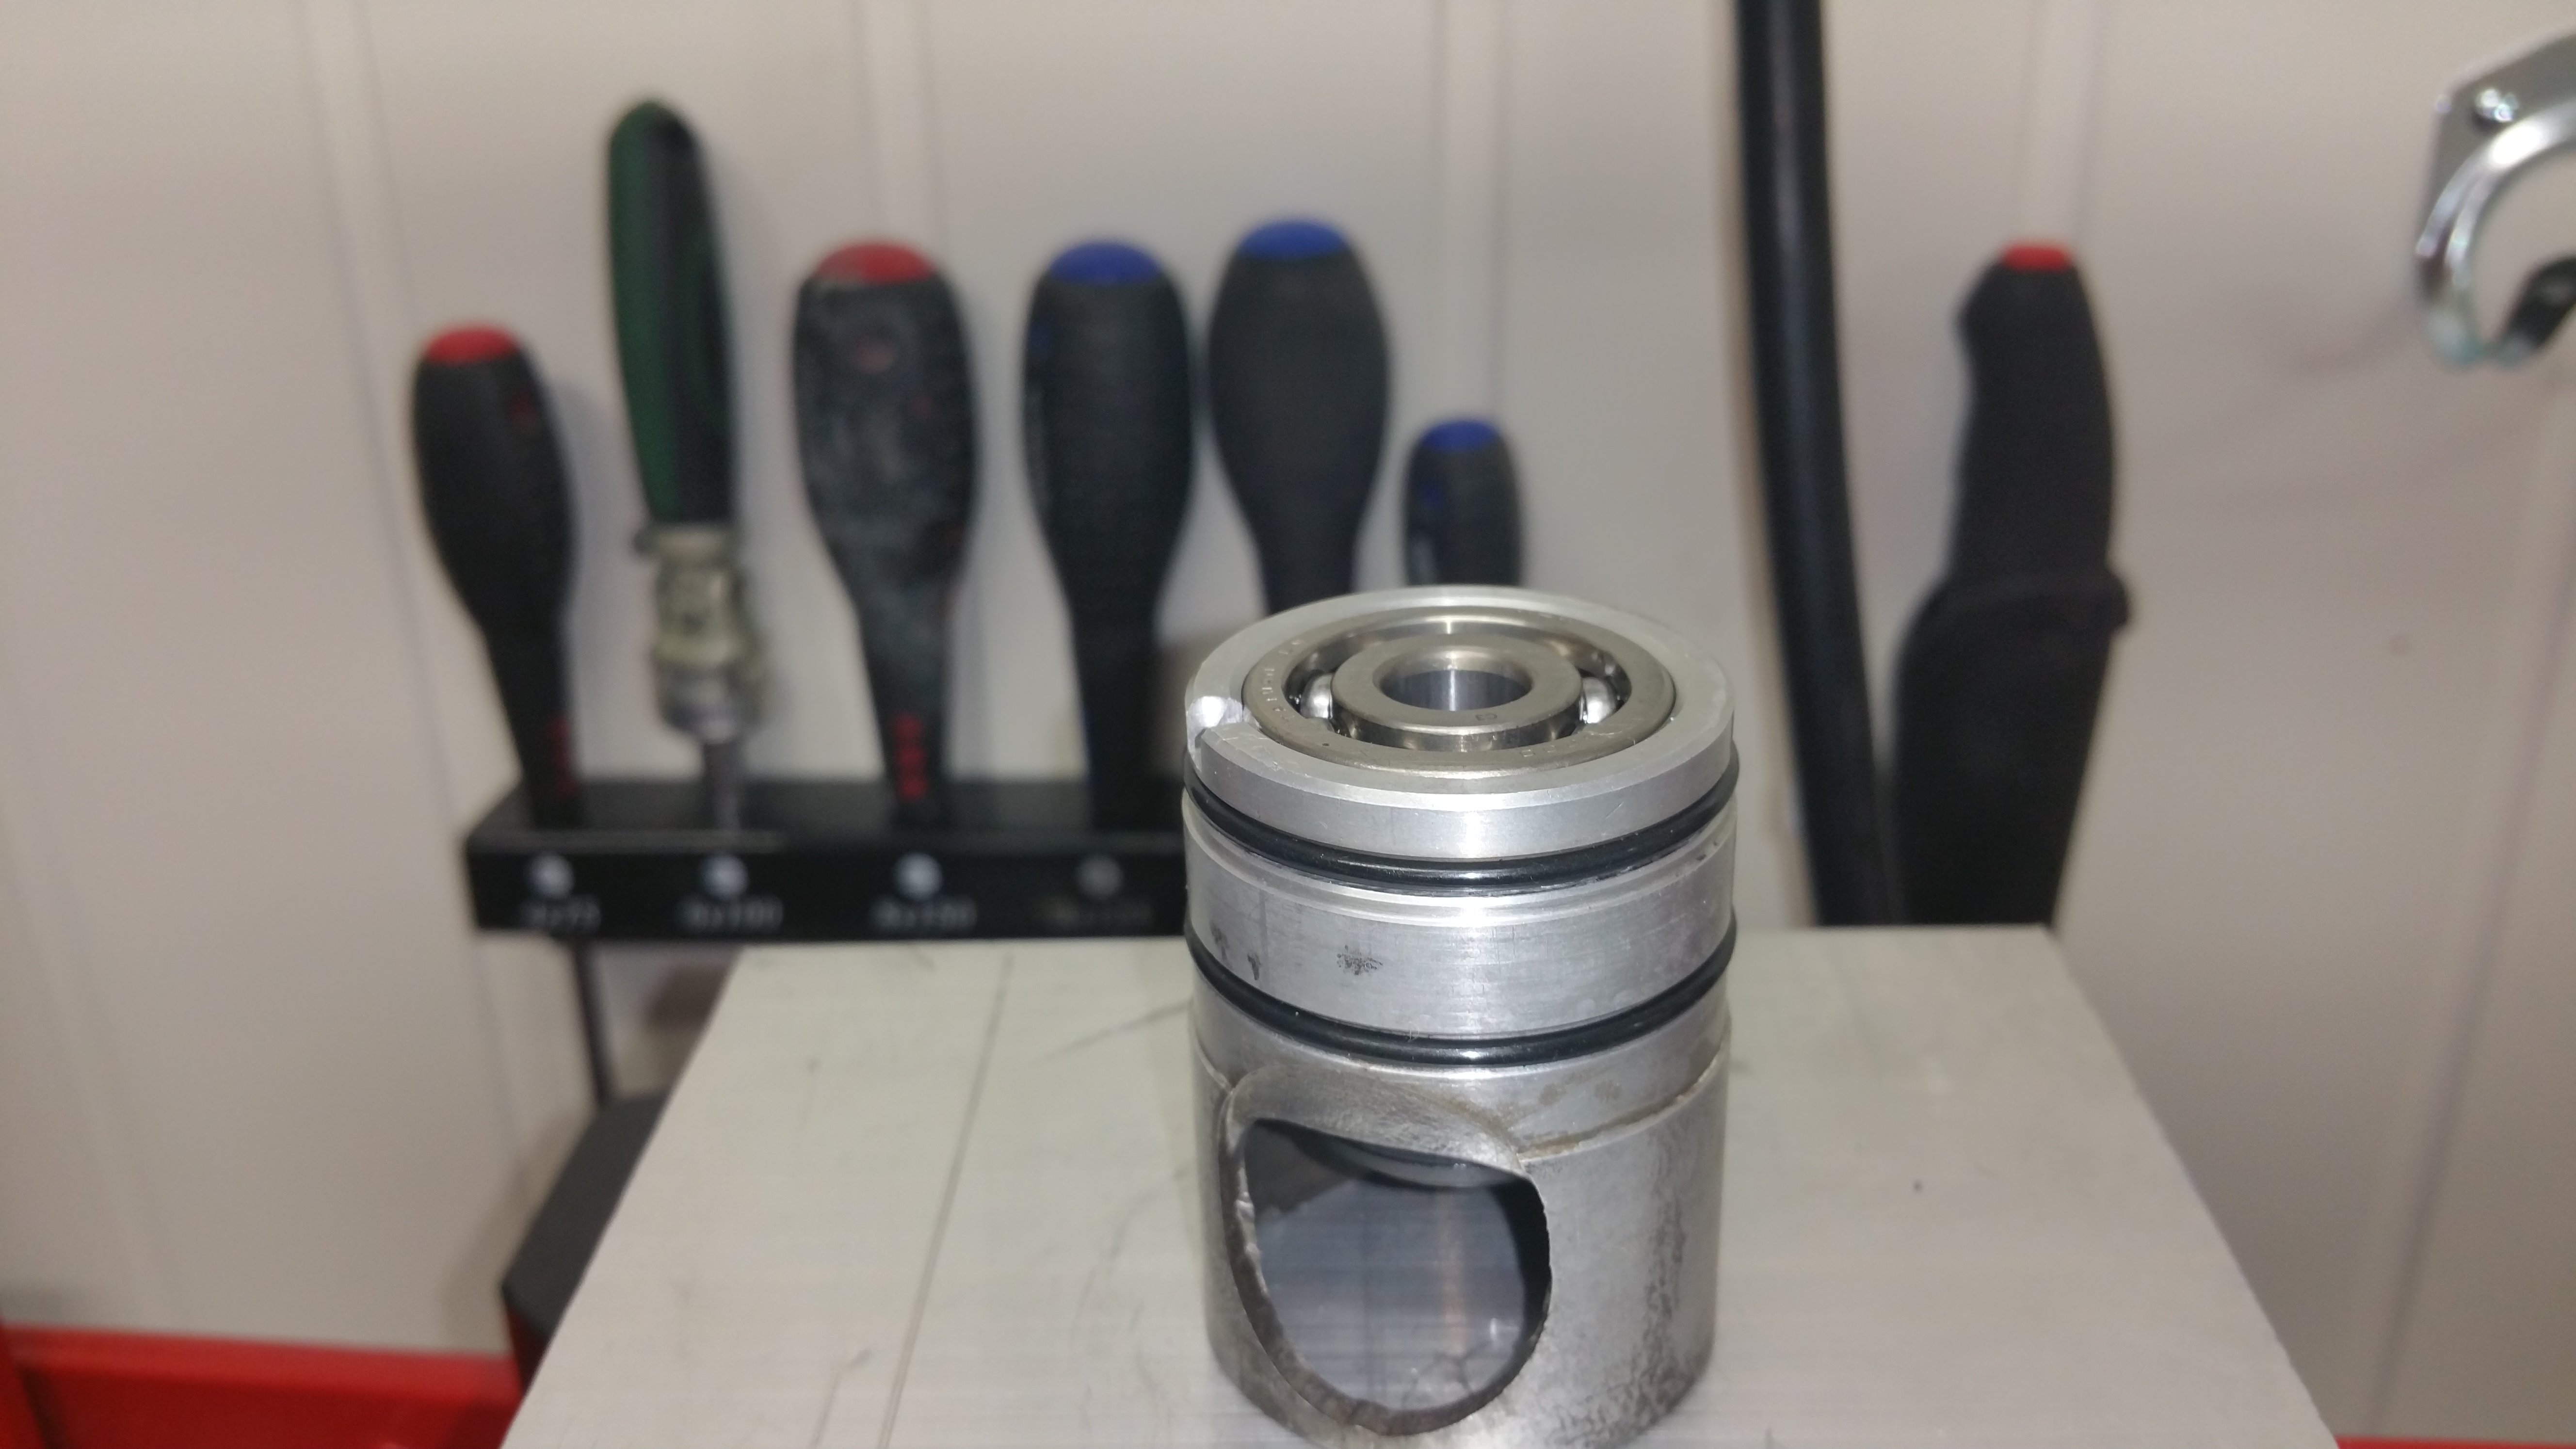
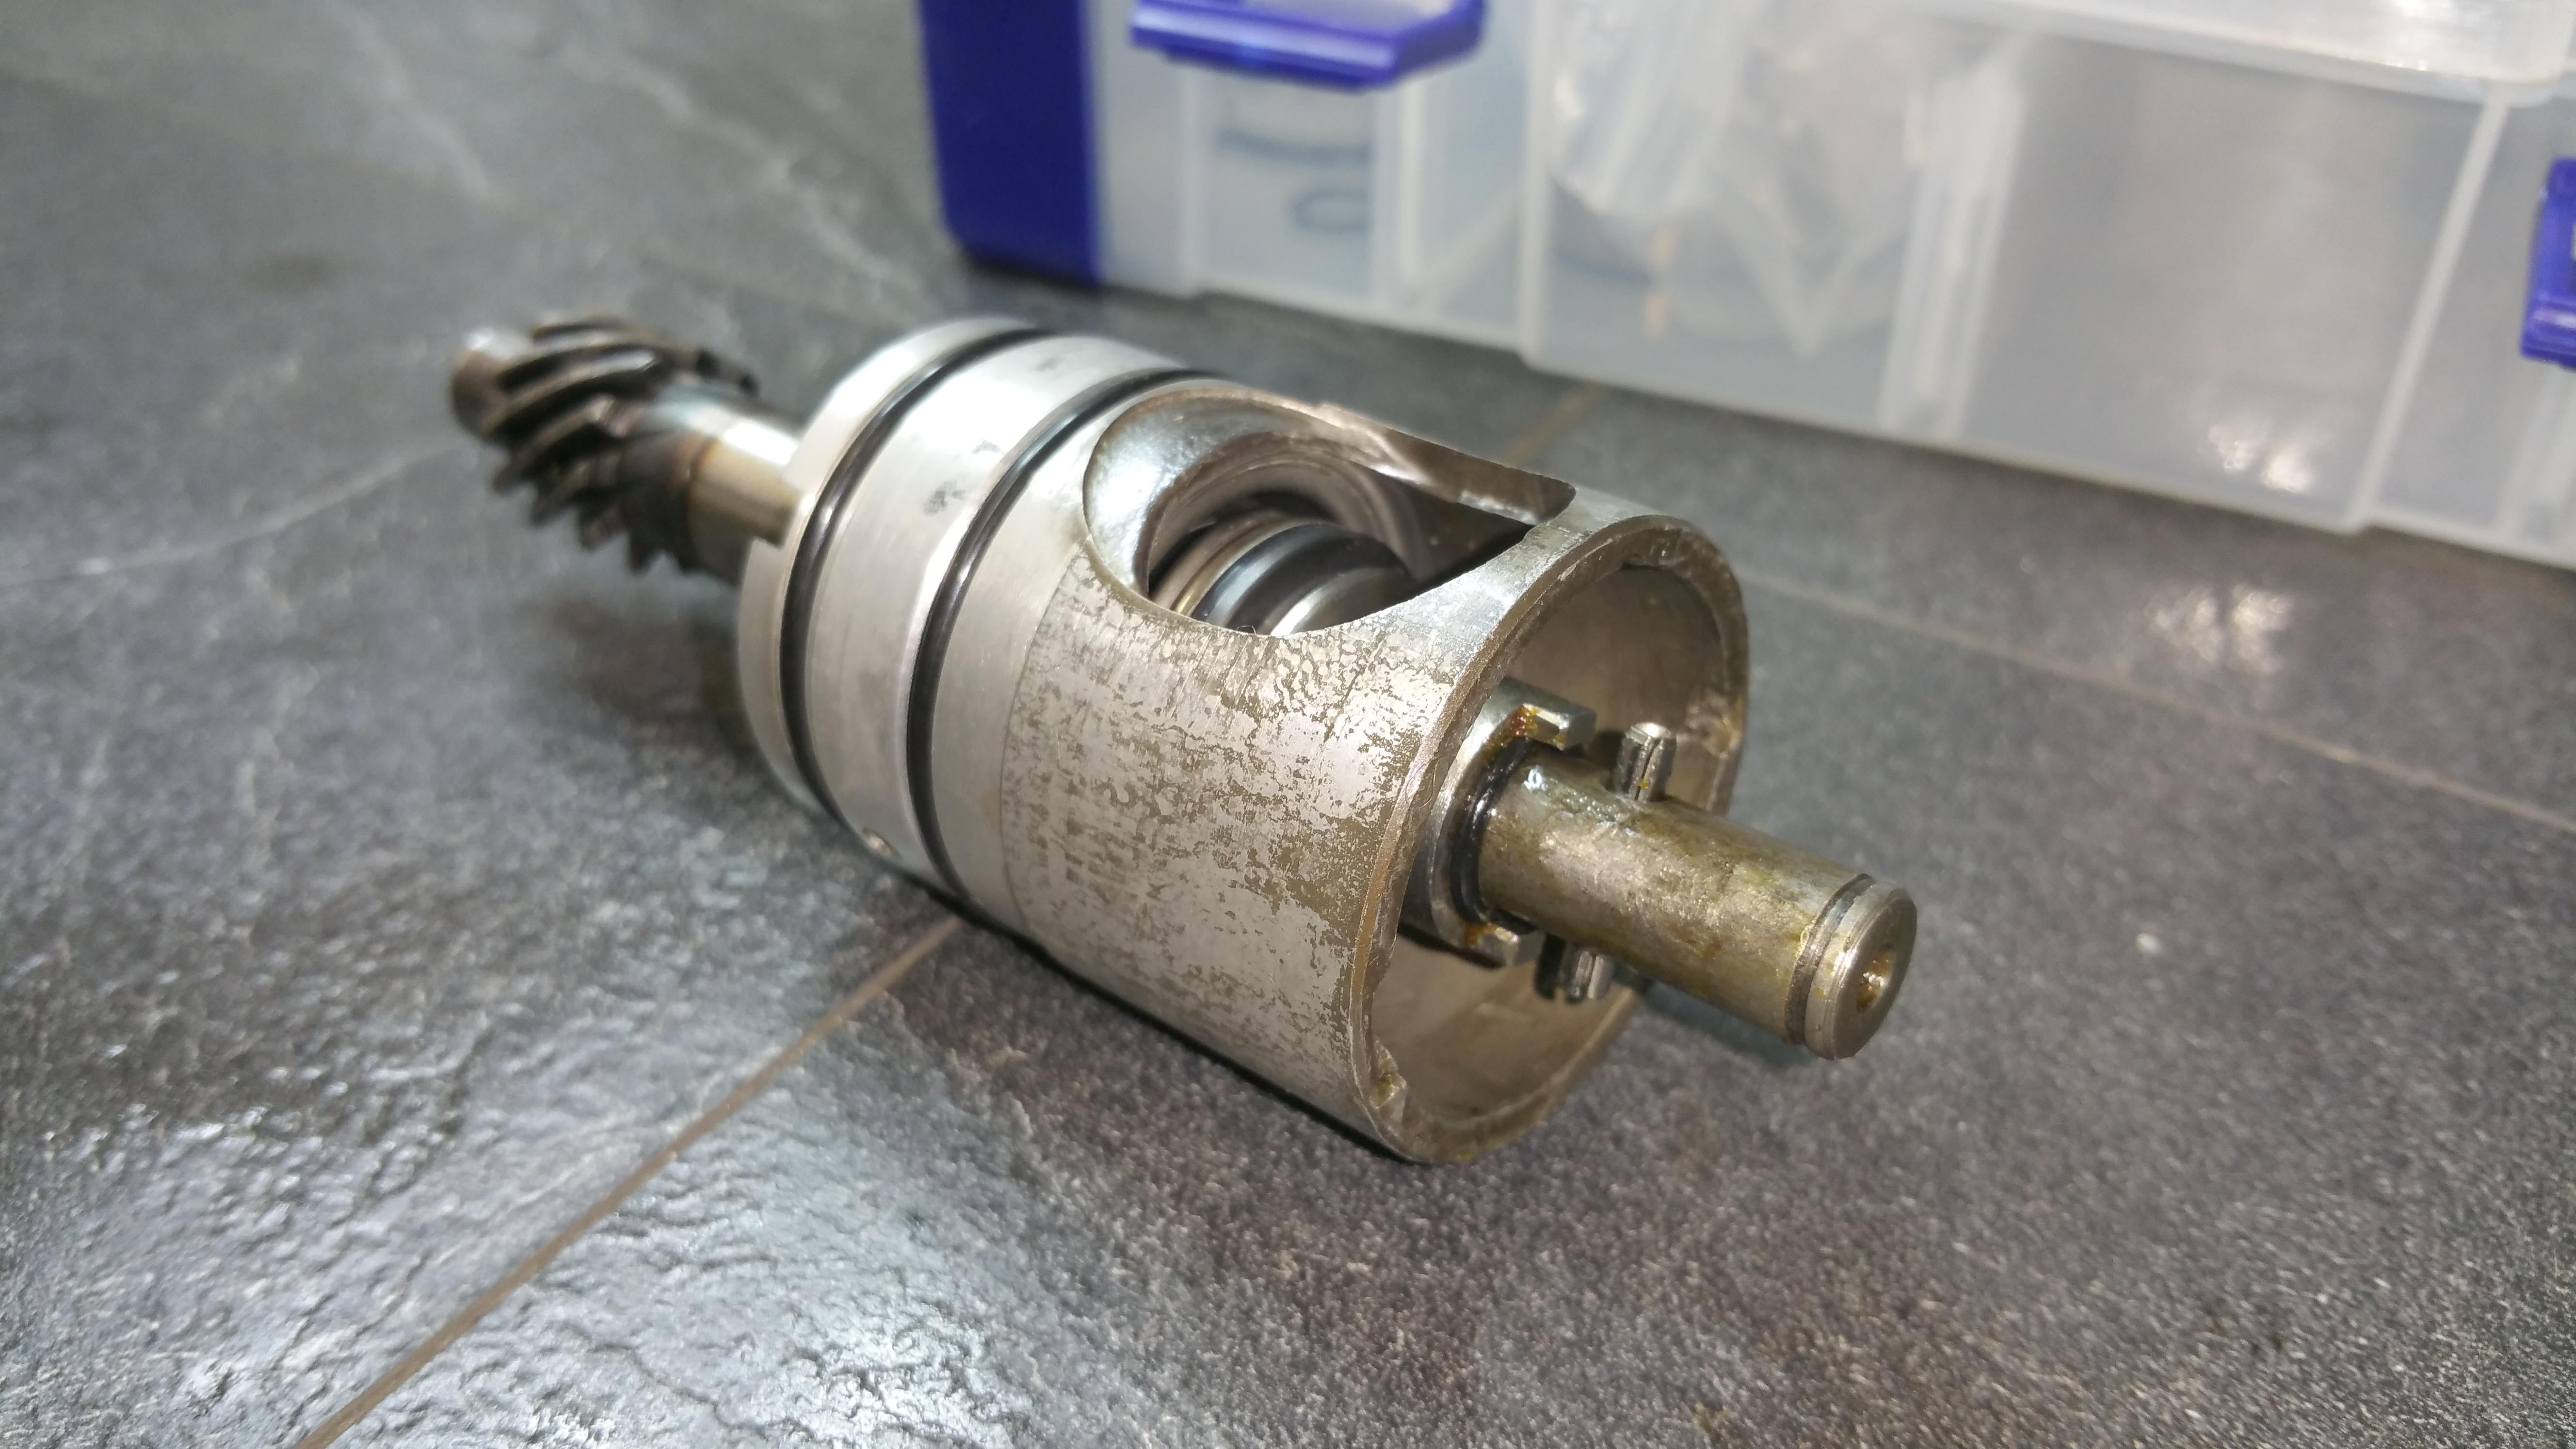
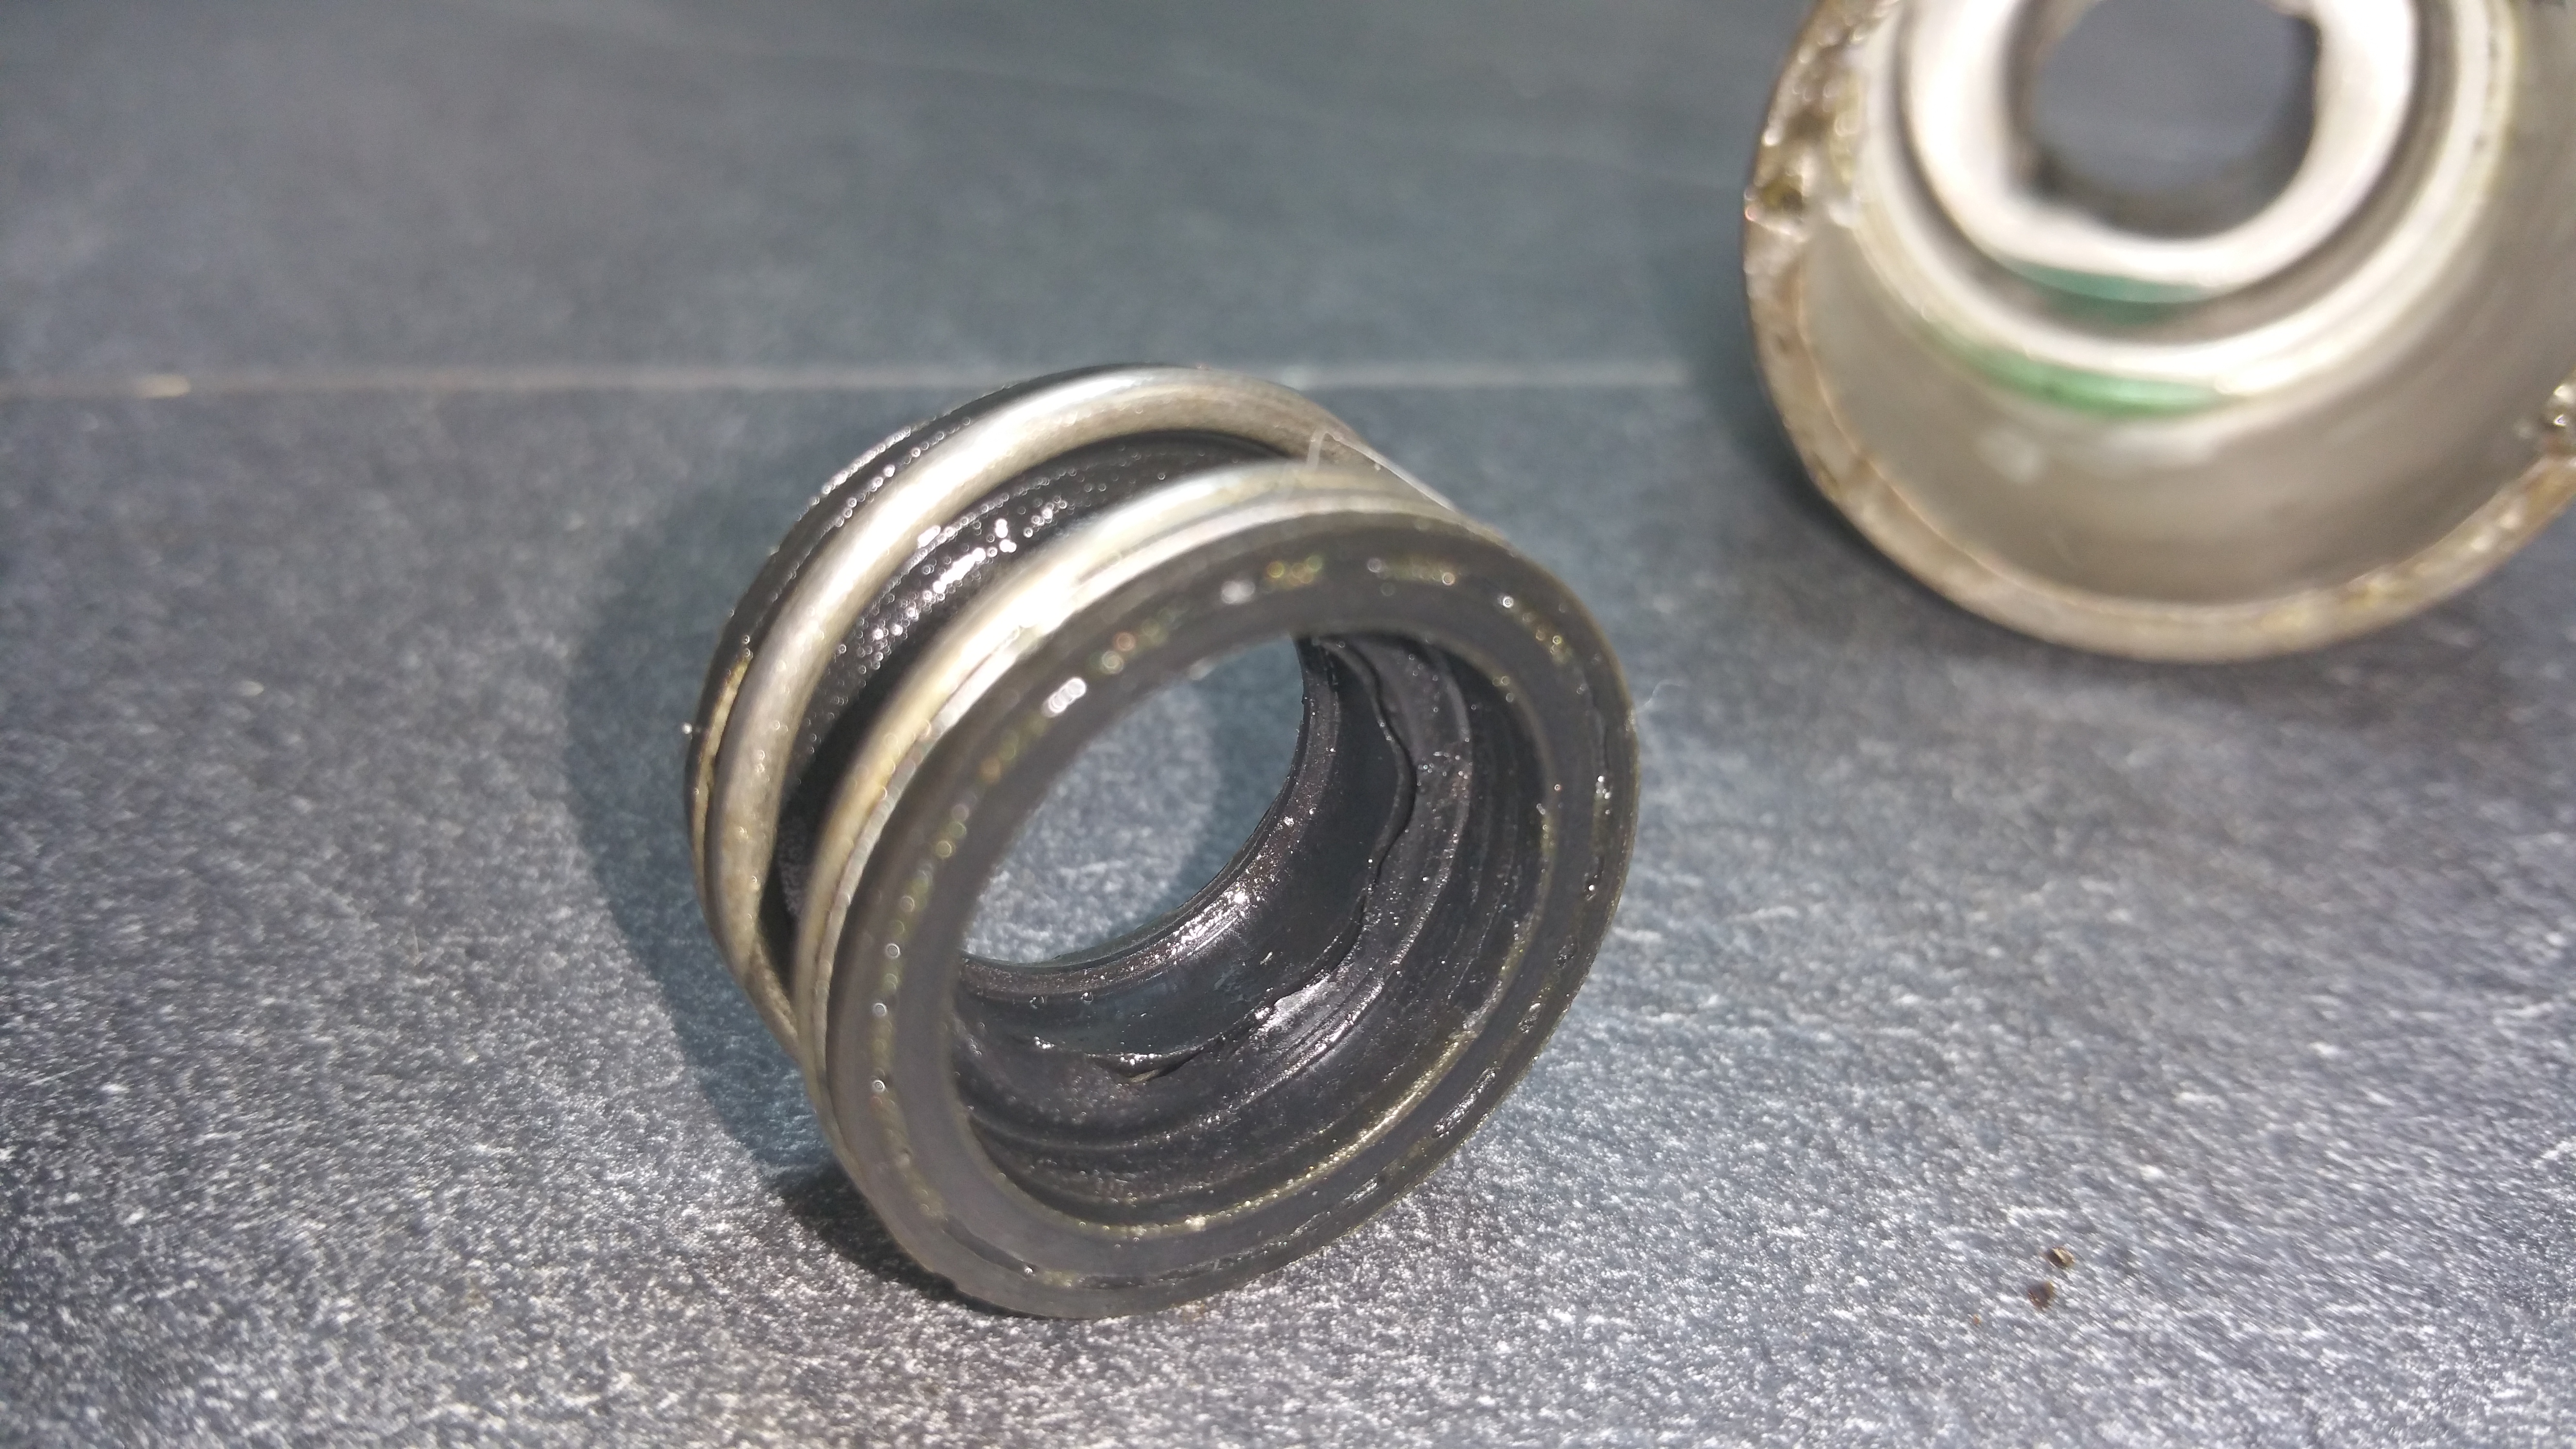
When dismounting the old pump the mechanical seal consist of 3 parts as shown in the picture. Make sure to remove all parts, also the metal cup. The new mechanical seal in the kit is mounted in one assembly. Don’t try to separate any of them.
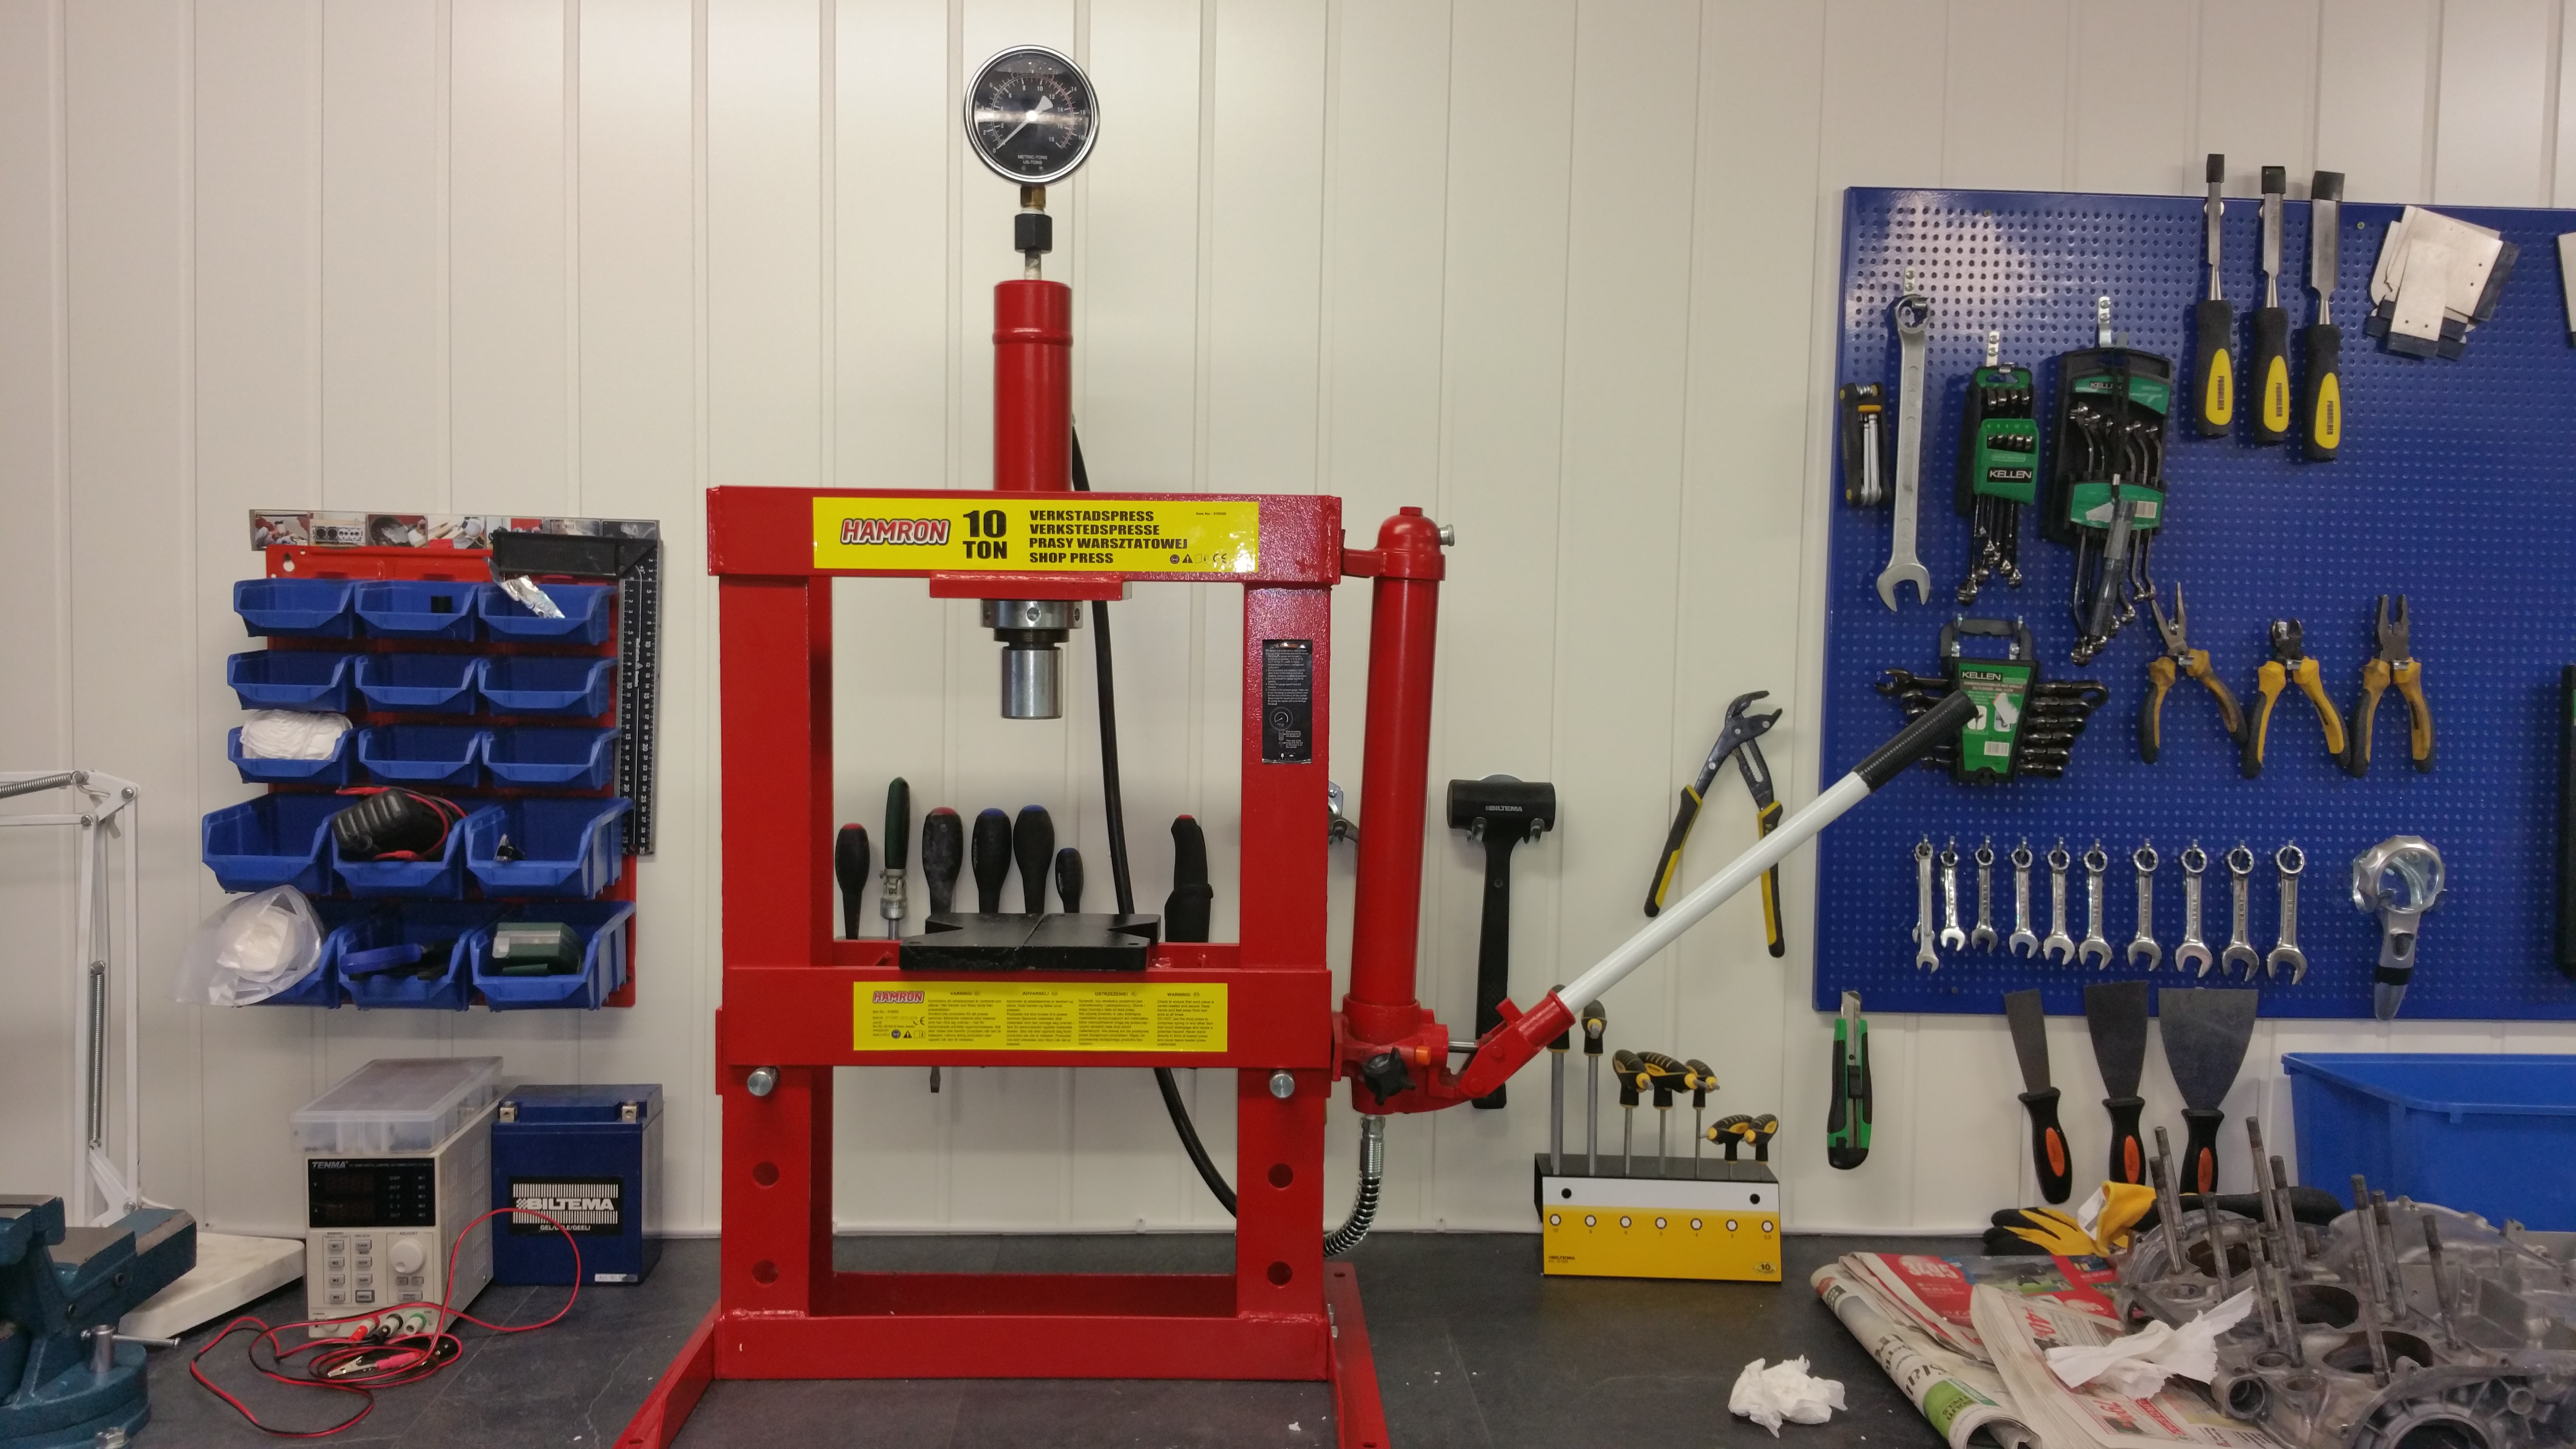
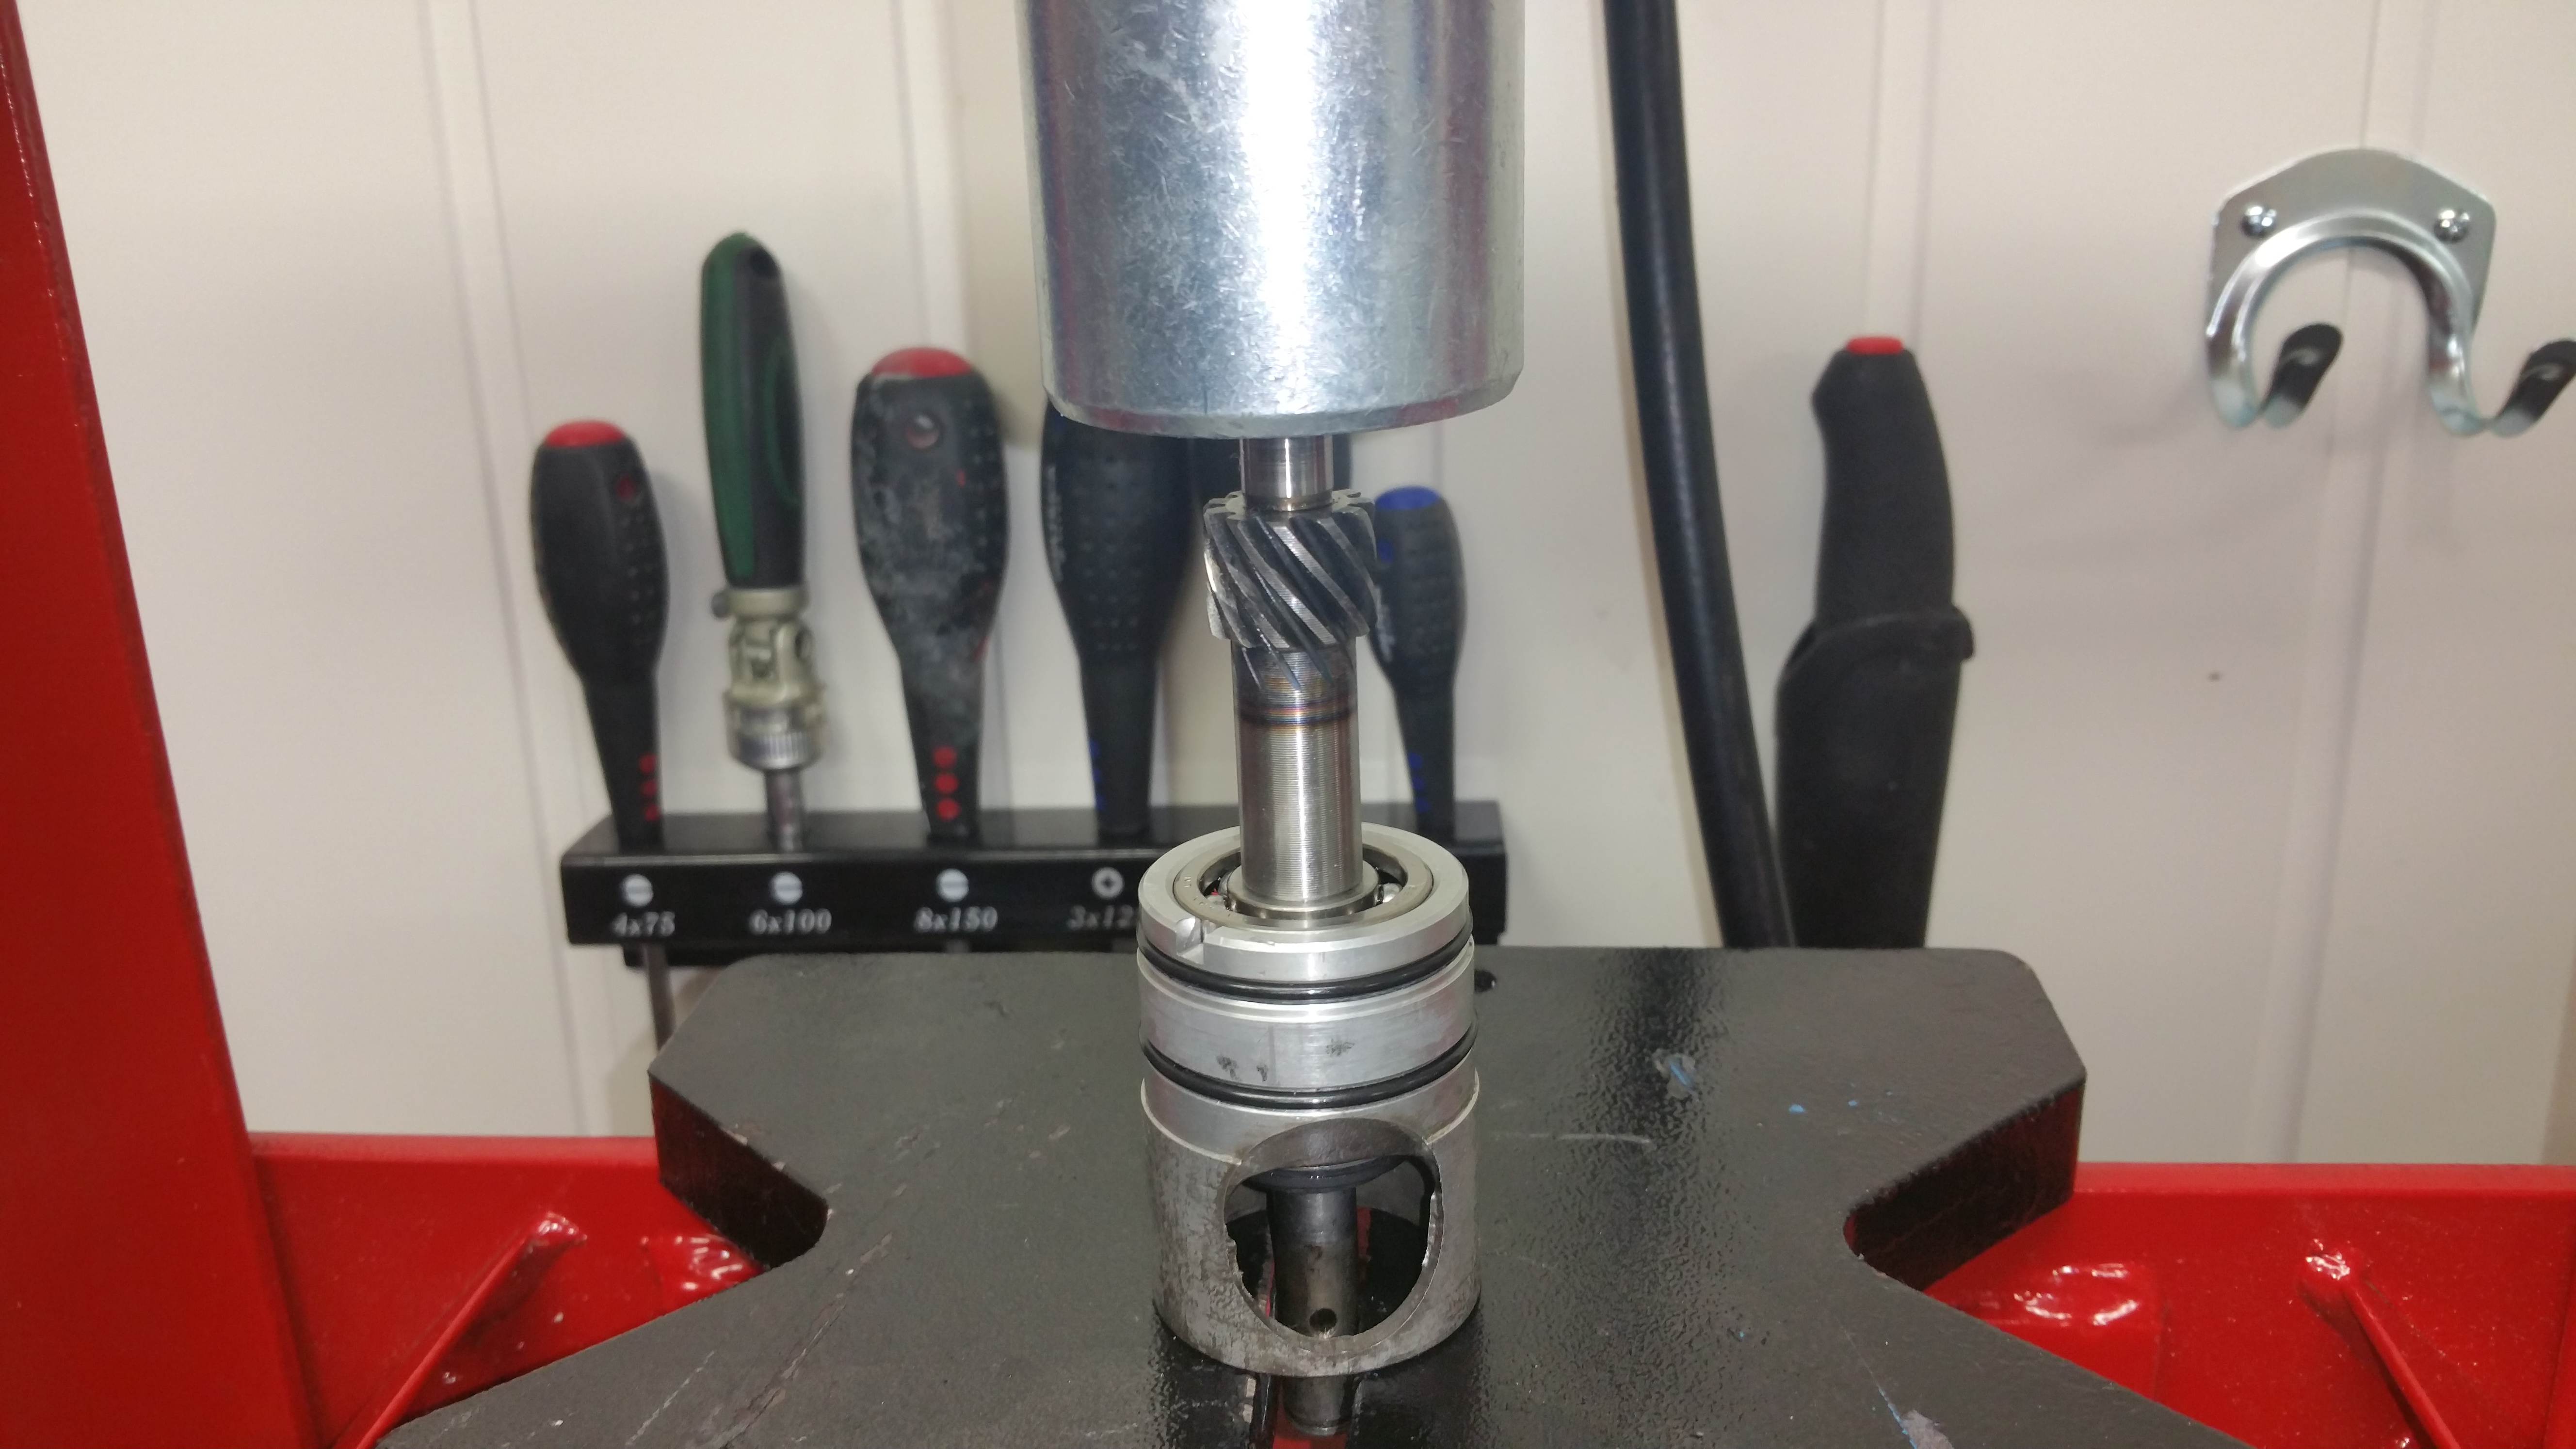
Tools to get the job done:
A simple shop press makes the process more easy. In addition I decided to make a special tool (adapter ) to fit the mechanical seal. It’s quite fragile and must be squeezed with care into its position.

Using my lathe and making an adapter fitting for the mechanical seal
Water pump housing, mechanical seal and the adapter

Mounting the mechanical seal into the adapter
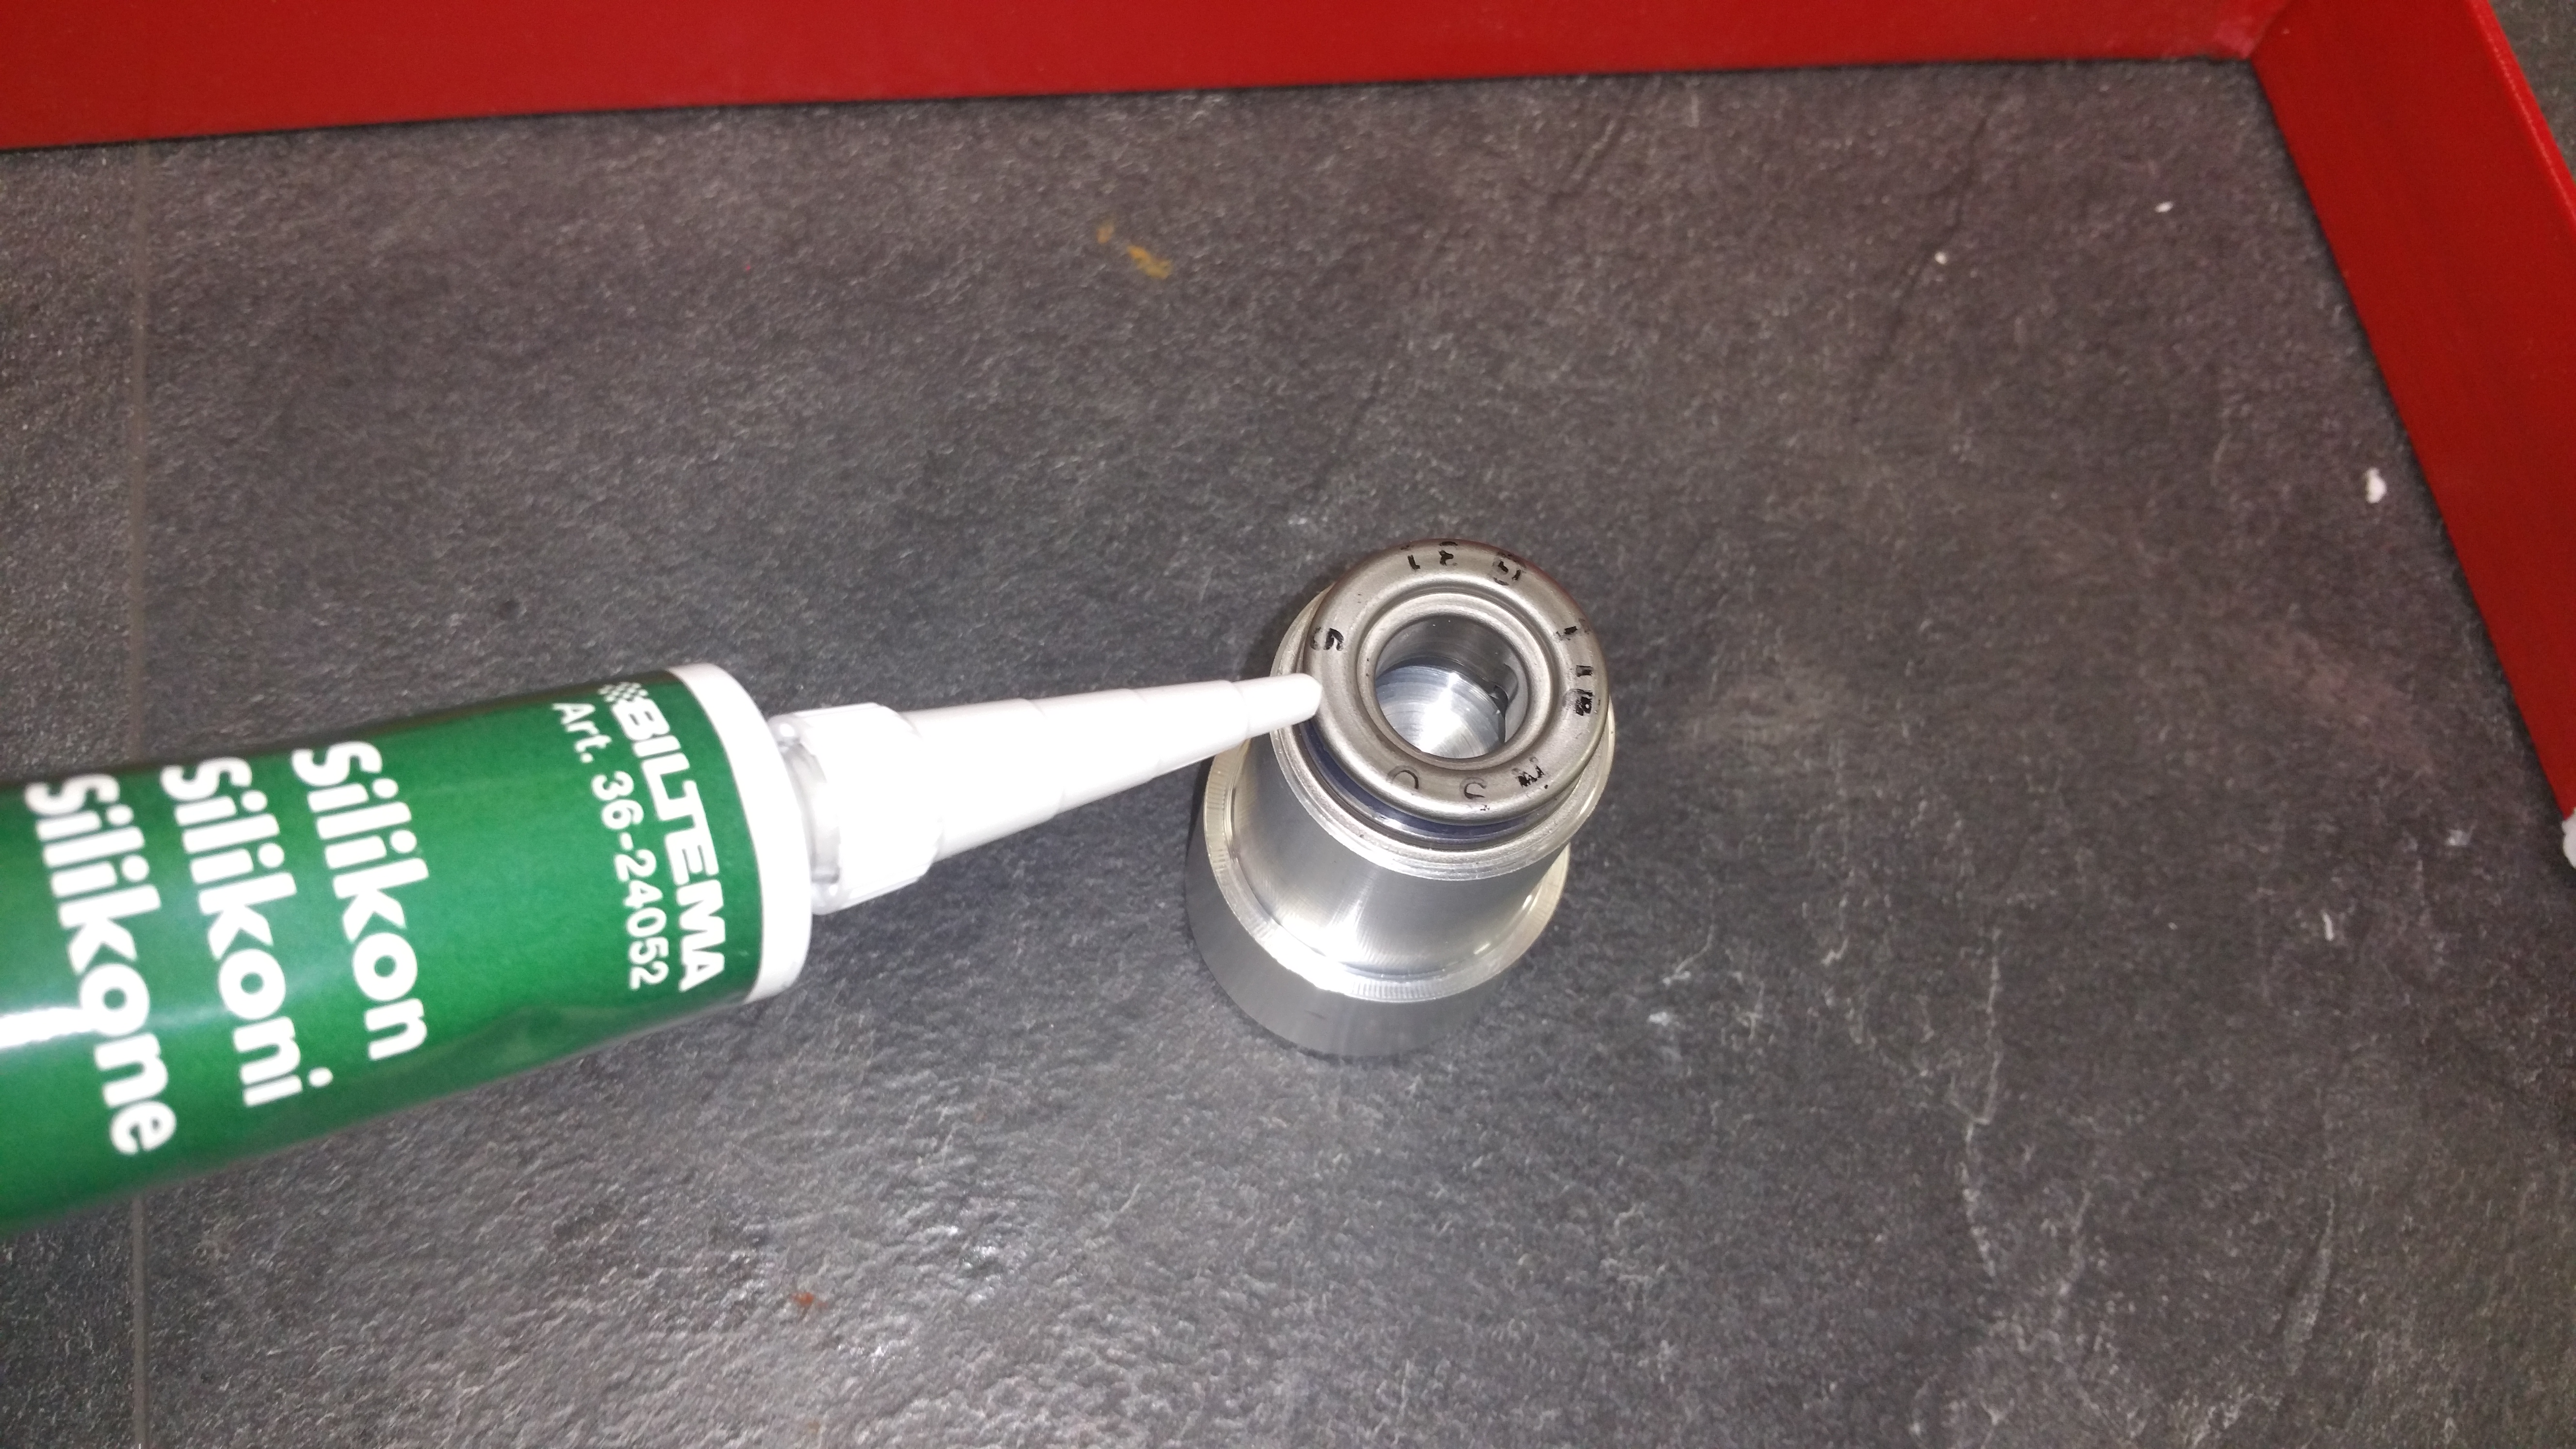
Apply a thin layer of silicone
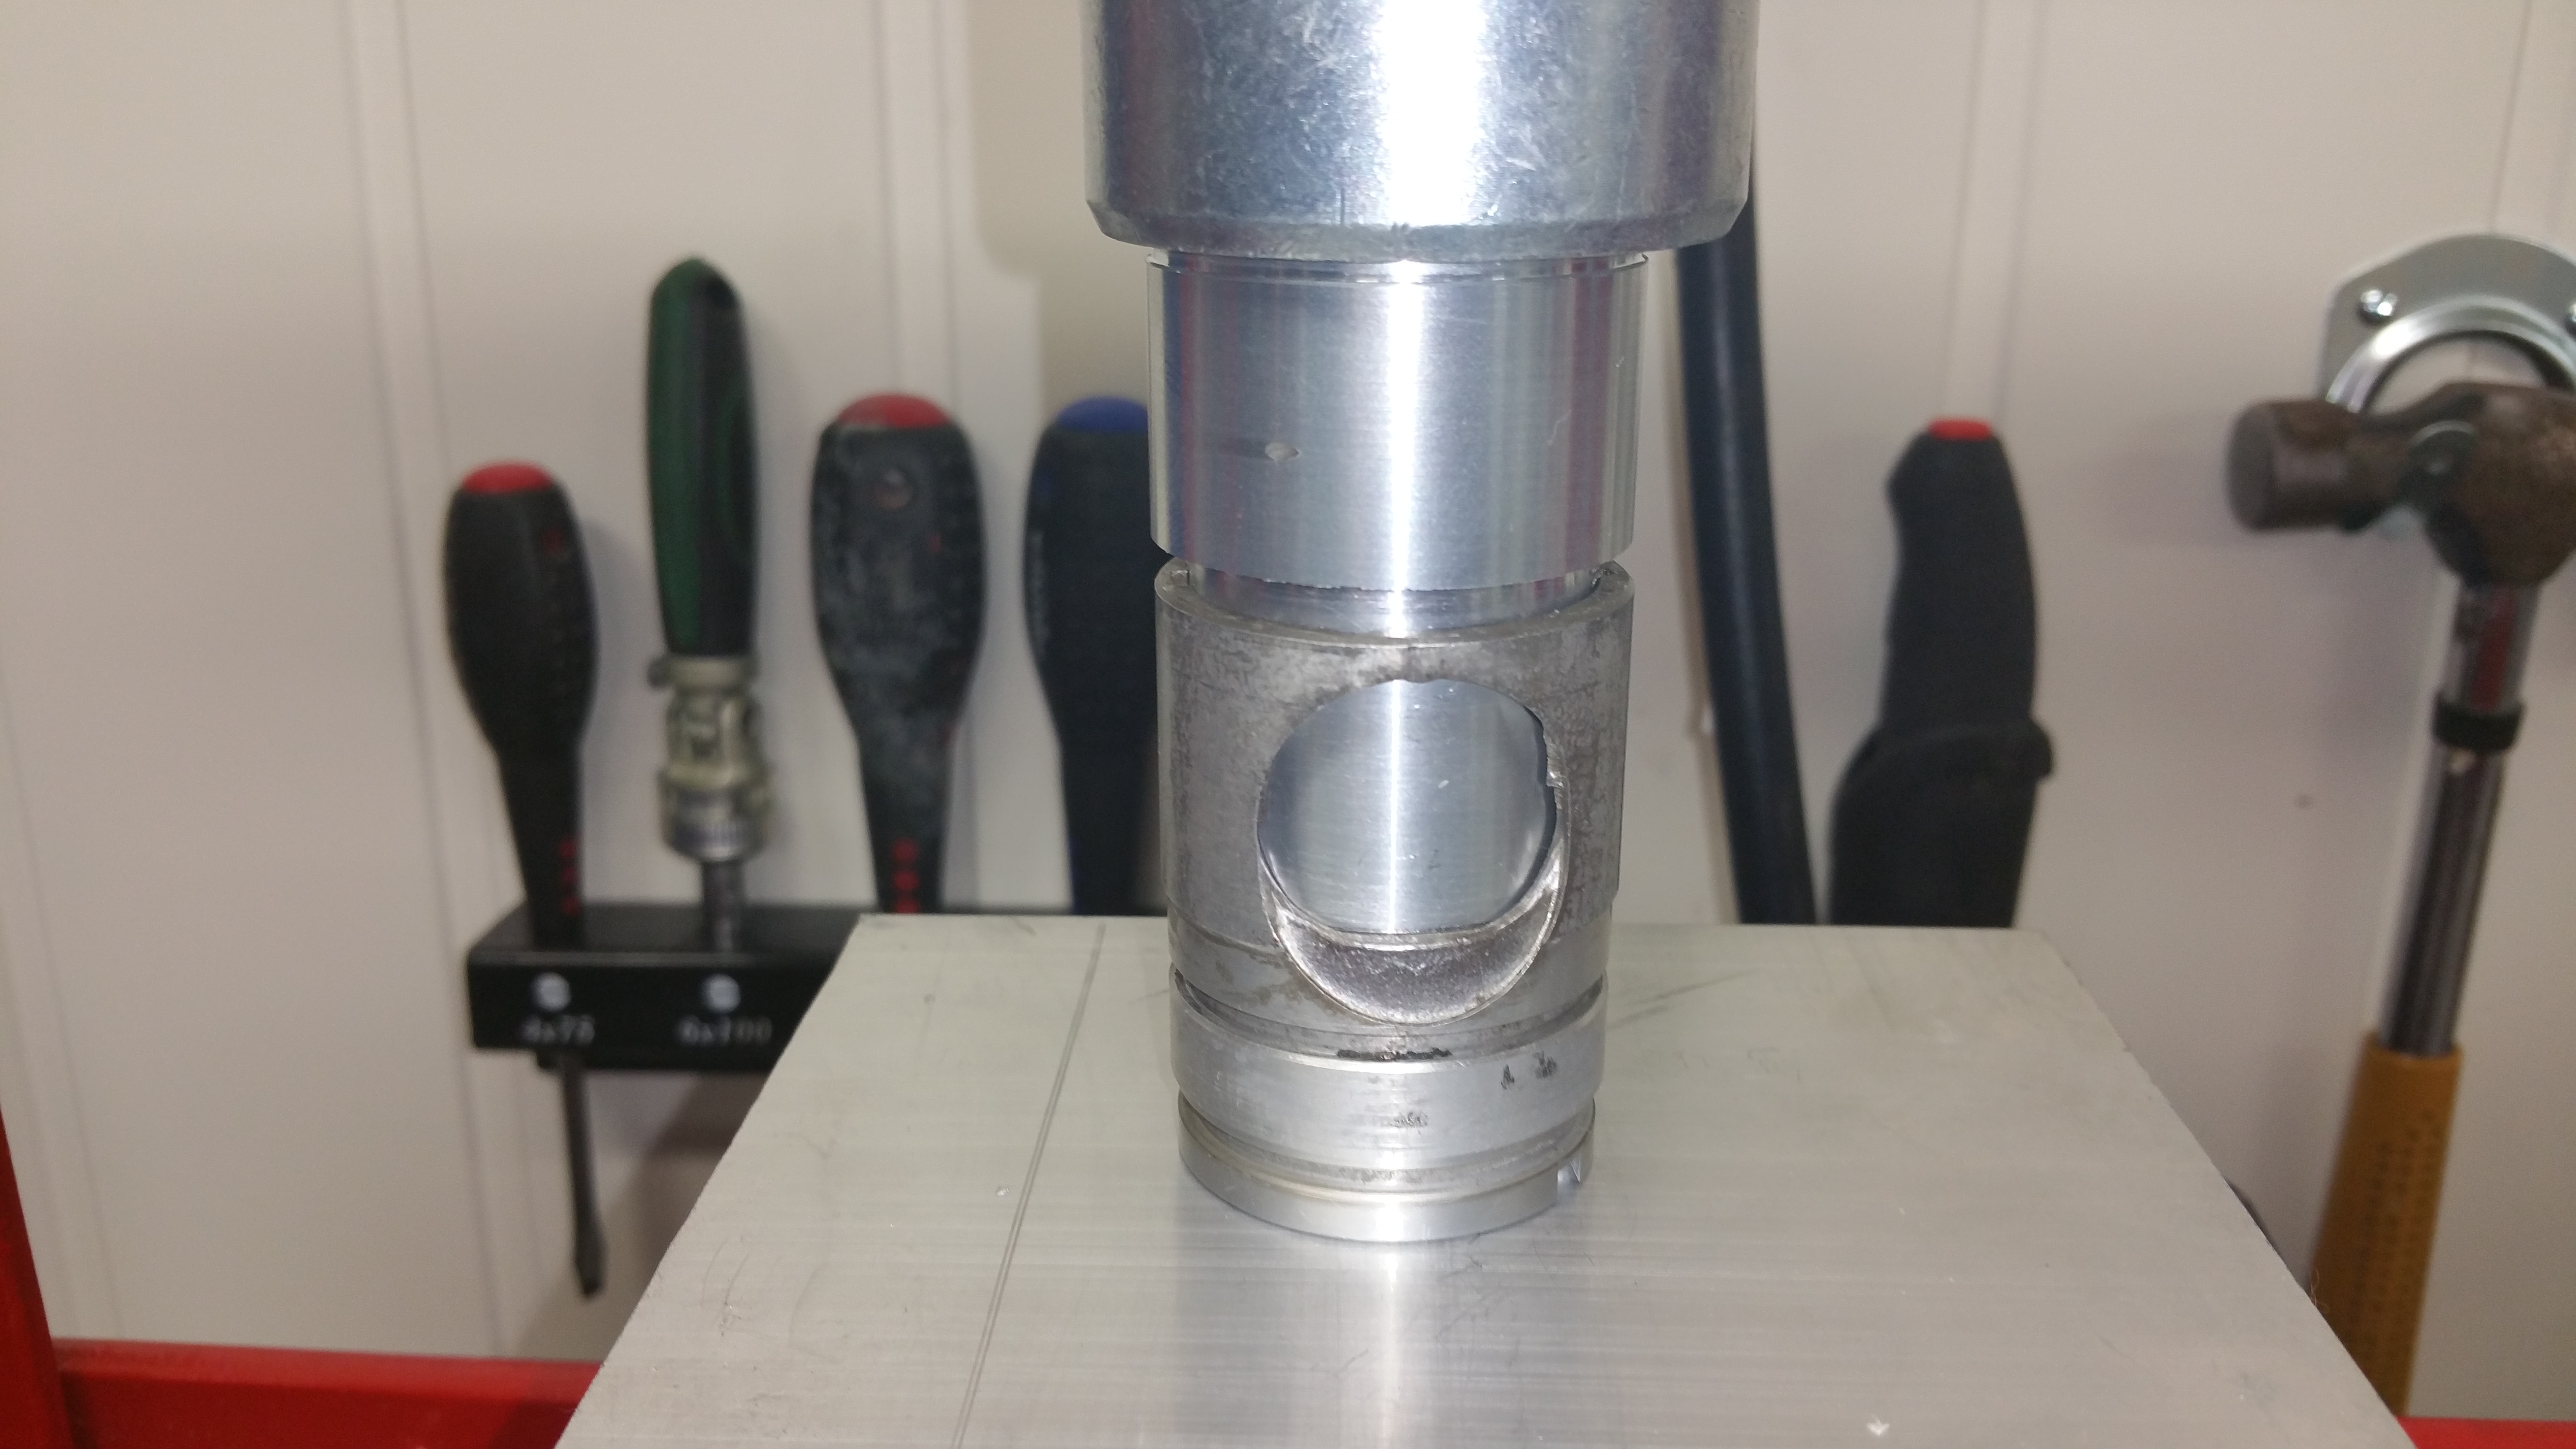
Press the seal all the way down to the bottom of the water pump housing.
Turn the water pump housing to the other side and mount the oil seal. Put the seal lips upwards facing aginst the bearing and the crankcase.
Suzuki mounted the seal with the flat side facing down, according to feedback I got on my post yesterday.
First I did this wrong, put the seal upside down. Warning !, wrong again ? Continue to read.
Oobs, I did it again… The first attempt where I mounted the seal with the flat side against the bearing might be correct after all. The high pressure side should always be against the seal side (the lips of the seal ) Based on the latest findings of “old” pumps from Suzuki, two of them have the flat side facing down and the seal side against the bearing. A brand new pump from Suzuki is the opposite. The flat side against the bearing, like I did the mounting the first time. Perhaps it doesn’t matter ? Quite odd if Suzuki has a random mounting procedure on this one. The basic question might be, is the high pressure side on the water side? If so, the first attempt was probably right and if a brand new pump is the blueprint I probably have to redo the mounting once more. But first I will wait and see if anyone else knows the correct answer.
11.02.2016, end of discussion:
I got an answer from the supplier of the water pump kit. All new pumps from Suzuki have the flat side facing the baring and the seal side down against the water pump, like I did the mounting the first time. The seal in the kit is compliant with seal in the latest water pumps from Suzuki and should therefore be mounted in the same way.
I have to wait one week for a new seal and mount it the proper way, again 🙂
Lesson learned:
There are two ways to mount a seal, one is the right one, or … ?
There is a high and low pressure side, the seal side (lips) facing against the high pressure side.
Conspiracy theory:
Perhaps Suzuki after many years and many water pump breakdowns drew the conclusion: The oil seal has been mounted wrong, let’s turn the flat side against the bearing and don’t tell anyone about the blunder ..
A never ending story..
A new theory is coming up: The oil seal is spring loaded and if the spring is not made of stainless steel it will corrode in a short period of time if the seal side is facing the water pump. That can explain why all old pump have the lips with the spring facing against the bearing and the oil. I checked the oil seal from the kit, the spring react on a magnet and is therefore NOT made of stainless steel. Perhaps the new pump from Suzuki has stainless steel spring ? I don’t know. I have ordered a new oil seal from a local supplier and if it’s magnetic I will place the seal side against the baring like it’s done in all old pumps. If it can corrode it will for sure end up rusty if facing down to the pump. The mechanical seal (checked, non magnetic ) is between the water and the oil seal but the spring in the oil seal will steel corrode if not covered in oil.
Is this end of the story ? Time will show….
Lates update:
The drawing from Haynes Service manual shows the orientation of the oil seal. As on all old pump the seal side is against the bearing and will be protected against corrosion.
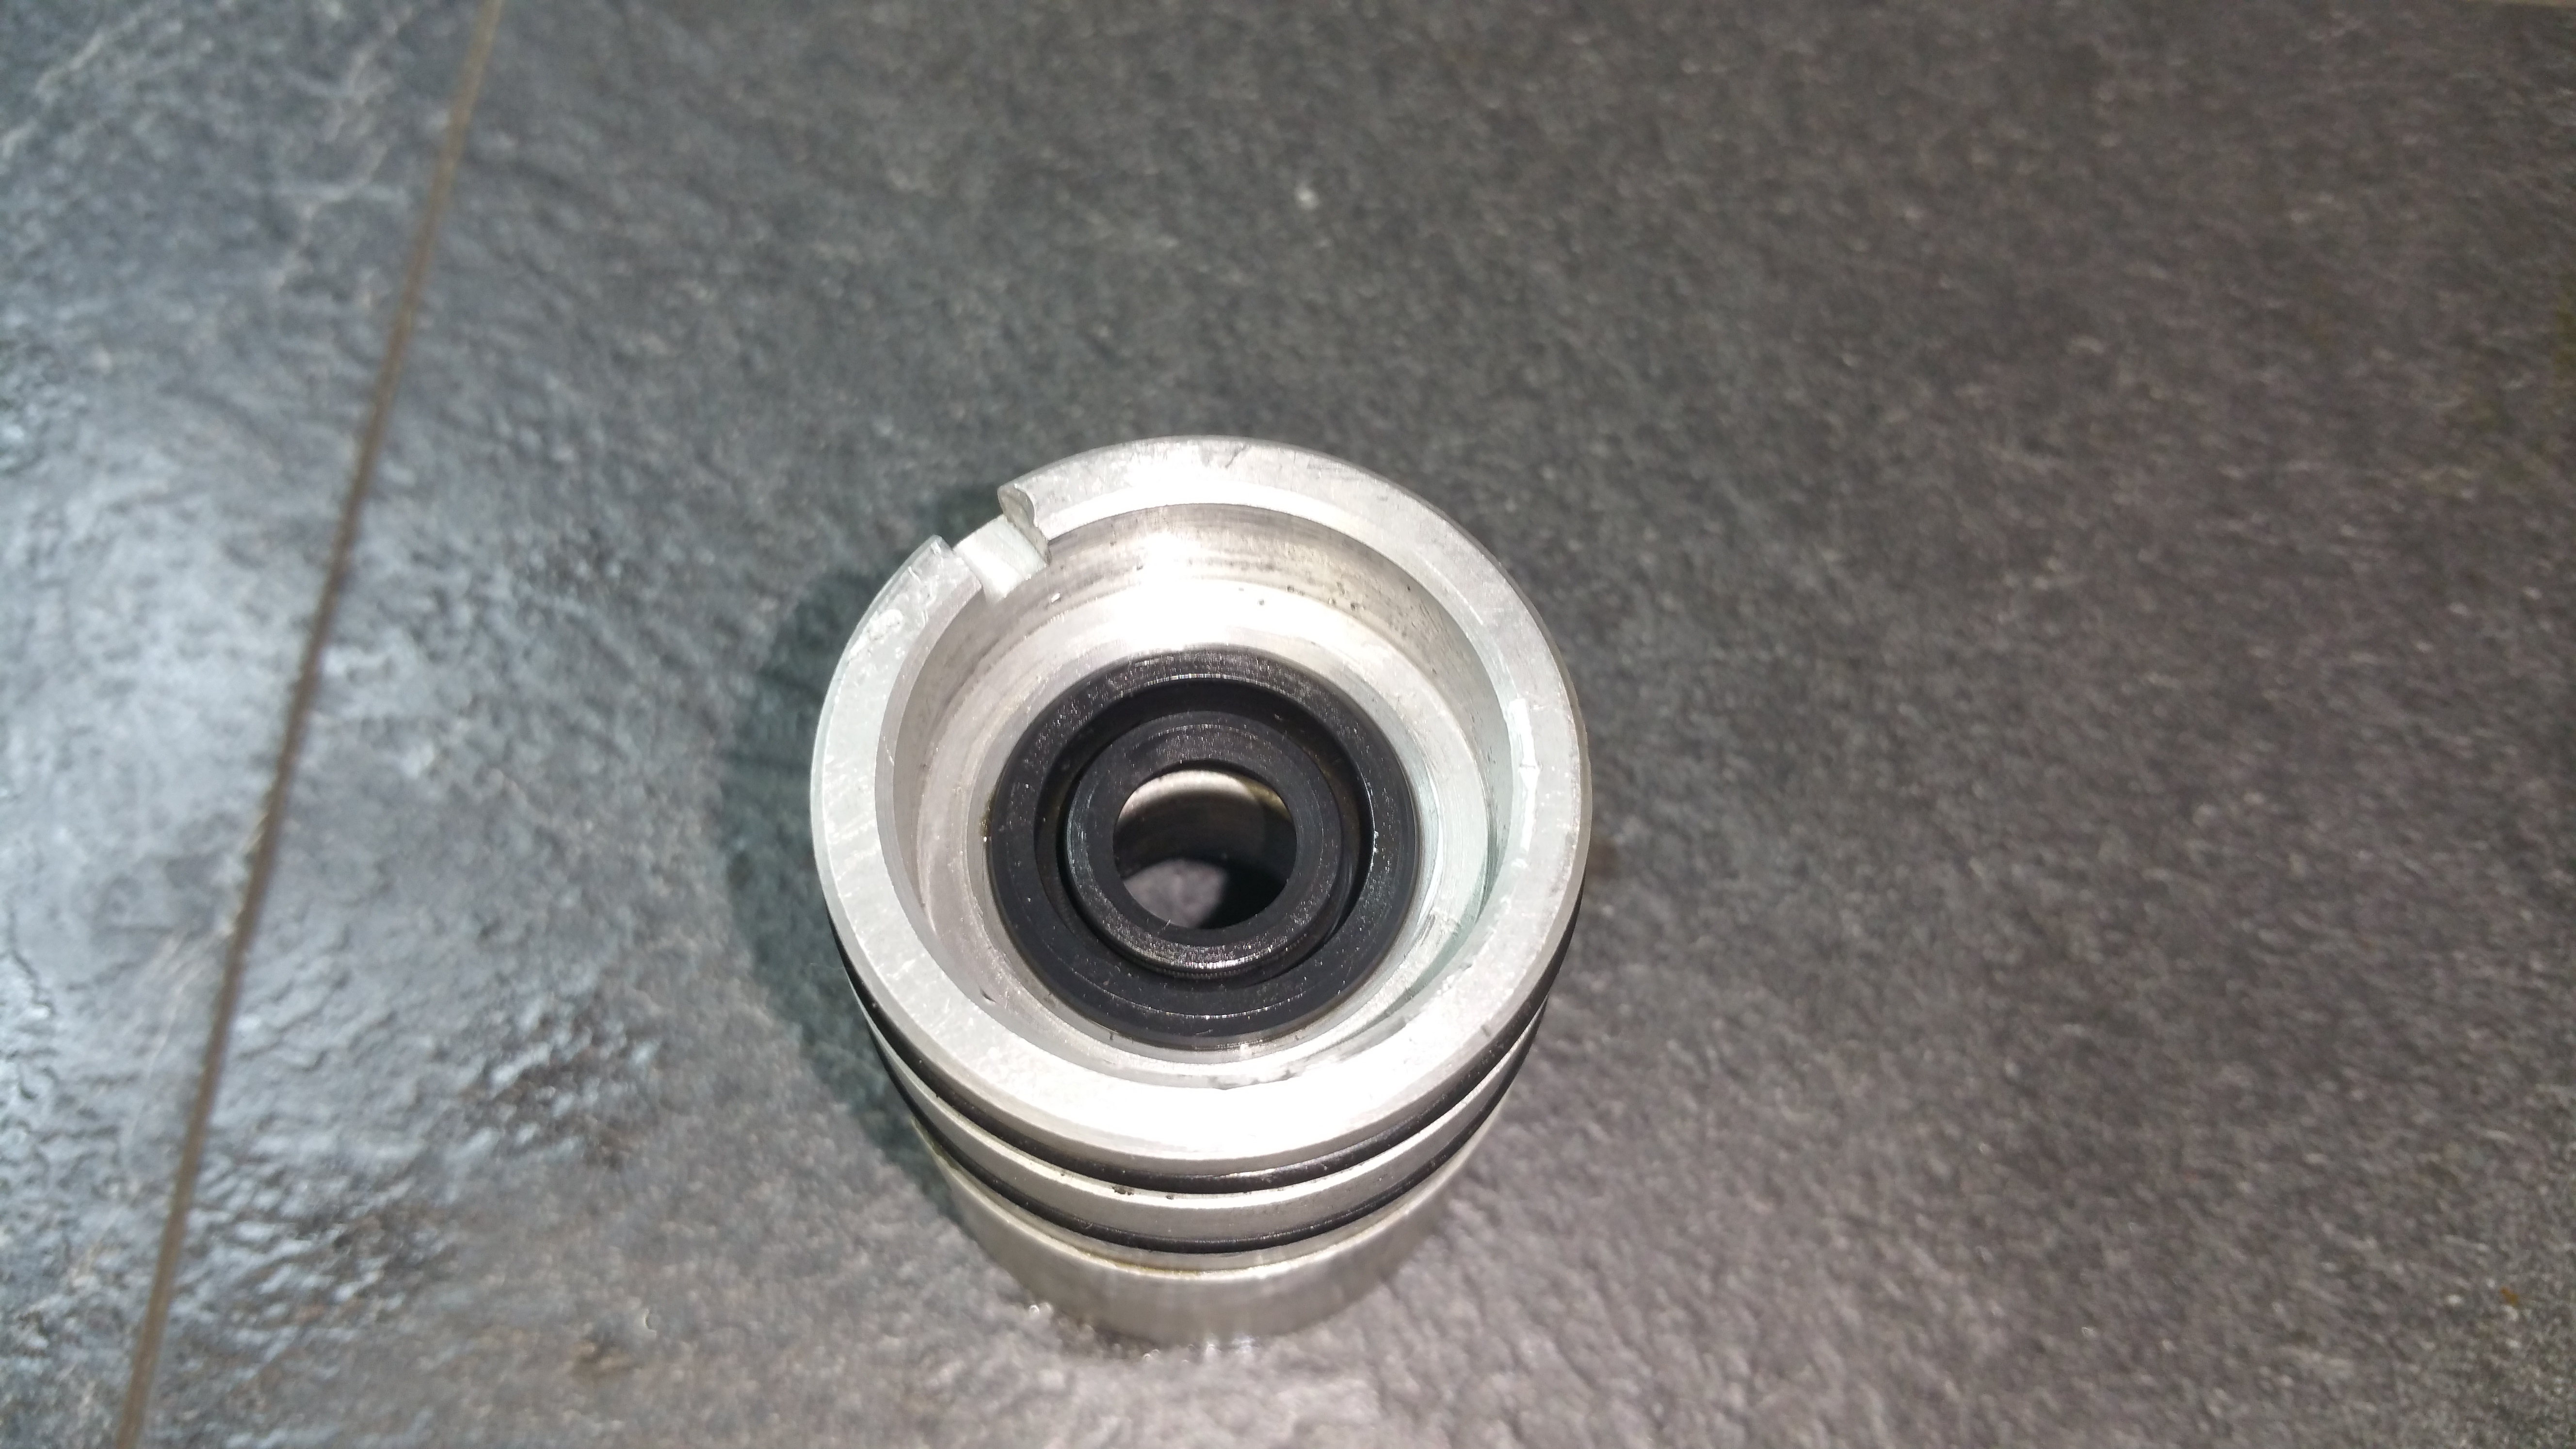
I got the new seal. Checked the seal with a magnet and the result tells it’s not made of stanless steel. Mounted the seal with the lips ( seal side) against the bearing like on the photo below.
Mount the bearing
Press the bearing all the way down to the edge.
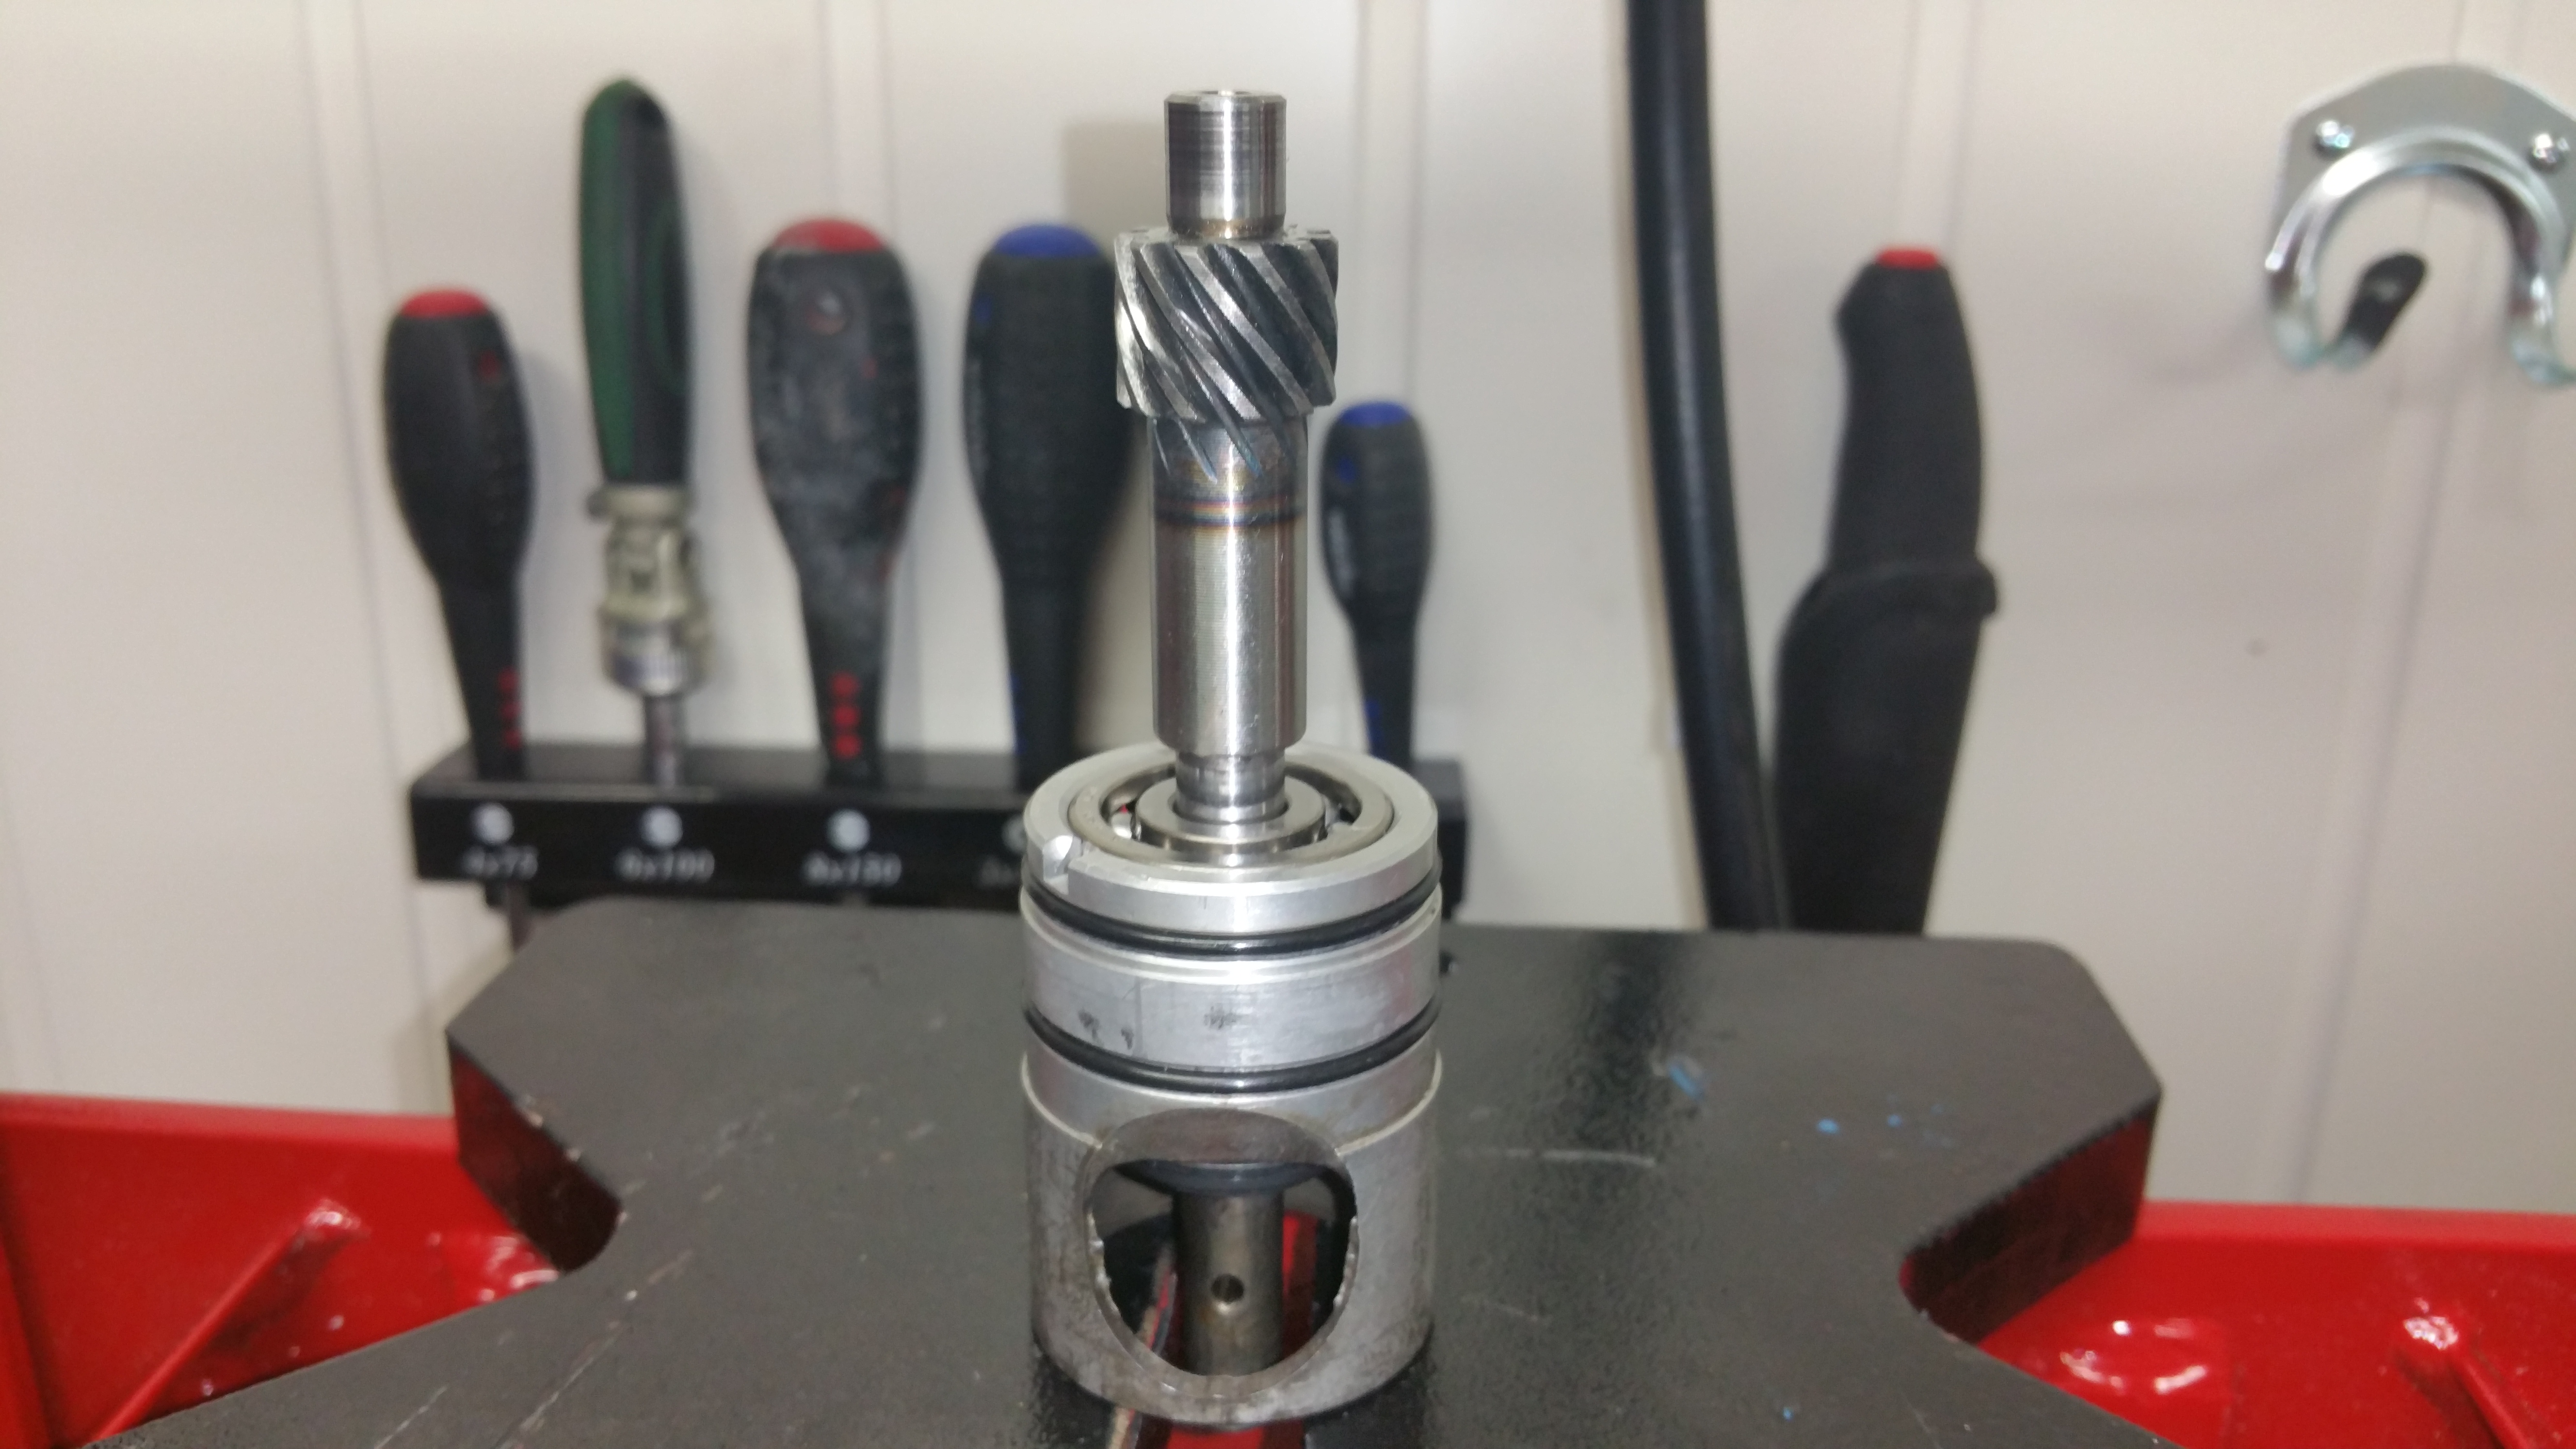
Mount the axle
All the way down as shown in the picture

Next part, sealing seat.
New locking pin
Done !
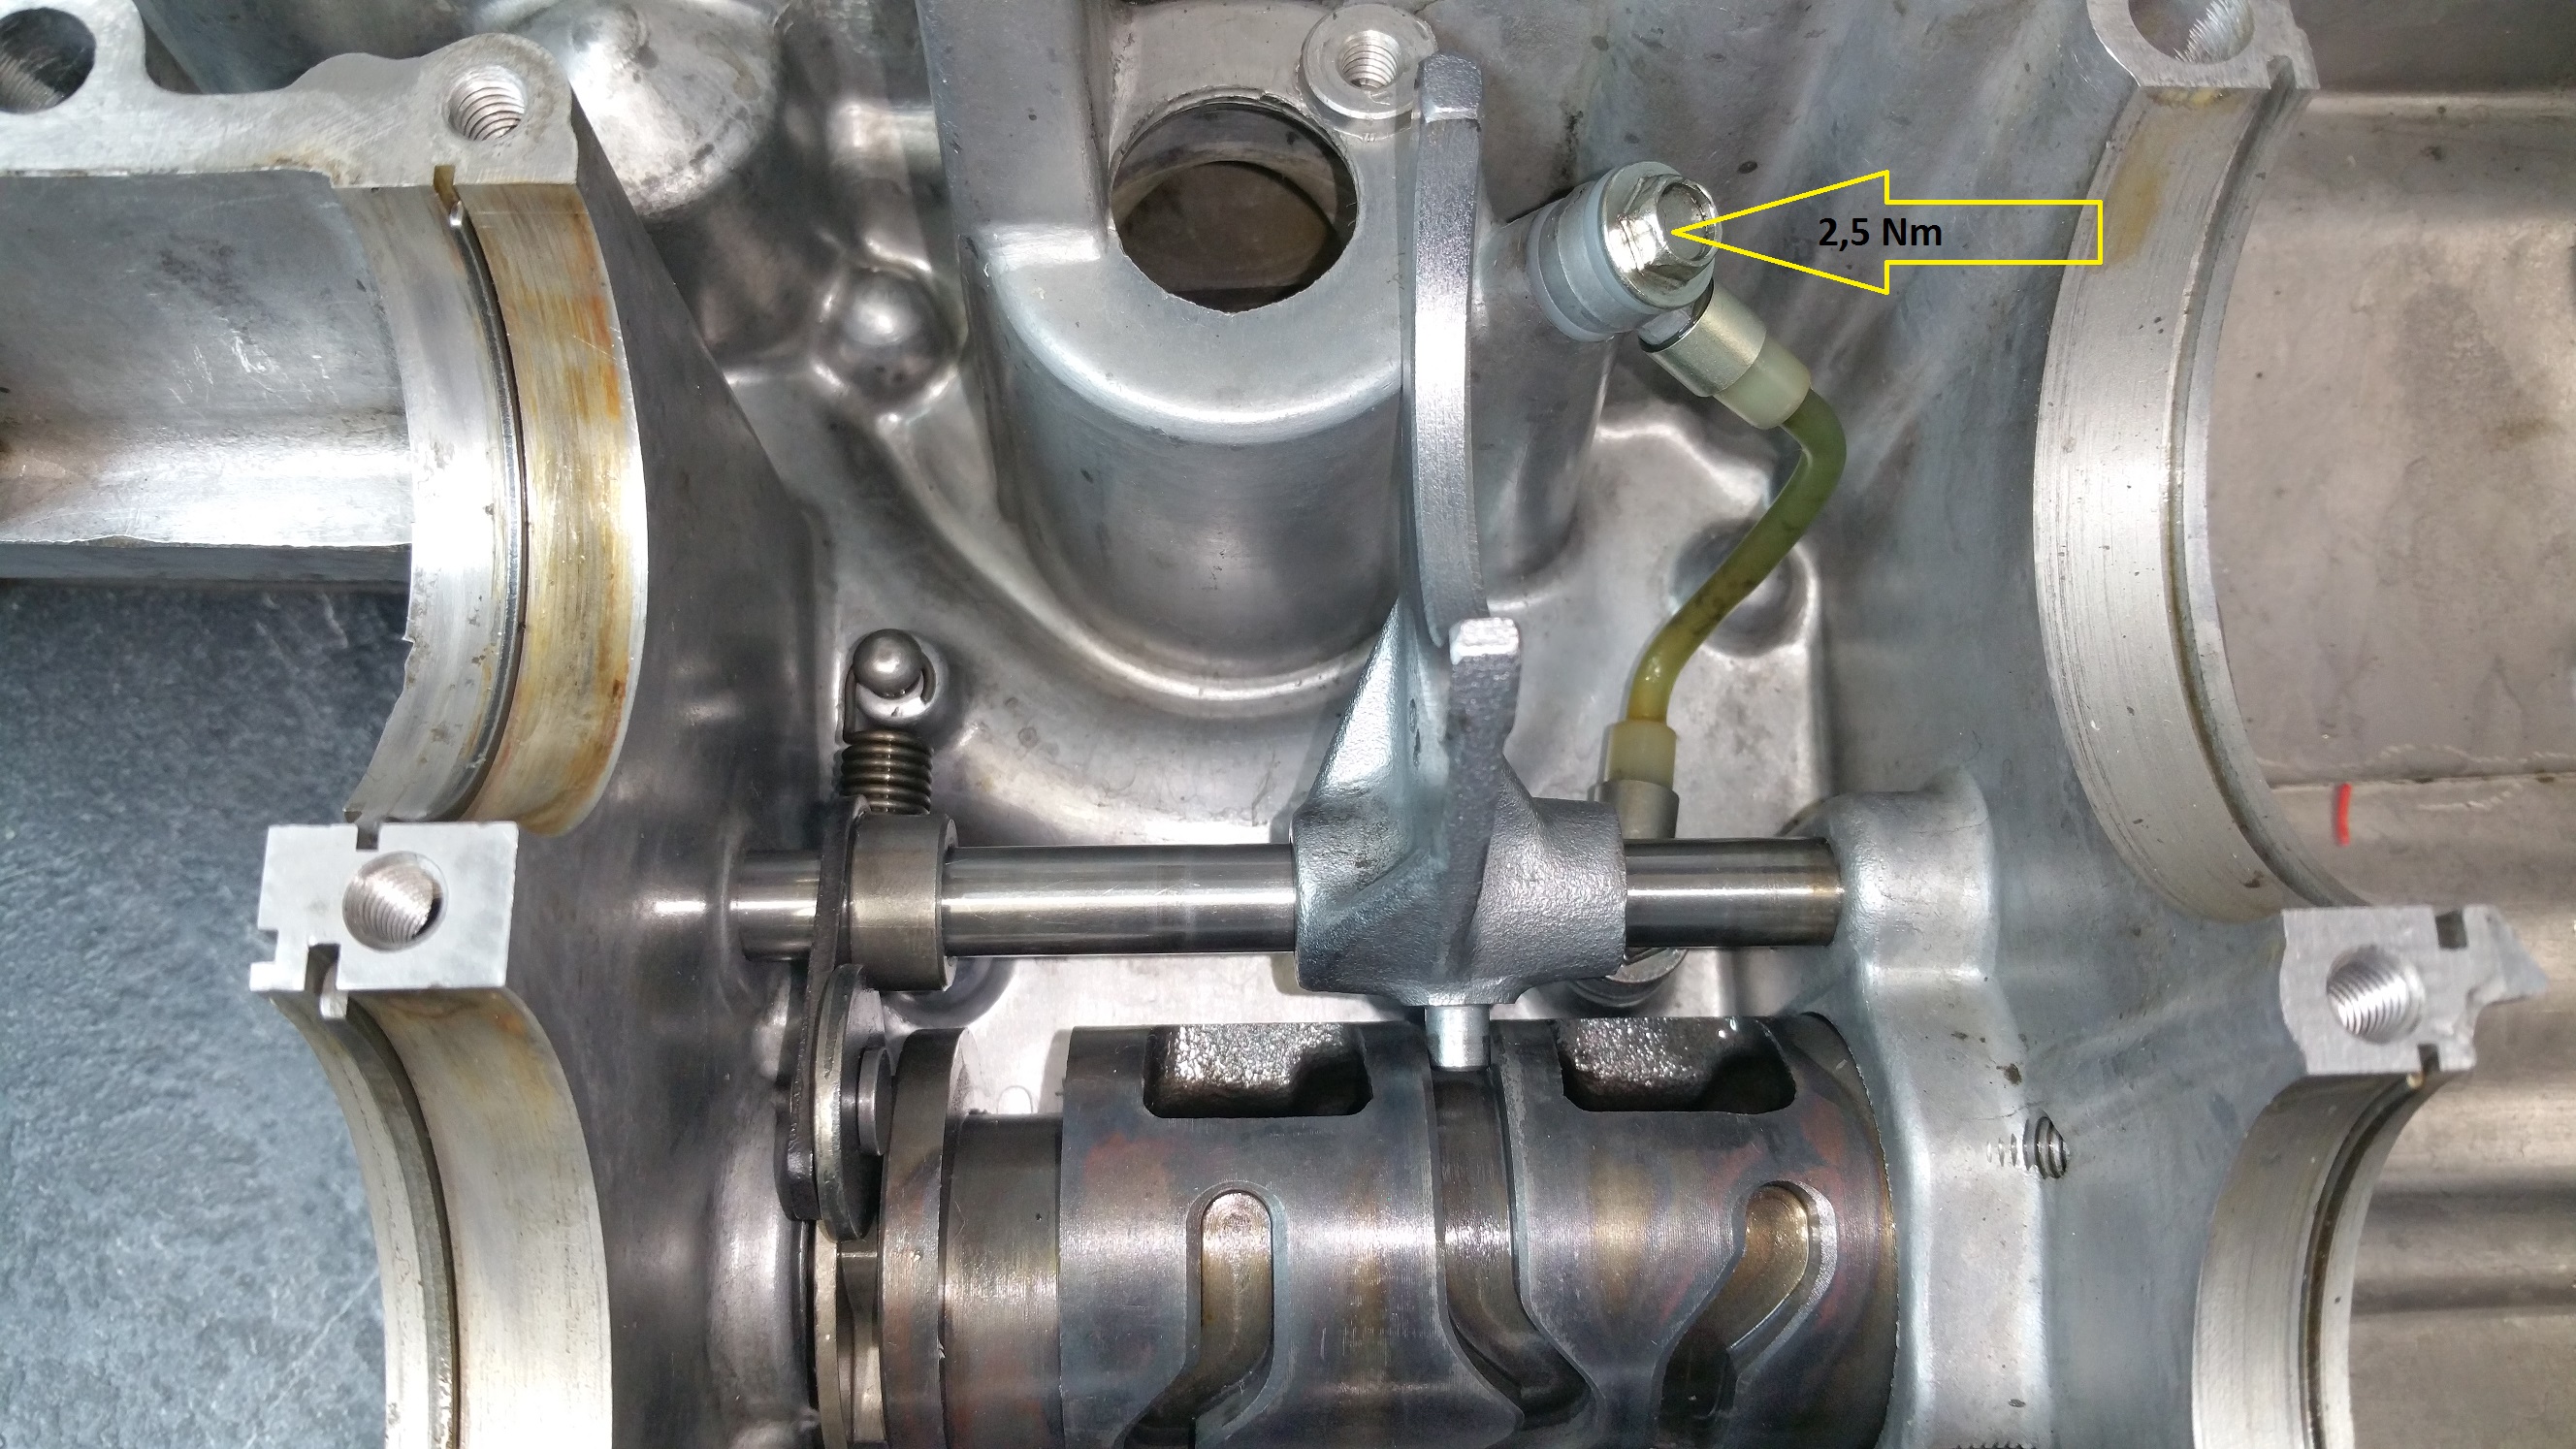
Remember to replace all o-rings, also the small one on the axle.
After some discussion on FB about the correct torque settings for fastening the nylon tube I ended up with 2,5 Nm. The bolts are mounted with nylon discs and can’t take to much torque. Not able to find any settings in the manual but a post on FB showing 2,5 Nm on the banjo bolts for the oil pump was a good indication. Same type of bolts with nylon discs. I also added a drop of thread lock
And what is the purpose of the nylon tube ? Seems to be a type of fault indicator if the water pump get worn. The tube ends at the bottom of the case and any leakage will be a sign to change or overhaul the water pump.
The front fork in the gearbox is also mounted. The rest of the gear will be installed as soon as the water pump is in place. Still waiting for the package from Germany with new parts for the water pump.
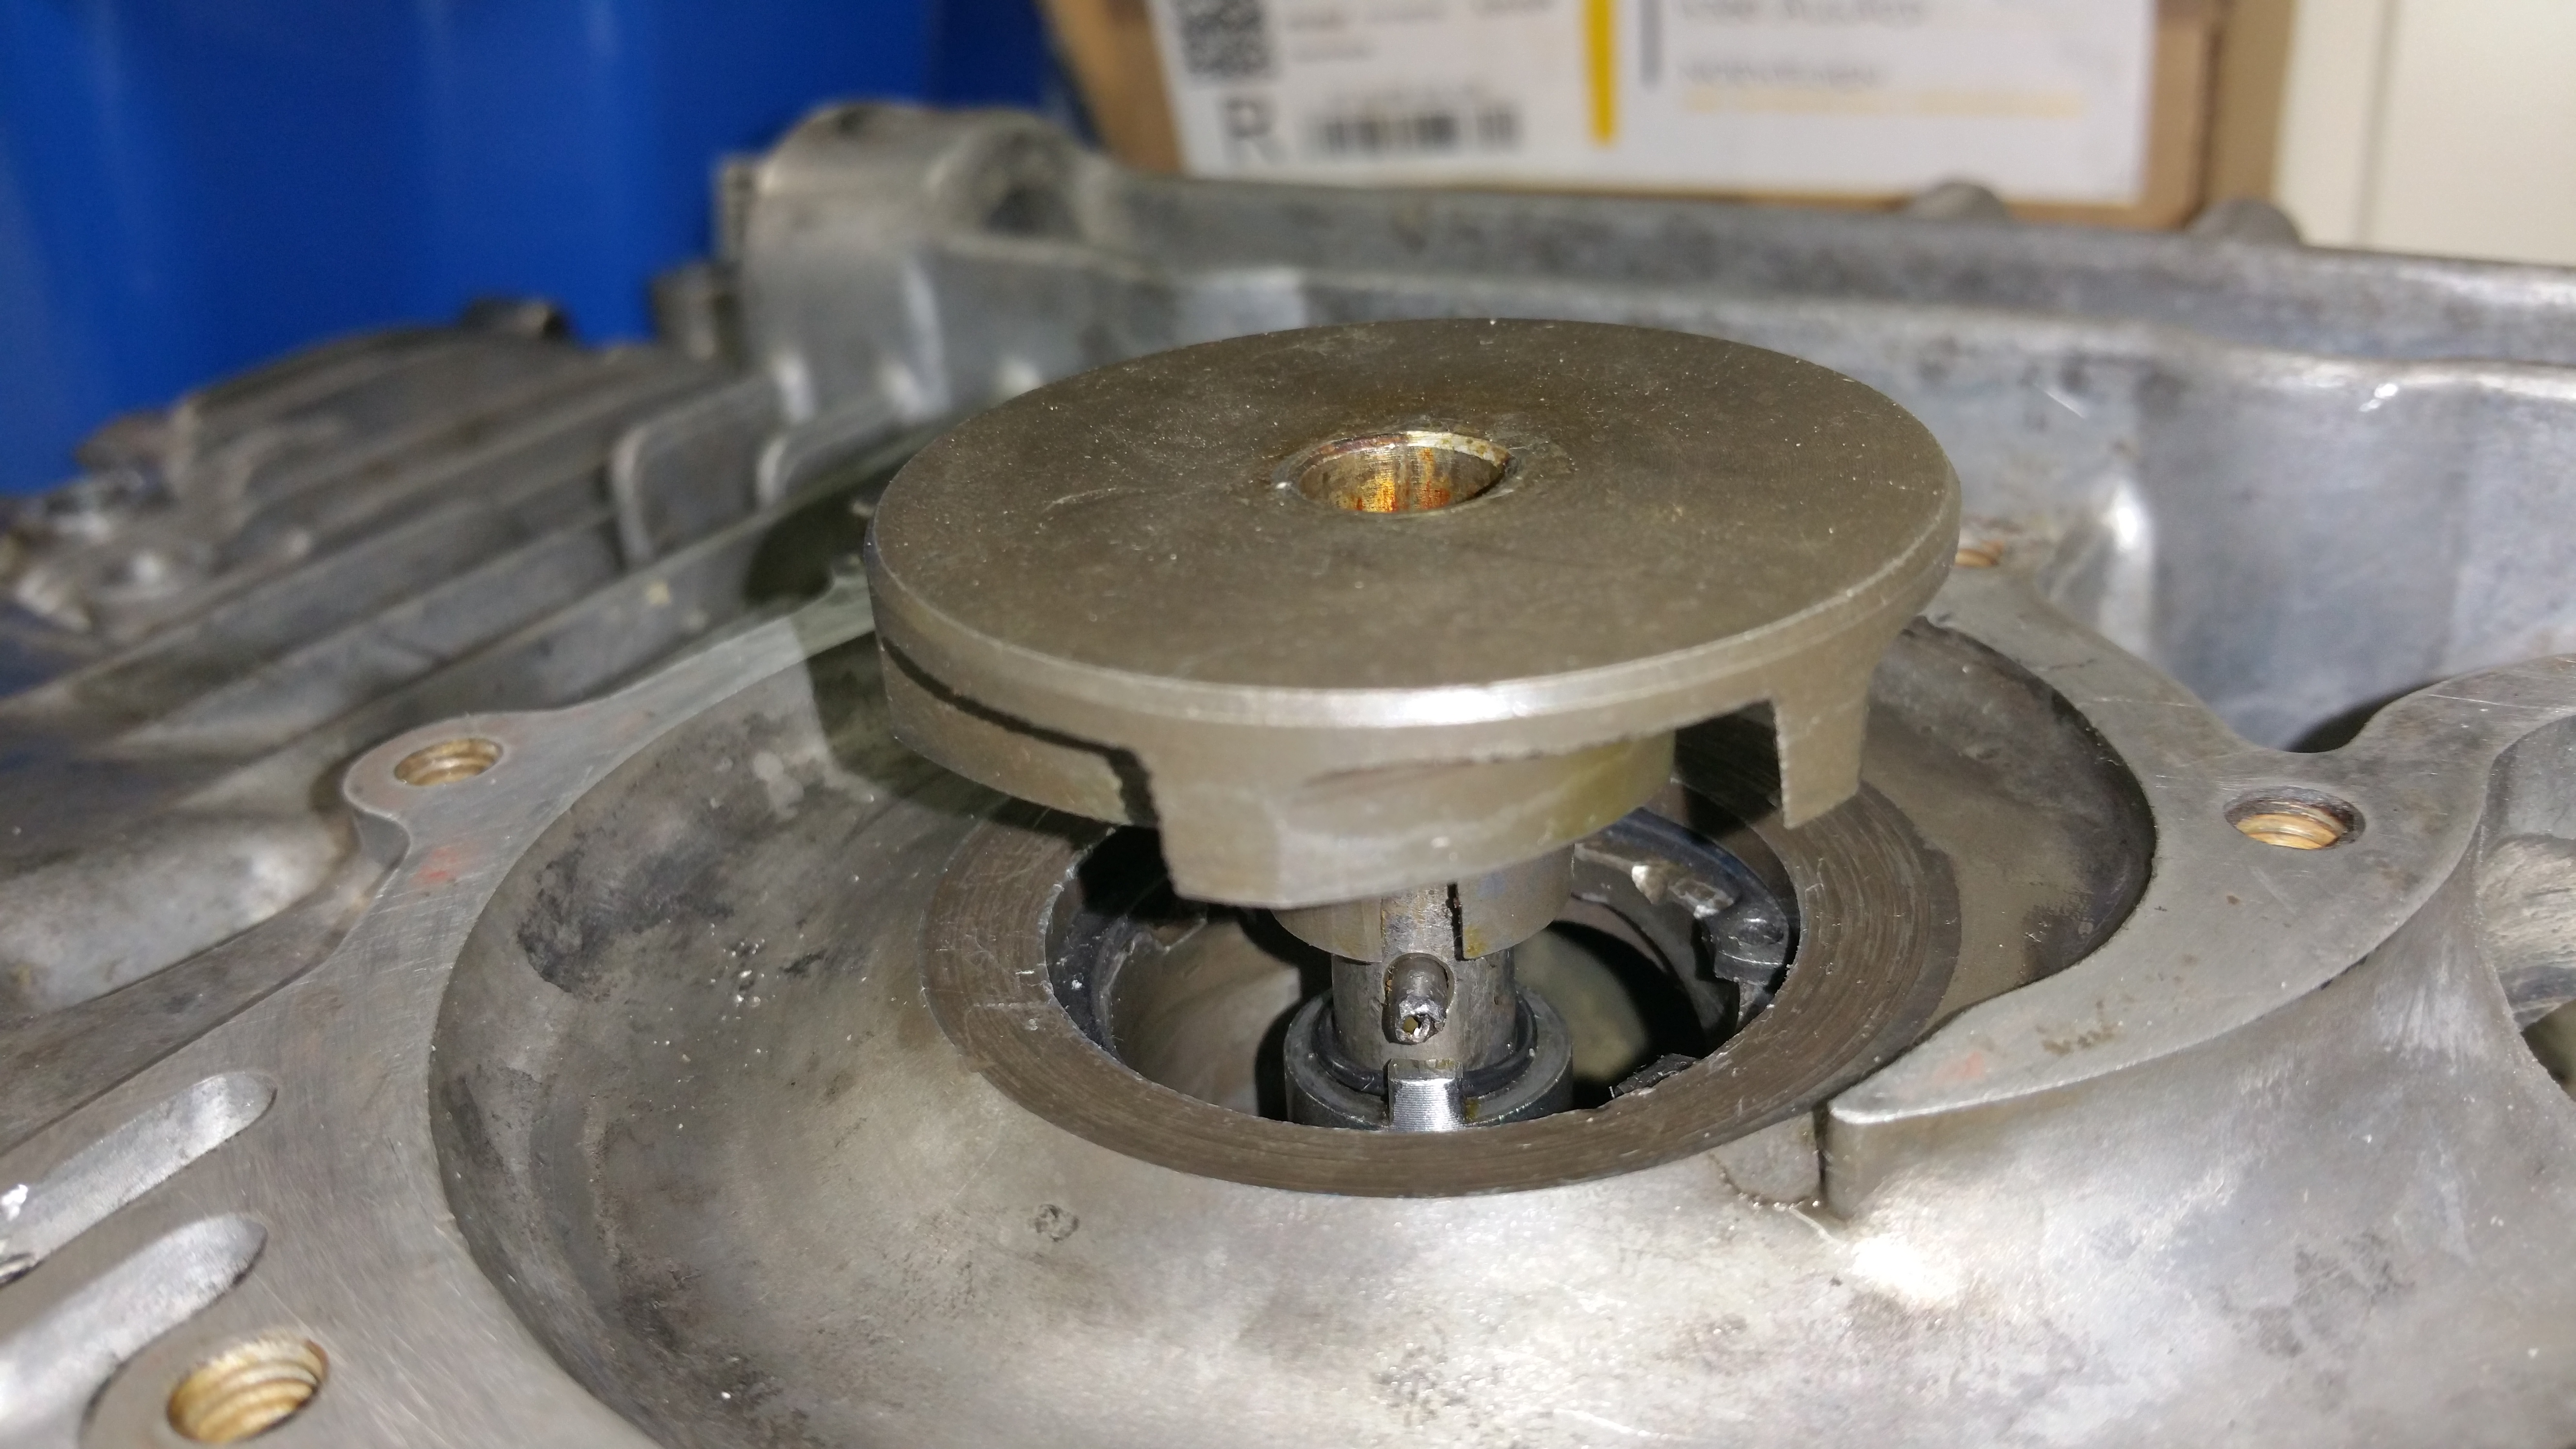
The seals in the pump are gone. The seal located within the spring might be difficult to get. Have to do some investigation to figure out if it’s part of the repair kit.
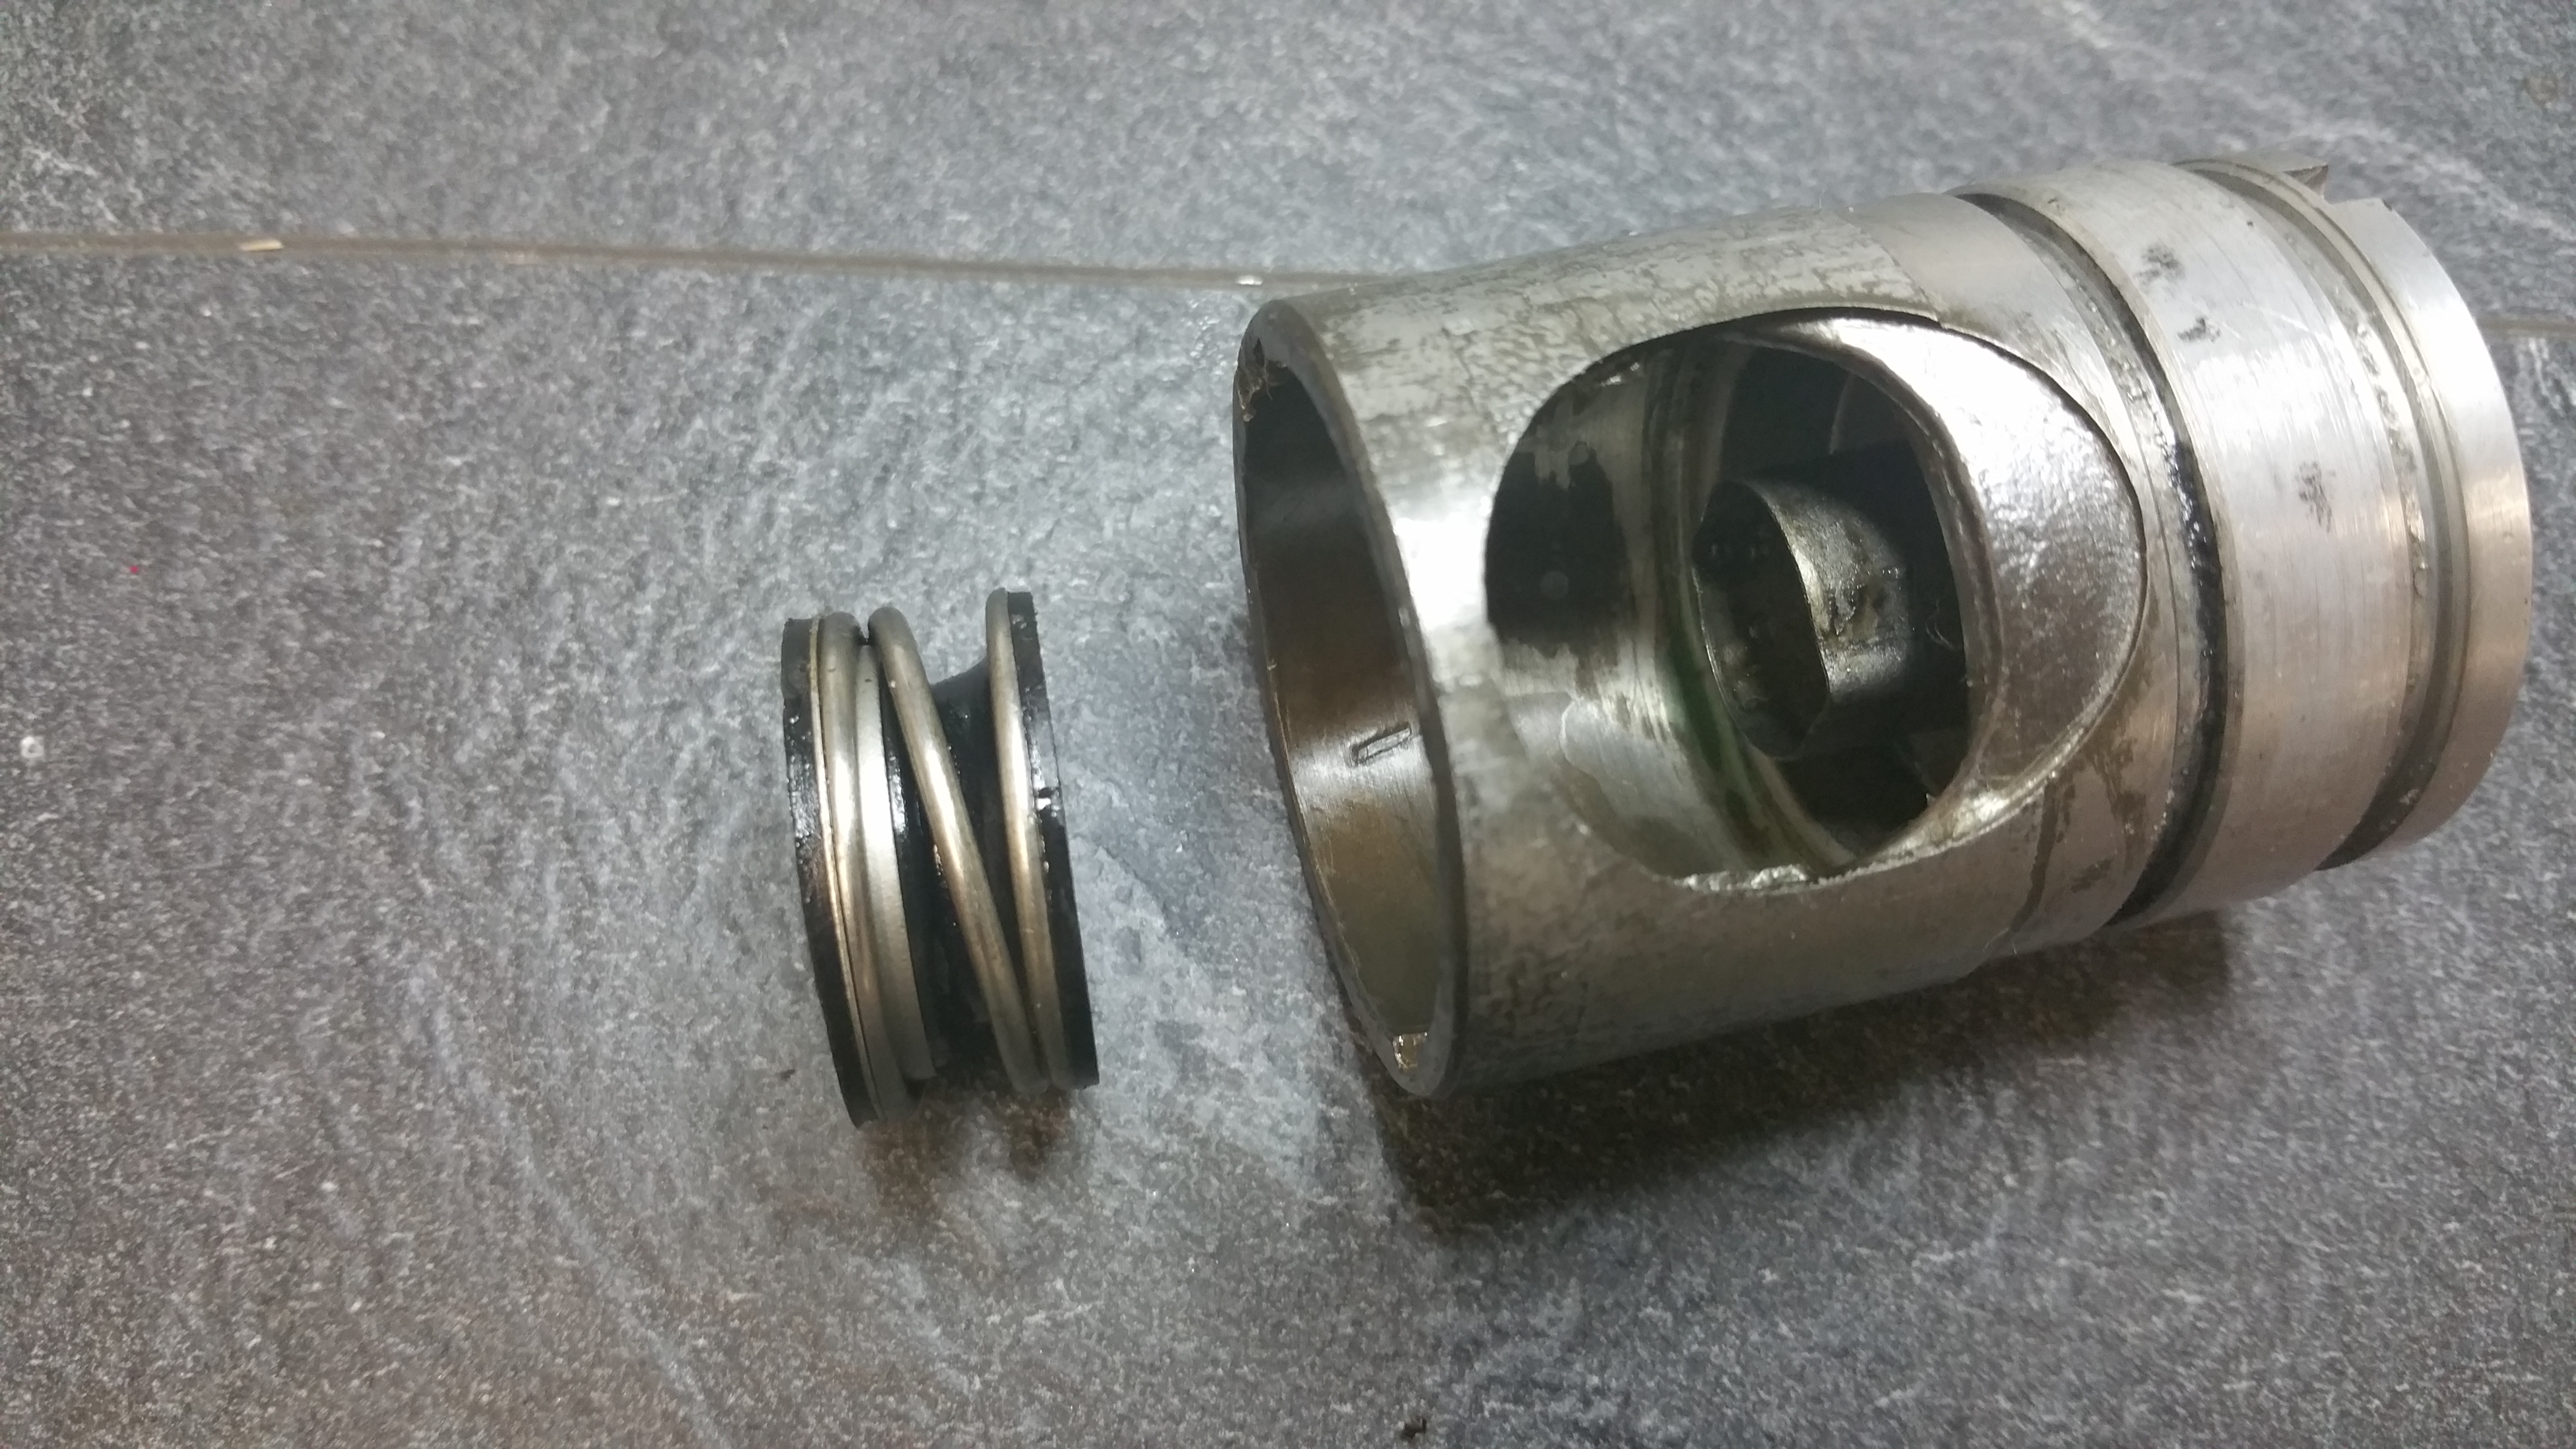

The bearing in the pump is not good and should be replaced. How to proceed to disassemble the pump ?
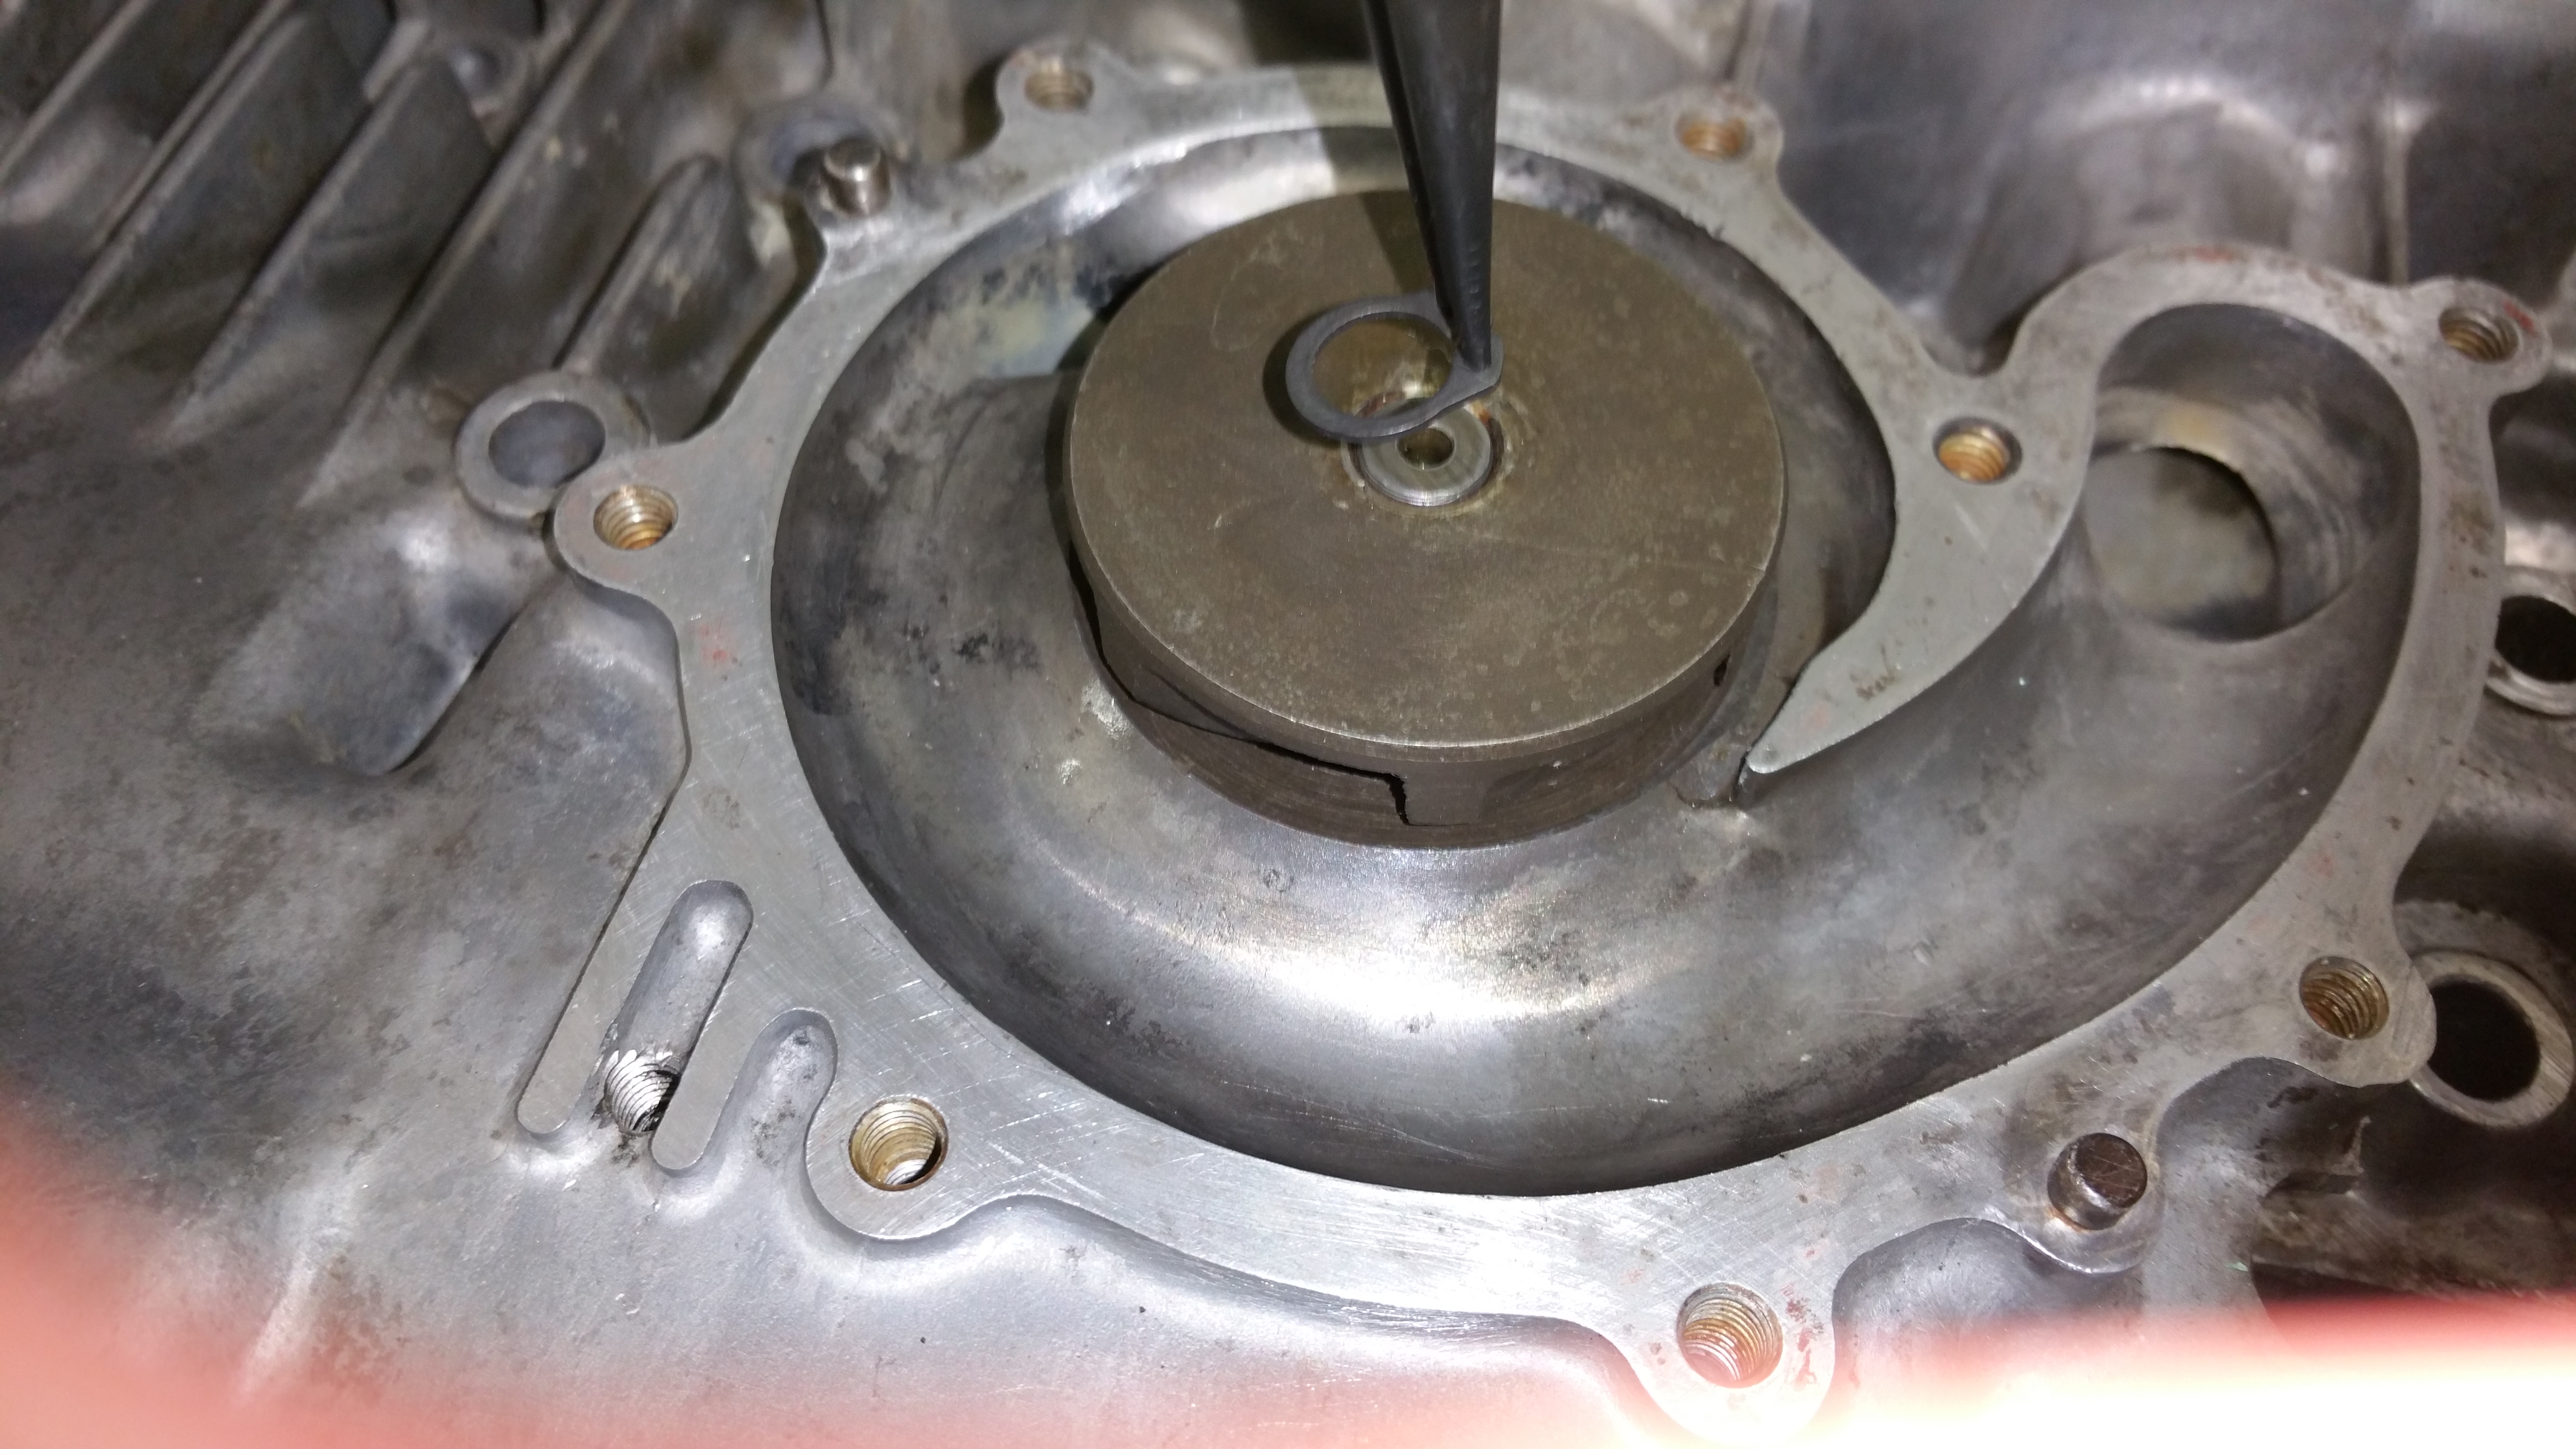
Remove the pin (17) and tap the axle (upwards) with a hammer.
The seal mounted in the middle of the spring seems to be difficult to get hold of. It’s worn and need to be replaced. Can’t see it as a part in the drawing. Perhaps it’s included in part 6 ? Not sure if that part is available either. If not I have to buy a complete new pump, quite expensive but still able to get. The new bearing I bought will be a waste of money if I have to buy a new pump….(a new lesson learned. )
Does anyone know where to buy the seal ?
