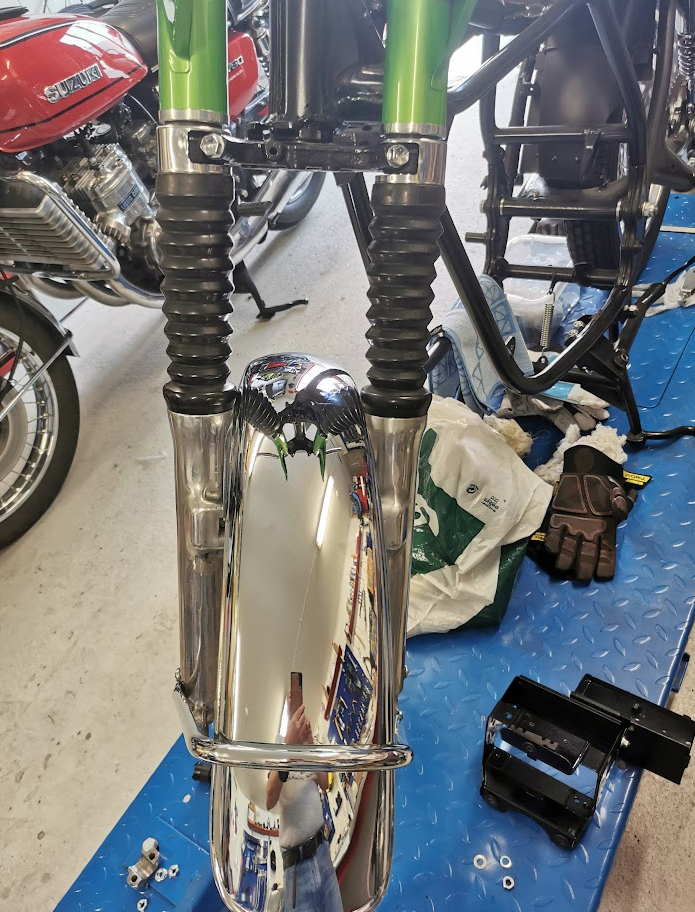
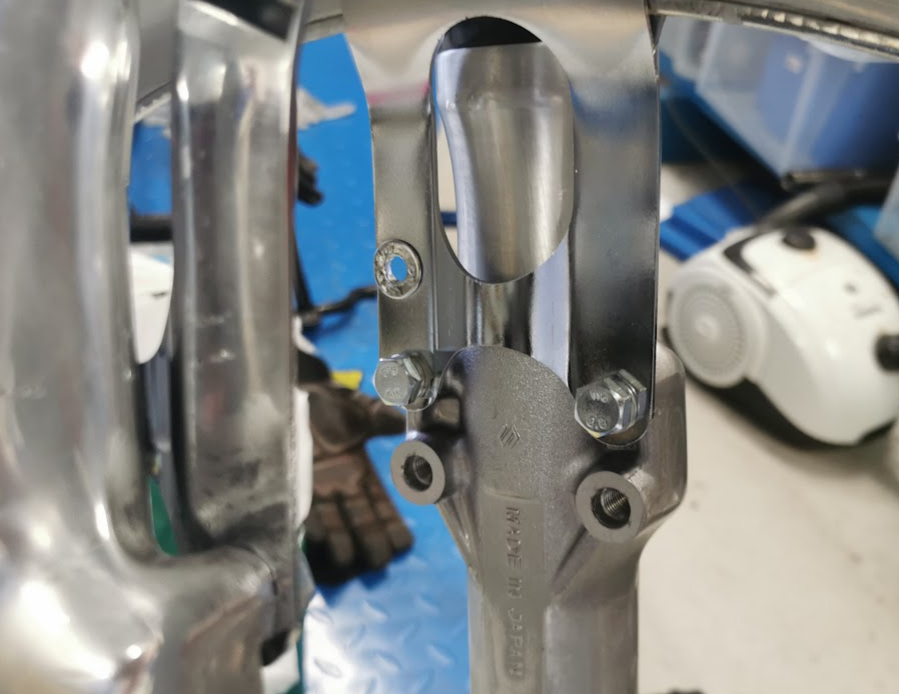
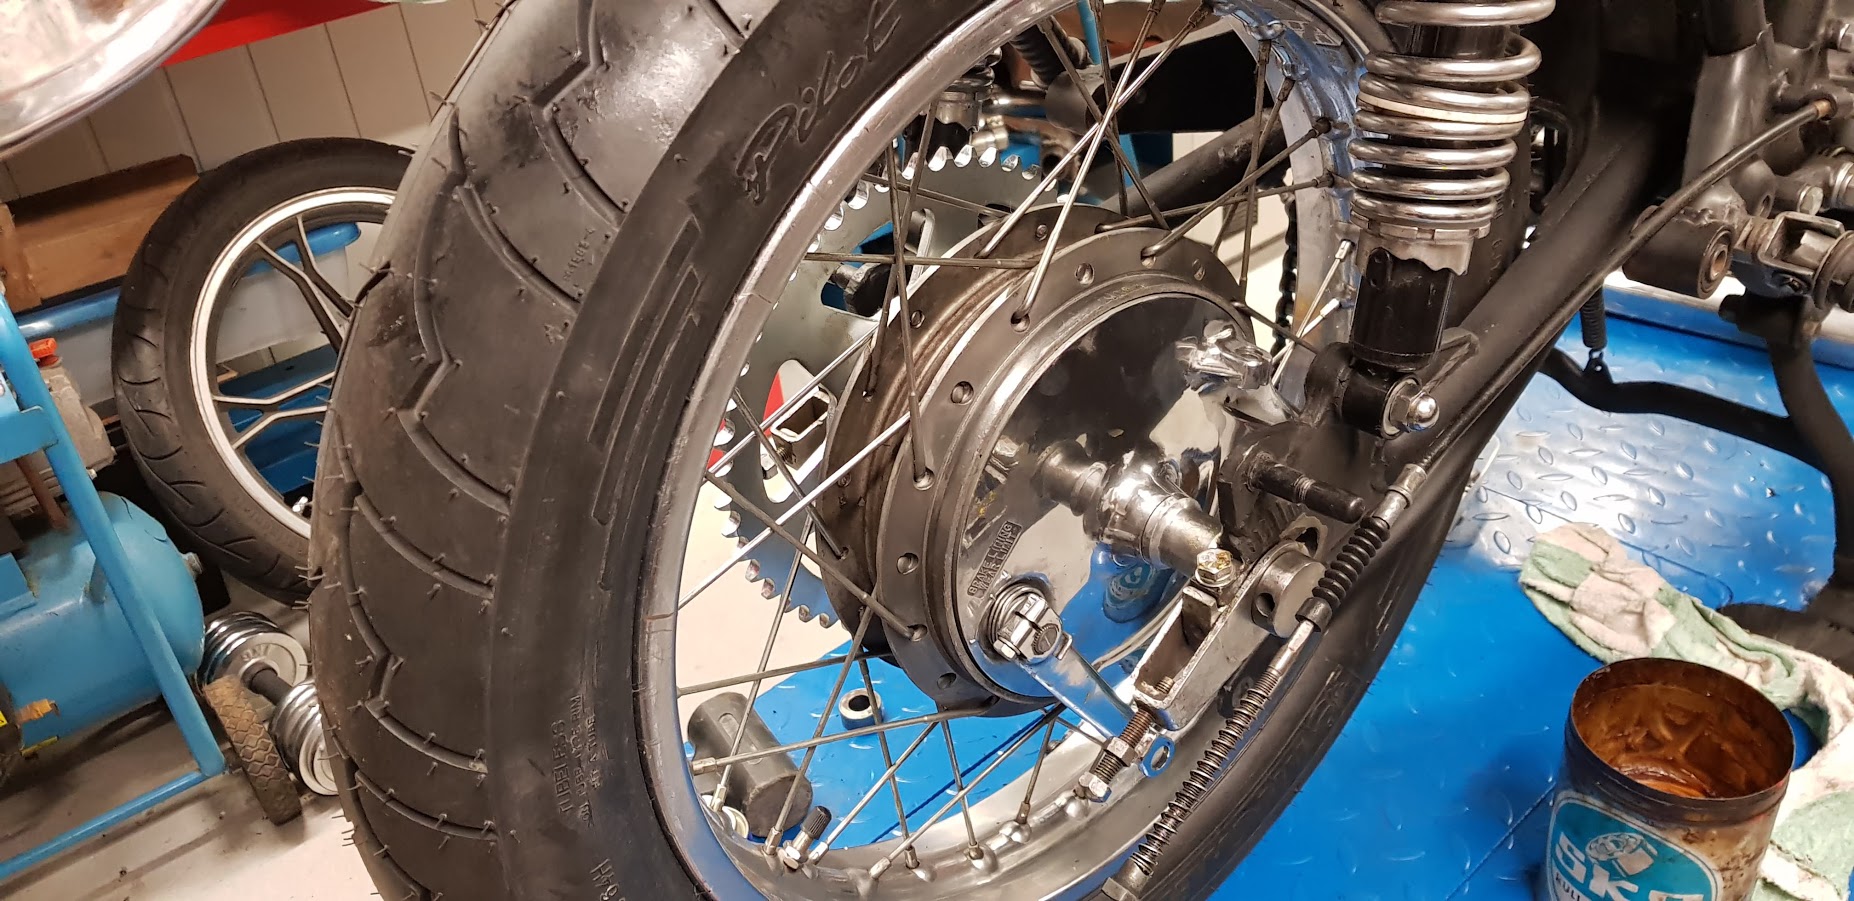
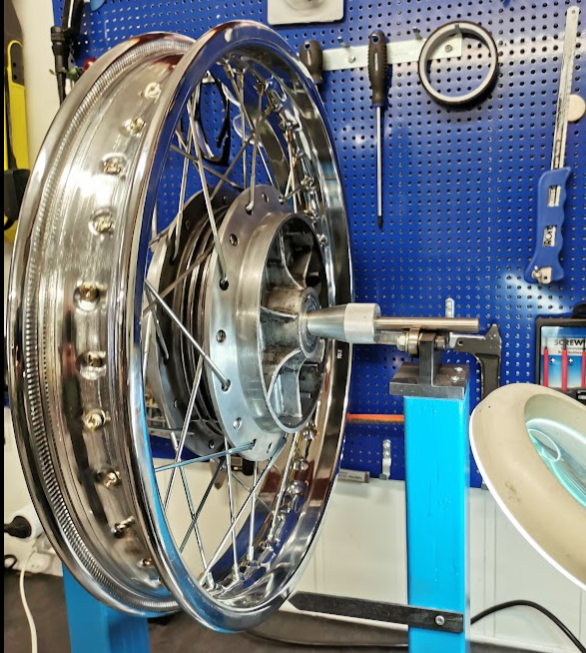
Browse Category: Wheel

GT750 rear wheel

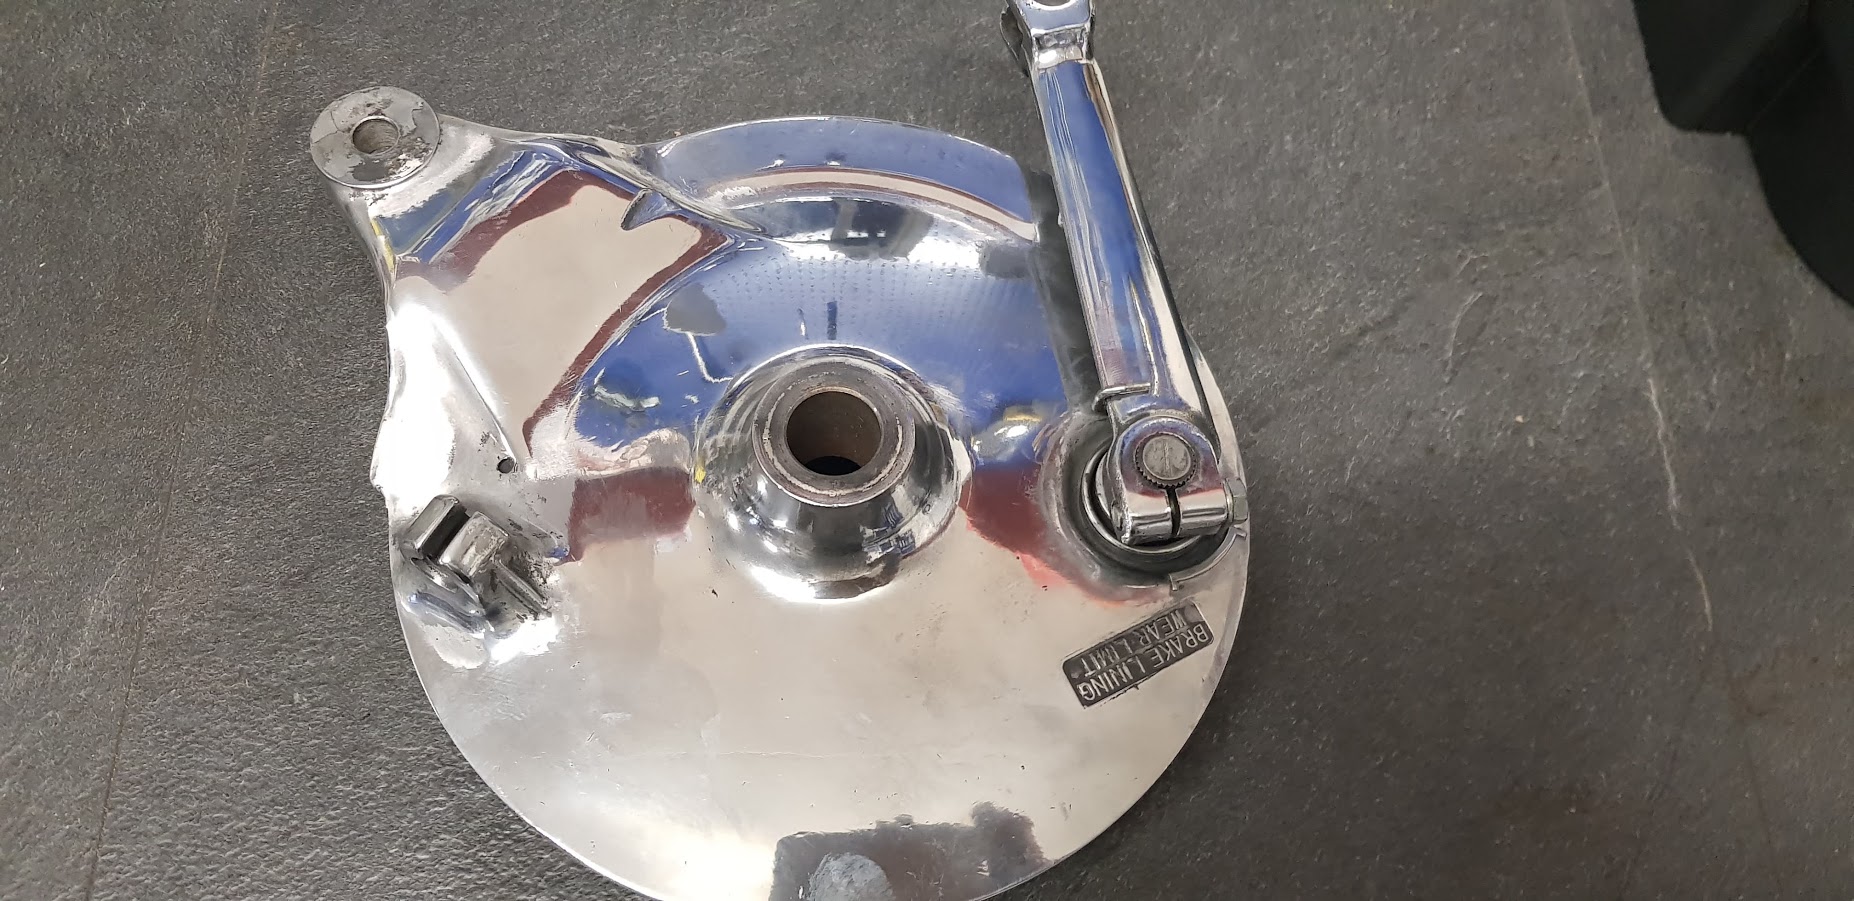
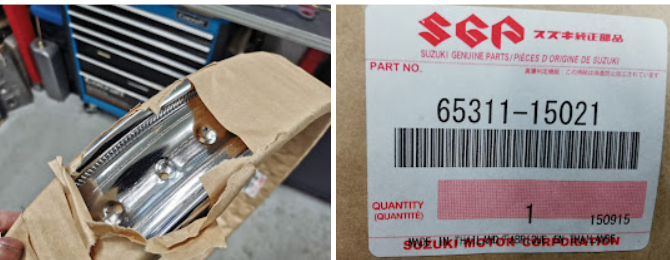
Time to build a rear wheel for my GT750. Was able to get a new original Suzuki rim, spokes and a used hub, and now it’s time to get the job done. The wheel mounted on the bike has some broken spokes and a dent in the rim I can’t repair. Better to rebuild a new one and keep the old as spare.

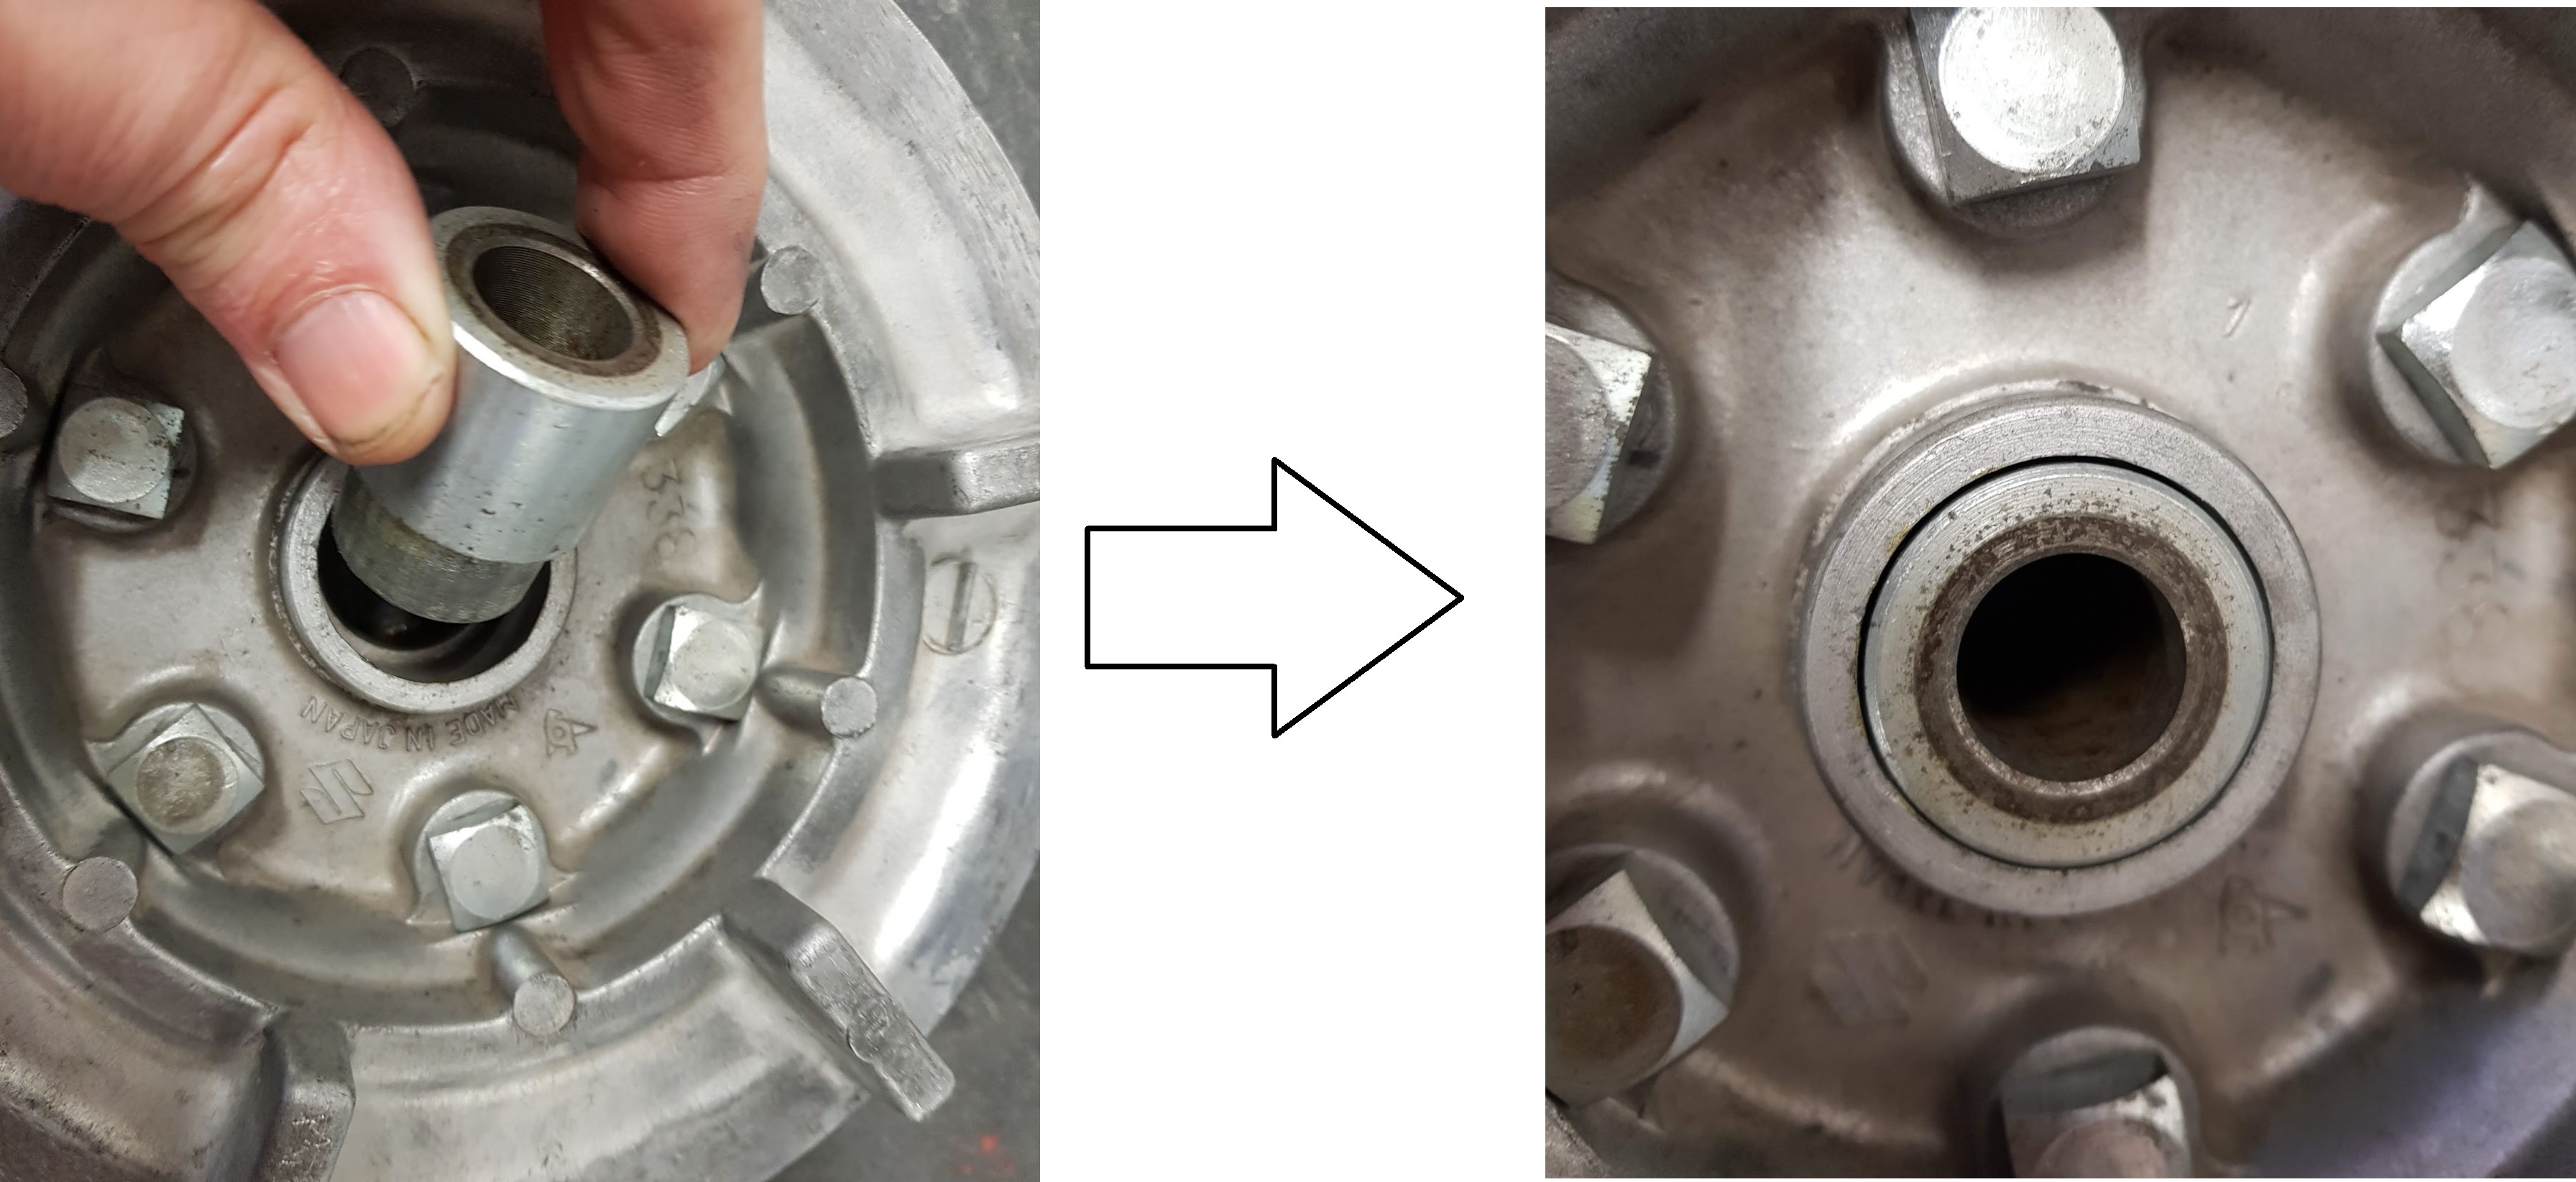
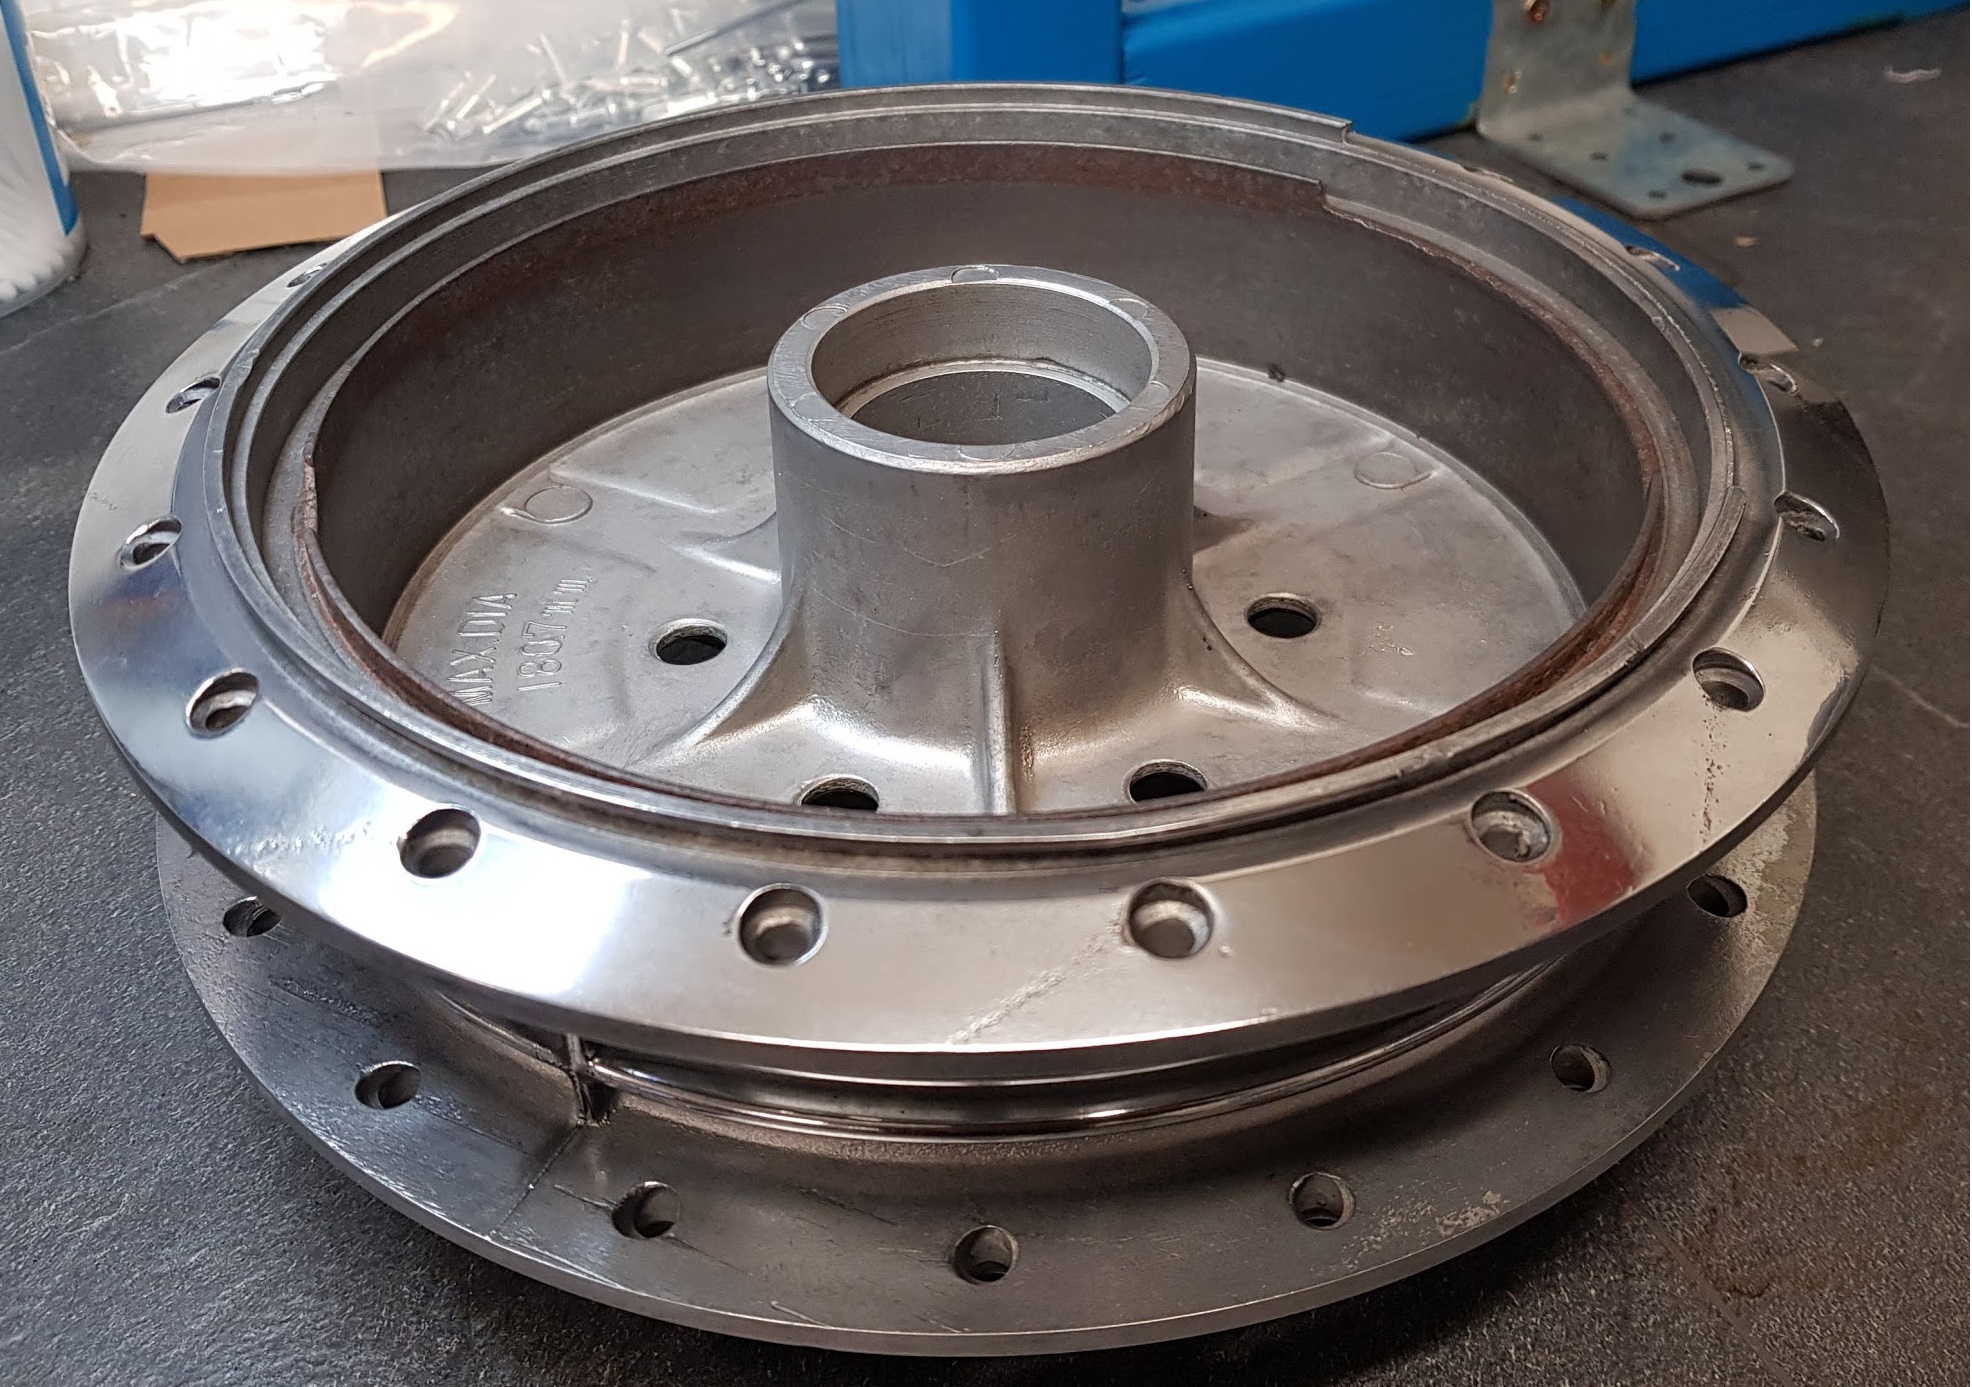
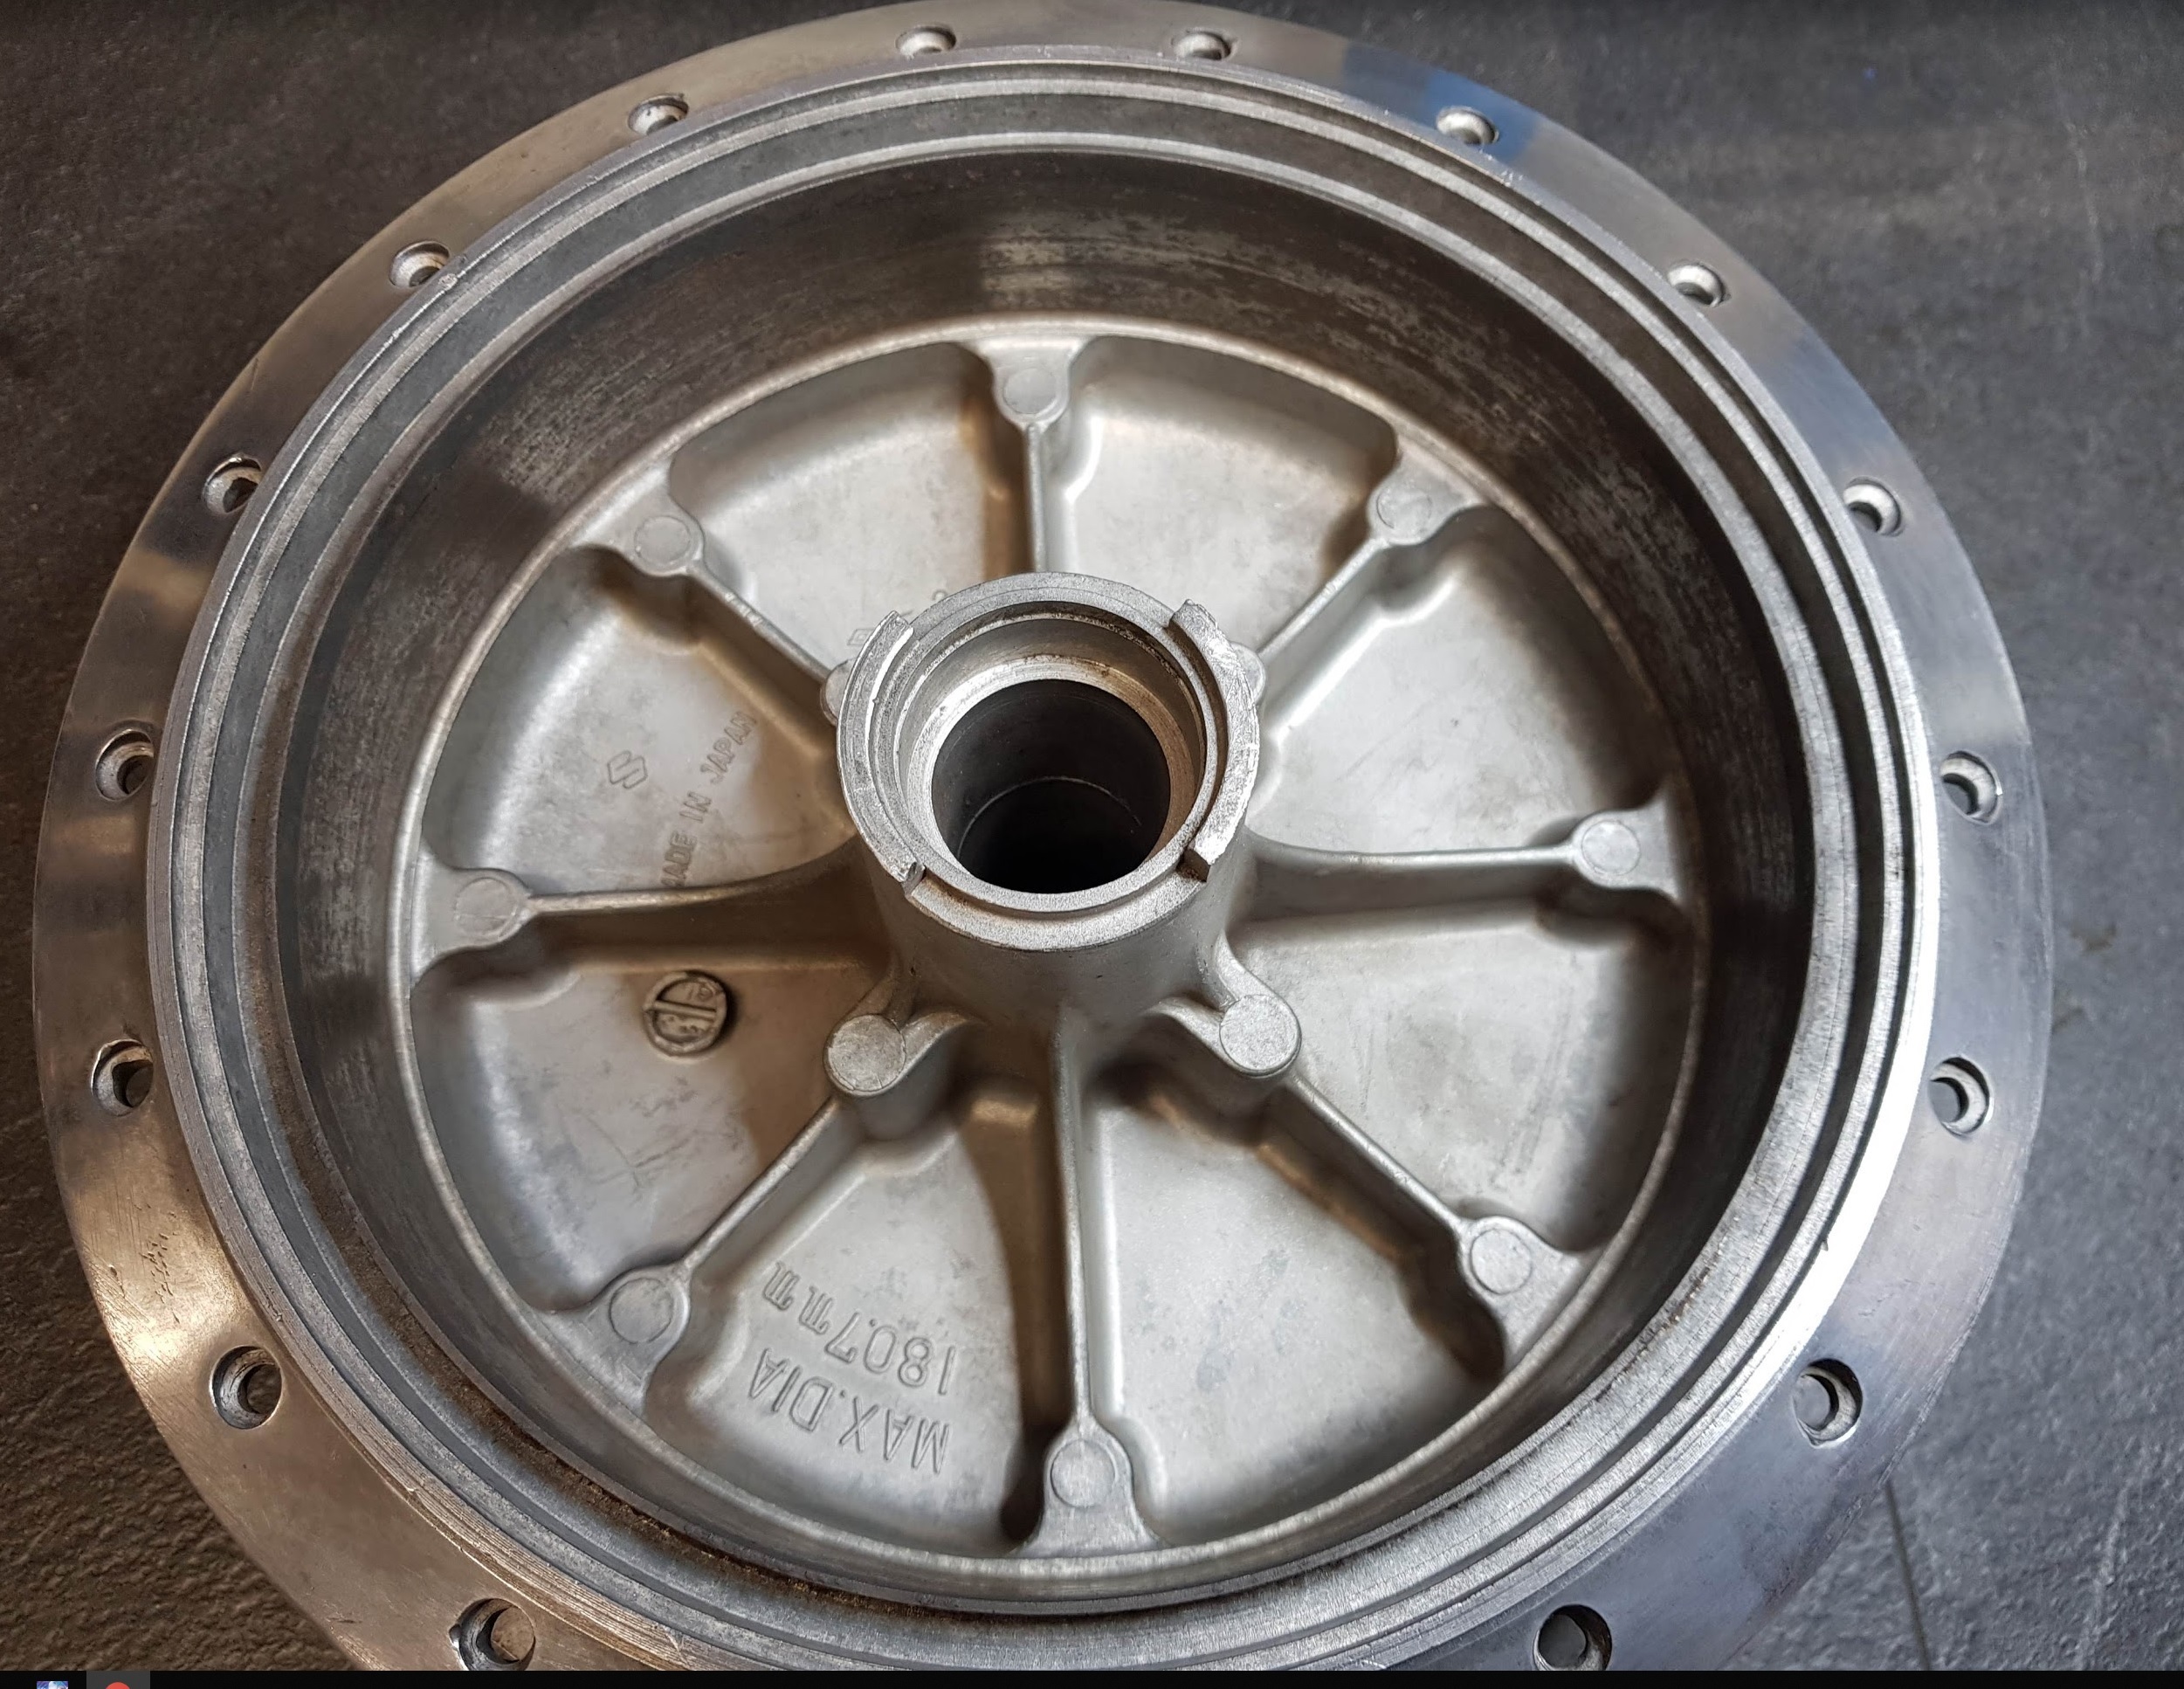
Removing the bearings from the hub.

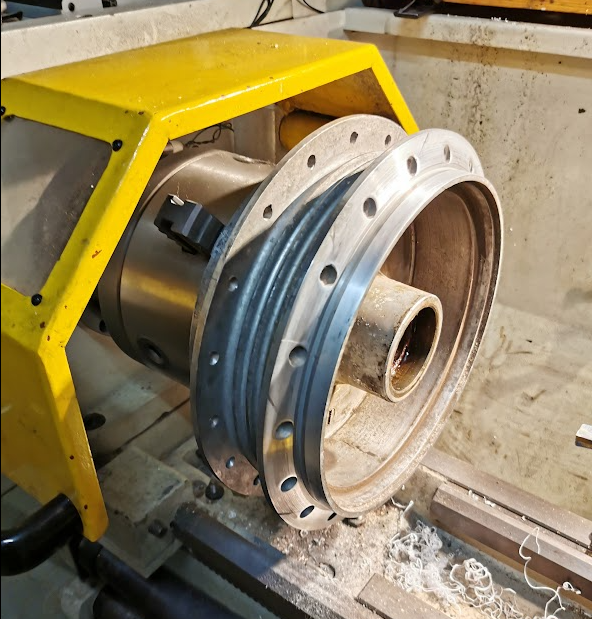
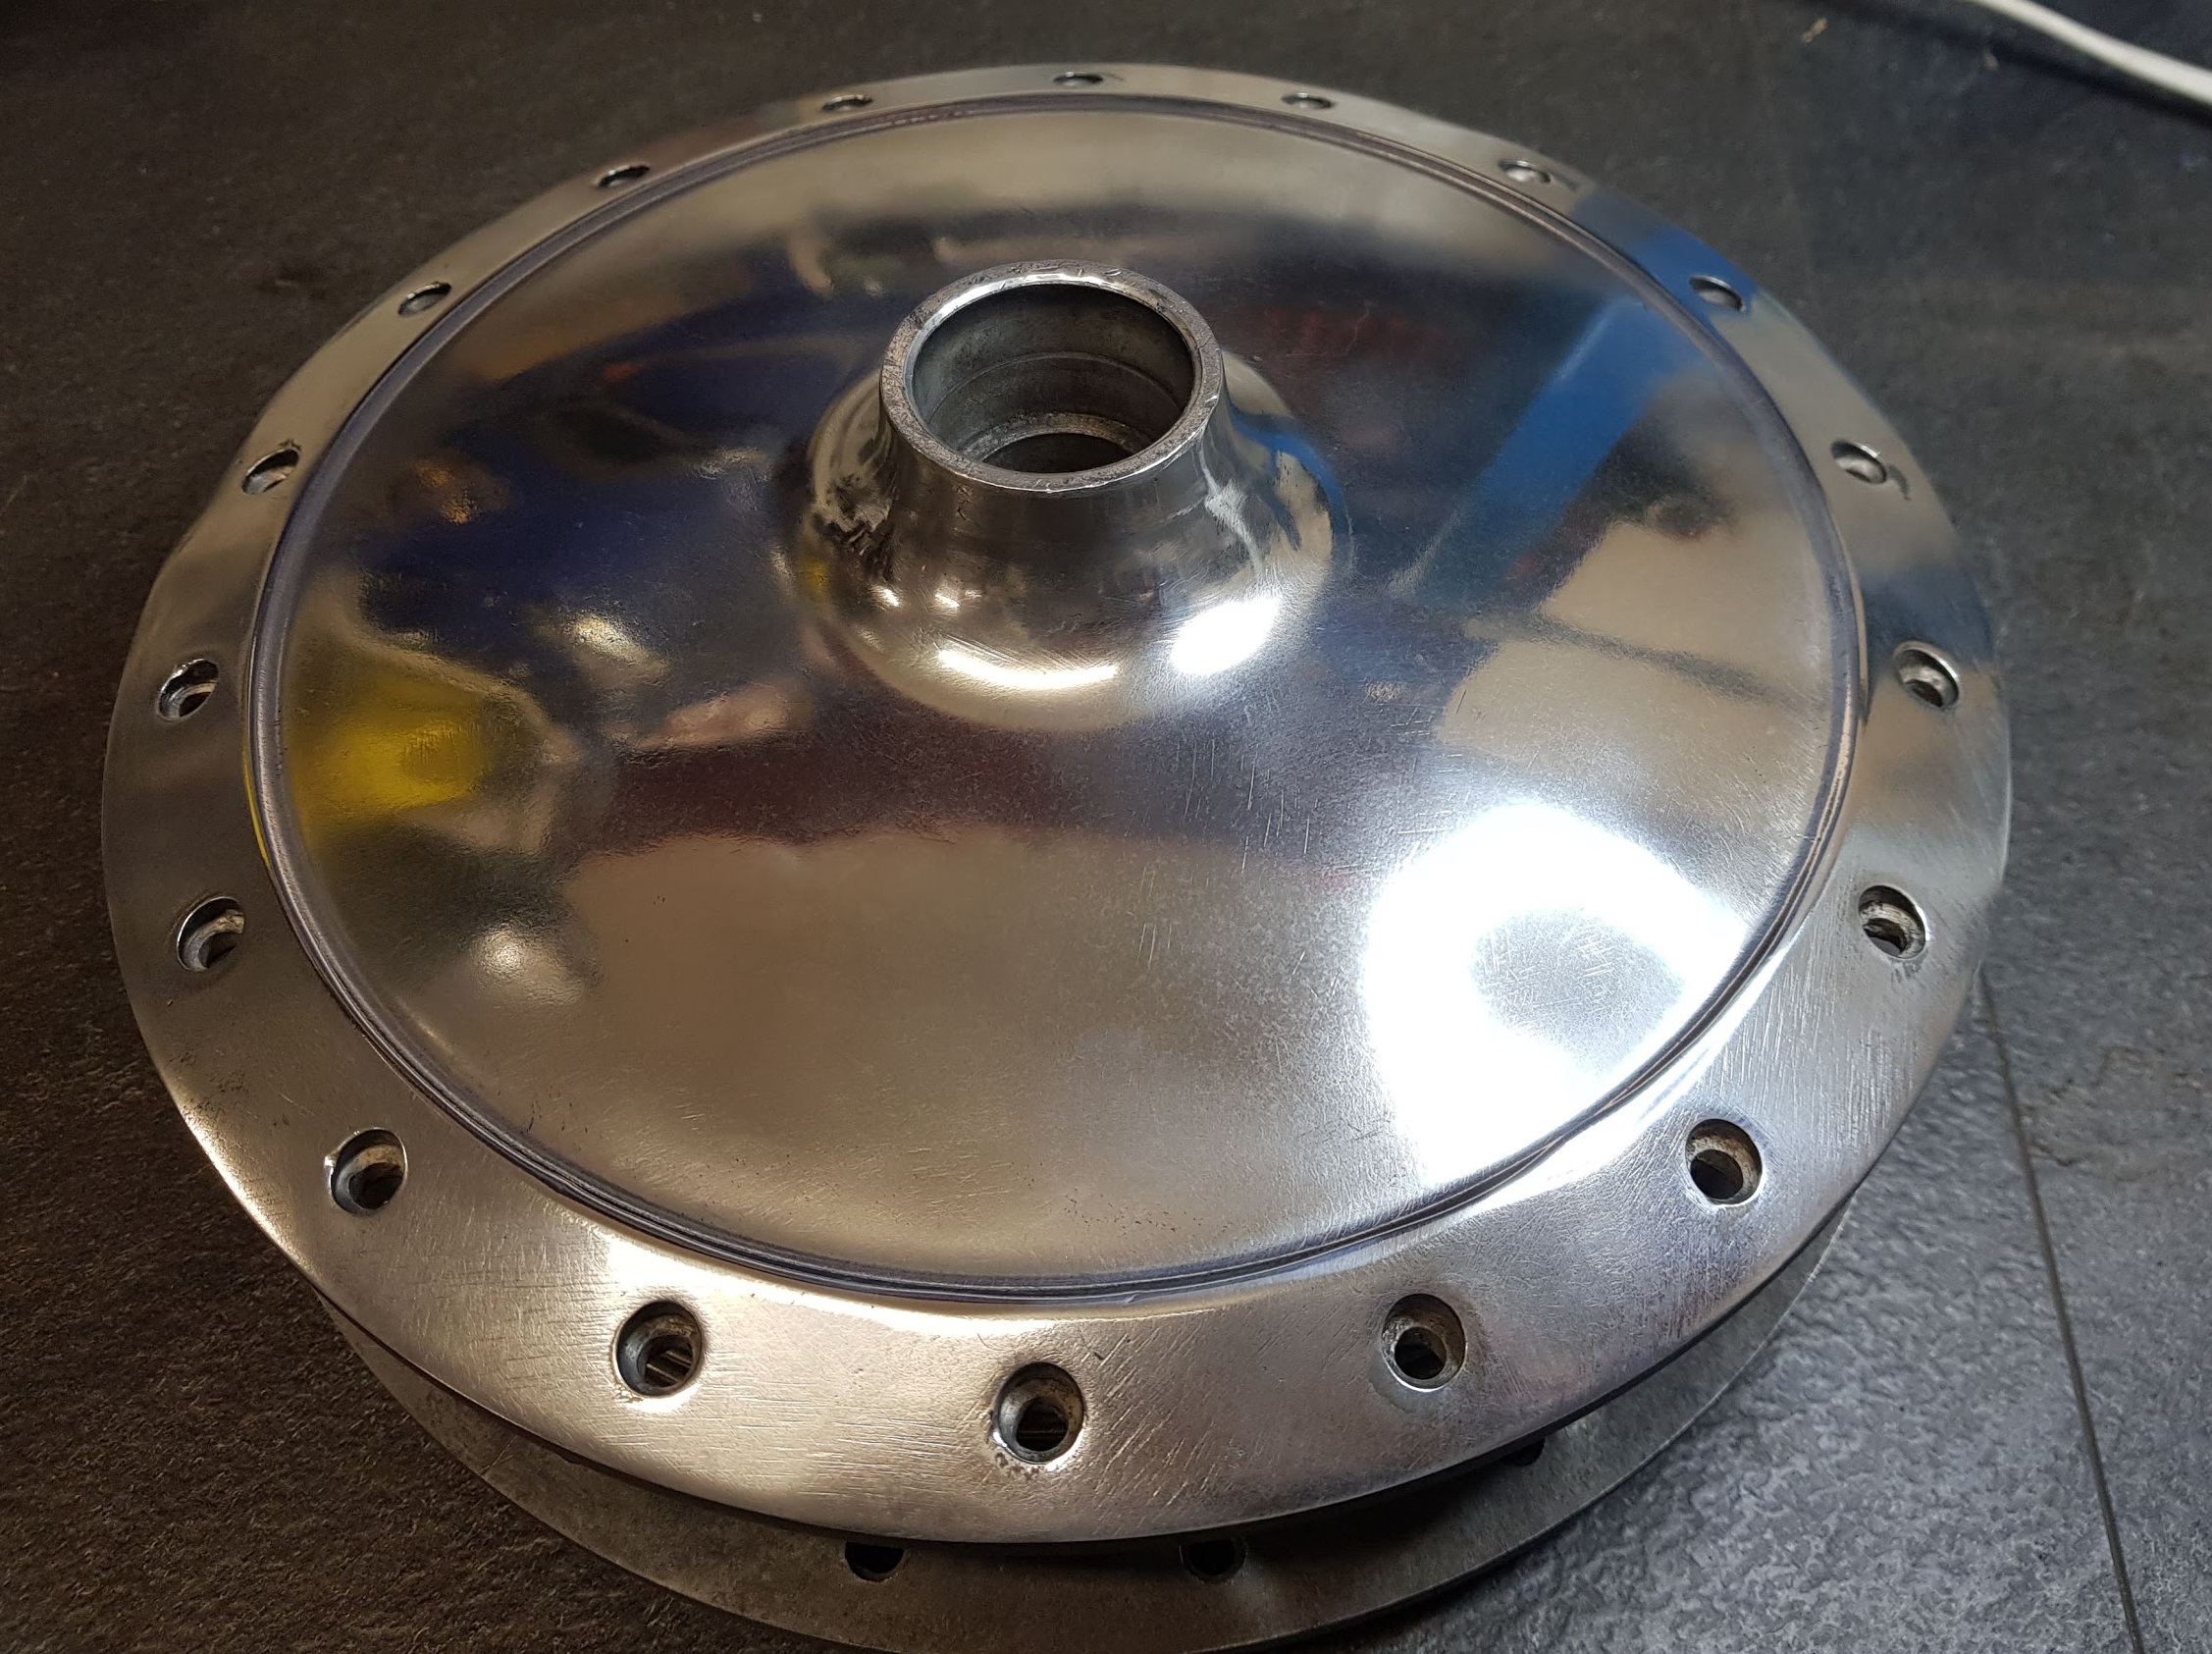
A bit sanding and polishing of the hub.

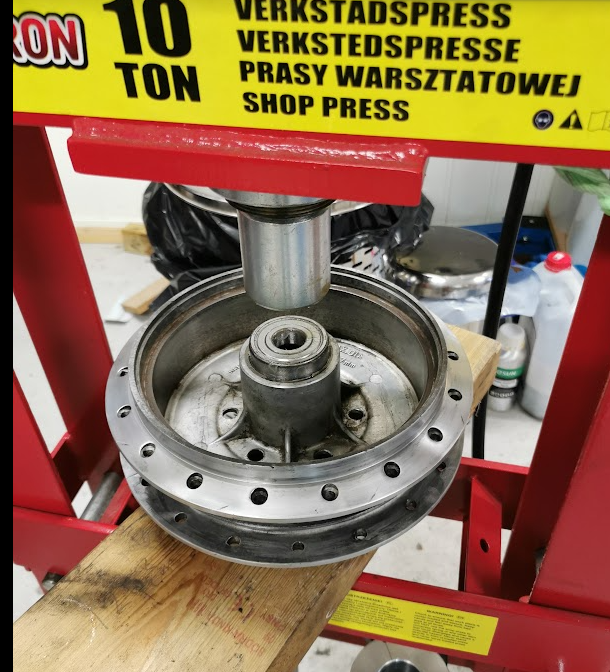
Mounting new bearings

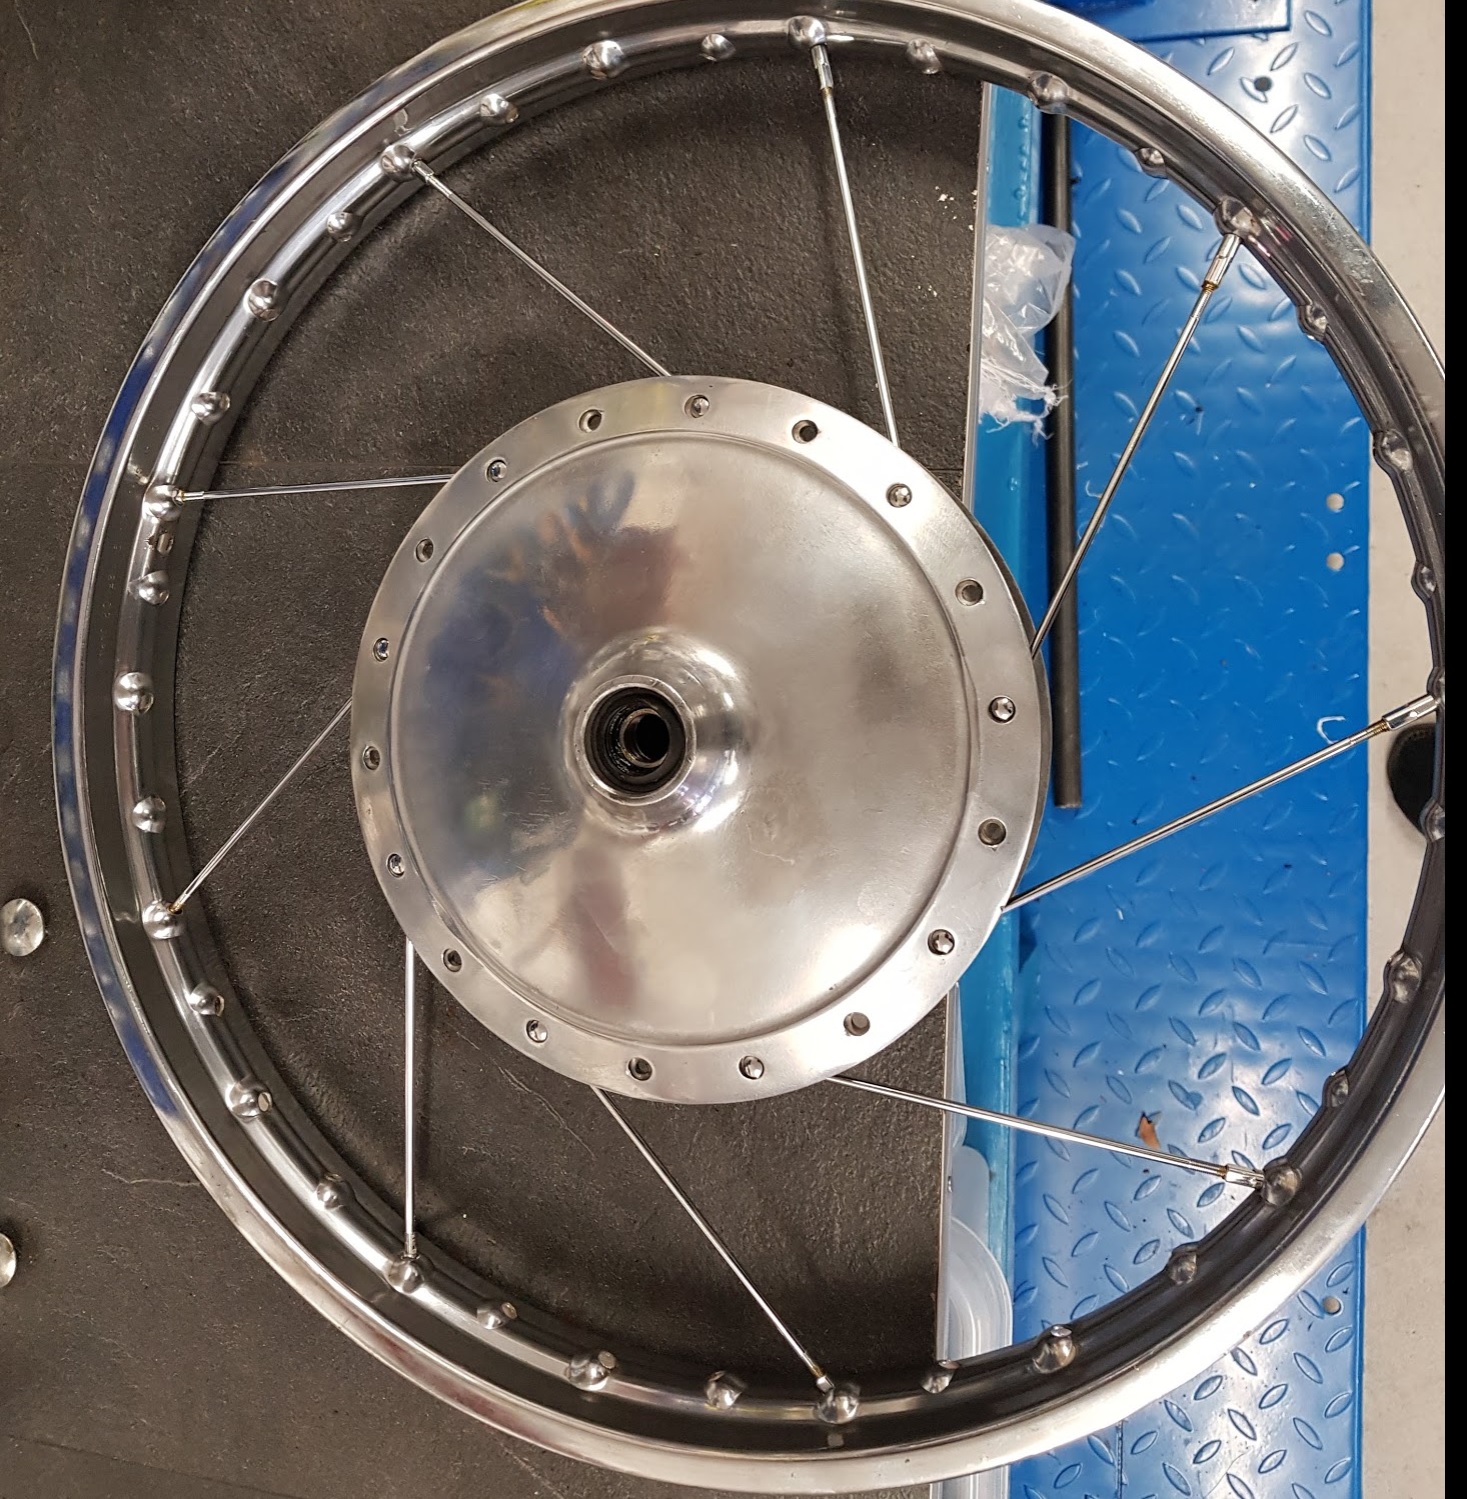
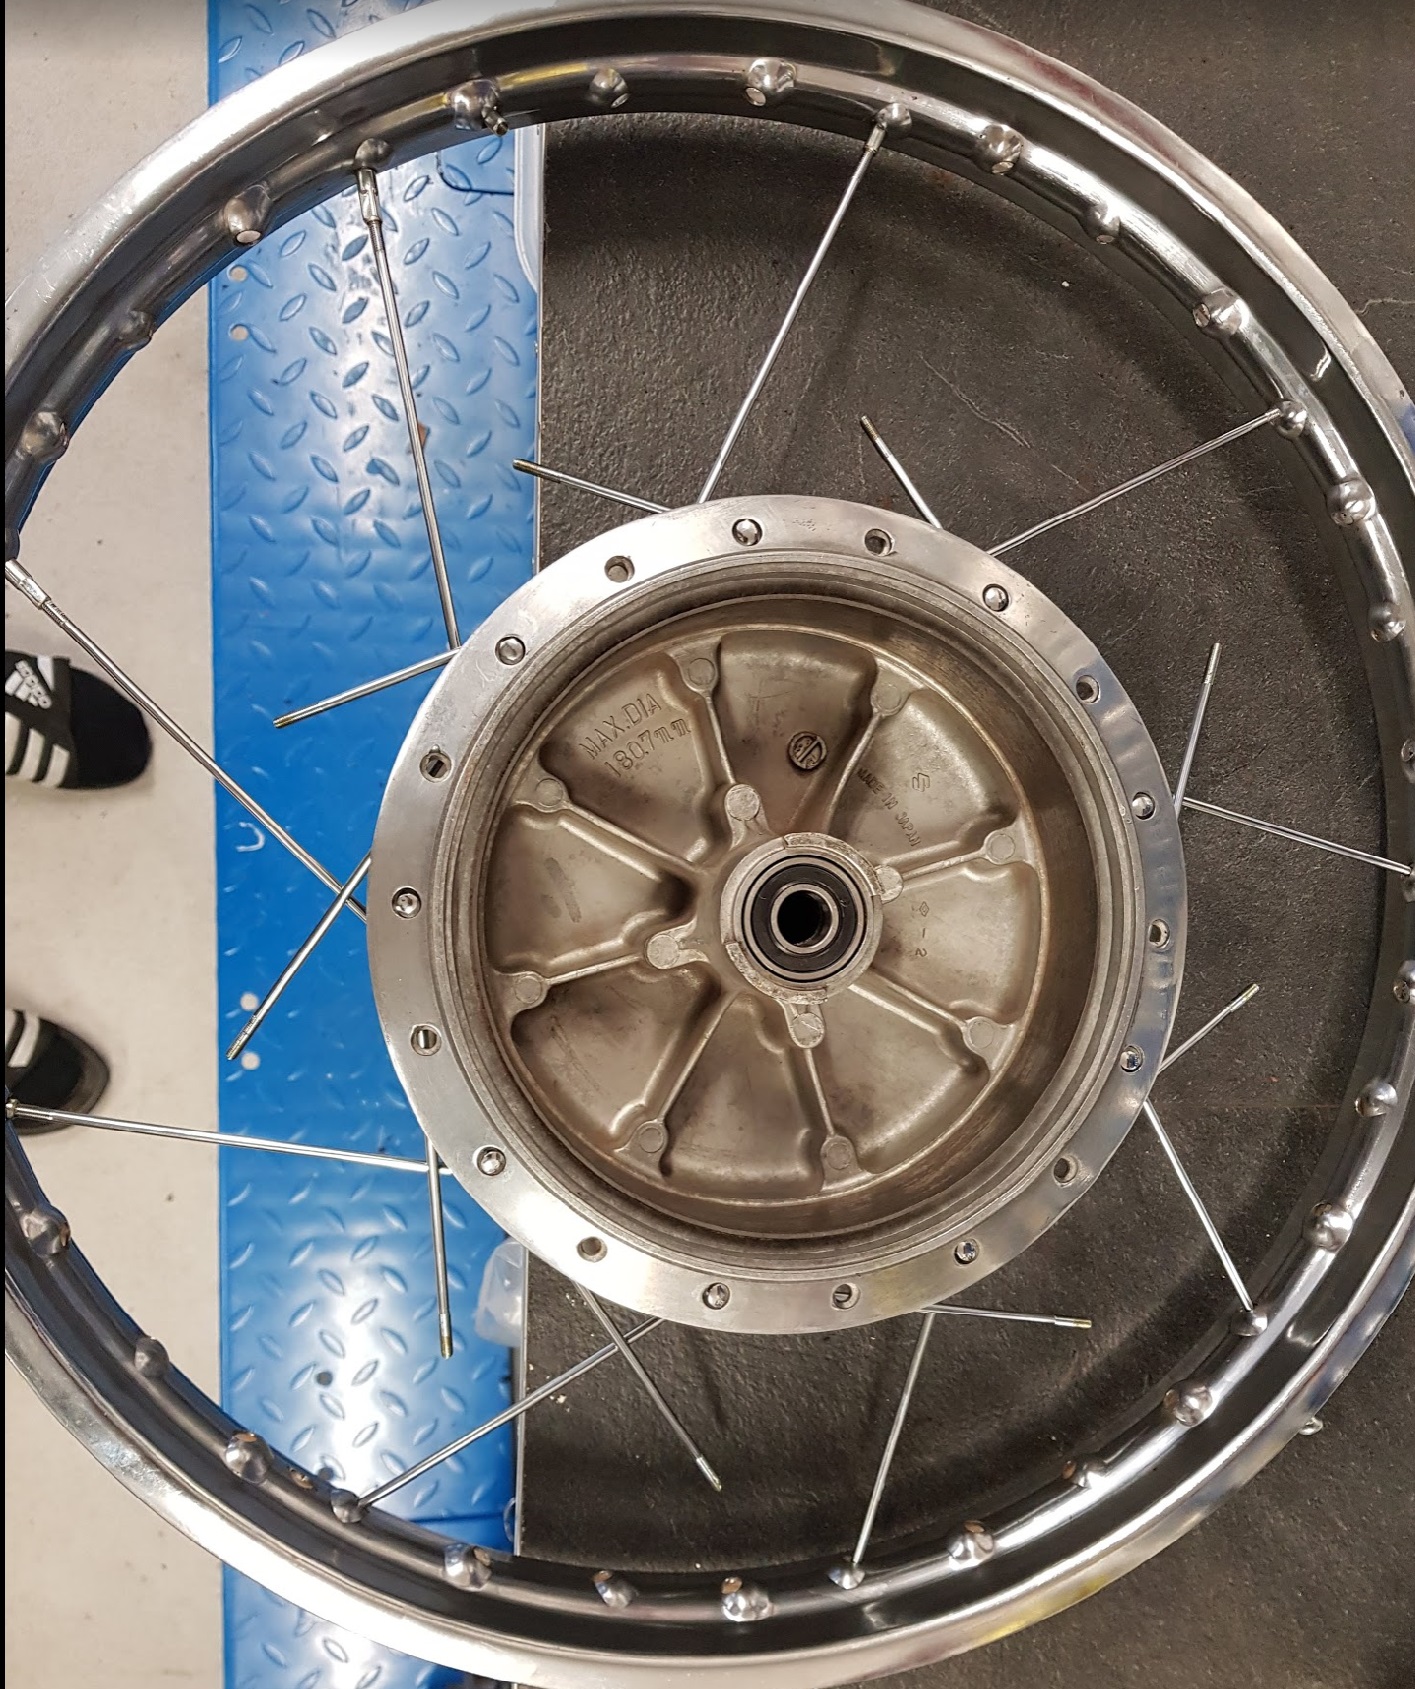
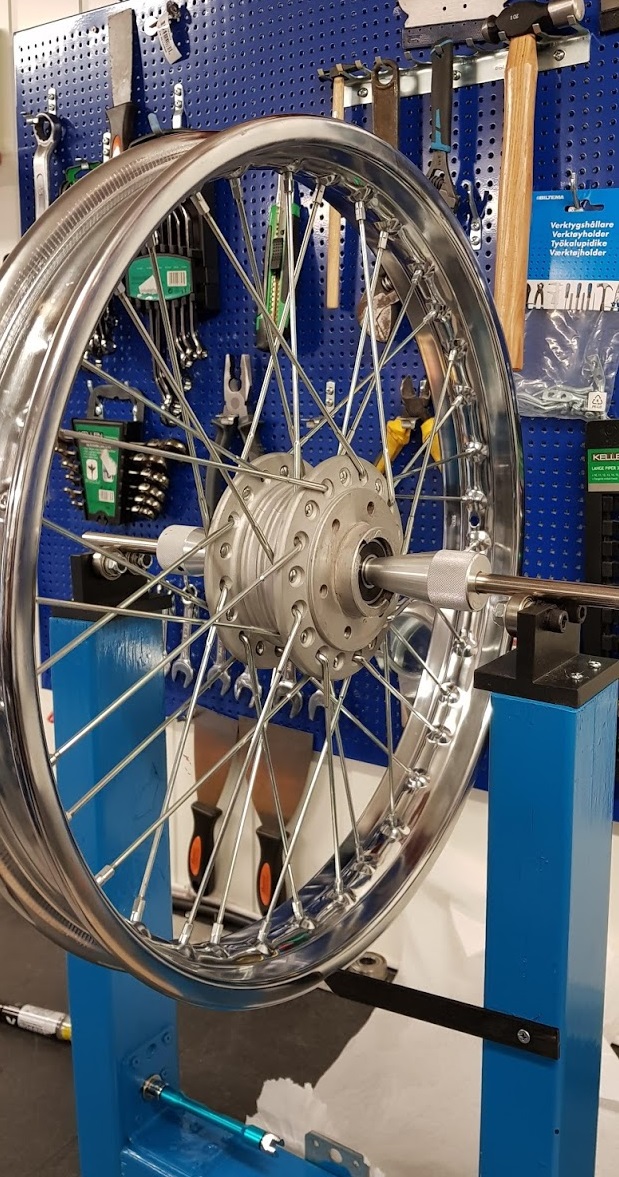
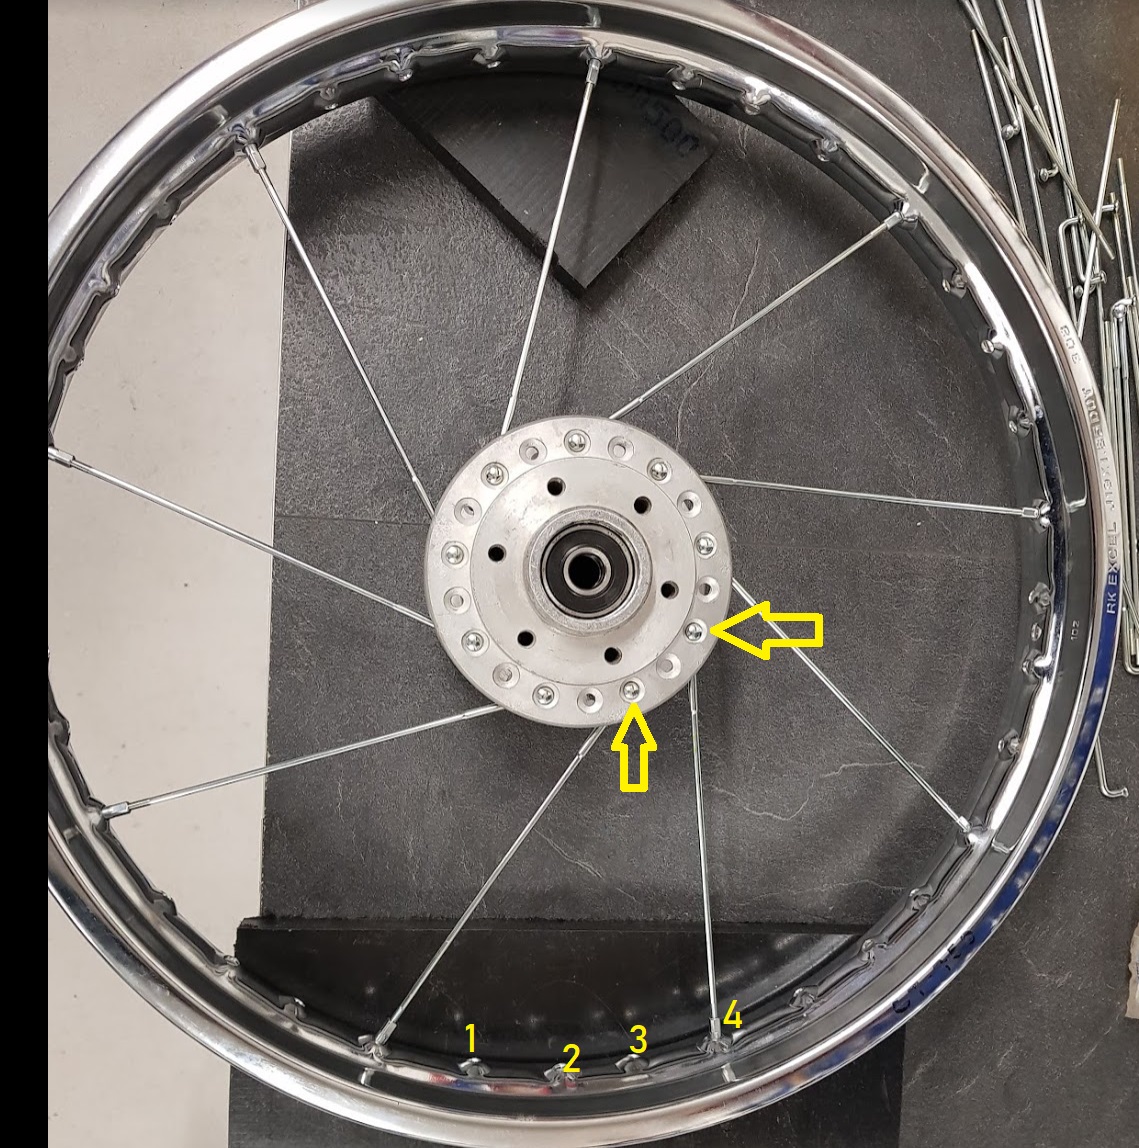
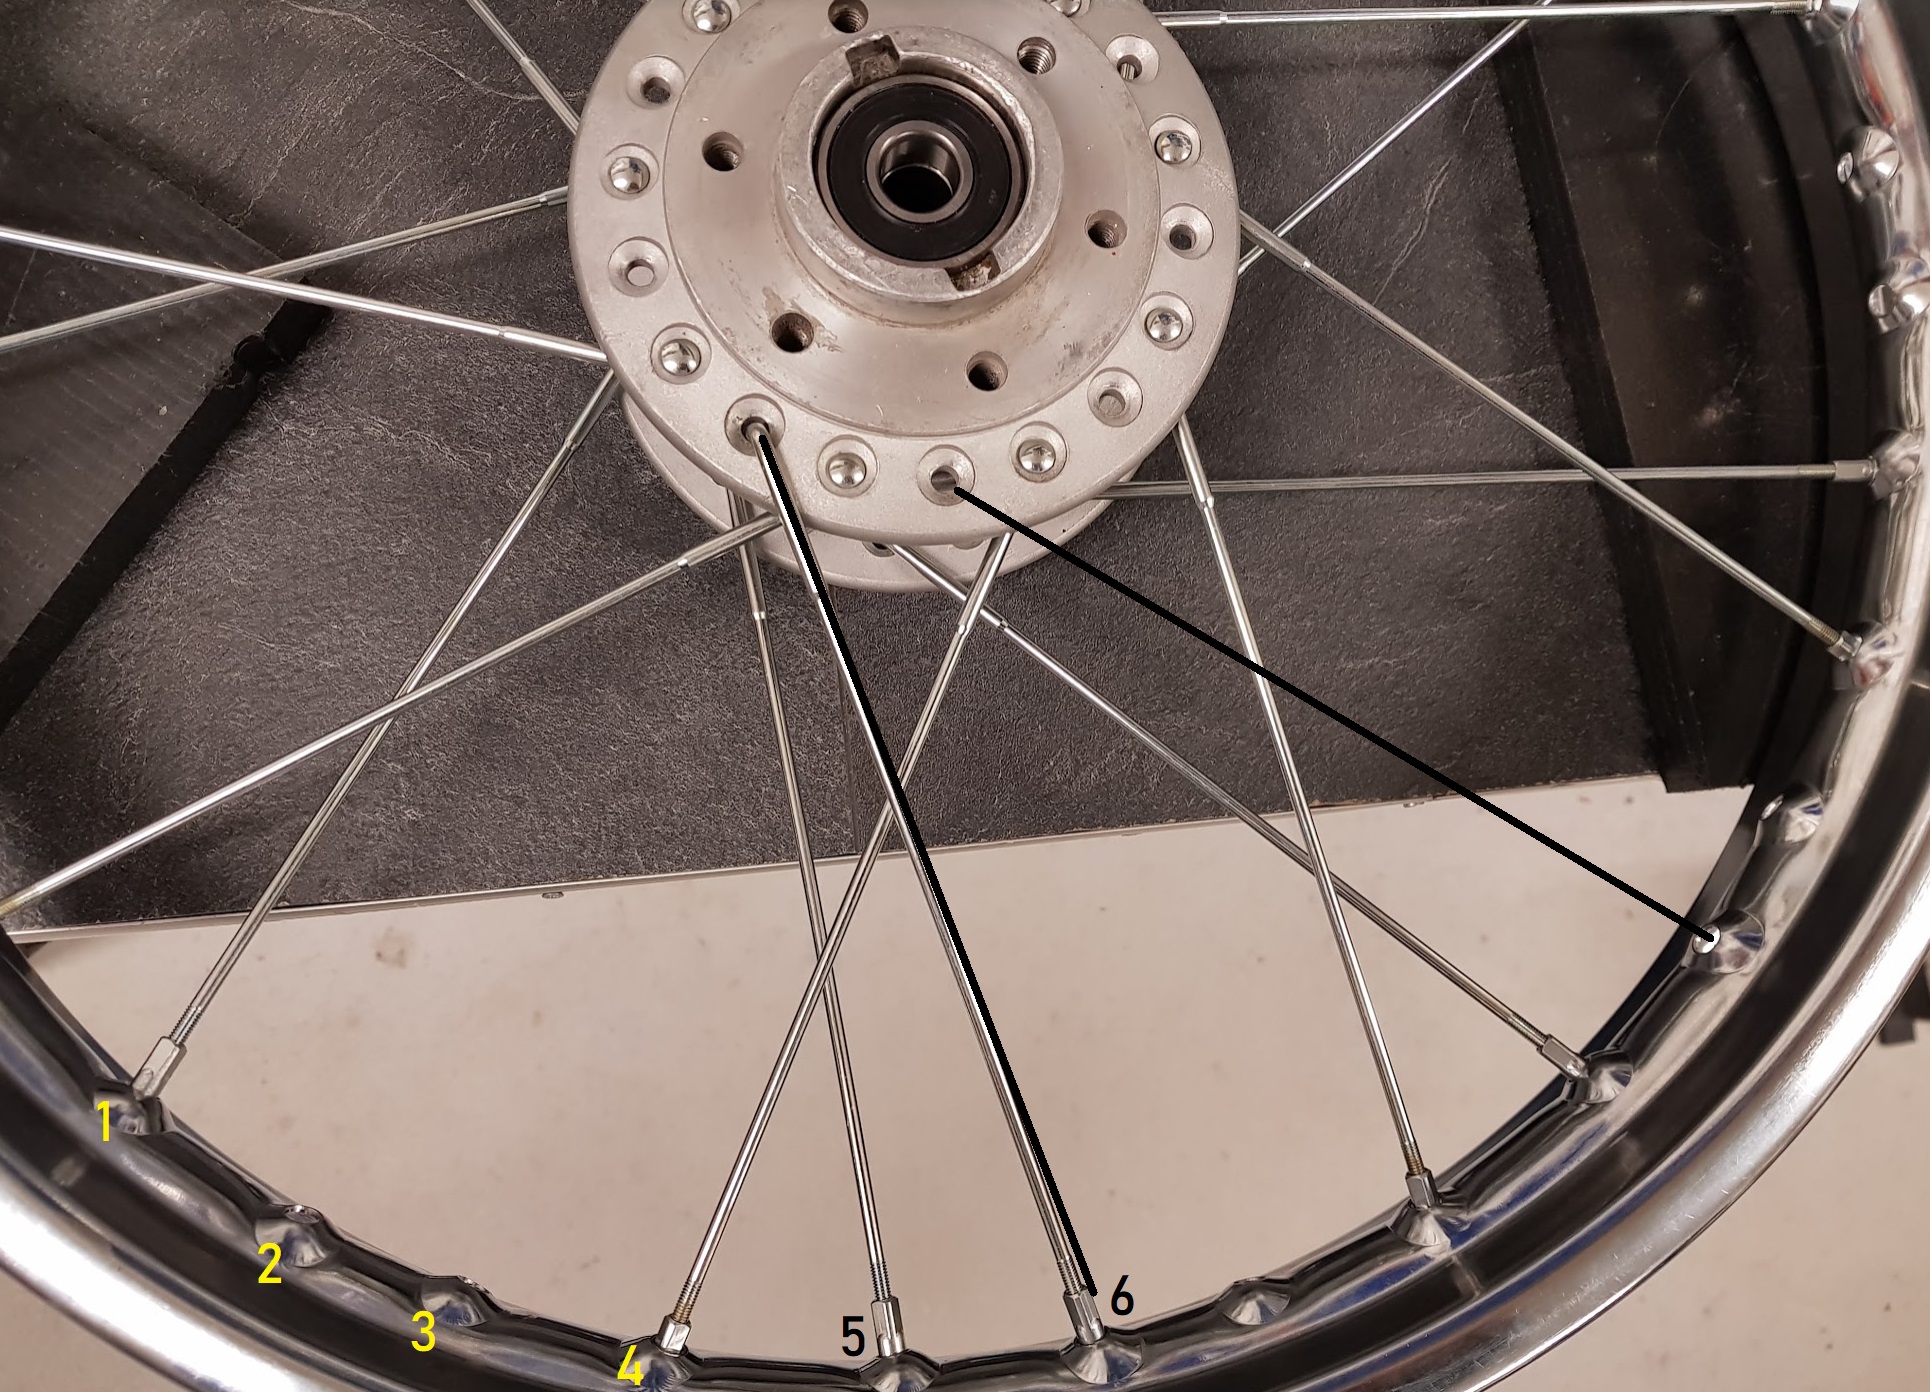
Next step, make sure you have all the parts organized: 18 inner side spokes and 18 outer side spokes

Brand new Suzuki rim 🙂

And what to do now ? Not sure, but I have done this before. Therefore I’m jumping to some old post on my blog:

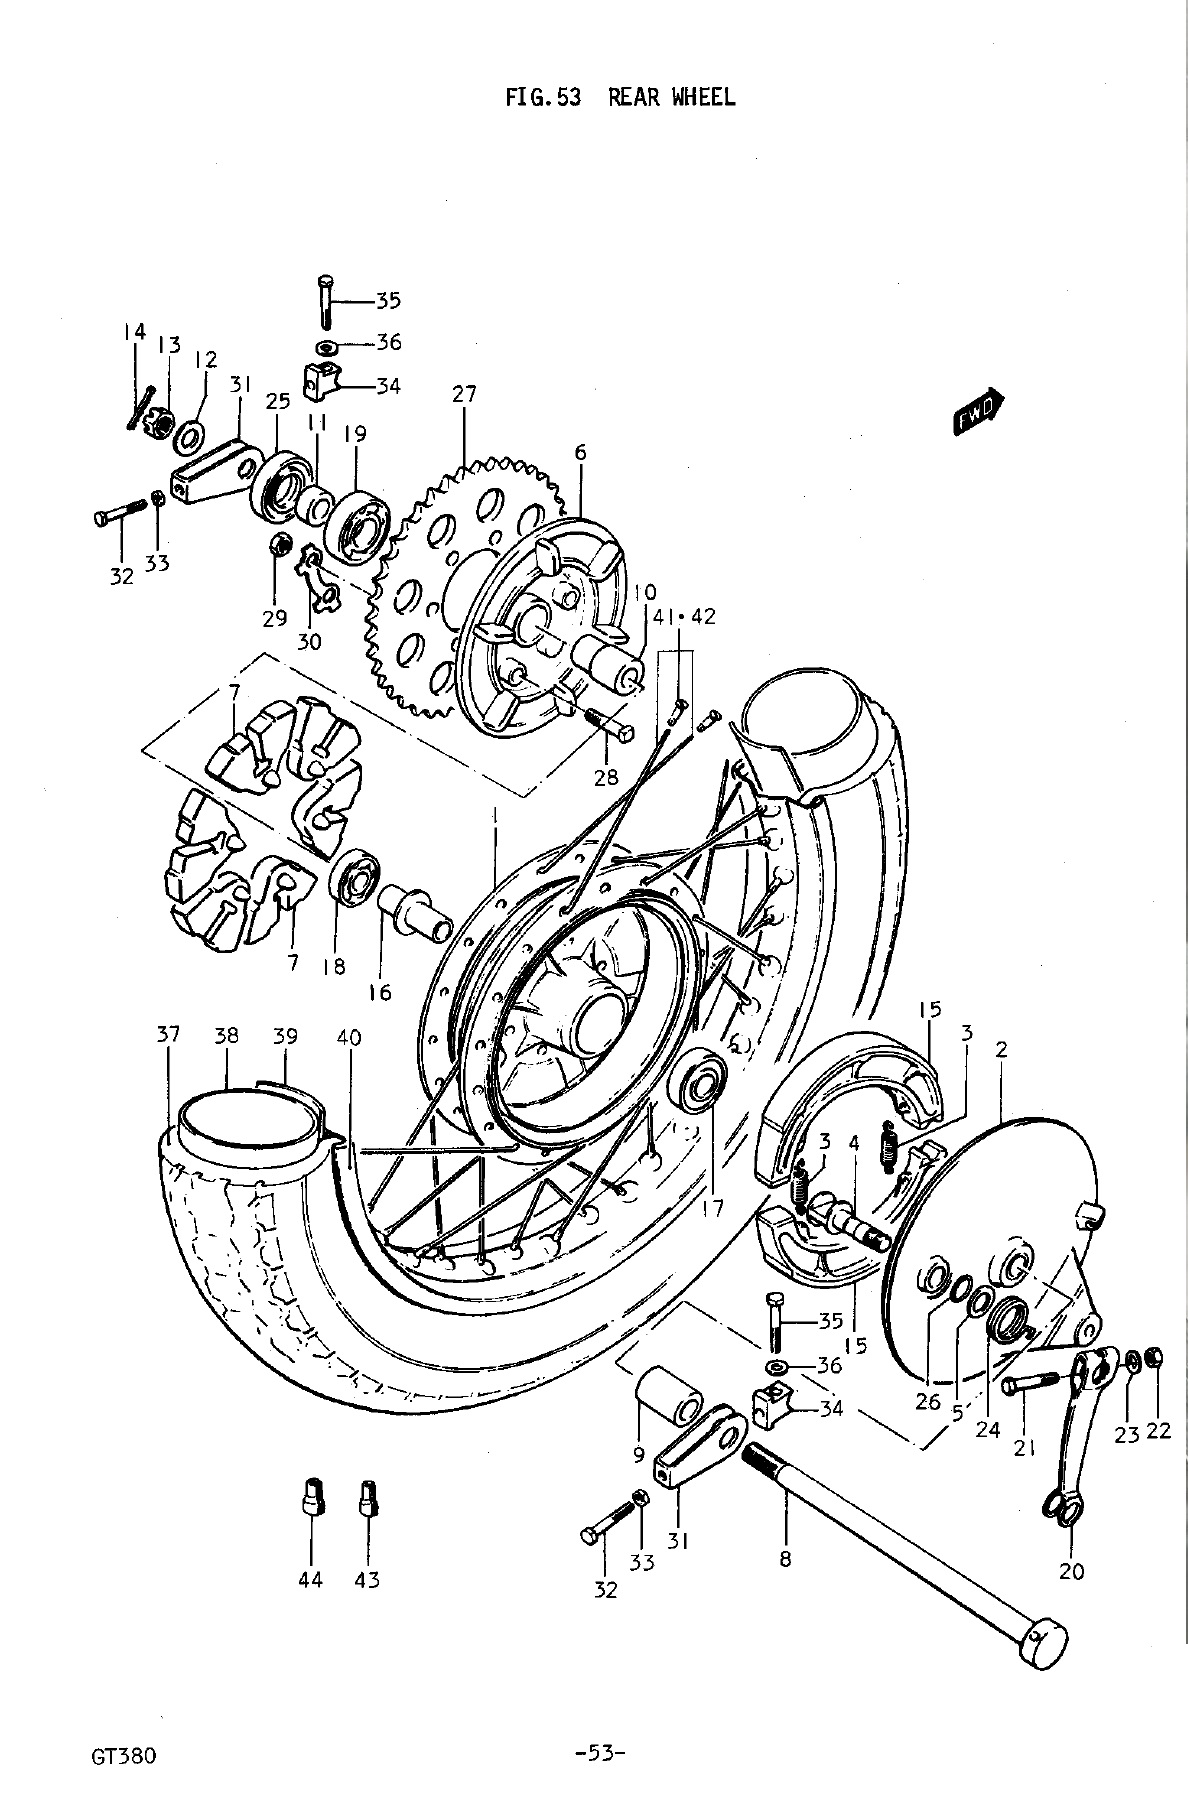
GT380 front and rear wheels:

I will follow my own procedure shown in the links above and will post an image of the rebuild rear GT750 wheel when I’m done later today.

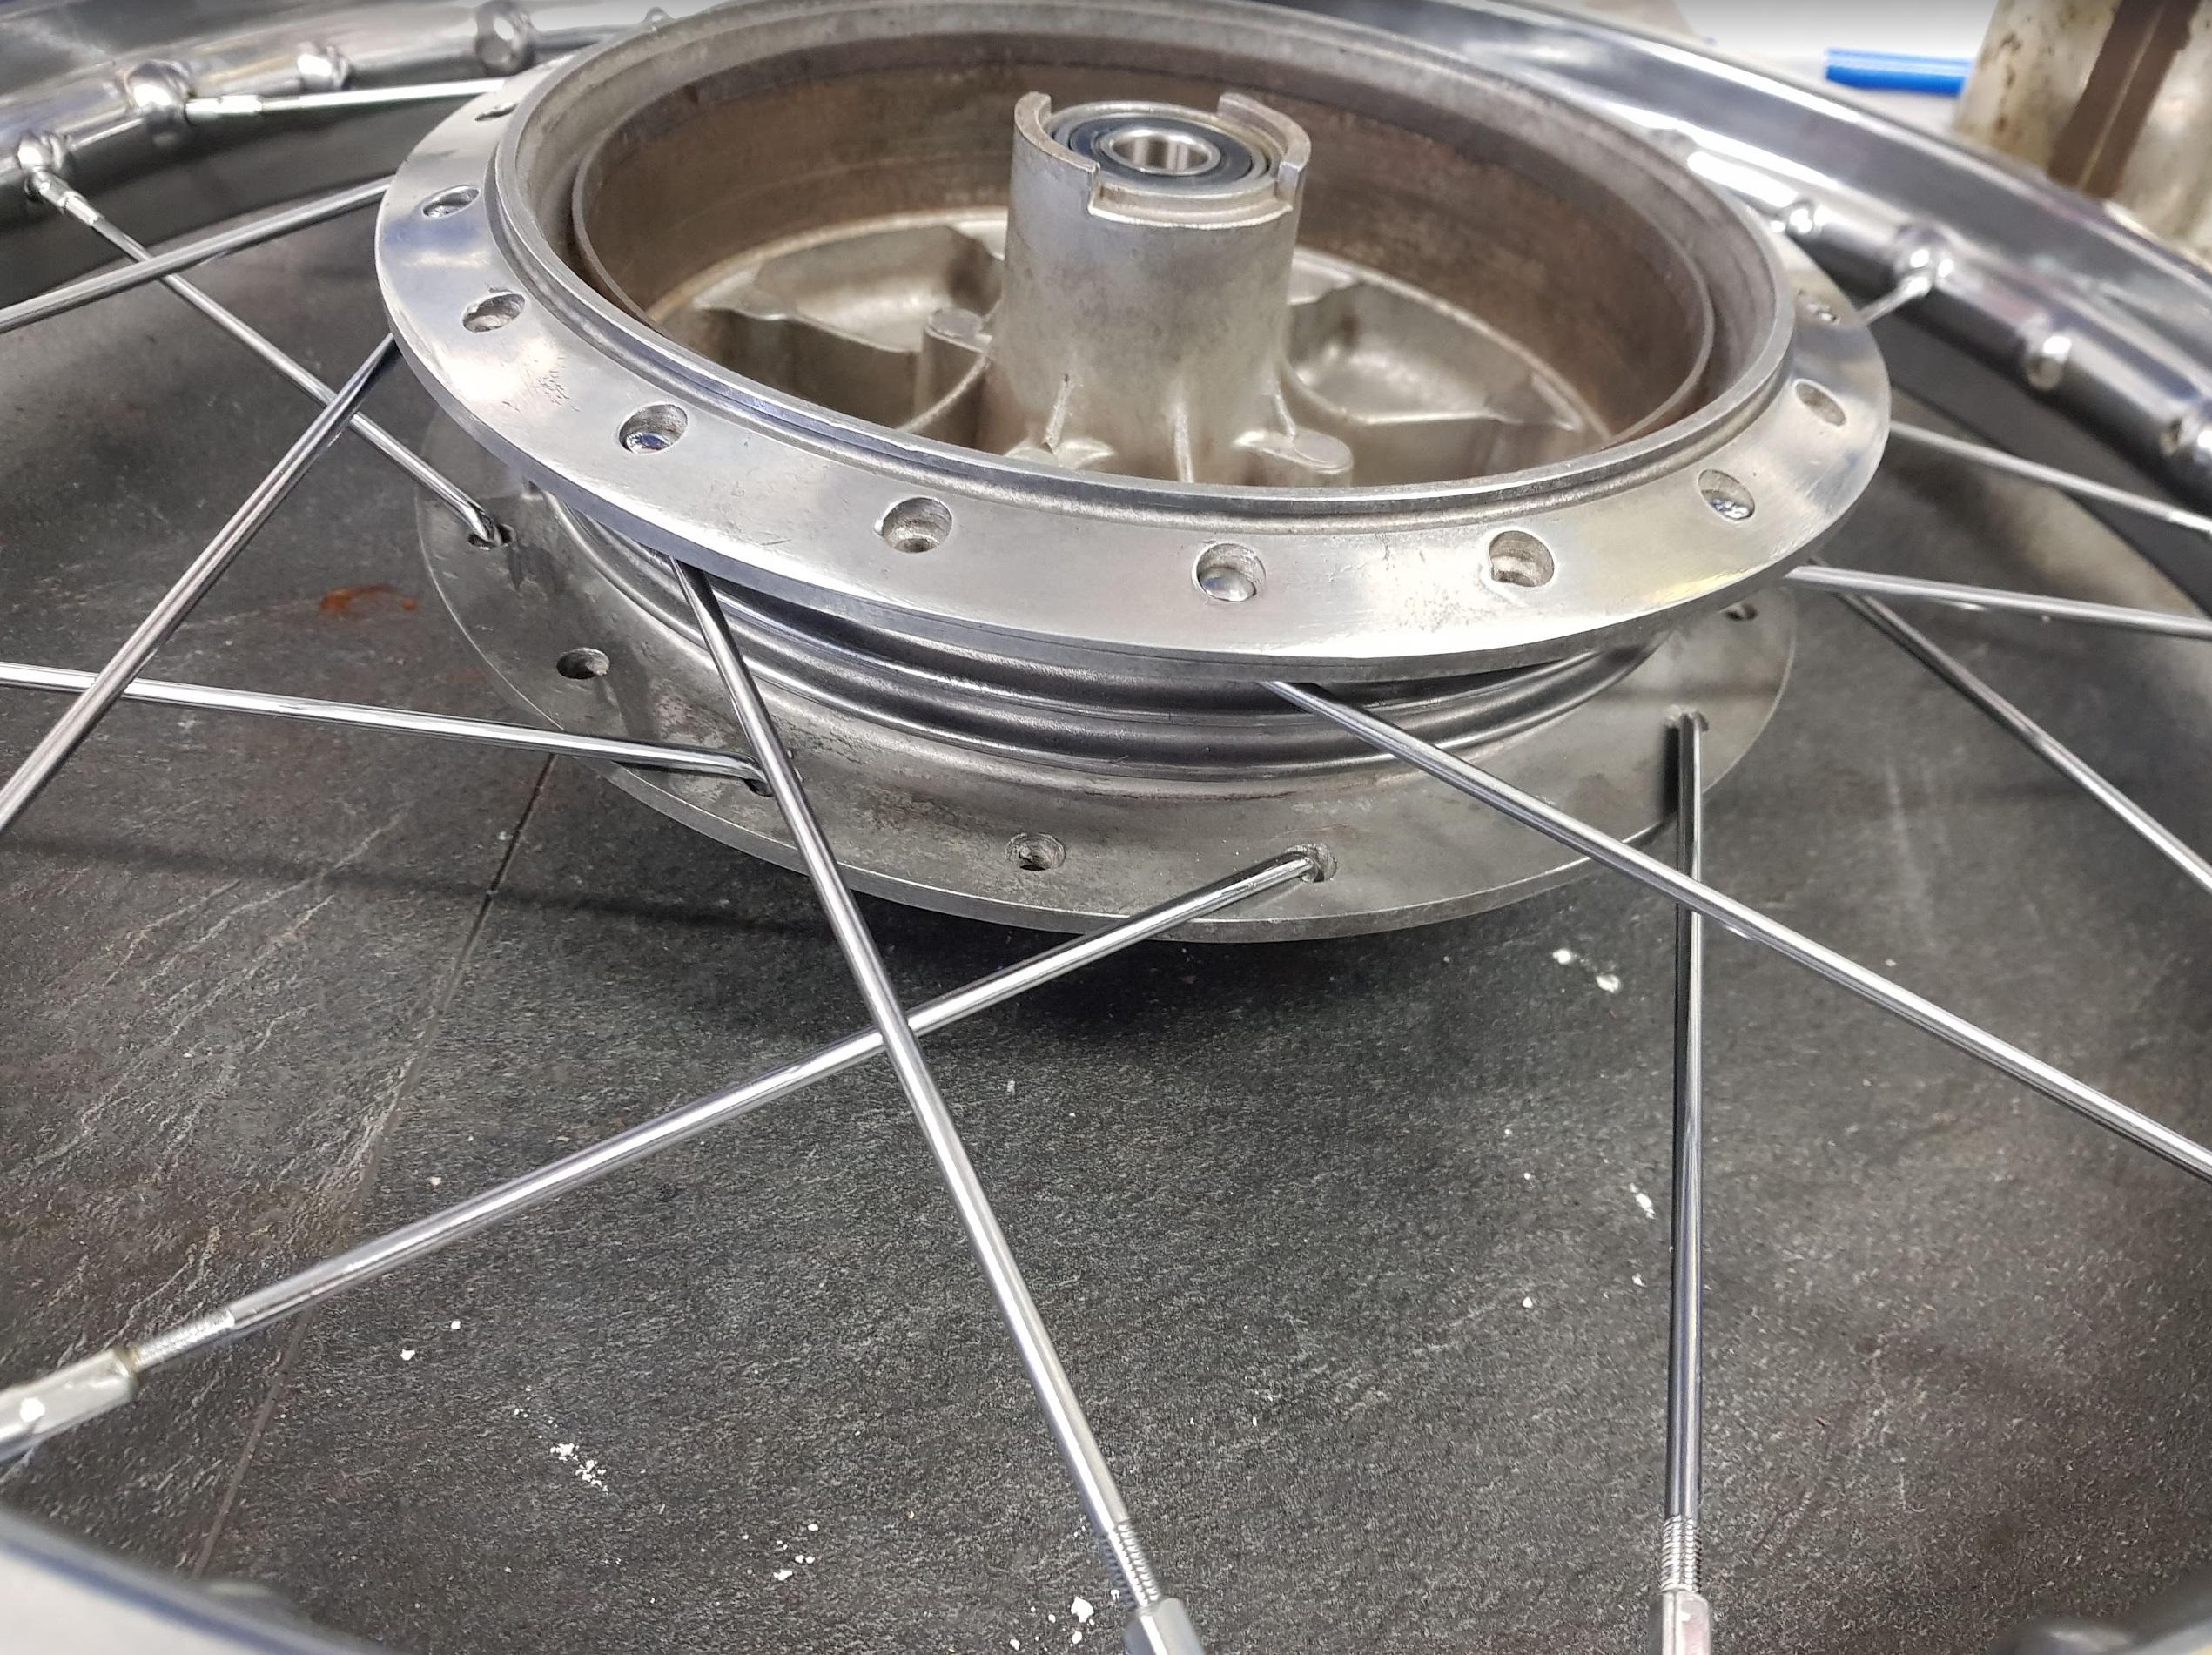
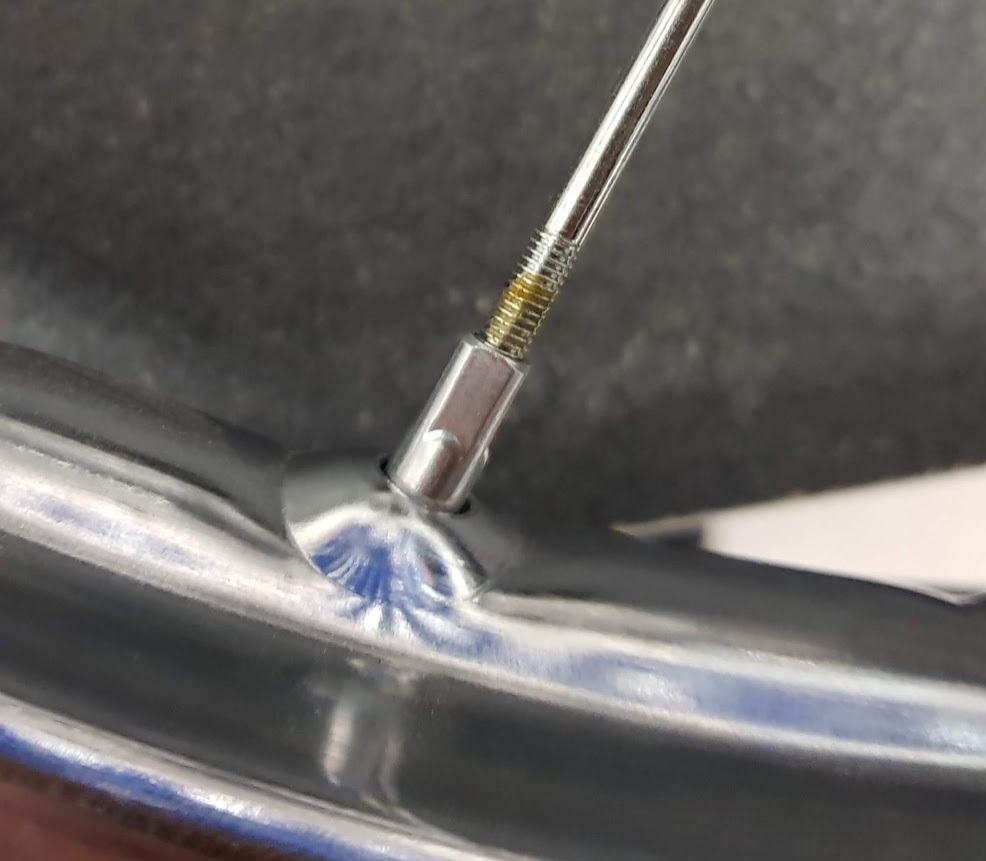
Step 1 (after studying my old GT380 post)

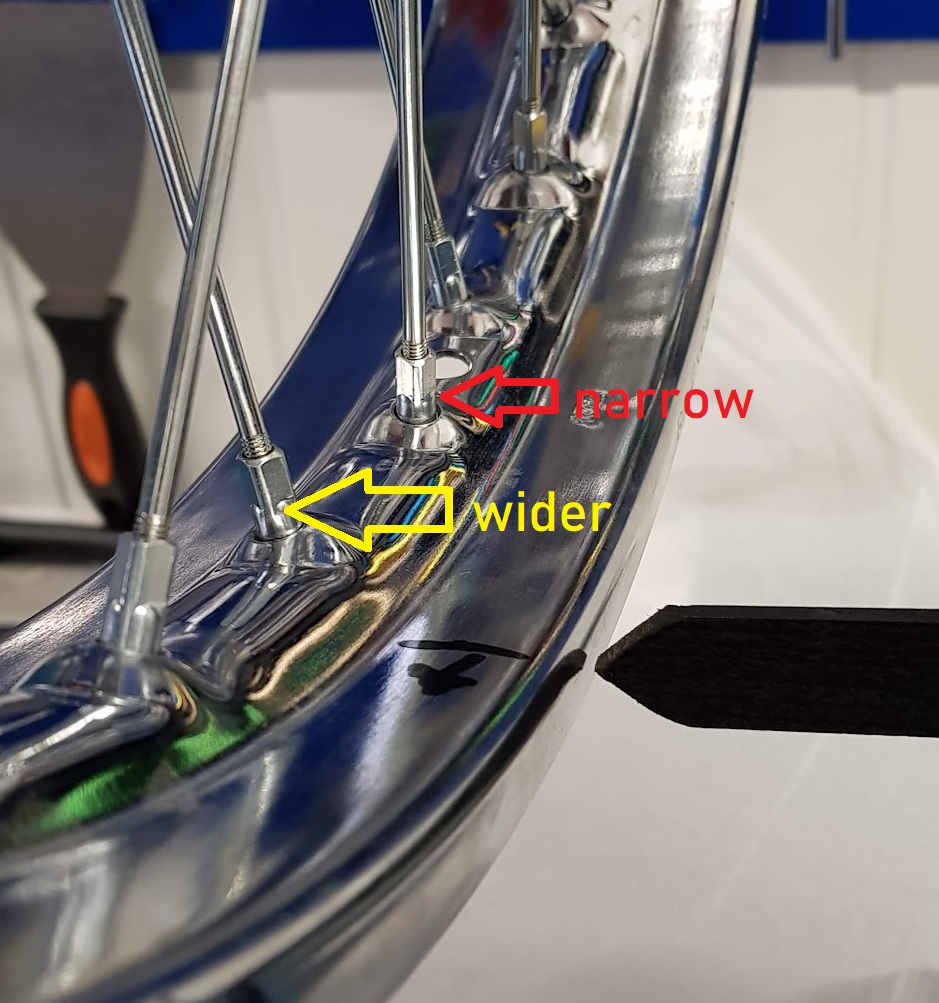
Please notice. I have some old scratches in the hub from the old outer side spokes. If you want them to be hidden with the new ones, remember to mount the inner side spokes at the opposite directions as I did in the photos above. Inner and outer side spokes have always the opposite directon of mounting, and you have to do the inner sides first. And once again, don’t do this for the first time if you have not study my old GT380 post about this topic.
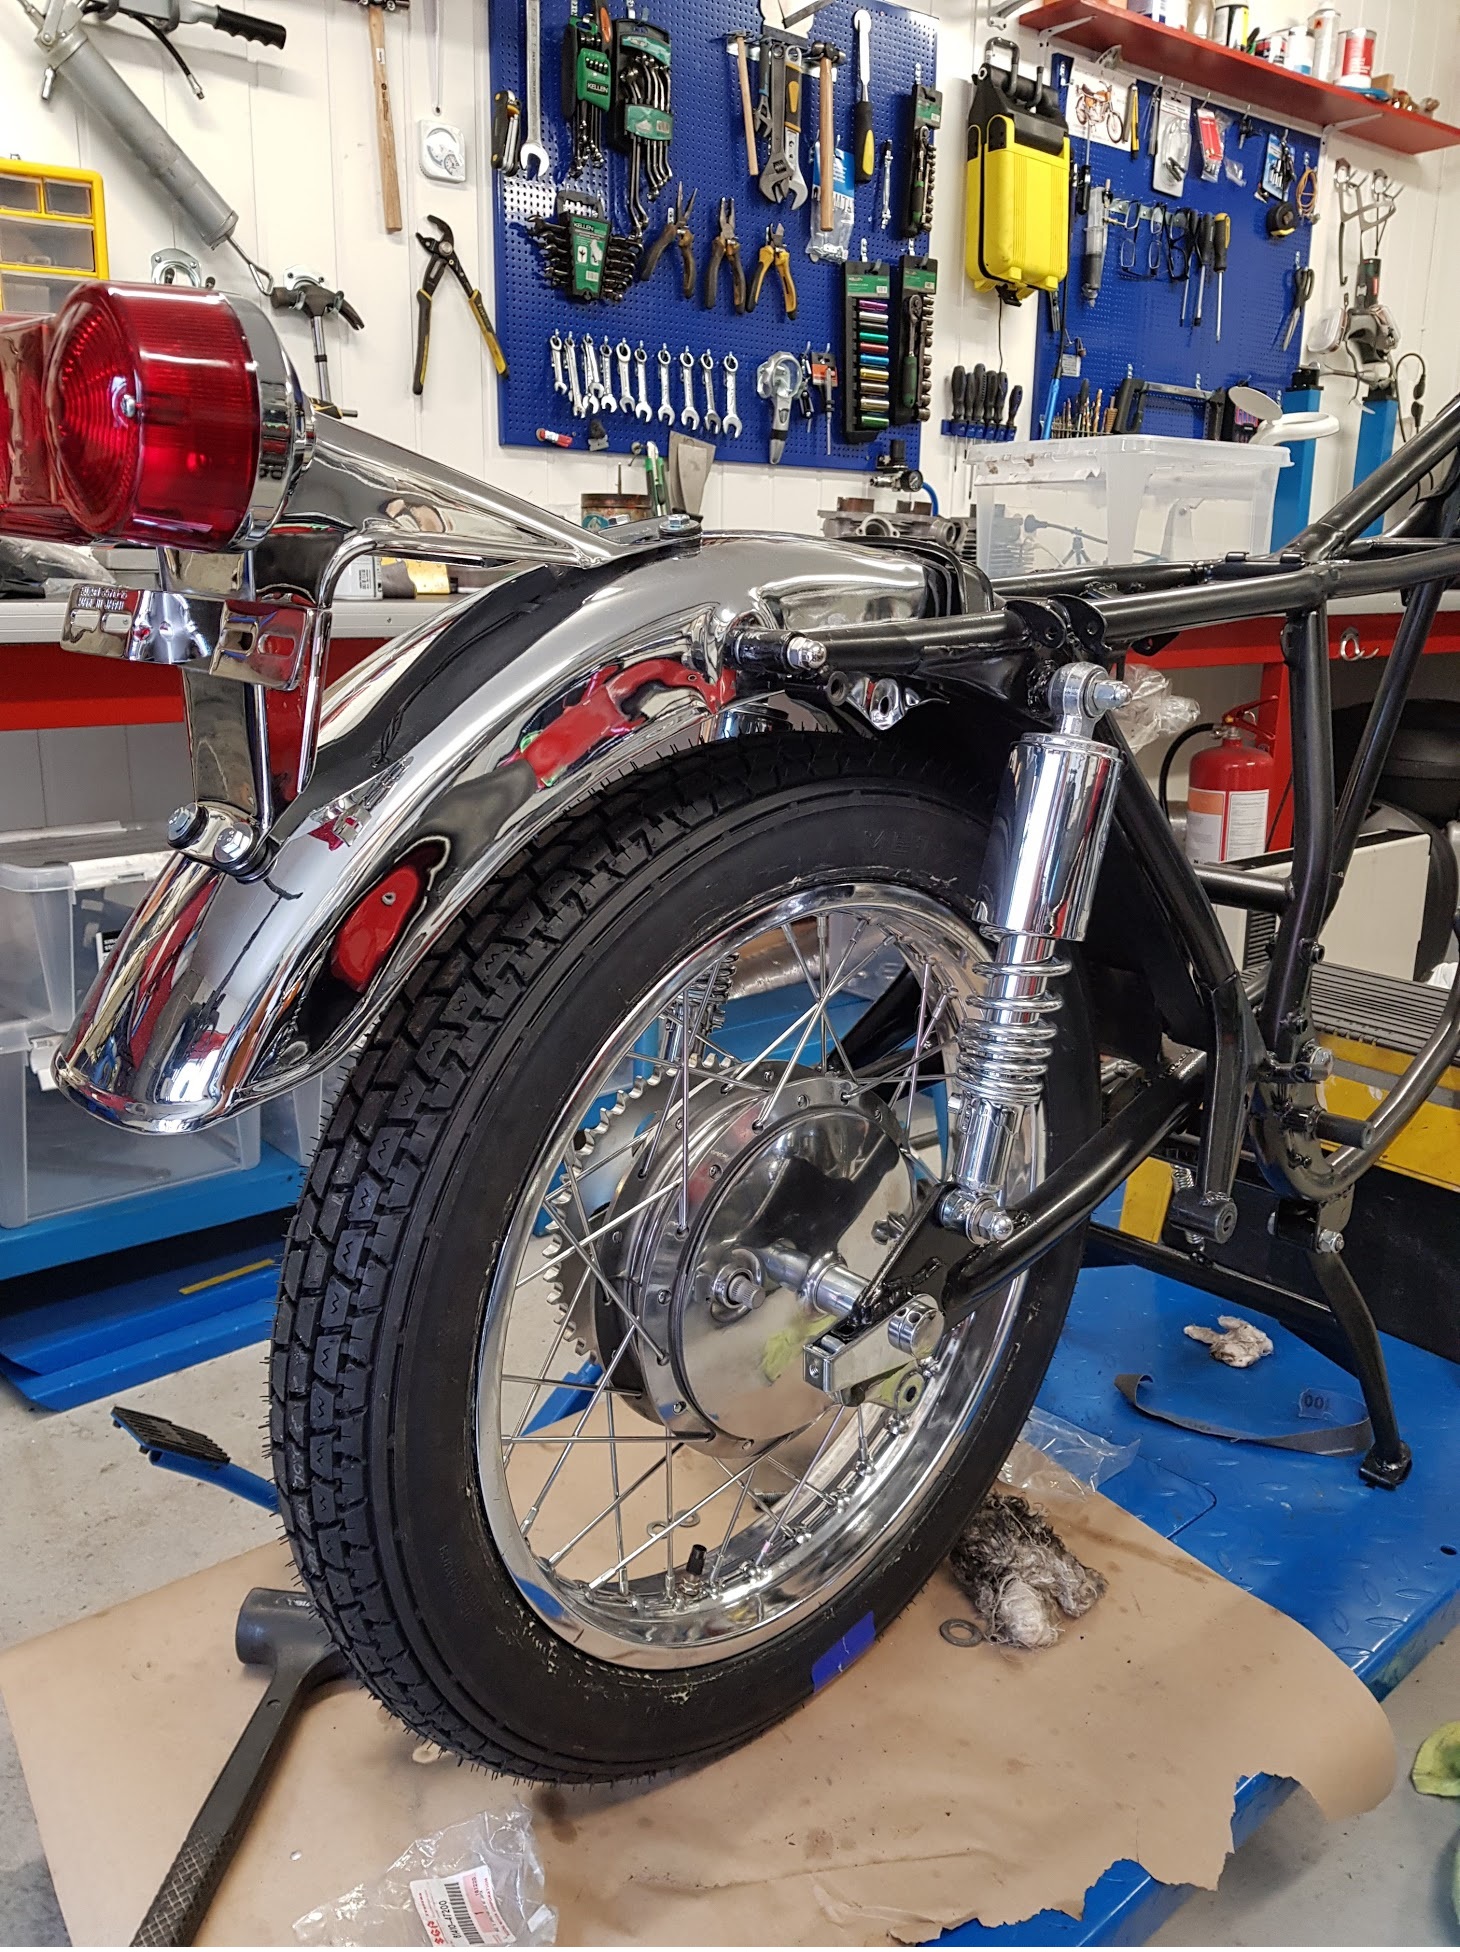
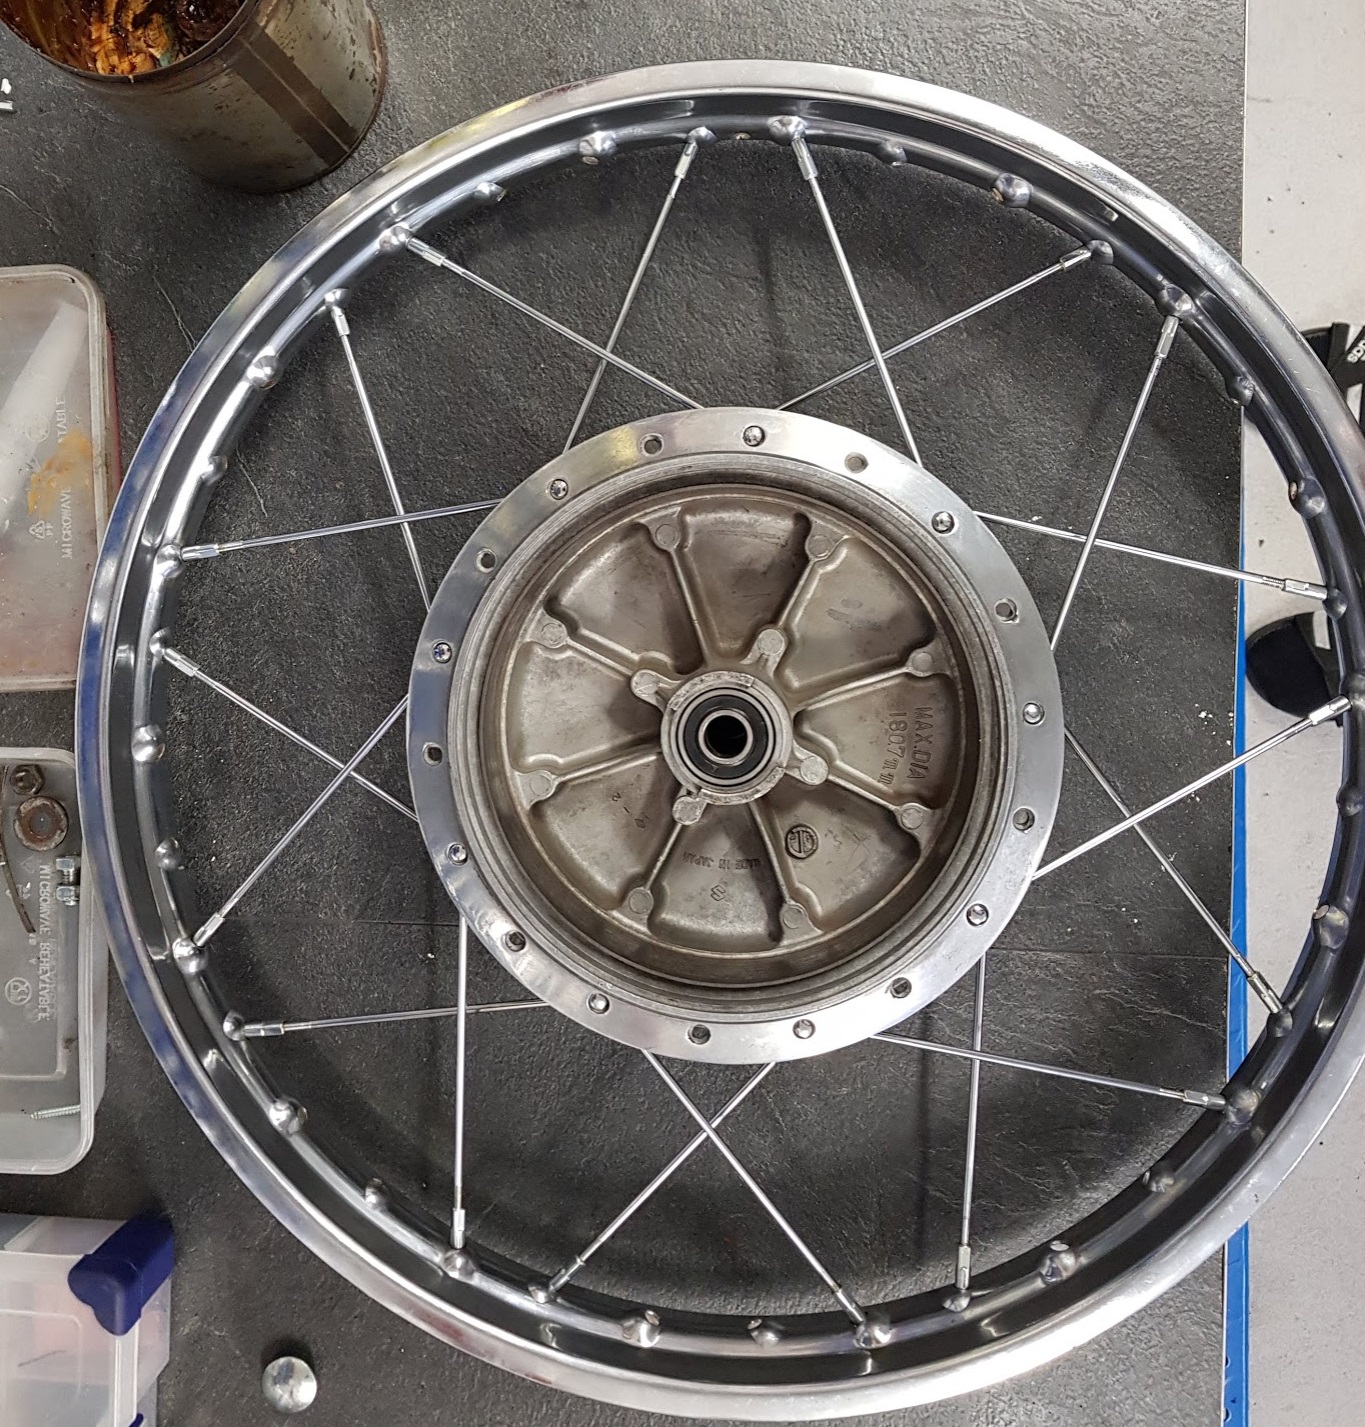
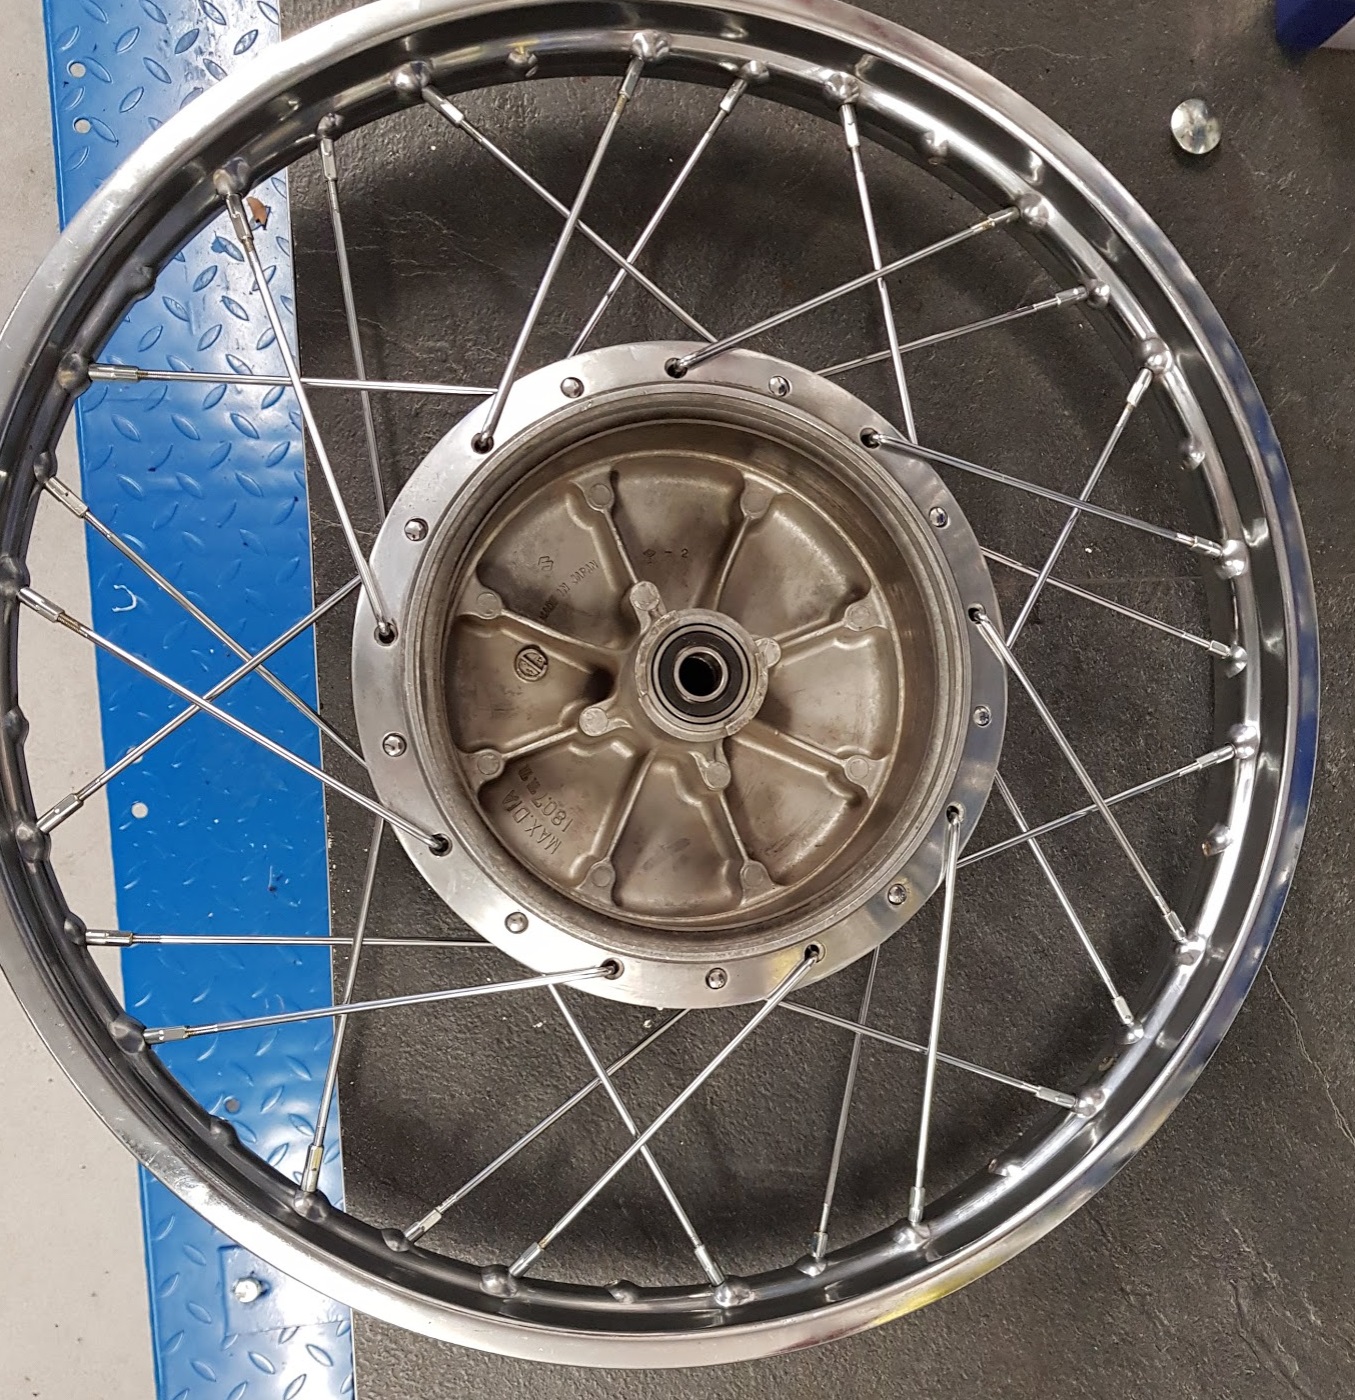
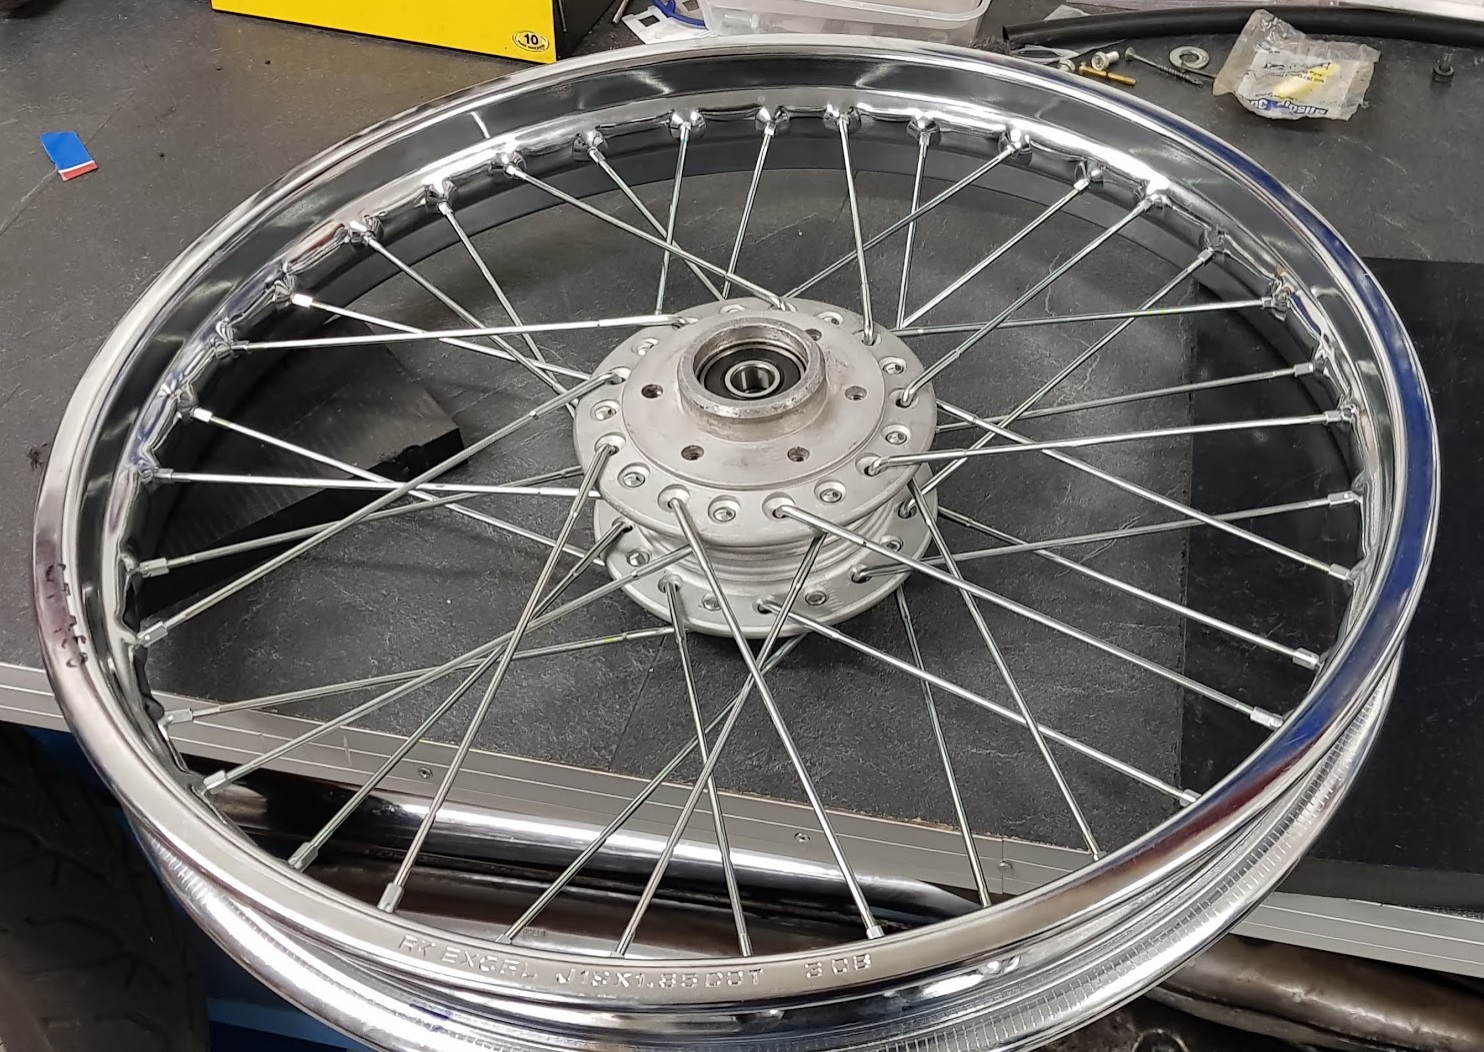
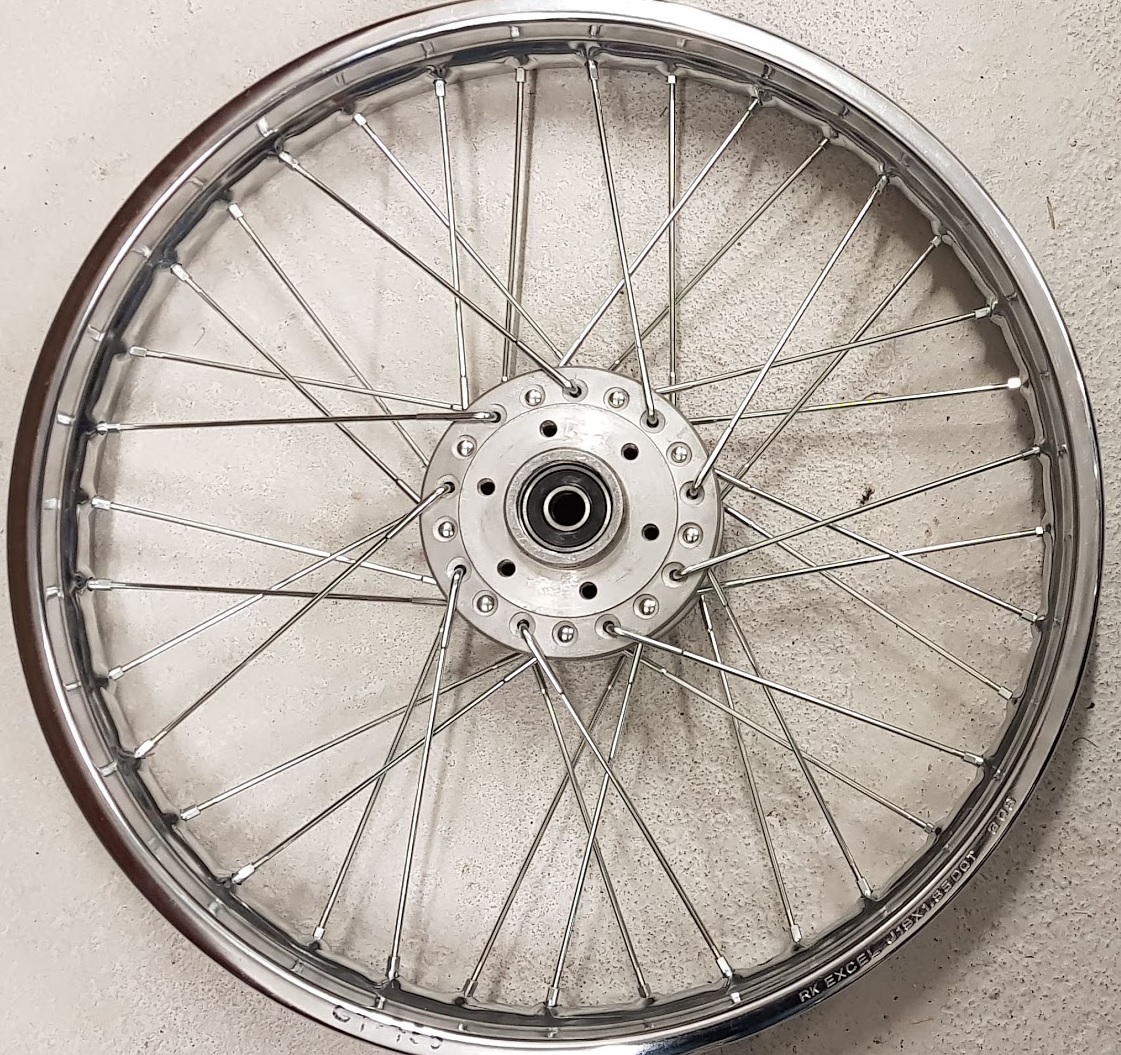
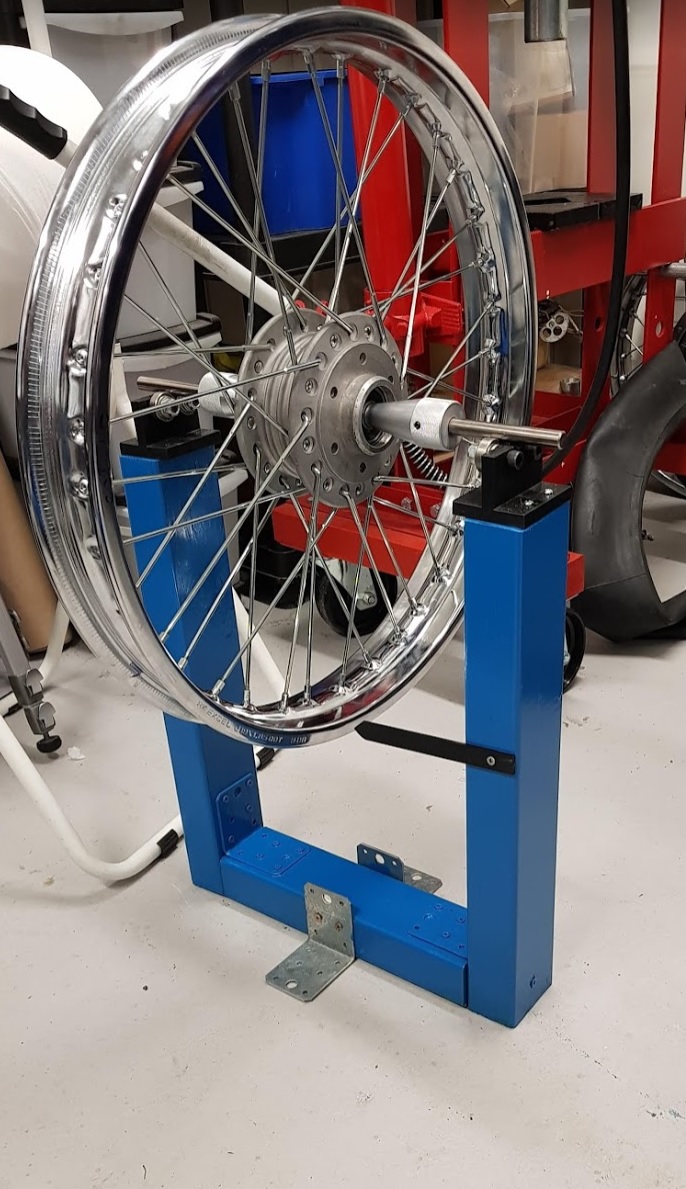
Done:

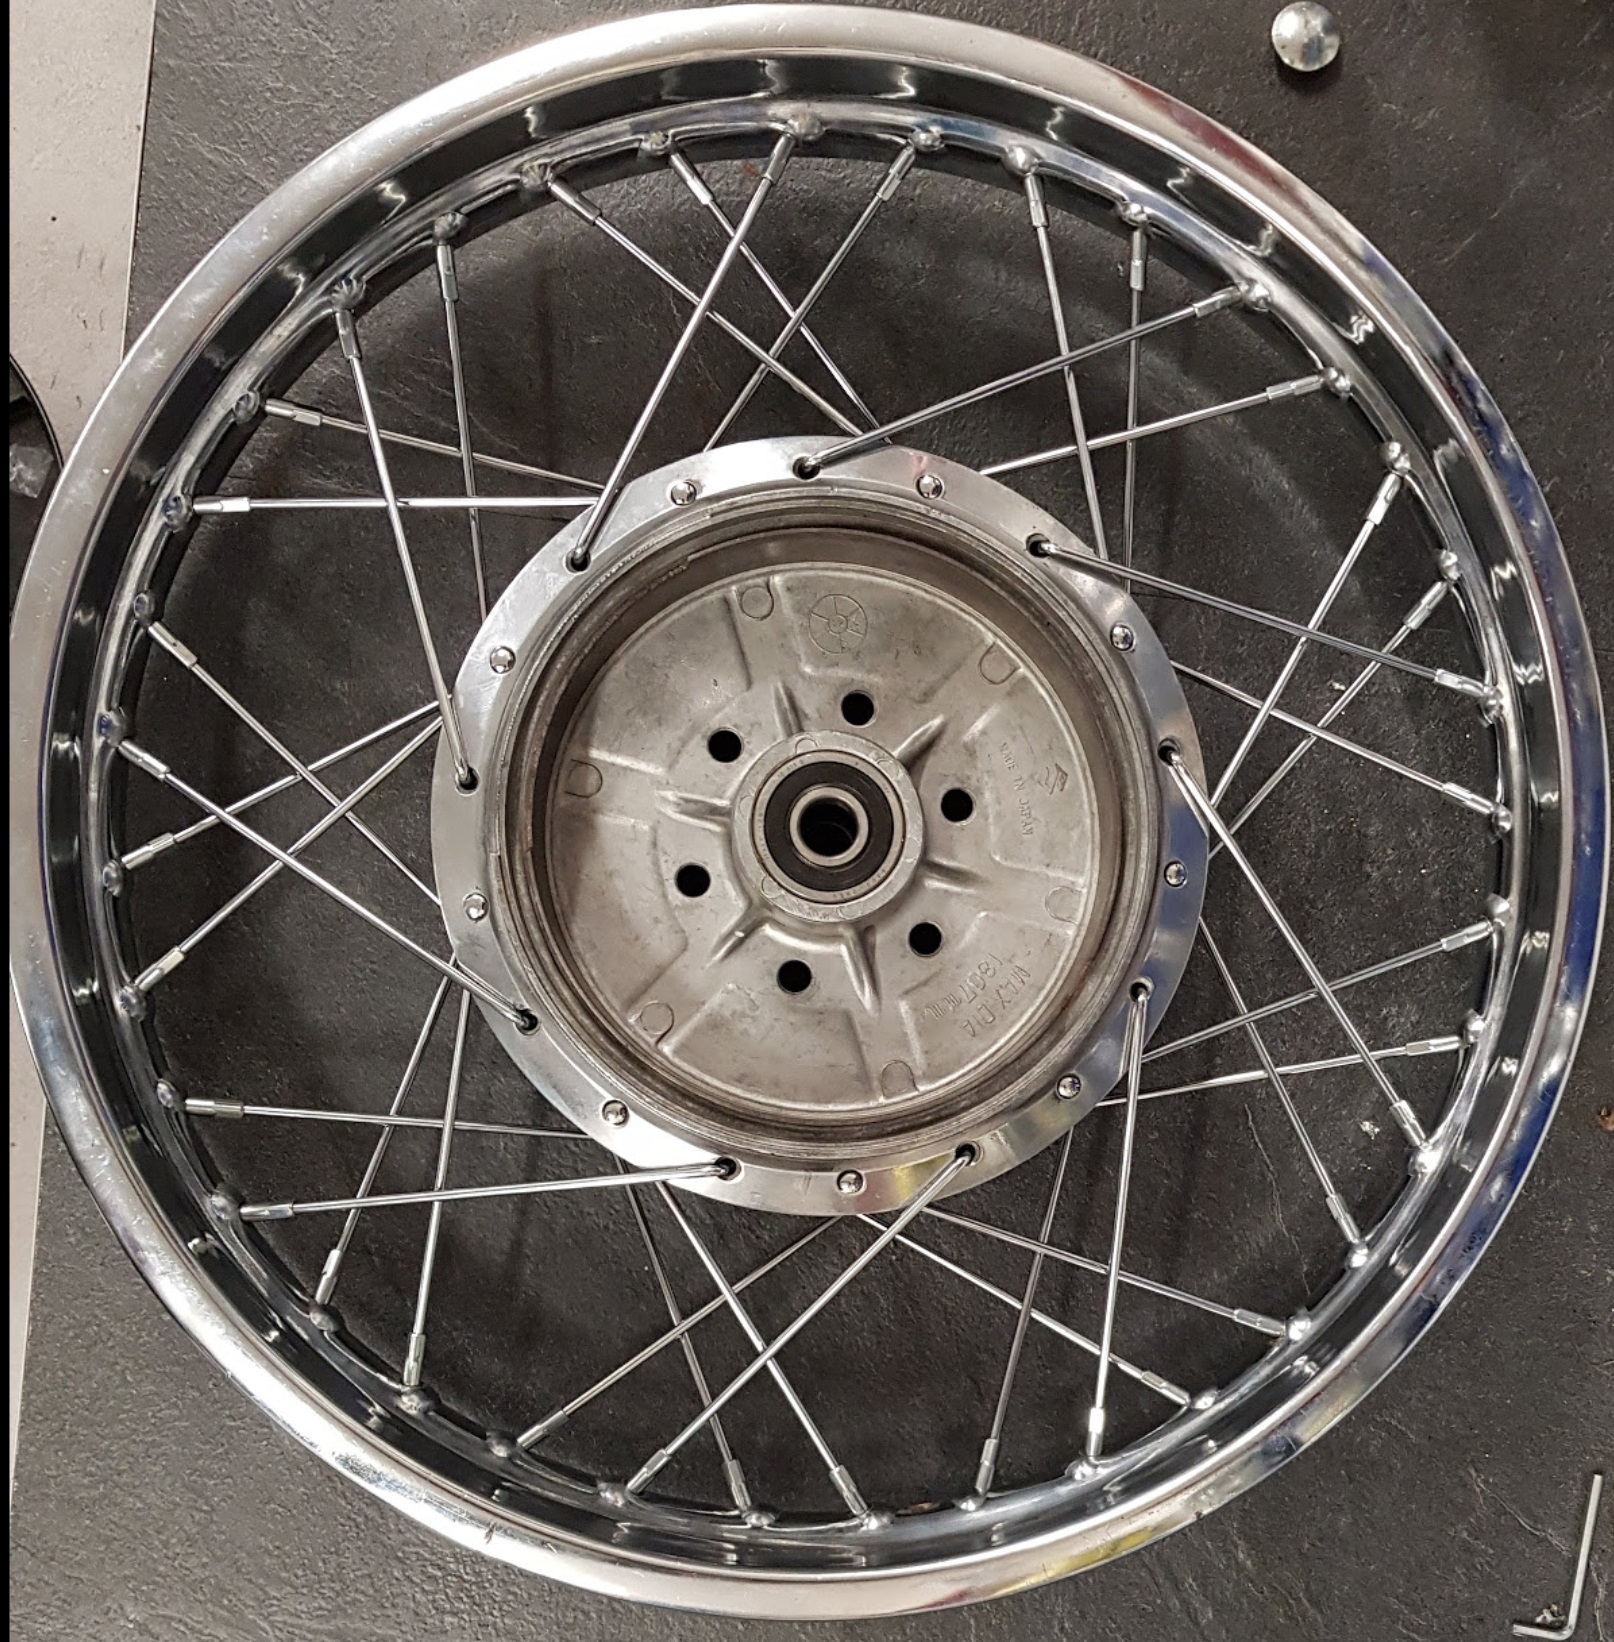
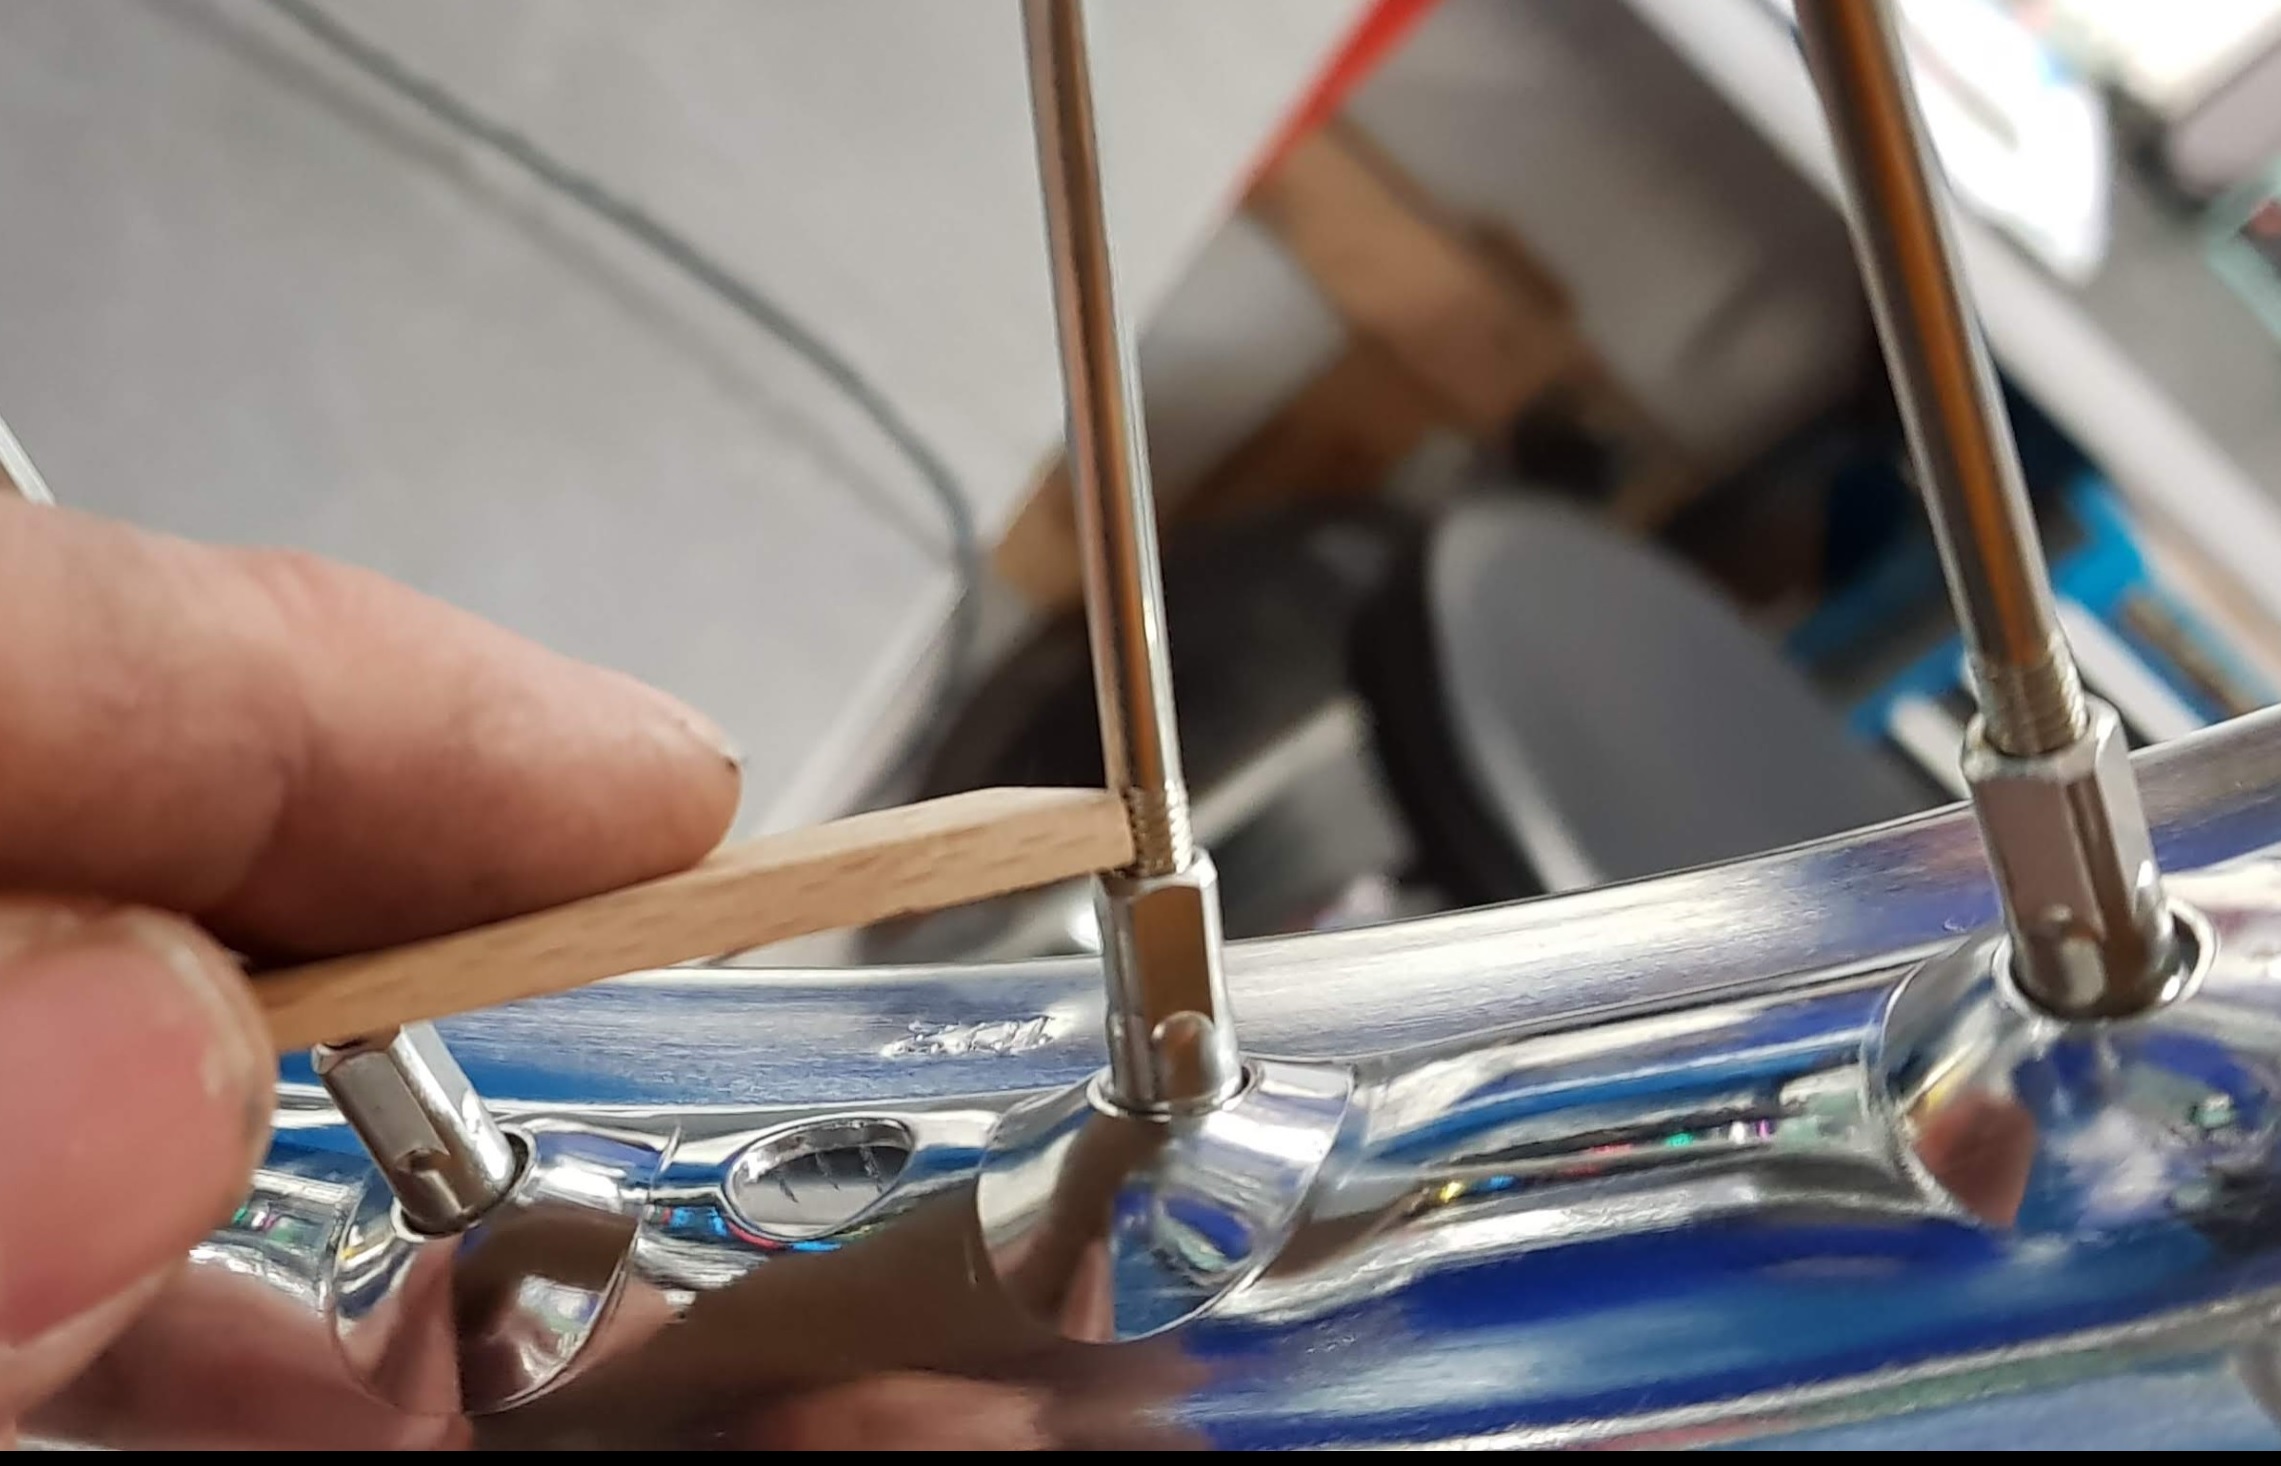
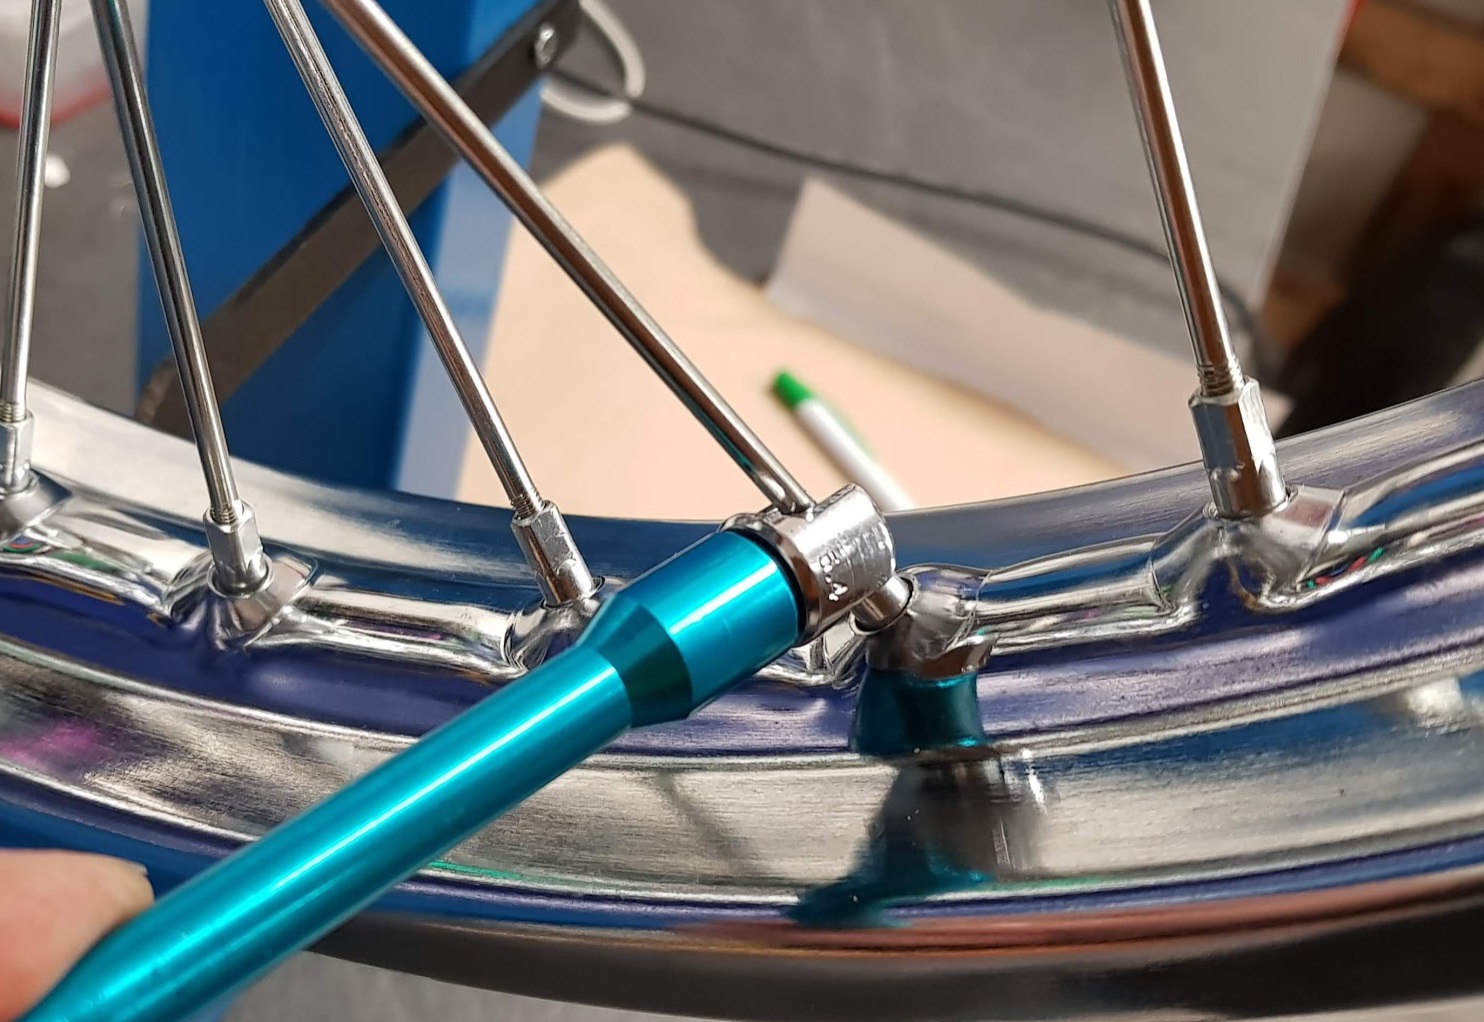
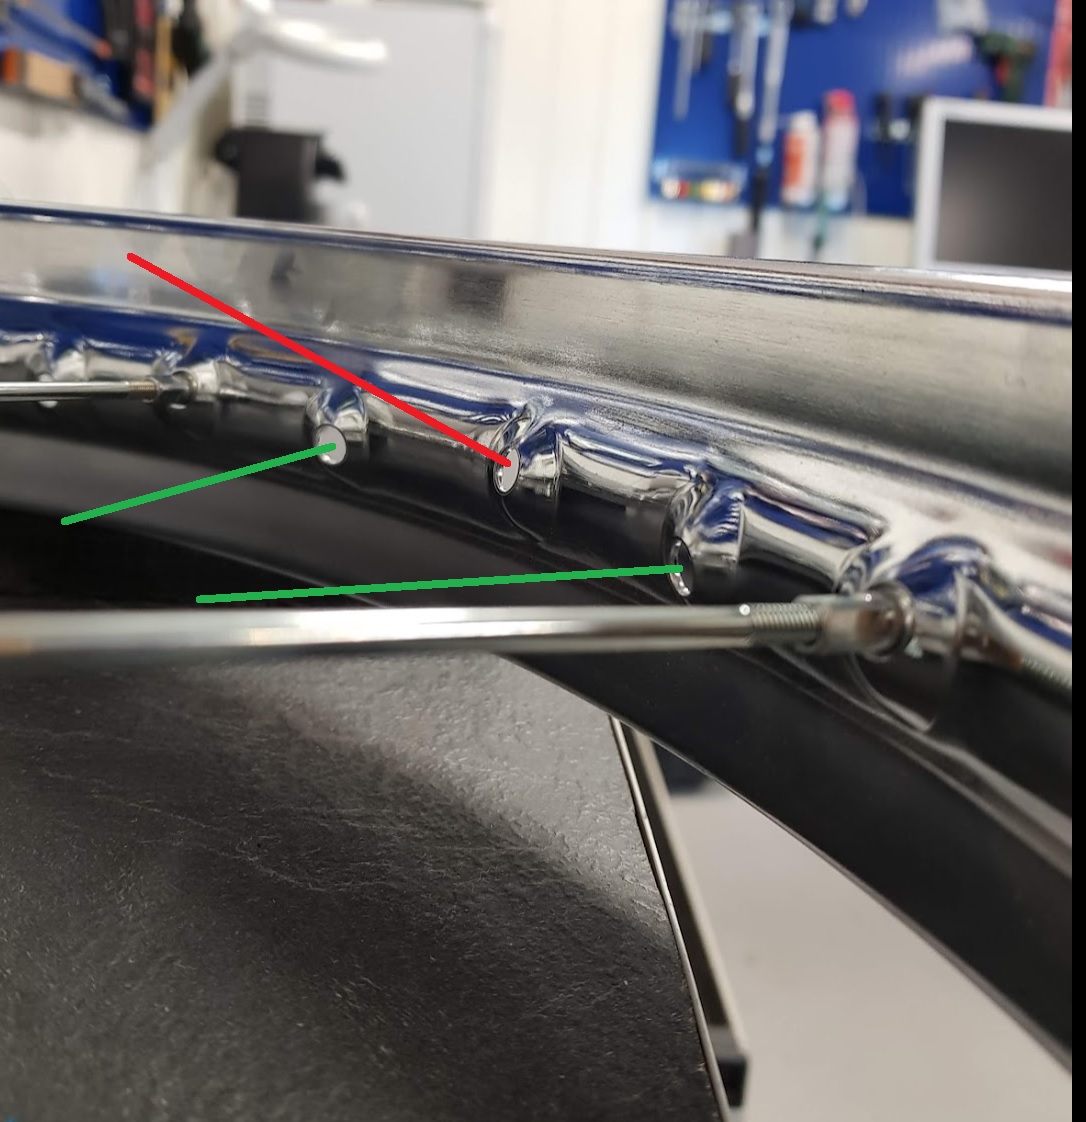
Adjustments: Once again, I checked out one of my old post about the topic:

Done 🙂

Fender and front wheel mounted

Mount the fender before the front wheel.

New fender mounted

Two 8mm 1,25mm pitch bolts on each side. The lower bigge hole (10mm 1,25mm pitch ) is for the front drum brake.

The front wheel:

I have not found any parts manual for the J model in pdf format, only from K and later, but this link on the web shows the J front wheel with the drum brake:

https://www.cmsnl.com/suzuki-gt380-1972-j-usa-e03_model16106/partslist/81501.html#.YvLRgXZByUl

Assembly of the rear wheel

Assembly

The brake shoes had little wear and were reused after cleaning and glass blasting.

New sprocket mounted

The spacer on the other side ( no 10 on the drawing)


New seal mounted and well greased before and after the last spacer was placed.


Mounted


Mounted on the bike, please see the drawing below for details. Remember, the entire parts manual can be found in the folder “documents”


GT380 wheels, mounting of spokes

GT380J, mounting the spokes: 

The procedure of mounting spokes is well explained in an earlier GT750 post. Please read the post before continue on this one.

GT750 post:

http://mc.grenasberg.no/2018/10/28/front-wheel-spokes-mounting/


Front wheel:


As described in the GT750 post, always start with the spokes at the inner side of the hub. And don’t mix the spokes. Inner and outer are different. Get the details from the post mention above.


Turn the wheel and continue with spokes at the inner side of the hub.

Arrange the spokes before mounting the nipples.

Both inner sides done.

Next step: mount the spokes at the outer side of the hub:

Turn the wheel and and mount the remaining spokes

Done, all spokes are mounted.


Rear wheel:

Do the rear hub in the same way as shown for the front hub.


The adjustment procedure will be the same as shown in the GT750 post:

Adjustments:

http://mc.grenasberg.no/2018/11/04/spokes-adjustments/


GT380J Front and rear hub

Step1

Cut off all the spokes and remove ball bearings.

Step2: 

Cleaning and glass blasting.

Step 3:

Grinding. Did no grinding to the rear hub. You can still see the scratches from the spokes. Will not be that visble when new spokes are mounted.

On the front hub I grined quite a bit to get rid of the bigges scratches. Started with P250 paper and thereafter P1000.

Step 4:

Rear hub after polishing:


Front hub after polishing:

Step 5, bearings

Mount new bearings, don’t forget the spacer in the middle before you mount the last bearing.

Be gentle when driving the bearings into position. Allow some slack to the spacer so each bearing can individually move freely.

Wheels mounted

A bit slow progress. Had to make parts on my lathe to be able to fit the rear wheel. Had plans to reuse the spacers from the GS wheel, but nothing was able to fit. Main reason : The GS axle was 17mm and the GT is 20mm.
Finally, both wheels are mounted on the bike. 🙂

At last, both wheels are on. GT wheels looks so much better compared to the GS wheels.

Spokes adjustments

Got some help today showing me how to adjust the spokes. Jan Hansen and Thor Haugland came all the way from Kristiansand help me on this.

A simple homemade wheel jig

Step 1

Adjust all the spokes to the same length, see the picture. I used a piece of stick as a template to get the same distance all over. Adjust the nipples by hand at this point. Make sure you have the same number of threads by comparing the thickness of the stick

Spin the wheel and watch the height. There should be not much play in the height of the rim if all the spokes are evenly adjusted.

Step 2

Tighten the spokes:

Turn the nipple 1/4 of a turn on all of the spokes. Continue until you start to feel some resistance. Not much torque should be applied at this point. Remember to spin the wheel and only 1/4 of a turn on each spoke.

Step 3

Time to check the play at the side:

Spin the wheel and use a whiteboard marker to define the area where you see the largest clearance to the reference stick. Make two lines, the start and stop of the area.

Adjust all spokes in the area to adjust the proper way. As the yellow arrow shows, the outer one to widen the gap and the inner one ( red arrow) to narrow the gap.

Repeat this procedure until you are down to 1-2mm play. Suzuki allows up to 3mm offset.

Step 4

Final adjustments

Continue with step 3 until you have to apply some torque to turn the nipples around.

This is the time when you have to trust your basic instinct. Do not overtighten the nipples !

If the nipple feels tight go further to the next one. Make sure you have about the same tension on all spokes. You can knock on the spokes and if one of them are to loose you will hear a different sound.

This is how I did it with help from Jan giving me advice all the time.
Am I lucky or something ? Looks like the wheel came out pretty well 🙂

GT 750 Front wheel, spokes mounting

For the frist time I’m going to build the front wheel with new spokes. Will be the same for both GT750 and Gt380.

Click on the images for a close up view.

All spokes mounted, but how?  Will try to give a detailed guidance below:

Step 1

Sort the spokes. There are 18 spokes to be mounted on the inner side of the hub and 18 spokes for the outer side

The spokes for the outer side of the hub has more bending at the end, see the picture above.

Step 2

Study the rim:

The mounting holes in the rim are aligned to left and right to fit with the corresponding side of the hub. The change in direction is done for every second hole. As the picture shows with red and green lines.

There is also angle pointing from the rim to the center of the hub. Should be easy to spot but if you don’t know this part will go wrong while mounting the spokes.


Step 3

Always start with the inner side of the hub and find a the right corresponding hole in the rim. Correct angle and direction ( left or right ) explained in step 2. Repeat the same for the next spoke counting 4 holes as shown in the picture. Fasten the spoke by mounting the nipple at the end, only some few turns. You can also apply some grease.

Complete the mounting all 9 spokes on this side. Turn the wheel and do the next 9 spokes on the other side of the wheel and still at the inner side of the hub.

Watch the first picture with all 36 spokes mounted before you start with the 9 inner side spokes at the next side of the wheel. Check the position in the hub carefully against the picture and find the right corresponding hole in the rim.

If you mount all 18 spokes on one side first ( inner and outer) you will not be able to fit the spokes at the other side.


Step 4

Mounting the spokes at the outer side of the hub

If you count in the same way as in step 3, the no 6 will be the right hole in the rim. See the black line in the picture and continue in the same way for every 4th hole.

If you are in doubt, have a close look at the first picture again.

Do both sides of the wheel and you are done 🙂

The next step, the adjustments will be uploaded in another post.